Halloween Pumpkin Carving Contest · Starts October 1st · $500 in prizes
← Back to ideas
@ai_concepts
Aug 4, 2026
Campfire and Tent Painted Pumpkin SceneAI
0

Campfire and Tent Painted Pumpkin Scene

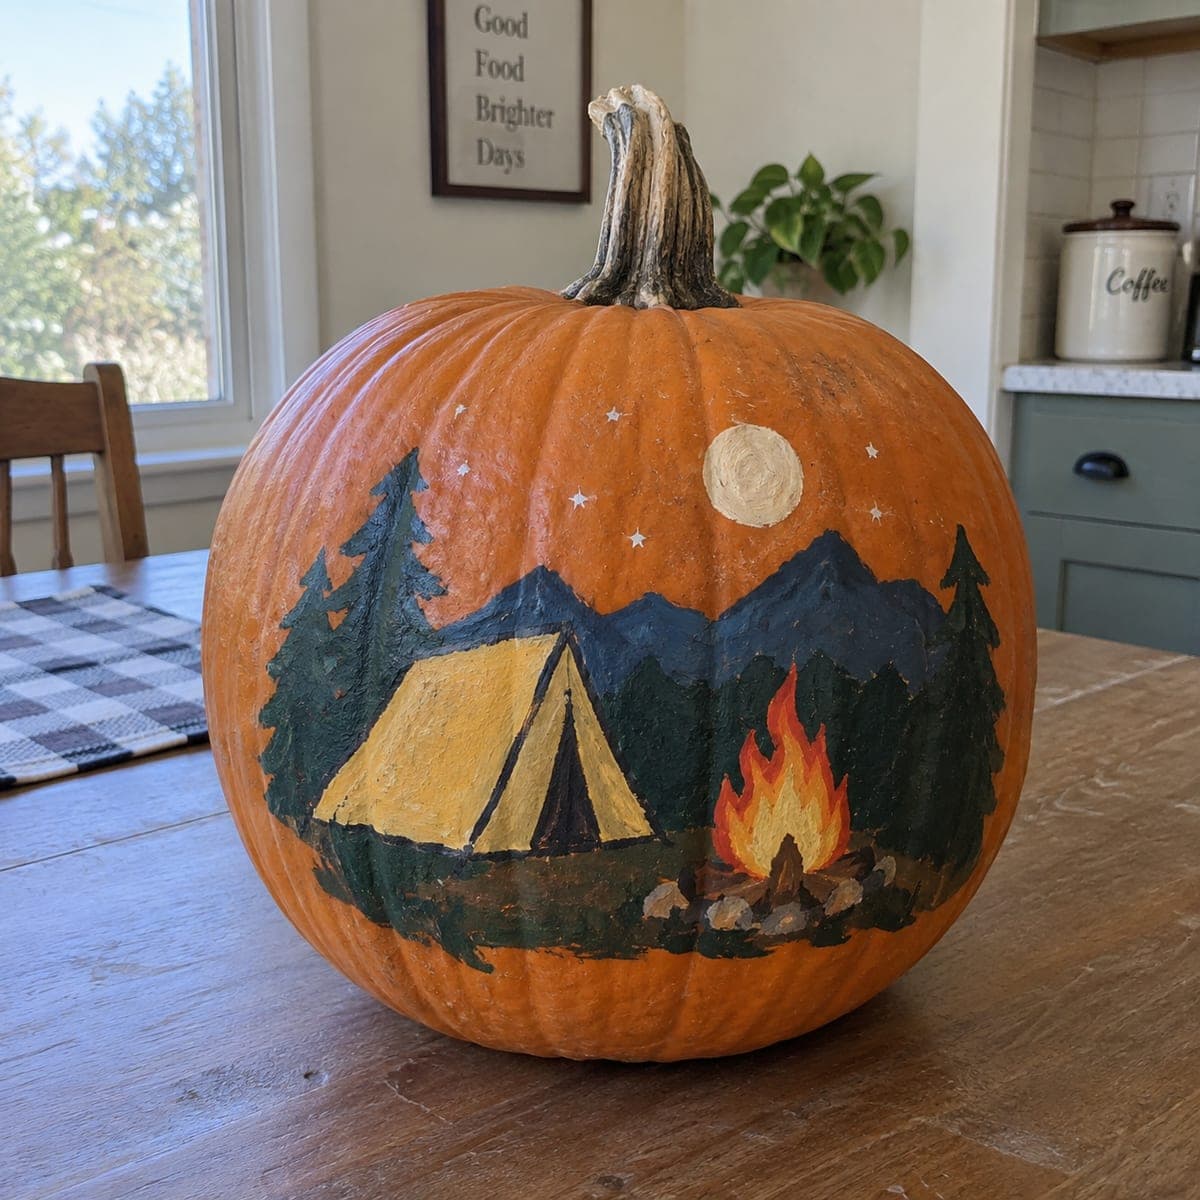
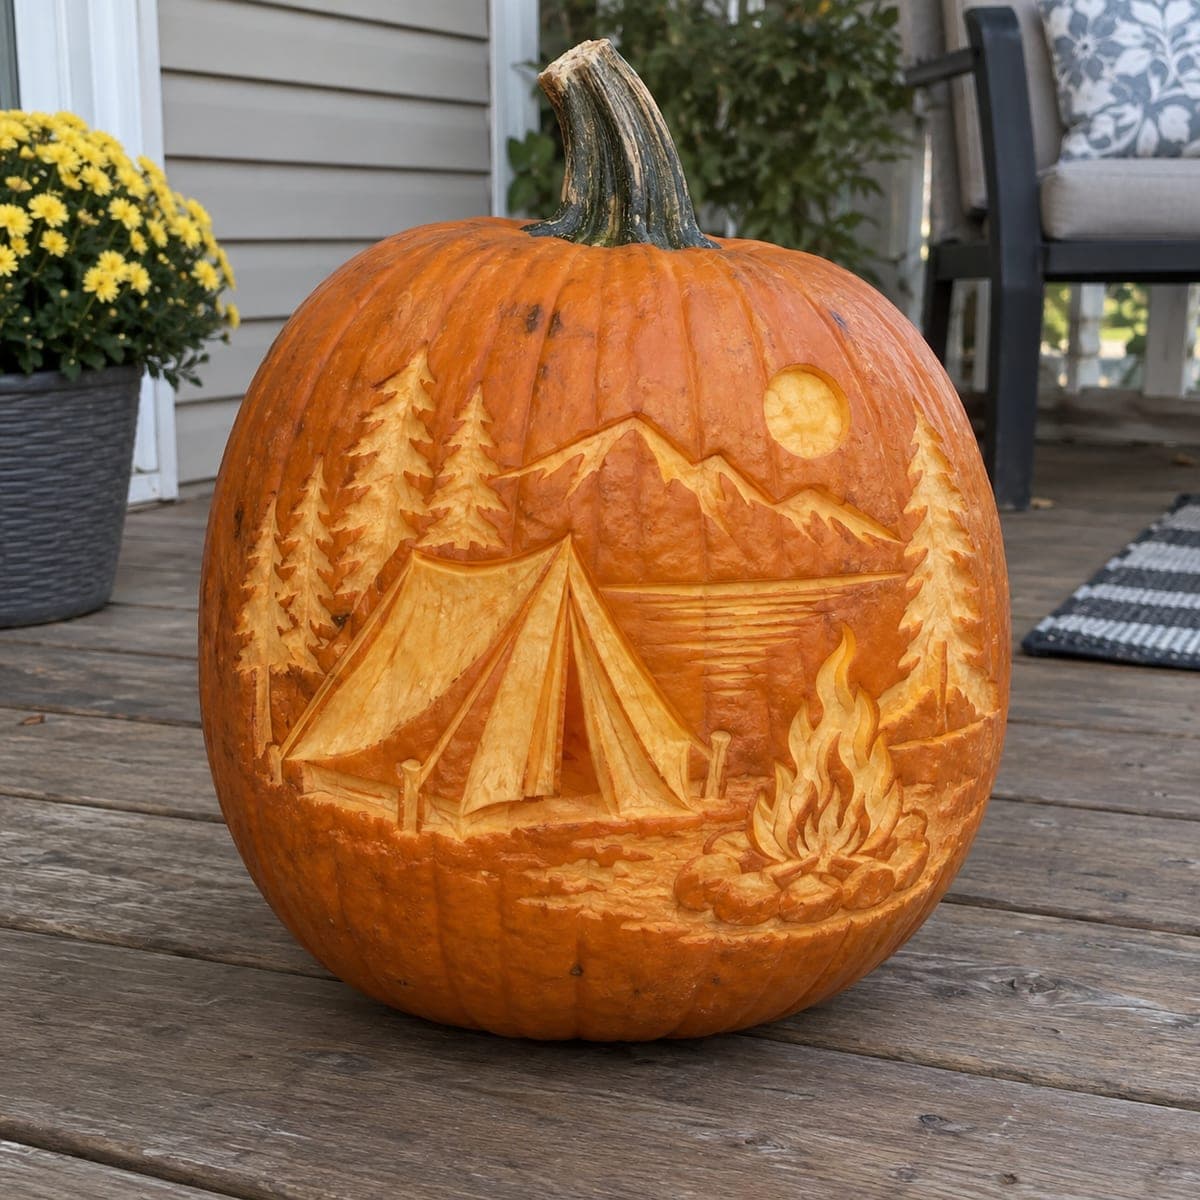
A cozy campsite wraps this no-carve pumpkin: a yellow tent under a full moon, a crackling campfire, starry sky, and a treeline of dark pines against painted mountains. Layering makes the scene work, so paint back to front, sky and mountains first, then trees, then the tent and fire on top. Acrylics adhere well to clean pumpkin skin, and the finished piece makes a warm centerpiece for anyone who loves fall camping.

This is an AI-generated concept image: a realistic, carvable design idea rather than a photo of a finished carve. AI concepts are always labeled and sit out the leaderboard and the contest.

No ratings yet · Sign in to rate
Comments (0)

  • No comments yet — be the first.

Save without an account. Sign in to like or comment.

Our tips for carving a similar design

The whole scene works because it is painted back to front, so each layer sits cleanly on top of the last. Start with the night sky and mountains, add the pine treeline, then finish with the bright tent and campfire in front. Since this is a no-carve concept, clean dry pumpkin skin becomes your canvas and acrylics do all the work.

Written by PumpkinCarvingIdeas.com, inspired by the image above. These are our suggestions, not instructions from the uploader. This approach to the AI concept has not been tested on a real pumpkin.

From pumpkin to porch

  1. Clean and sketch the scene

    Wipe the pumpkin with a damp cloth and dry it fully so paint grips well. Pick the flattest, smoothest face for your scene and turn the stem away from the view. Lightly pencil in the horizon line, the moon, and rough shapes for the tent, fire, and mountains. Keep marks faint since you will paint right over them.

  2. Paint the sky and moon

    Block in the dark blue night sky across the upper area, leaving the natural orange showing below for the ground. Paint a soft off-white circle for the full moon and let it dry before touching it again. Dot in small white stars with the tip of a fine brush. Two thin coats look smoother than one thick one.

  3. Add the mountains

    Once the sky is dry, paint the layered blue-gray mountain ridges along the horizon. Vary the tone slightly so the ridges read as separate layers. Keep the ridgeline crisp where it meets the sky. Let this layer dry before adding anything in front of it.

  4. Build the pine treeline

    Paint dark green pines on the left and right to frame the scene, working over the dried mountains. Use short downward strokes off a central trunk line so the branches look natural. Overlap a few trees for depth. This dark border helps the tent and fire pop later.

  5. Paint the tent and campfire

    Add the yellow tent last on the left, then shade one side darker so it looks three dimensional. Paint the campfire with a red base, orange middle, and yellow center, plus a small log and stone ring at its base. Keep the flame shapes loose and slightly uneven for a real crackle. These are your brightest front-layer elements, so let earlier layers dry first.

  6. Seal and stage it

    Once everything is fully dry, brush on a thin coat of matte acrylic sealer to protect the scene. Set the pumpkin on a table with the campsite facing the room. For an optional glow, tuck a small battery LED puck nearby or behind it rather than inside. Snap your photo in soft evening light to show off the colors.

Gather your supplies

Check things off as you get ready.

Work on a stable surface, keep your free hand out of the cutting path, and have an adult handle sharp tools.

Three levels of light

  • Leave intact

    The lower orange skin left unpainted reads as warm ground and glows if you add a nearby LED.

  • Peel & shade

    Lightly scuff the moon area before painting so its off-white sits bright against the dark sky.

  • Cut through

    No cutting needed, but you could pierce a few tiny star holes for pinpoints of real light.

Learn the carving basics

Before you start cutting

Do I have to carve anything for this design?

No, this is a fully painted no-carve pumpkin. That makes it beginner-friendly on the tool side and it keeps the pumpkin fresh longer since you never open it. If you want a little glow, set a battery LED beside or behind it instead of inside.

What order should I paint the layers?

Always work back to front so nearer objects cover farther ones cleanly. Do the sky, moon, and stars first, then mountains, then the pine treeline, and finally the tent and fire on top. Let each layer dry before starting the next so colors do not smear together.

Will acrylic paint stick to the pumpkin?

Yes, acrylics adhere well to clean, dry pumpkin skin. Wipe off any dirt and wax residue first and let the surface dry completely. Use two thin coats rather than one heavy coat for smooth, even color, and seal it at the end to protect your work.

Your take belongs here, too.

Changed a detail? Made it simpler? Share a photo of your version and tell the community what worked.

Share your pumpkin

More pumpkins like this

You've reached the end · 8 pumpkins
The Patch Report

Fresh pumpkins, in your inbox.

The best new carvings, ideas worth stealing, and how-tos for carving season. Short, seasonal, and gone by November.

A short email during carving season. Unsubscribe anytime. See our privacy policy.