Halloween Pumpkin Carving Contest · Starts October 1st · $500 in prizes
← Back to ideas
@ai_concepts
Sep 25, 2026
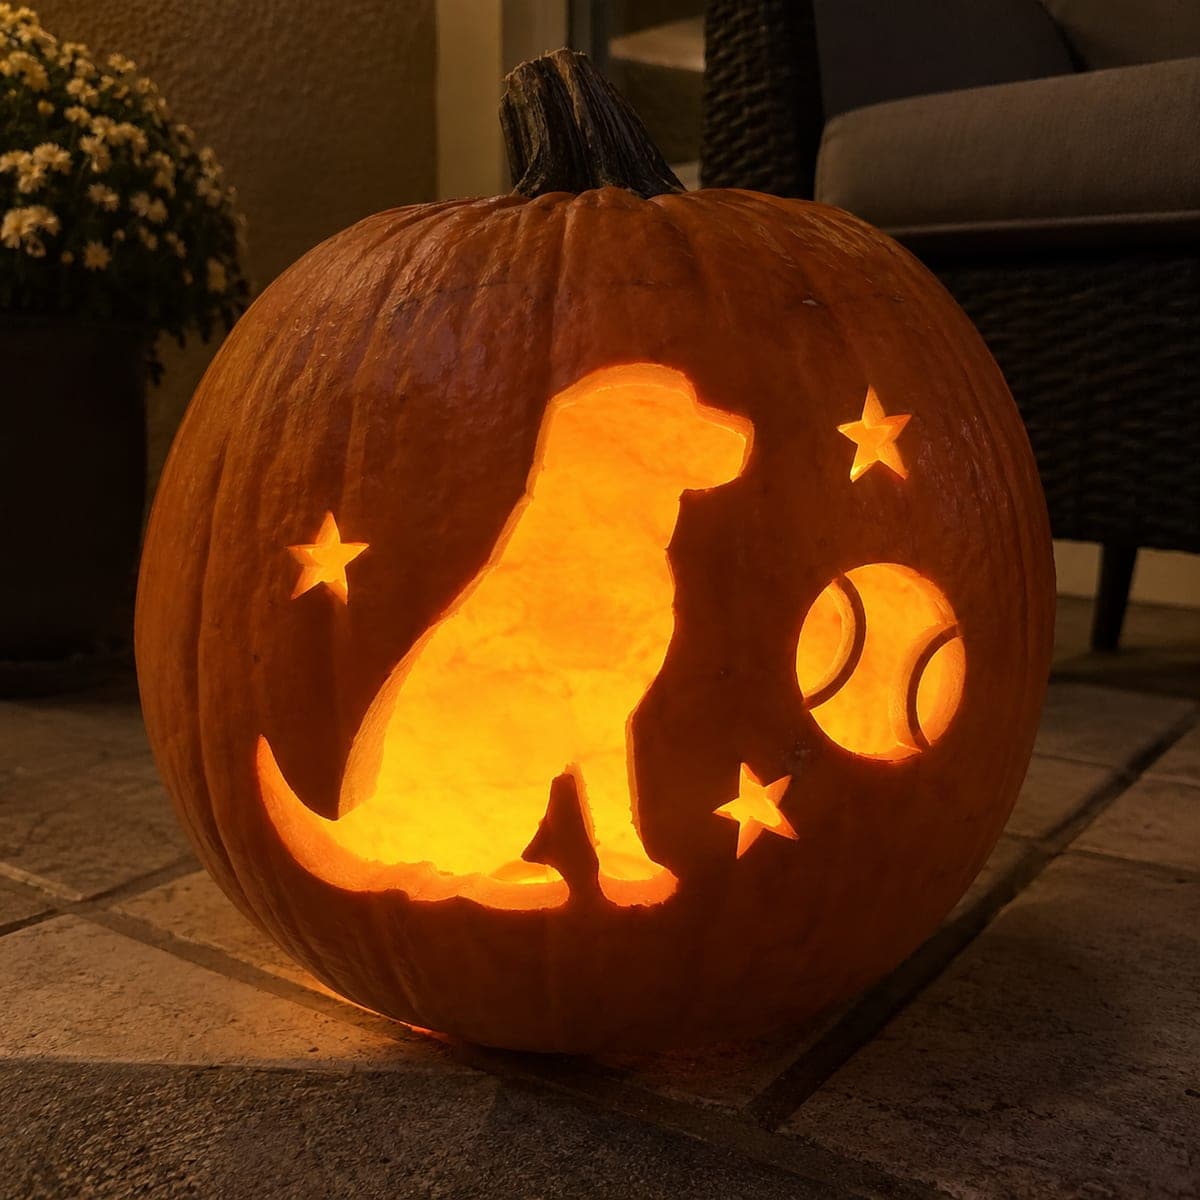
Sitting Dog and Bone Silhouette Pumpkin CarvingAI
0

Report this carving

Tell us what is wrong. Reports are private.

Sitting Dog and Bone Silhouette Pumpkin Carving

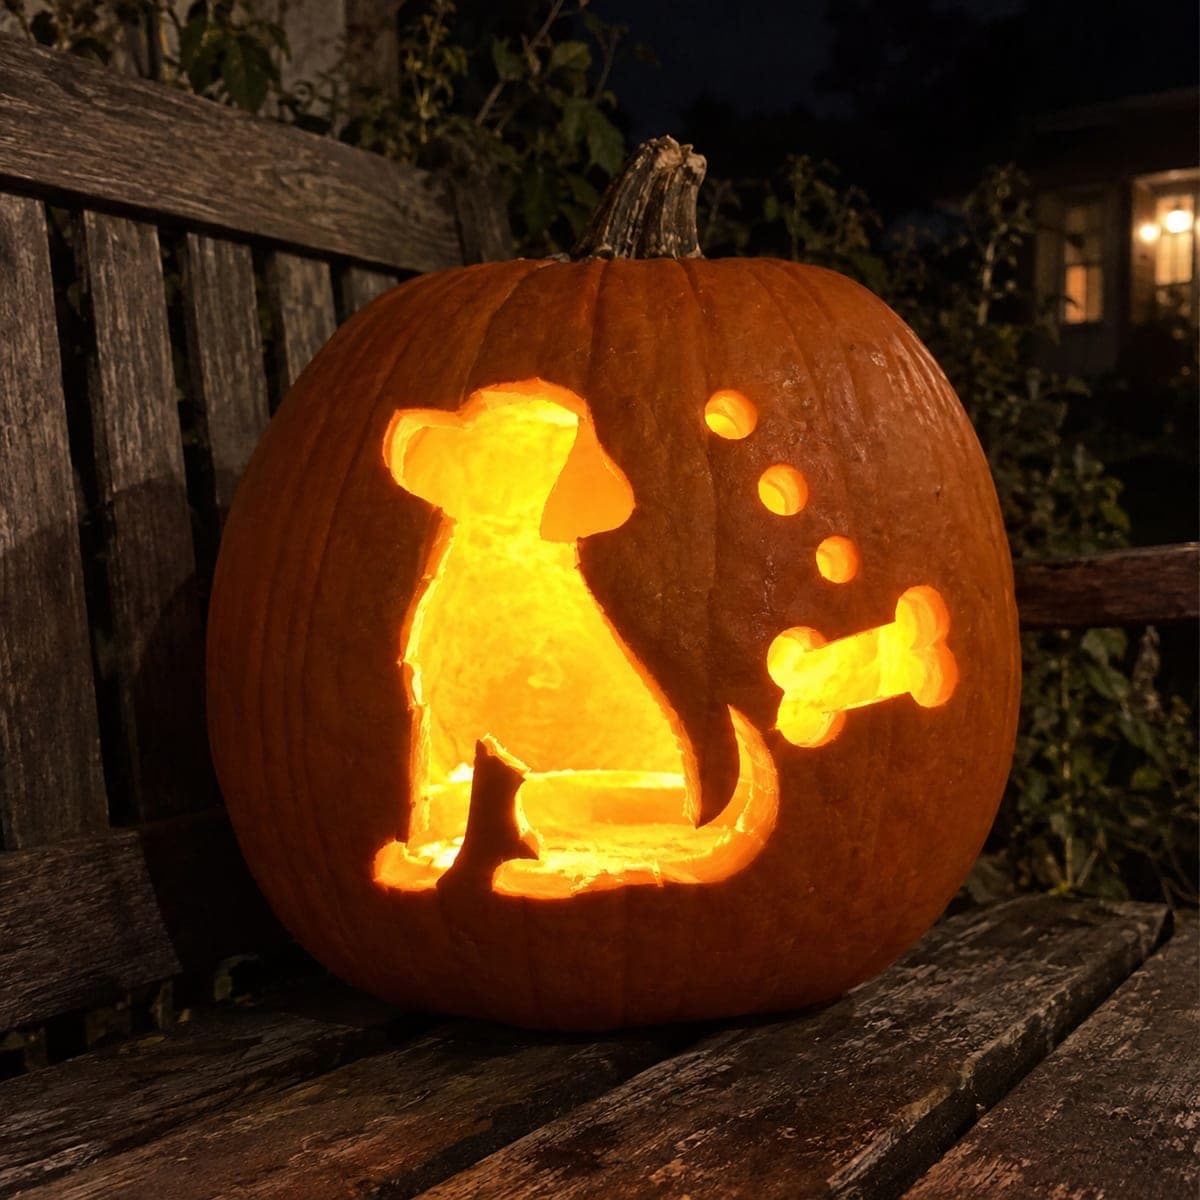
A full sitting dog shape and a bone are cut away entirely as two separate glowing voids in this medium dog pumpkin carving idea, with generous solid rind spacing between them so the design holds without any floating pieces. The clean negative-space approach makes this pumpkin carving idea one of the most readable from a distance, especially when lit from within. Use a jigsaw-style pumpkin saw for the tight curves of the sitting dog's legs and tail. Displayed beside a real dog dish or collar tag, this pumpkin makes a great pet-owner Halloween decoration.

No ratings yet · Sign in to rate

Save this design for carving night, then share a photo of your own jack-o'-lantern once it's glowing.

Comments (0)

  • No comments yet — be the first.

Save without an account. Sign in to like or comment.

Our tips for carving a similar design

Both the sitting dog and the bone are removed entirely as separate voids, with generous solid rind left between them to keep the pumpkin shell stable. The design relies on the contrast between the glowing negative space and the dark surrounding rind, which makes it one of the most readable pet-themed pumpkins from a distance.

From pumpkin to porch

  1. Hollow and prep

    Cut access from the back of the pumpkin and scrape the interior to a consistent inch of thickness across both the dog and bone areas. Equal wall thickness means the two shapes glow with matching brightness, which is important for a balanced negative-space design.

  2. Lay out both shapes

    Transfer the sitting dog outline to one side of the face and the bone shape with comfortable spacing on the other. Mark the rind gap between them and confirm it is at least two centimeters wide at the narrowest point. Draw the cutting lines clearly with a marker before picking up any blade.

  3. Cut the dog silhouette first

    The dog is the larger and more complex of the two shapes, so cut it while the shell is at its most rigid. Use a thin detail saw for the tight curves between the legs and tail. Work around the full outline, then pop the waste piece inward.

  4. Cut the bone opening

    The bone's rounded knob ends are the trickiest part. Use short curved strokes and let the blade follow the circular shape rather than forcing it. The straight shaft between the knobs cuts easily with steady forward strokes.

  5. Clean up edges and check the spacing

    Smooth any jagged edges with a small file. Step back and check that the rind gap between the dog and bone looks intentional and even. Touch up the marker outline and remove any uneven bumps with the knife tip.

  6. Light and display

    Place an LED candle inside and display on a front step or beside a real dog dish for a pet-owner Halloween vignette. The dog and bone read immediately from a distance. A warm amber glow suits the friendly tone of the design.

Written with AI to match this design

Gather your supplies

Check things off as you get ready.

Work on a stable surface, keep your free hand out of the cutting path, and have an adult handle sharp tools.

Three levels of light

  • Leave intact

    All surrounding orange rind and the gap between the dog and bone shapes

  • Peel & shade

    None, this is a pure negative-space design

  • Cut through

    The complete sitting dog silhouette and the full bone shape, both glowing equally

Learn the carving basics

Before you start cutting

What is the trickiest part of the sitting dog outline?

The concave gaps between the sitting dog's legs and between the tail and the body are the most challenging because the blade can snag in tight curves. Use a narrow detail blade and approach each concave area from both sides with short strokes rather than trying to power through in one pass.

Does the bone need to be a specific size relative to the dog?

The bone looks best when it is roughly a quarter to a third the size of the dog silhouette. Too large and it competes with the dog for attention; too small and it disappears at night. Keep both shapes in the same rough visual weight class for a balanced display.

How far apart should the dog and bone be?

At least two centimeters of solid rind between them keeps the shell stable. Visually, a gap slightly wider than the bone diameter reads as intentional negative space rather than an awkward squeeze. Mark and confirm the spacing before cutting.

Your take belongs here, too.

Changed a detail? Made it simpler? Share a photo of your version and tell the community what worked.

Share your pumpkin

More pumpkins like this

You've reached the end · 8 pumpkins
The Patch Report

Fresh pumpkins, in your inbox.

The best new carvings, ideas worth stealing, and how-tos for carving season. Short, seasonal, and gone by November.

A short email during carving season. Unsubscribe anytime. See our privacy policy.