Halloween Pumpkin Carving Contest · Starts October 1st · $500 in prizes
← Back to ideas
@ai_concepts
Sep 25, 2026
Shiba Inu Pumpkin with Cheek Contour ReliefAI
0

Report this carving

Tell us what is wrong. Reports are private.

Shiba Inu Pumpkin with Cheek Contour Relief

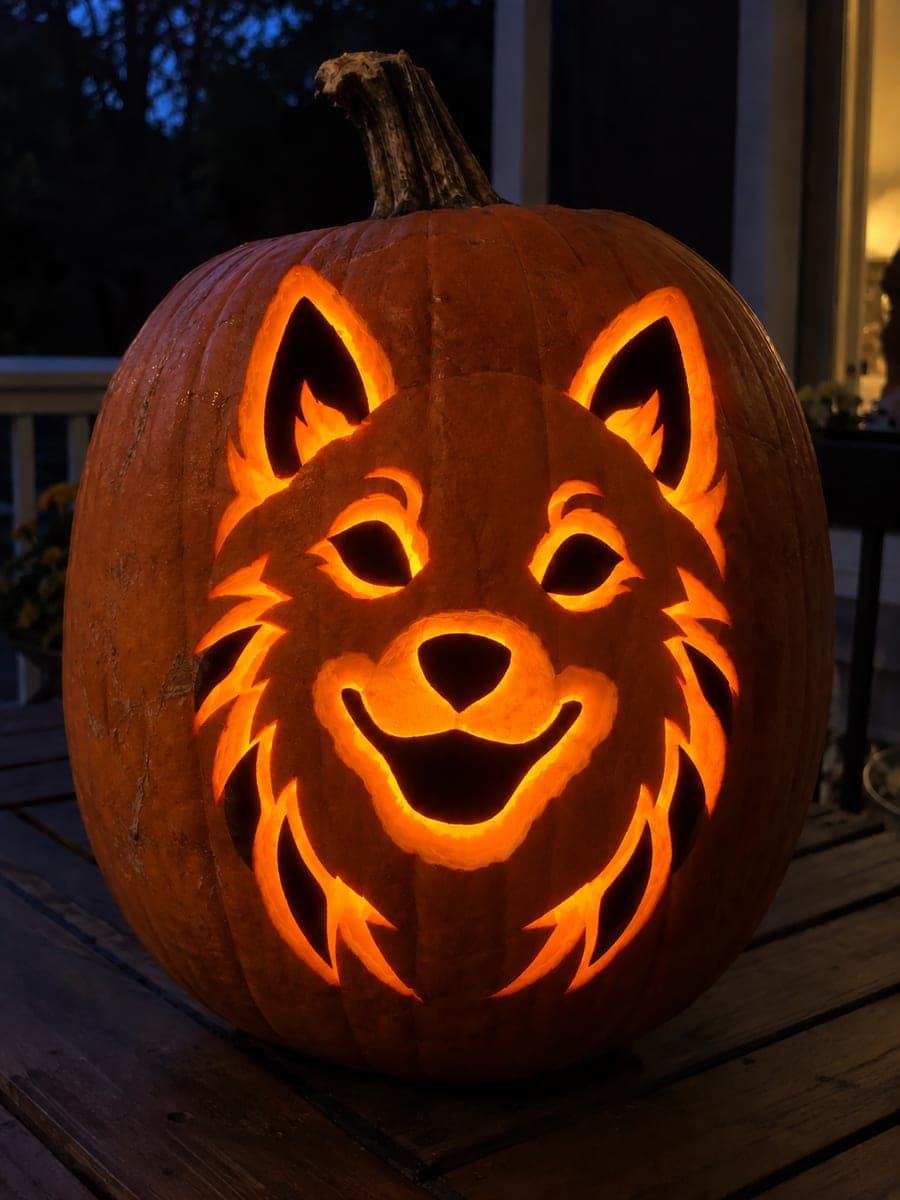
Open inner ears, eyes, and nose are surrounded by rounded cheek, mouth, and outer face contours carved as shallow backed relief in this intermediate shiba inu pumpkin stencil, with no enclosing through-cut around the head. The backed contours give the face a sculpted look that photographs well in daylight and glows warmly at night. Cut the through apertures first so you have registration points for the backed contours. A directional flashlight during setup helps you gauge the depth of each relief stroke.

No ratings yet · Sign in to rate
Comments (0)

  • No comments yet — be the first.

Save without an account. Sign in to like or comment.

Our tips for carving a similar design

Open inner ears, eyes, and nose give bright focal points, and the surrounding backed cheek, mouth, and outer face contours sculpt the Shiba's distinctive expression without requiring any through-cut around the head outline. The no-enclosing-through-cut approach means the design blends naturally into the pumpkin surface, giving it a photographically interesting daytime appearance as well.

From pumpkin to porch

  1. Hollow and mark structural zones

    Hollow to half an inch throughout and mark the outer face contour boundary to remind yourself never to cut through that line. The face panel should extend to the natural edge of the pumpkin surface, with the design receding into the rind like a bas-relief sculpture.

  2. Transfer all lines in two colors

    Mark inner ears, eyes, and nose as through-cut apertures in one color. Mark cheek, mouth, and outer face contours as backed relief in another. Confirm you can tell them apart from a normal working distance before picking up a blade.

  3. Cut the inner ear apertures

    Saw out the triangular inner ear apertures first. These define the top of the face composition and confirm the correct scale before you commit to anything lower. Clean the edges with a detail knife.

  4. Cut the eye and nose apertures

    Open the almond eyes and small nose, working carefully with a fine-tipped saw for the eye points. Check that all apertures are symmetrical in the face layout before moving to the relief work. Registration errors are easiest to fix now rather than later.

  5. Carve backed contours outward from the face

    Start relief carving at the cheek boundaries (closest to the apertures) and work outward to the outer face edge. This order prevents undercutting the aperture edges. Use a detail knife at a low angle for the curved cheek shapes and a narrow gouge for the tighter mouth contour.

  6. Evaluate with directional light

    Use a flashlight inside the pumpkin to check the relief depth before finalizing. The raking light from inside shows exactly how much shadow each contour will cast when displayed. Deepen any areas that look too shallow and smooth transitions between depth levels.

Written with AI to match this design

Gather your supplies

Check things off as you get ready.

Work on a stable surface, keep your free hand out of the cutting path, and have an adult handle sharp tools.

Three levels of light

  • Leave intact

    The outer face contour boundary and the rest of the pumpkin shell

  • Peel & shade

    Cheek, mouth, and outer face contours at varied backed relief depths

  • Cut through

    Inner ear apertures, almond eye openings, and the nose

Learn the carving basics

Before you start cutting

Without a through-cut around the head, how do I know where the face ends?

The deepest backed contour line (the outer face edge) creates enough of a shadow boundary that the face reads as a defined shape even without a full cut. Think of it like a woodblock print: the gradual transition from relief to flat rind is part of the aesthetic.

The cheek contours look lumpy rather than smooth. How do I fix them?

Lumpy contours usually come from uneven pressure on the detail knife. Re-pass each cheek curve in one smooth continuous stroke rather than multiple short strokes, applying steady low pressure throughout. Remove ridges between strokes with a very light follow-up pass.

Does this design require a specific pumpkin shape?

A medium round pumpkin works best because the flat-facing surface gives the backed relief the most even depth from center to edge. A very elongated or asymmetric pumpkin can make the contours look uneven simply because the wall curves more on one side. Choose the most symmetrical pumpkin available.

Your take belongs here, too.

Changed a detail? Made it simpler? Share a photo of your version and tell the community what worked.

Share your pumpkin

More pumpkins like this

You've reached the end · 8 pumpkins
The Patch Report

Fresh pumpkins, in your inbox.

The best new carvings, ideas worth stealing, and how-tos for carving season. Short, seasonal, and gone by November.

A short email during carving season. Unsubscribe anytime. See our privacy policy.