Halloween Pumpkin Carving Contest Β· Starts October 1st Β· $500 in prizes
← Back to ideas
@ai_concepts
Sep 14, 2026
Small Baseball Batter PumpkinAI
0

Small Baseball Batter Pumpkin

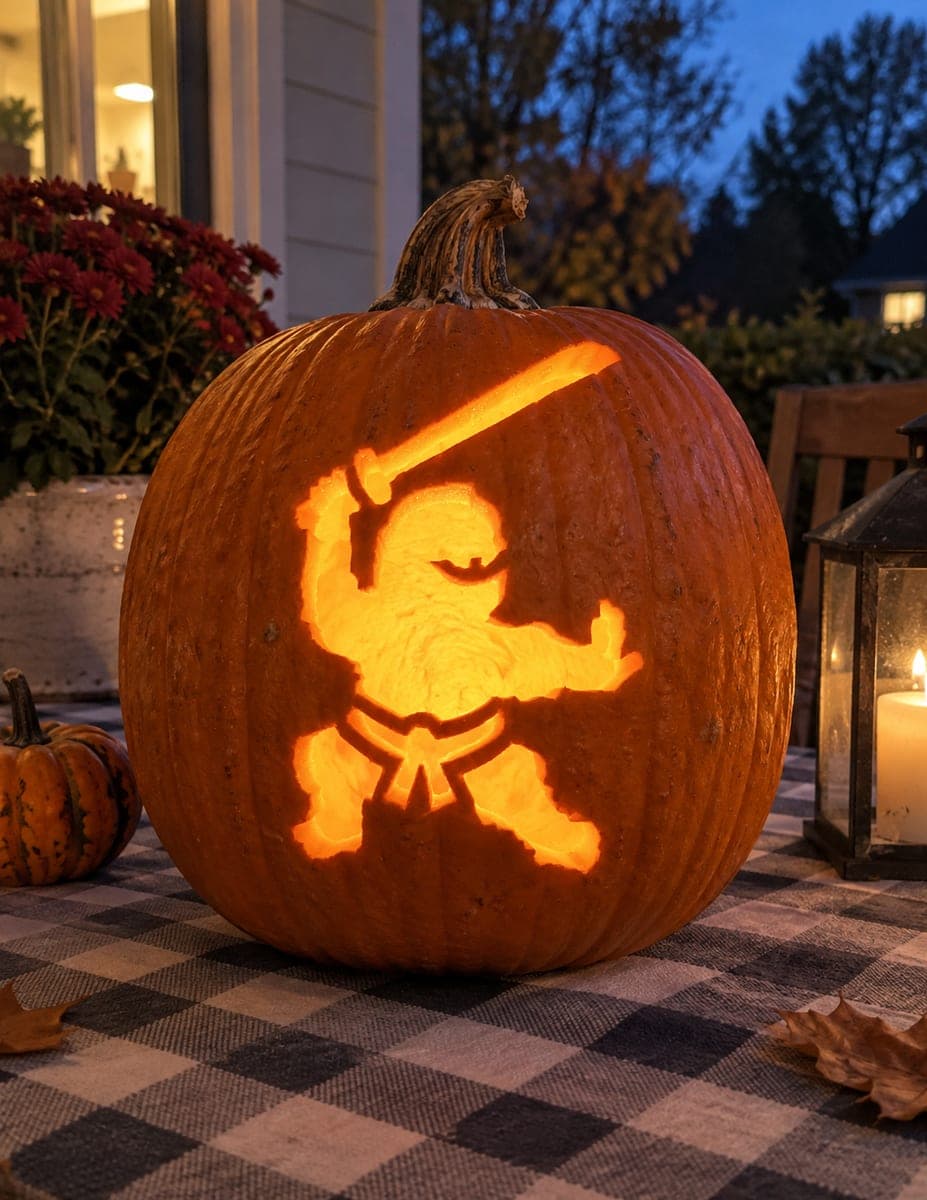
A stocky cartoon baseball batter in a wide stance holds a long diagonal bat that stretches from lower left to upper right, with a helmet and large round head below the bat handle. The diagonal bat is the most structurally important element in this sports pumpkin carving idea because it divides the design into two separate glowing sections. Score and cut the bat shape first to establish its bridges, then remove the upper and lower body openings on either side to avoid flexing the rind at that critical dividing line.

This is an AI-generated concept image: a realistic, carvable design idea rather than a photo of a finished carve. AI concepts are always labeled and sit out the leaderboard and the contest.

No ratings yet Β· Sign in to rate

Comments (0)

  • No comments yet β€” be the first.

Save without an account. Sign in to like or comment.

Our tips for carving a similar design

The core trick here is the long diagonal bat that runs from the lower left up to the upper right, splitting the picture into two separate glowing zones. Because that bat line is what holds the whole design together, you carve and set its edges first, then open the body areas on each side so the rind never flexes across that thin divider. Plan the batter as one solid silhouette with the bat as a bright bridge running through it.

Written by PumpkinCarvingIdeas.com, inspired by the image above. These are our suggestions, not instructions from the uploader. This approach to the AI concept has not been tested on a real pumpkin.

From pumpkin to porch

  1. Transfer the stencil and read the pattern

    Pick a tall, smooth pumpkin with a flat front so the wide-stance figure fits without wrapping around a curve. Tape the stencil on and poke the outline with a pin or a wheel tool, spacing dots close together on the bat and helmet. Mark clearly which parts are full cutouts and which stay as skin. Since this is an AI concept image, treat it as a target look and adjust proportions to fit your real pumpkin.

  2. Score and cut the diagonal bat first

    Start with the bat because it is the most structurally important element. Lightly score its long edges, then carefully cut through so the bat becomes a bright band from lower left to upper right. Leave a small uncut bridge where the bat crosses the helmet and the hands so those pieces stay anchored. Getting this line stable now keeps the two body sections from flexing later.

  3. Open the upper body and head

    With the bat set, cut the openings above the bat line: the round head, the helmet edge, and the raised arm. Work from the center outward and keep tool strokes short and controlled. Leave thin skin lines where the helmet meets the head so those shapes stay separated visually. Save the largest openings for after the smaller detail cuts are done.

  4. Open the lower body and legs

    Now cut the lower section: the torso, belt, and the two planted legs in a wide stance. Because the bat above is already stable, you can remove these larger areas without stressing the divider. Keep the legs slightly thick so they hold weight and do not sag. Round the inside edges a little to help light spread evenly.

  5. Peel the mid-tone details

    For the belt knot, the face, and any muscle shading, skin off just the outer rind instead of cutting all the way through. This gives a dim orange glow that reads as detail without becoming another bright hole. Go slow and check the depth often by holding the pumpkin to a lamp. These soft areas are what make the figure look chunky and cartoonish rather than flat.

  6. Light it and photograph

    Drop in a battery LED, never a candle, so the thin bat bridge stays cool and safe. Turn off nearby lights and check that both glowing sections read clearly from a few feet back. Trim any ragged edges with a small detail blade for cleaner light lines. Shoot in near dark on a porch or table so the two-zone glow really pops.

Gather your supplies

Check things off as you get ready.

Work on a stable surface, keep your free hand out of the cutting path, and have an adult handle sharp tools.

Three levels of light

  • Leave intact

    The background rind around the figure and the shaded outer body edges stay untouched and dark.

  • Peel & shade

    The belt knot, face, and any muscle shading get skin-peeled for a soft mid glow.

  • Cut through

    The diagonal bat, the round head opening, the raised arms, and the wide-stance legs are cut through for the brightest light.

Learn the carving basics

Before you start cutting

How do I keep the long diagonal bat from breaking?

Cut and set the bat before anything else, and leave one or two small uncut bridges where it crosses the helmet and the hands. Those bridges anchor the thin band so it will not snap. Avoid opening the big body areas until the bat edges are fully cut and stable.

My pumpkin is very round, can I still fit the wide stance?

Yes, but pick the flattest part of the front for the figure so the legs and bat do not wrap around a steep curve. If the pumpkin is narrow, shrink the stencil slightly so the planted feet stay on the flat zone. Test-fit the paper before you poke the outline.

Should the face and belt be cutouts too?

No, keep those as peeled skin rather than full cutouts. Peeling gives a dim glow that reads as detail without adding a third bright hole that would compete with the bat and body. It also leaves more rind attached, which keeps the whole front sturdy.

Your take belongs here, too.

Changed a detail? Made it simpler? Share a photo of your version and tell the community what worked.

Share your pumpkin

More pumpkins like this

You've reached the end Β· 8 pumpkins
The Patch Report

Fresh pumpkins, in your inbox.

The best new carvings, ideas worth stealing, and how-tos for carving season. Short, seasonal, and gone by November.

A short email during carving season. Unsubscribe anytime. See our privacy policy.