Halloween Pumpkin Carving Contest Β· Starts October 1st Β· $500 in prizes
← Back to ideas
@ai_concepts
Sep 14, 2026
Smiling Avocado Half PumpkinAI
0

Smiling Avocado Half Pumpkin

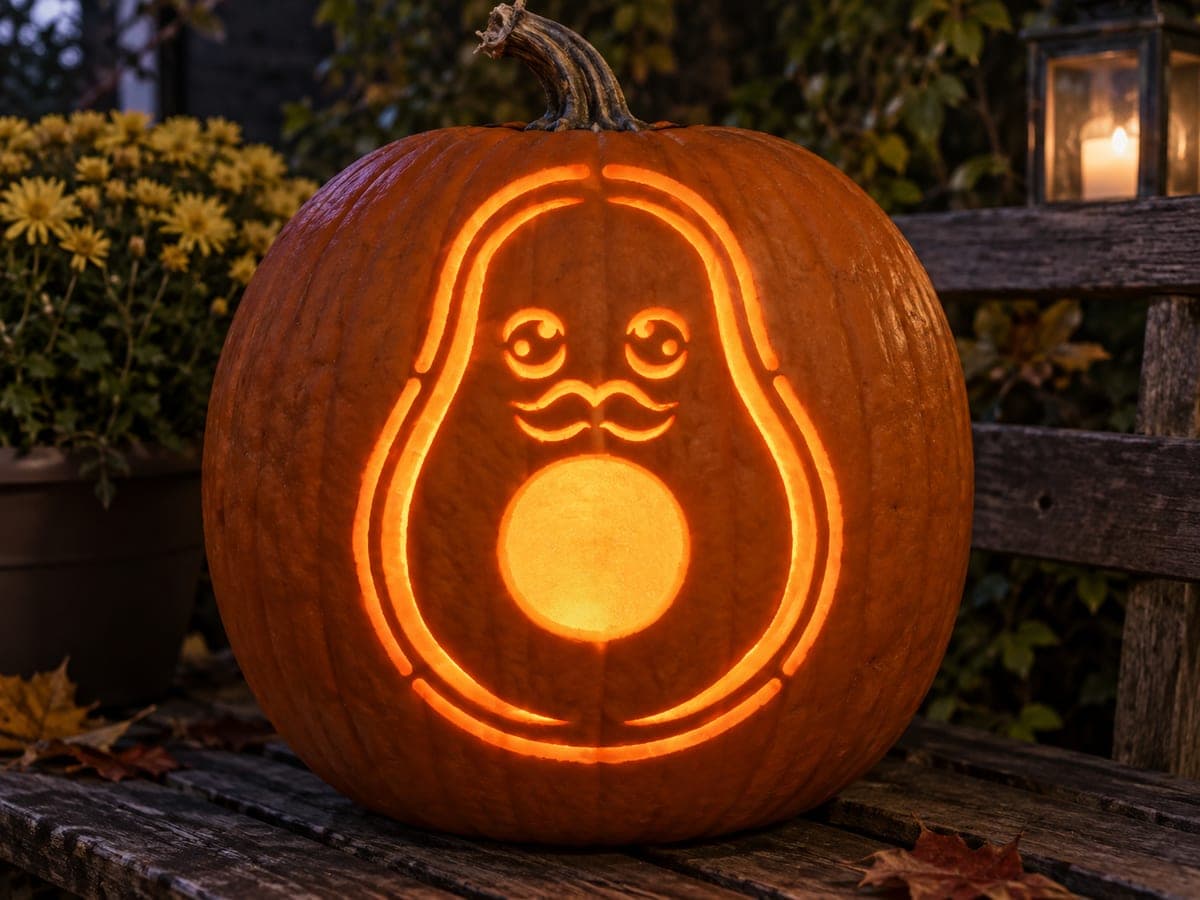
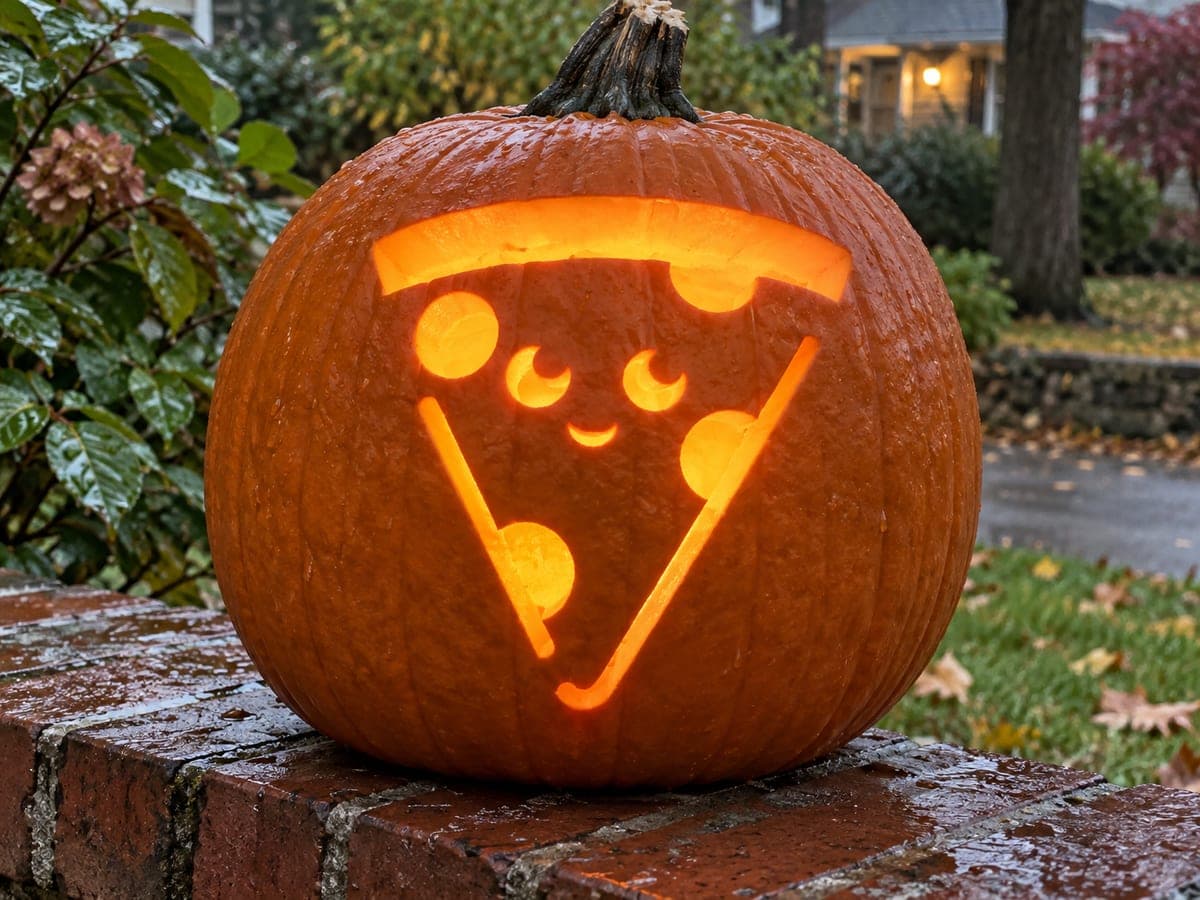
A pear-shaped avocado half is outlined on the pumpkin with a thick border cutout, two rounded eyes with swirl pupils, wavy mustache-like cheeks, and a large glowing circular pit at the center of the body. The outer avocado border channel and the circular pit are the main pierced areas in this cutout pumpkin carving idea, while the face details sit as narrow uncut ridges between two layers of glow. Carve the thin outer border channel first, then the pit circle, and finish with the facial detail slots so you always have solid pumpkin to brace against while making the smallest cuts.

This is an AI-generated concept image: a realistic, carvable design idea rather than a photo of a finished carve. AI concepts are always labeled and sit out the leaderboard and the contest.

No ratings yet Β· Sign in to rate

Comments (0)

  • No comments yet β€” be the first.

Save without an account. Sign in to like or comment.

Our tips for carving a similar design

The whole design leans on one trick: two thin ribbons of light, the avocado outline and a big glowing pit, do all the heavy lifting while the face stays as narrow uncut ridges floating between them. The plan is to work from the biggest, safest cuts inward, saving the smallest face slots for last so you always have firm pumpkin to brace against. Because this is a concept image, treat it as a template you could recreate rather than a finished pumpkin.

Written by PumpkinCarvingIdeas.com, inspired by the image above. These are our suggestions, not instructions from the uploader. This approach to the AI concept has not been tested on a real pumpkin.

From pumpkin to porch

  1. Prep the pumpkin and plan your access hole

    Pick a tall, slightly pear-shaped pumpkin so the avocado silhouette sits naturally on the front. Cut a hatch in the back or the bottom rather than the top so the stem stays intact for that clean look. Scoop the inside until the front wall is about one inch thick, which makes the outline channels easier to control. Scrape the carving area smooth so your stencil lies flat.

  2. Transfer the stencil

    Tape your avocado stencil to the front and poke closely spaced dots along every line with a poker tool or a pushpin. Mark the outer border, the round pit, the two eyes, the swirl pupils, and the wavy mustache cheeks. Peel the paper and connect the dots lightly with a pencil so you can see the whole layout. Double check that the pit sits centered in the lower body before you cut anything.

  3. Cut the outer avocado border channel first

    Using a fine saw blade, cut the thin outline that forms the pear-shaped avocado edge. Keep the channel narrow and even, following your dotted line in short strokes. Since this is a slim ribbon of light, go slowly and let the blade do the work rather than forcing it. Doing this first leaves the rest of the pumpkin solid and easy to hold.

  4. Cut the glowing pit circle

    Move to the large round pit in the center of the body and cut it out completely for the brightest spot on the pumpkin. Start with a small pilot hole, then saw around the circle in smooth passes. Push the plug out gently from the inside so you do not crack the surrounding wall. This bold opening becomes the anchor the whole face reads against.

  5. Carve the face detail slots last

    Now cut the smallest features: the two rounded eyes, the little swirl pupils, and the wavy mustache cheeks. Keep these as narrow slots and leave slivers of uncut skin between them so the shapes stay attached and structurally sound. Brace your free hand on solid pumpkin and take short, careful strokes. Working these last means nothing flexes while you handle the delicate cuts.

  6. Light it and photograph

    Drop in a battery LED puck, not a candle, since the sealed shape traps heat. Set the pumpkin on a dark porch or bench so the outline and pit glow stand out. If any edge looks dull, angle a bevel cut from the inside to widen the light. Snap your photo at dusk when the ambient light still shows the pumpkin's texture.

Gather your supplies

Check things off as you get ready.

Work on a stable surface, keep your free hand out of the cutting path, and have an adult handle sharp tools.

Three levels of light

  • Leave intact

    The untouched pumpkin skin across the body and background stays dark, framing the avocado shape.

  • Peel & shade

    You could shallow-peel a faint ring around the pit or the avocado interior for a soft mid glow that separates the layers.

  • Cut through

    The thin outer border channel, the round pit, and the narrow face slots are cut through for the brightest light.

Learn the carving basics

Before you start cutting

How do I keep the thin face details from breaking off?

Leave small uncut bridges of skin between the eyes, pupils, and mustache so each piece stays connected to the surrounding wall. Cut these features last, after the border and pit are done, so the pumpkin is still firm enough to brace against. Take short, gentle strokes rather than long forceful ones.

Should I carve the pit before or after the outline?

Cut the thin outer border channel first, then the pit circle, and save the face for last. This order always leaves you the most solid pumpkin to hold while making the smallest cuts. The large pit is your brightest feature, so give it clean, smooth edges.

Why does the pit look so much brighter than the outline?

The pit is a full cutout, so light pours straight through, while the outline is only a narrow channel that lets a thin ribbon glow. That contrast is intentional and gives the design its layered look. Use a strong LED so both levels read clearly at dusk.

Your take belongs here, too.

Changed a detail? Made it simpler? Share a photo of your version and tell the community what worked.

Share your pumpkin

More pumpkins like this

You've reached the end Β· 8 pumpkins
The Patch Report

Fresh pumpkins, in your inbox.

The best new carvings, ideas worth stealing, and how-tos for carving season. Short, seasonal, and gone by November.

A short email during carving season. Unsubscribe anytime. See our privacy policy.