Halloween Pumpkin Carving Contest · Starts October 1st · $500 in prizes
← Back to ideas
@ai_concepts
Sep 14, 2026
Square Grinning Frankenstein PumpkinAI
0

Square Grinning Frankenstein Pumpkin

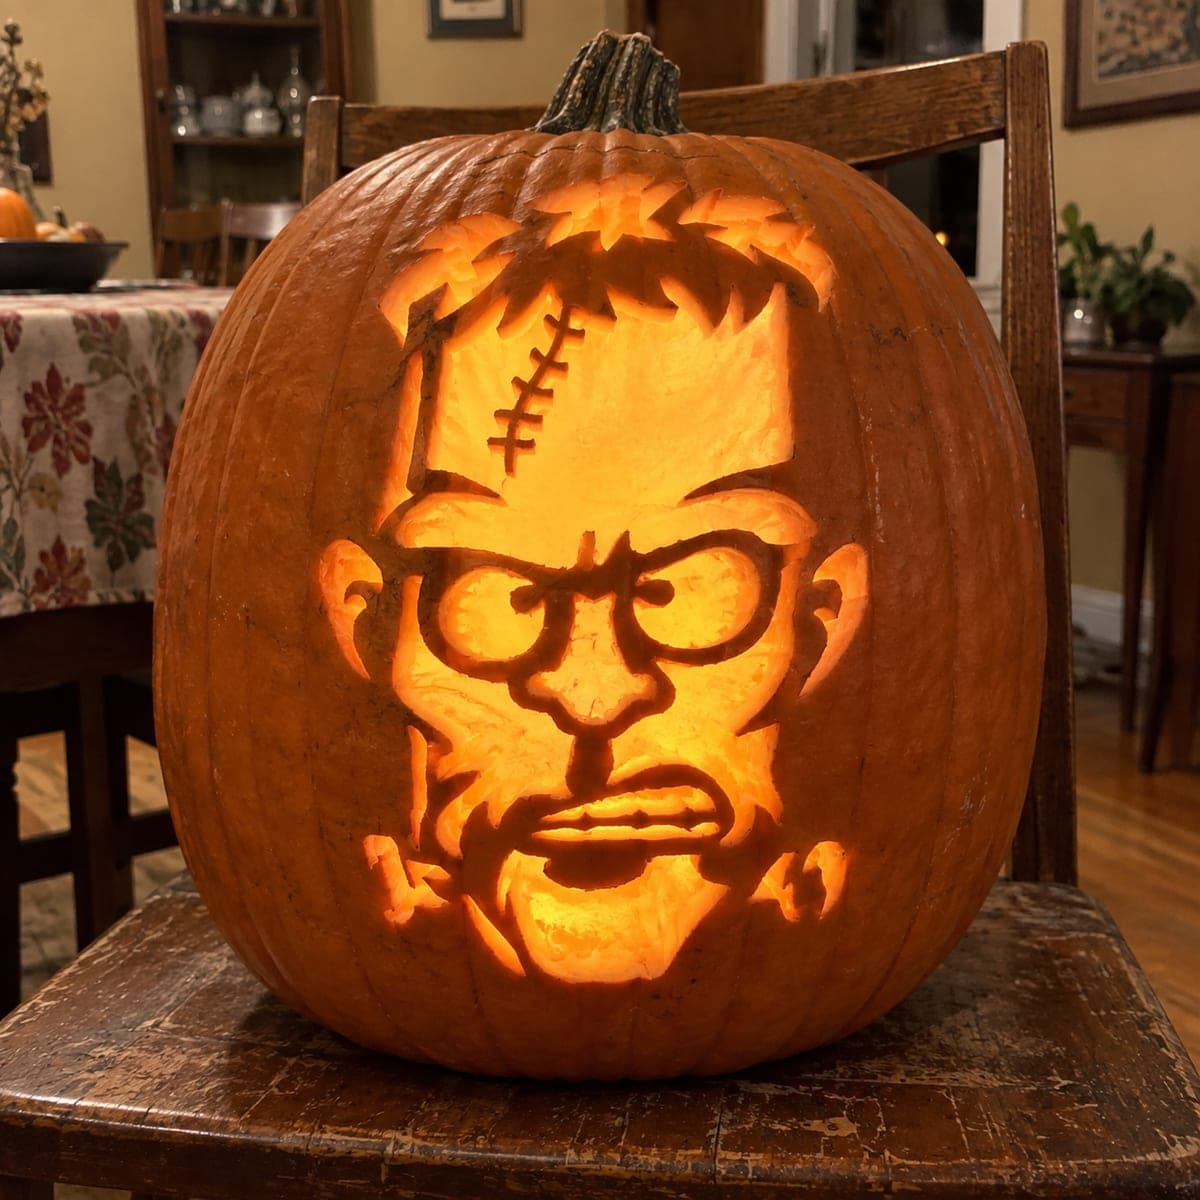
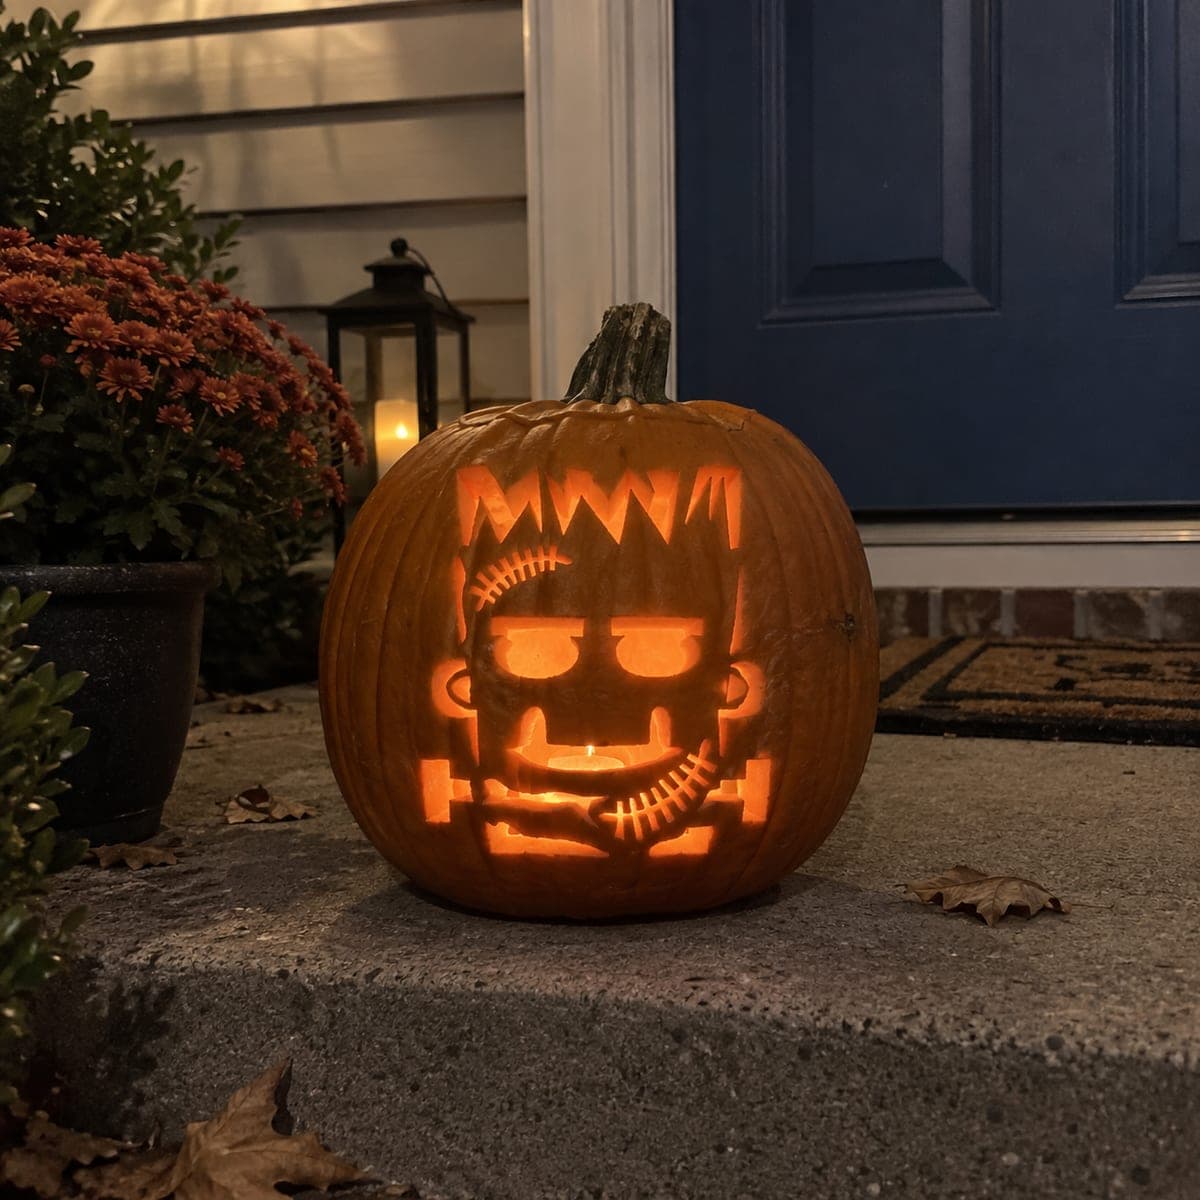
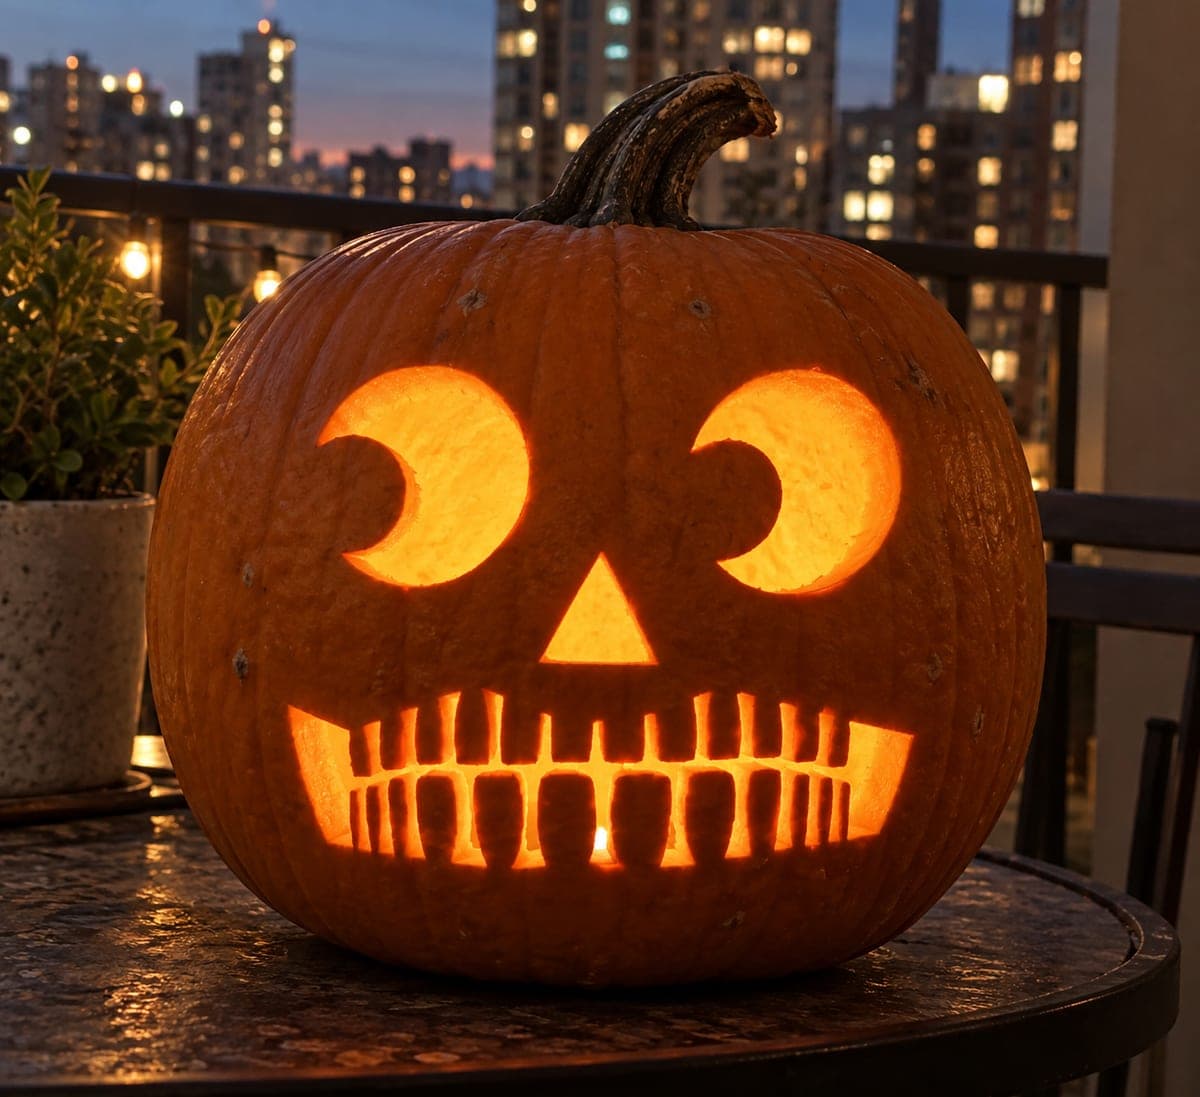
A compact square Frankenstein face with rectangular slot eyes, side bolts, a jagged stitch mouth, and a spiky flat-top hairline fills this porch-step jack-o-lantern in a bold funny pumpkin carving cutout design. The eye slots, mouth gaps, and hair spike spaces are all pierced through, while the bolt circles and the face outline remain as dark rind. Open the hair spike triangles along the crown first, since they are the narrowest cuts and set the spacing for everything below. Candlelight behind the face makes the rectangular eyes read as a glowing stare and sharpens the stitched smile into a dramatic grin.

This is an AI-generated concept image: a realistic, carvable design idea rather than a photo of a finished carve. AI concepts are always labeled and sit out the leaderboard and the contest.
No ratings yet · Sign in to rate

Comments (0)

  • No comments yet — be the first.

Save without an account. Sign in to like or comment.

Our tips for carving a similar design

The core trick here is treating the face as a set of clean rectangular cutouts framed by dark rind, so the light does the storytelling through the slot eyes and jagged mouth. Plan the whole face on paper first, keeping the spiky flat-top hairline, the two slot eyes, the side bolts, and the stitched grin all in proportion. Cut the narrow hair triangles first to lock in your spacing, then work down to the bigger mouth opening last.

Written by PumpkinCarvingIdeas.com, inspired by the image above. These are our suggestions, not instructions from the uploader. This approach to the AI concept has not been tested on a real pumpkin.

From pumpkin to porch

  1. Pick and prep a boxy pumpkin

    Choose a pumpkin that leans tall and flat-faced rather than round, since a square monster reads best on a broad front. Cut a lid from the bottom or the back so the top stays intact for the spiky hairline, and scoop the walls down to about one inch thick. A thinner front wall makes carving the slots and stitches much easier. Wipe the face area dry before you transfer your pattern.

  2. Transfer the pattern

    Print or draw the square face with slot eyes, side bolts, a spiky top hairline, and a jagged stitch mouth. Tape it snugly and poke the outlines with a pin or transfer tool, marking corners of every rectangle so lines stay crisp. Clearly note which shapes are cutouts and which stay as dark rind. Step back and check the spacing before you cut anything.

  3. Cut the hair spikes first

    Start with the triangle gaps along the crown, since these are the narrowest cuts and they set the rhythm for the face below. Use a small saw and make each triangle in short controlled strokes, letting an adult handle the blade. Leave solid rind between spikes so the flat-top hairline stays strong. Clear the bits as you go to keep your sightlines clean.

  4. Open the eye slots and side bolts

    Cut the two rectangular eye slots as full openings so they glow as a steady stare. For the side bolts, peel just the skin in circles instead of cutting through, so they read as dim raised studs against the bright eyes. Keep the corners of the slots sharp with a fresh knife tip. Take breaks to check both eyes match in size.

  5. Carve the stitched grin last

    Save the wide mouth for last because it is the biggest opening and removing it early weakens the face. Cut the main grin gap through, then add the short stitch marks as skin-deep scratches or thin slits so they stay attached. Leave small bridges between the mouth teeth so nothing sags. Go slow along the jagged lower edge to keep that stitched look clean.

  6. Light it and photograph

    Drop in a battery LED, never a candle, and set the pumpkin at eye level on a step. Warm white light makes the slot eyes and grin pop while the dark rind bolts stay shadowed. Shoot in near darkness with the light steady, and try a slightly low angle for that looming monster feel. Mist the cut edges with water if you want them to look fresh on camera.

Gather your supplies

Check things off as you get ready.

Work on a stable surface, keep your free hand out of the cutting path, and have an adult handle sharp tools.

Three levels of light

  • Leave intact

    The face outline and background rind stay dark and untouched.

  • Peel & shade

    The round side bolts get skin-peeled so they glow a dim orange.

  • Cut through

    The slot eyes, hair spike triangles, and the jagged grin are cut through for the brightest light.

Learn the carving basics

Before you start cutting

How do I keep the thin hair spikes from breaking off?

Cut the triangle gaps and leave solid rind between them rather than carving the spikes as separate pieces. Working on a thinner front wall helps the saw glide without forcing. If a spike feels wobbly, widen the neighboring gap slightly instead of pushing on the point.

Should the bolts be cut all the way through?

No, keep them as peeled circles so they stay dark studs against the bright eyes. If you cut them through, they compete with the eye slots and the face loses its focus. A shallow skin peel gives just enough dim glow to suggest the classic neck bolts.

Why cut the mouth last?

The grin is the largest opening, and removing it early leaves the lower face flimsy while you are still carving above it. By saving it for last, the pumpkin keeps its strength through the detailed work. Leave small bridges between the teeth so the stitched smile holds its shape.

Your take belongs here, too.

Changed a detail? Made it simpler? Share a photo of your version and tell the community what worked.

Share your pumpkin

More pumpkins like this

You've reached the end · 8 pumpkins
The Patch Report

Fresh pumpkins, in your inbox.

The best new carvings, ideas worth stealing, and how-tos for carving season. Short, seasonal, and gone by November.

A short email during carving season. Unsubscribe anytime. See our privacy policy.