Halloween Pumpkin Carving Contest · Starts October 1st · $500 in prizes
← Back to ideas
@ai_concepts
Aug 23, 2026
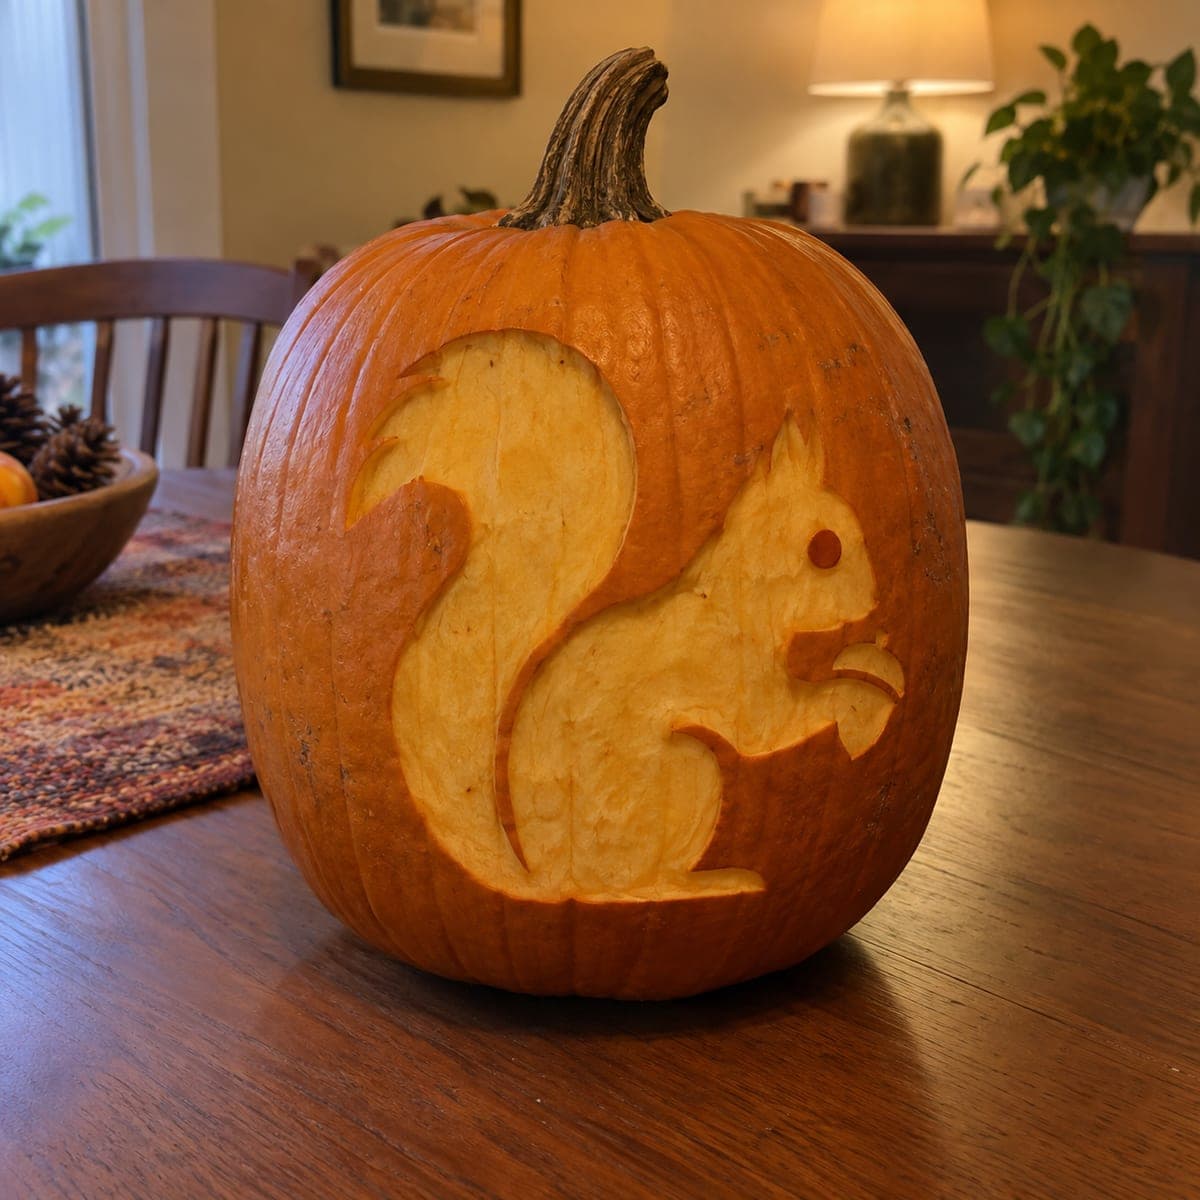
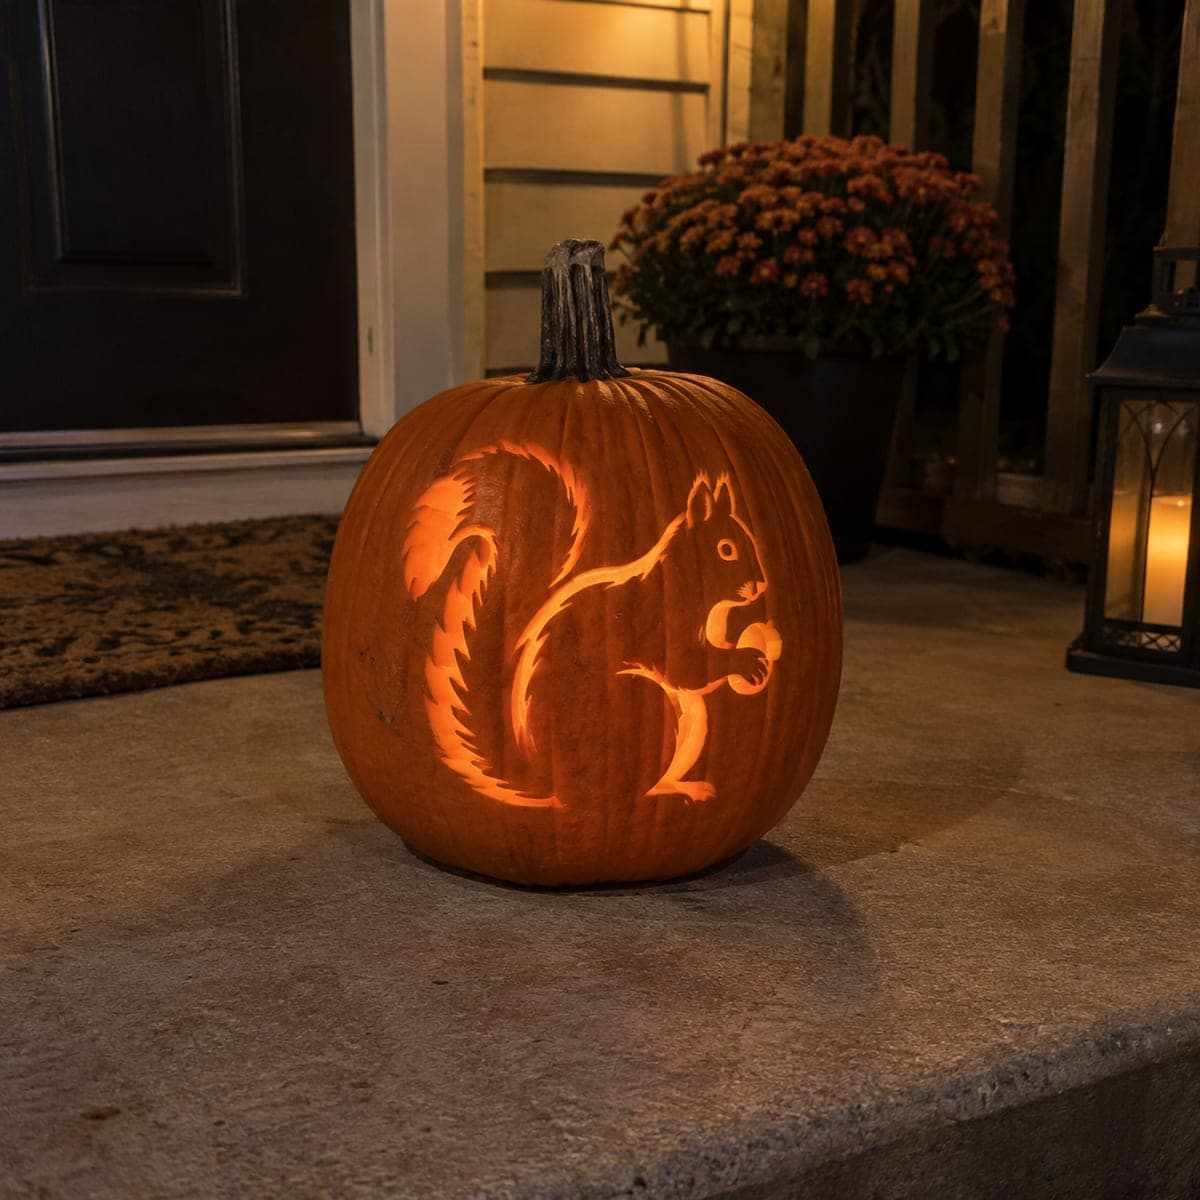
Squirrel Holding an Acorn Etched PumpkinAI
0

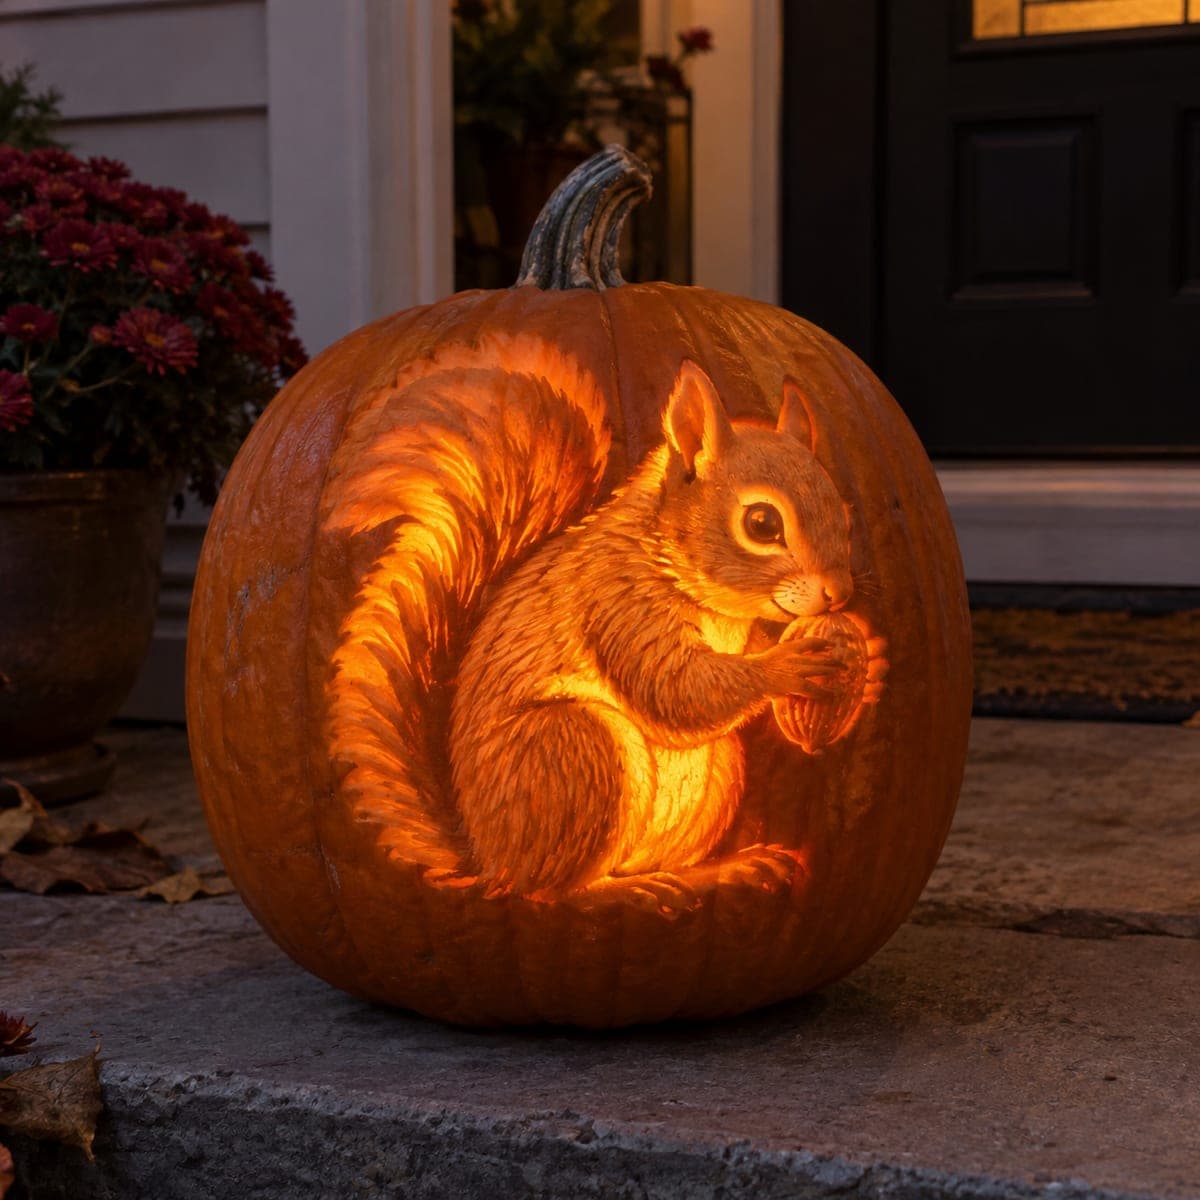
Squirrel Holding an Acorn Etched Pumpkin

A squirrel clutches an acorn against this glowing pumpkin, its enormous plumed tail curling up the side in hundreds of fine feathered strokes. Etch the tail in long sweeping gouge lines that all flow from base to tip, then switch to shorter strokes for the dense body fur. Thin the belly and cheeks most so the light concentrates where the acorn is held. Warm, seasonal, and impressive, it suits fall porches well beyond Halloween.

This is an AI-generated concept image: a realistic, carvable design idea rather than a photo of a finished carve. AI concepts are always labeled and sit out the leaderboard and the contest.

No ratings yet · Sign in to rate
Comments (0)

  • No comments yet — be the first.

Save without an account. Sign in to like or comment.

Our tips for carving a similar design

The whole effect here comes from relief shading, where you shave the pumpkin skin to different depths instead of cutting all the way through. The trick is directional fur: long flowing gouge lines for the big plumed tail and short dense strokes for the body, with the belly and cheeks thinned most so light pools around the acorn. Almost nothing gets cut clean through, which keeps the pumpkin strong and lets the wall glow like lit sculpture.

Written by PumpkinCarvingIdeas.com, inspired by the image above. These are our suggestions, not instructions from the uploader. This approach to the AI concept has not been tested on a real pumpkin.

From pumpkin to porch

  1. Prep the pumpkin and pick a smooth face

    Choose a tall pumpkin with one broad, even side facing forward. Cut a lid or a bottom access hole so you can reach in and thin the wall, and scrape the inside of your carving face down to about one inch thick with a loop tool. A thinner, even wall glows more predictably when you shade it. Let the inside dry for a few minutes before you transfer the design.

  2. Transfer the squirrel and acorn

    Tape your stencil over the flat face and poke the main outlines with a pin or a transfer tool. Mark the big shapes first: the curled tail, the rounded body, the head and ear, the front paws, and the acorn. Add a few dots to remind you where the fur direction changes. Peel the paper and connect the dots lightly with a washable marker so you can see the map clearly.

  3. Etch the tail with long sweeping strokes

    Start with the tail since it covers the most area. Using a medium U-gouge, pull long curved lines that all flow from the base of the tail up toward the tip, following the same arc. Keep the pressure gentle and consistent so you remove only the outer skin and top layer of flesh. Overlap your strokes slightly so no bare skin shows between them, and let the deepest grooves fall along the outer edge of the tail curl.

  4. Shade the body, head, and paws

    Switch to shorter strokes for the dense body fur, working in the direction the coat would naturally lie: down the back, forward on the chest, tight little flicks on the cheeks and ear. Use a smaller gouge for the face so the eye, nose, and whiskers stay crisp. Leave the eye area mostly untouched so it reads dark, and give the ear a soft rim. Carve the acorn last with a few clean facets so its cap texture stands out against the smoother nut.

  5. Thin the glow zones for contrast

    Go back over the belly, the chest, and the fur right around the held acorn and shave those areas thinner than the rest. This is where you want the brightest inner glow, so remove more flesh here without breaking through. Feather the edges of these thinned zones so the brightness fades gradually into the darker fur instead of stopping in a hard line. Check your progress by holding a light behind the wall as you go.

  6. Light it and set it out

    Drop in a battery LED puck or two, warm white for that cozy amber tone, and never a real candle near all this thinned flesh. Rotate the lights until the belly and acorn area glow strongest and the tail reads as soft feathered streaks. Wipe the surface, coat the cut edges with a little petroleum jelly to slow drying, and set it on a shaded porch. Take your photo at dusk when the surrounding light is low and the etching shows best.

Gather your supplies

Check things off as you get ready.

Work on a stable surface, keep your free hand out of the cutting path, and have an adult handle sharp tools.

Three levels of light

  • Leave intact

    The eye, the deepest tail edges, and the darkest fur shadows stay as untouched skin.

  • Peel & shade

    Most of the tail and body fur is skin-peeled to a dim orange, showing the directional strokes.

  • Cut through

    Little to nothing is cut fully through on this design; the brightest points are the most thinned belly and the area around the acorn.

Learn the carving basics

Before you start cutting

How do I keep the fur strokes from looking messy?

Commit to a clear direction for each region before you start cutting, and follow the natural flow of a real coat. The tail flows base to tip, the back flows downward, and the cheeks get short flicks. Consistent direction reads as fur even if individual strokes are imperfect.

This is shown as a concept image. Can a real pumpkin actually glow like this?

Yes, this style is real relief carving, though the concept image looks smoother than a hand-carved result. The soft gradients come from shaving the skin to different depths rather than cutting holes. Thin your wall evenly first and the glow will follow your strokes.

Where should the strongest light land?

Aim the brightest glow at the belly and the acorn the squirrel is holding, since that is the focal point. Thin those areas more than anywhere else and feather the edges so the light fades gently. Keep the tail dimmer so it frames the scene instead of competing with it.

Your take belongs here, too.

Changed a detail? Made it simpler? Share a photo of your version and tell the community what worked.

Share your pumpkin

More pumpkins like this

You've reached the end · 8 pumpkins
The Patch Report

Fresh pumpkins, in your inbox.

The best new carvings, ideas worth stealing, and how-tos for carving season. Short, seasonal, and gone by November.

A short email during carving season. Unsubscribe anytime. See our privacy policy.