Halloween Pumpkin Carving Contest · Starts October 1st · $500 in prizes
← Back to ideas
@ai_concepts
Jul 8, 2026
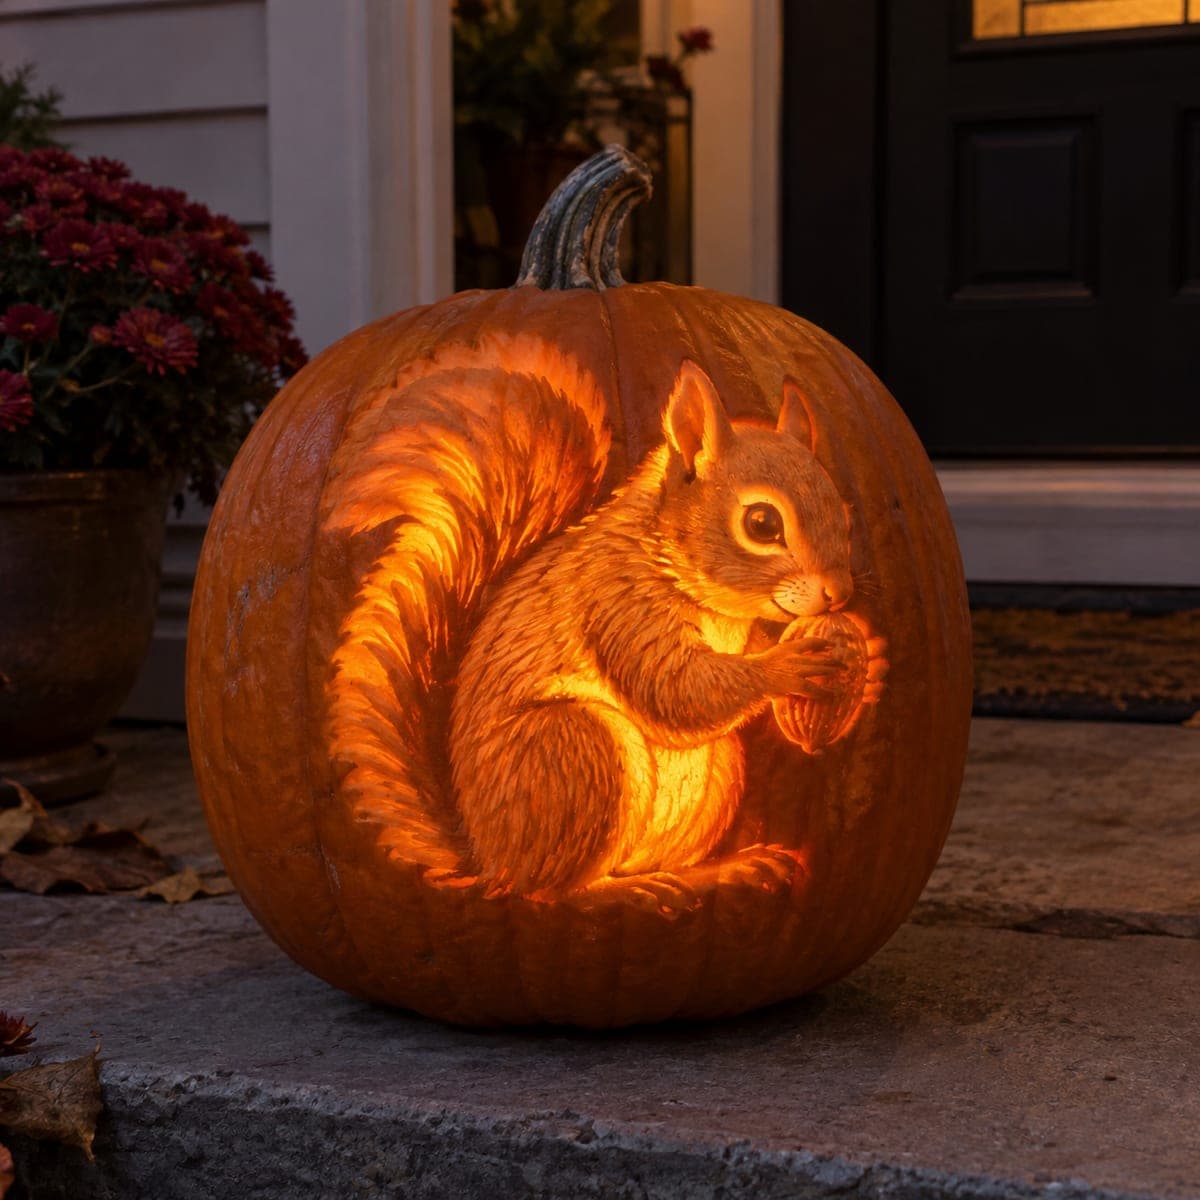
Lifelike Chipmunk Relief Carved PumpkinAI
0

Lifelike Chipmunk Relief Carved Pumpkin

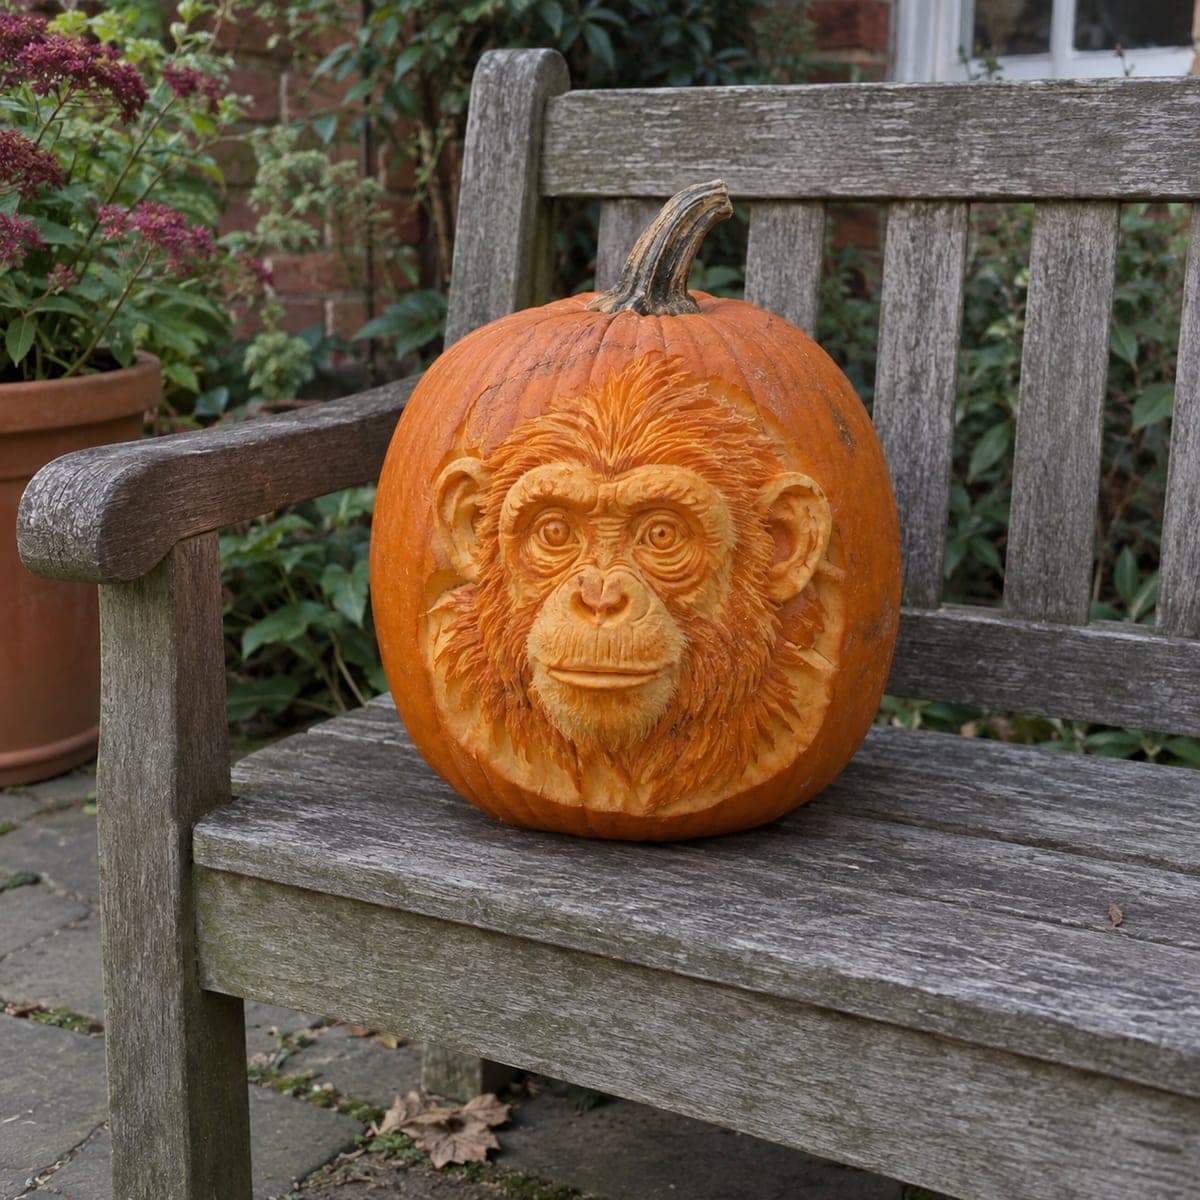
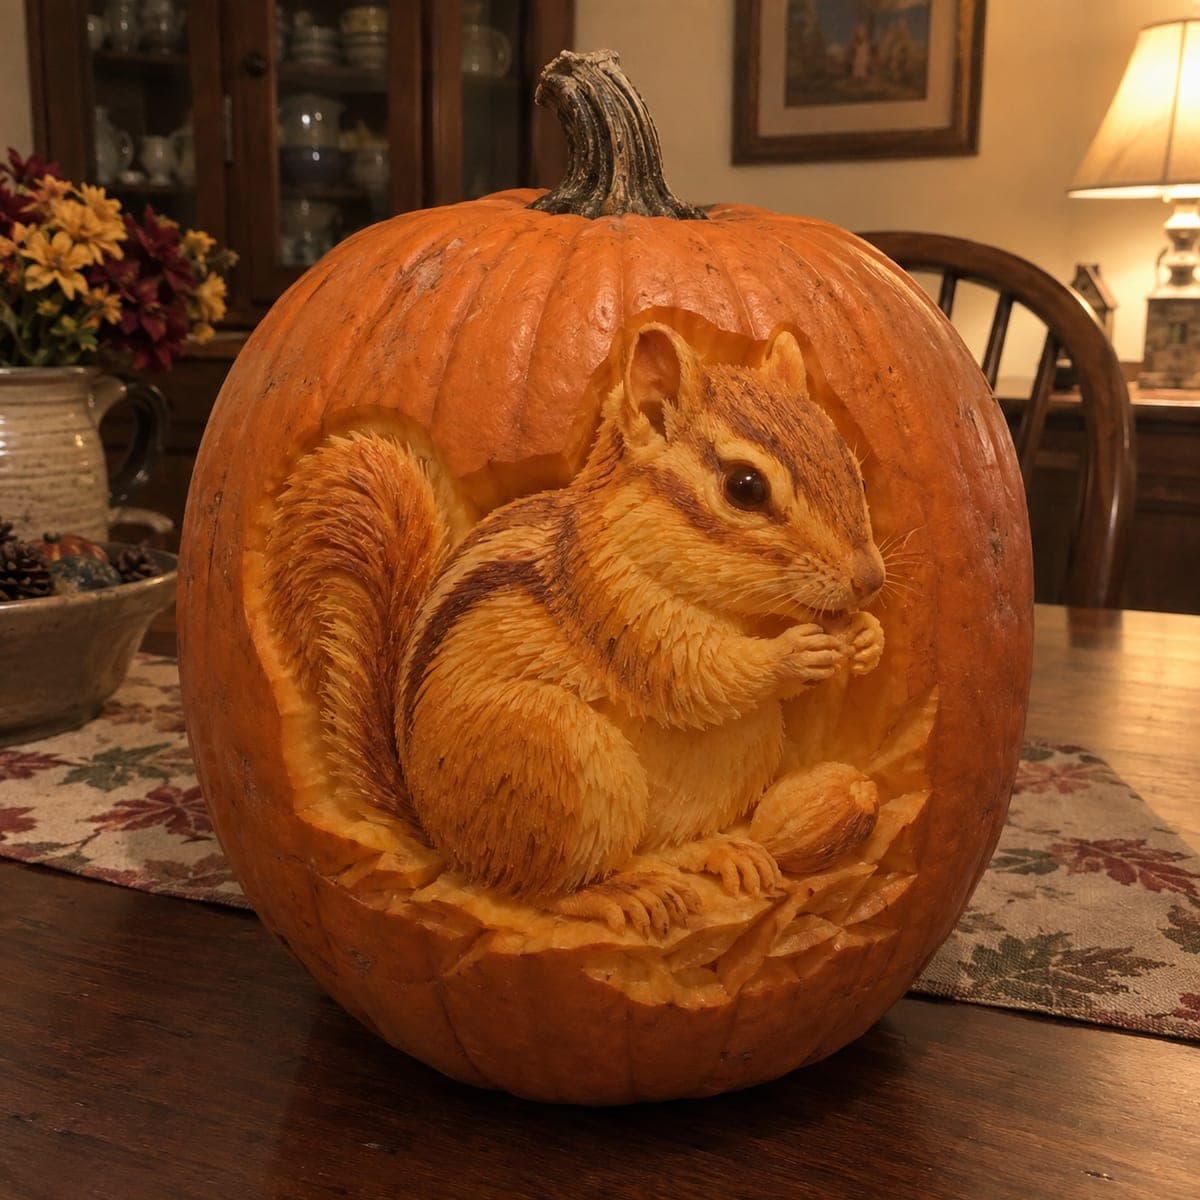
Holding an acorn to its mouth, this chipmunk is sculpted into the pumpkin in astonishing relief, from the striped back to the fluffed curl of its tail. Every hair is a separate gouge stroke, and the animal sits inside a carved-out hollow that frames it like a shadow box. Excavate the background niche first, then rough the body, then commit to the fur texture in one sitting. This is a competition-level pumpkin carving that rewards patience.

This is an AI-generated concept image: a realistic, carvable design idea rather than a photo of a finished carve. AI concepts are always labeled and sit out the leaderboard and the contest.

No ratings yet · Sign in to rate
Comments (0)

  • No comments yet — be the first.

Save without an account. Sign in to like or comment.

Our tips for carving a similar design

The core trick here is relief sculpting rather than cutting holes: the chipmunk is raised out of a shallow carved niche so it reads like a shadow box. You work almost entirely by peeling and gouging skin at different depths, letting light glow through the thinned areas while the body stays higher and denser. Plan on excavating the background first, roughing the animal's form second, then committing to the fur in one focused sitting.

Written by PumpkinCarvingIdeas.com, inspired by the image above. These are our suggestions, not instructions from the uploader. This approach to the AI concept has not been tested on a real pumpkin.

From pumpkin to porch

  1. Prep the pumpkin and transfer the design

    Pick a tall, blemish-free pumpkin with a wide flat front and cut a lid from the bottom, not the top, so the stem stays intact and the shell keeps its strength. Scrape the inside of the front wall down to about one inch thick using a loop tool, checking thickness with a pin. Tape your chipmunk stencil to the front and poke or trace the main outlines: the body, tail curl, striped back, ear, and the acorn. Since no real pumpkin exists in this concept image, treat this as a plan for how you could build the same relief yourself.

  2. Excavate the background niche

    Using a wide loop tool, carve away the skin and a shallow layer of flesh in the ring around the chipmunk to sink the background. Keep the animal outline standing proud at full height so it becomes the raised subject. Work slowly and evenly so the recessed frame reads as a smooth bowl of shadow. Leave the very outer edge of the niche a touch thicker so the shell stays rigid.

  3. Rough in the body forms

    Switch to smaller loop and detail tools and start rounding the big shapes: the arched back, the haunch, the curl of the tail, and the head tucked toward the acorn. Remove skin from the belly and inner tail to establish where the brightest glow will sit, and leave the striped back and darkest markings as untouched skin. Do not chase individual hairs yet. Get the overall three-dimensional shape reading correctly first, stepping back often to check the silhouette.

  4. Commit to the fur texture

    Plan to do all the fur in one sitting so the strokes match and the pumpkin does not dry between sessions. Using a fine detail gouge or a V-tool, pull short directional strokes that follow the flow of the coat: down the back, out along the flanks, and in feathery sweeps through the tail. Vary depth so some strokes just skim the surface and others cut a little deeper for mid glow. Carve the whiskers as very shallow lines and keep them attached, since thin raised bits break easily.

  5. Detail the face, eye, and acorn

    Deepen the eye socket and leave a small rounded high spot of skin as the glossy eyeball so it catches light without cutting through. Refine the ear, the cheek pouch, and the little hands cupping the acorn, keeping the fingers thick enough to stay strong. Shade the acorn cap with tight cross strokes and leave its nut body smoother. These small contrasts of texture are what make the animal feel alive.

  6. Light it and photograph

    Set a battery LED puck or a string of warm LEDs inside, never a candle, since the thinned relief can scorch and dry fast. Angle the light low so it rakes across the fur and throws the raised body into gentle shadow against the recessed frame. Mist the carving with water and refrigerate between viewings to keep the fine strokes crisp. Shoot photos in a dim room at dusk to capture the shadow box effect.

Gather your supplies

Check things off as you get ready.

Work on a stable surface, keep your free hand out of the cutting path, and have an adult handle sharp tools.

Three levels of light

  • Leave intact

    The dark dorsal stripes, the eye highlight, and the acorn body stay as untouched skin

  • Peel & shade

    The main coat, flanks, and tail glow dim orange where the skin is thinned into fur strokes

  • Cut through

    Nothing is cut fully through; the deepest gouges in the belly and inner tail read brightest

Learn the carving basics

Before you start cutting

How thick should the front wall be for this relief?

Aim for about one inch on the front where the chipmunk sits. That gives you room to sink the background and still carve varied fur depth without breaking through. Check often with a pin so you do not go too thin in the glowing areas.

Do I cut any holes all the way through?

No, this is a relief carving, so the glow comes entirely from thinning the skin at different depths rather than open cutouts. The brightest spots are your deepest gouges, not holes. Keeping the wall intact is what preserves the sculpted, lifelike look.

Why carve the fur all in one sitting?

Pumpkin flesh dries and shrinks within hours, which dulls fine strokes and makes new cuts look mismatched. Doing the whole coat at once keeps the texture consistent and crisp. Mist and refrigerate the pumpkin whenever you pause.

Your take belongs here, too.

Changed a detail? Made it simpler? Share a photo of your version and tell the community what worked.

Share your pumpkin

More pumpkins like this

You've reached the end · 8 pumpkins
The Patch Report

Fresh pumpkins, in your inbox.

The best new carvings, ideas worth stealing, and how-tos for carving season. Short, seasonal, and gone by November.

A short email during carving season. Unsubscribe anytime. See our privacy policy.