Halloween Pumpkin Carving Contest · Starts October 1st · $500 in prizes
← Back to ideas
@ai_concepts
Jul 16, 2026
Chubby Beaver Relief Carved PumpkinAI
0

Chubby Beaver Relief Carved Pumpkin

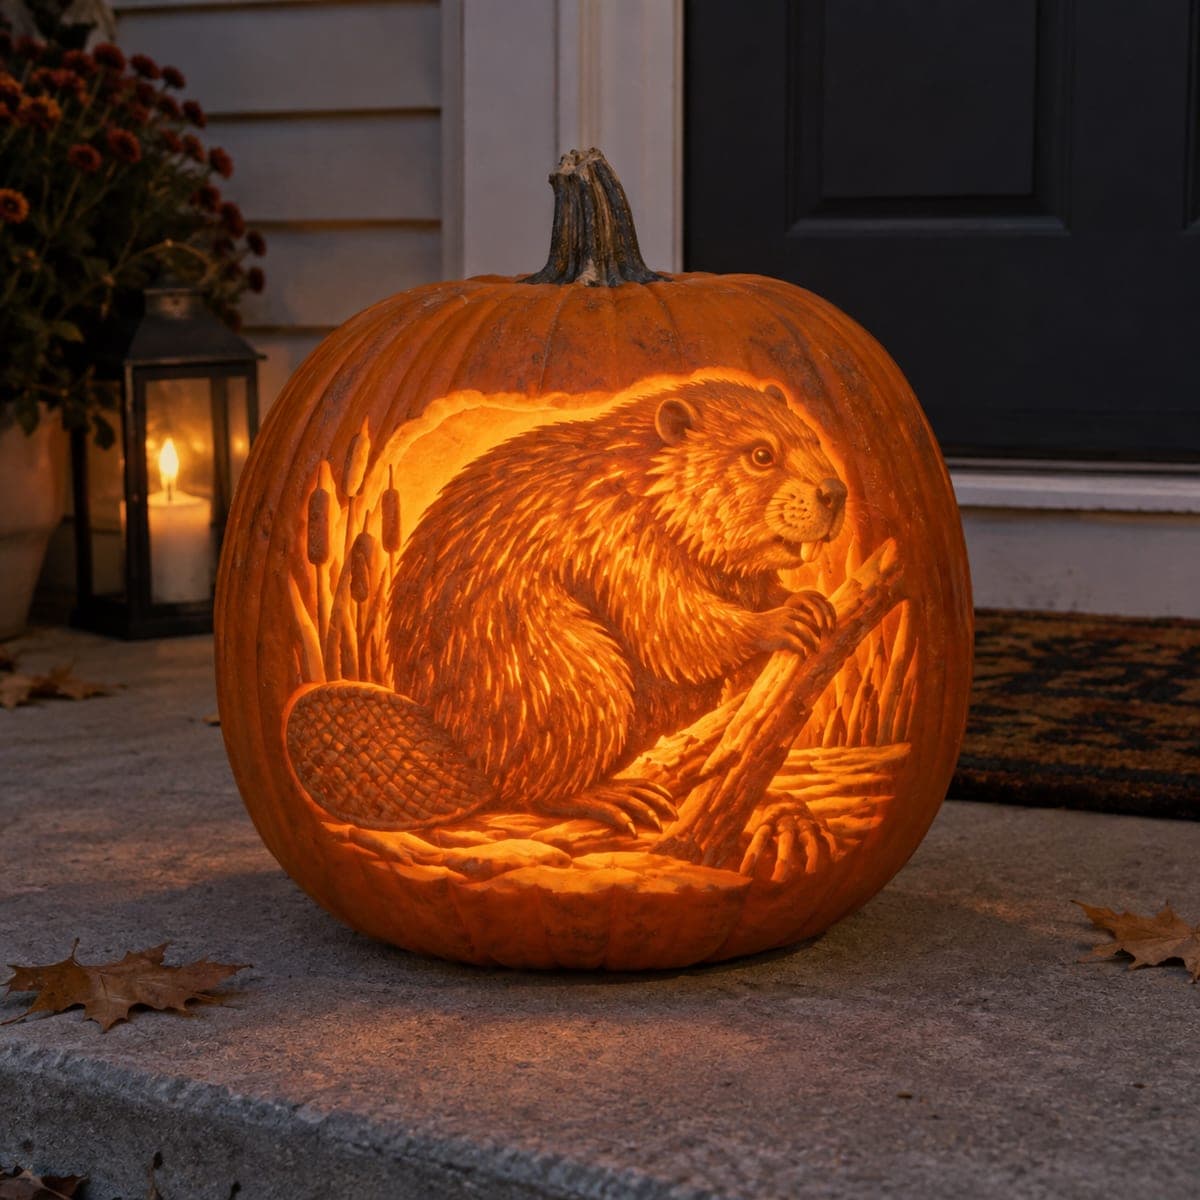
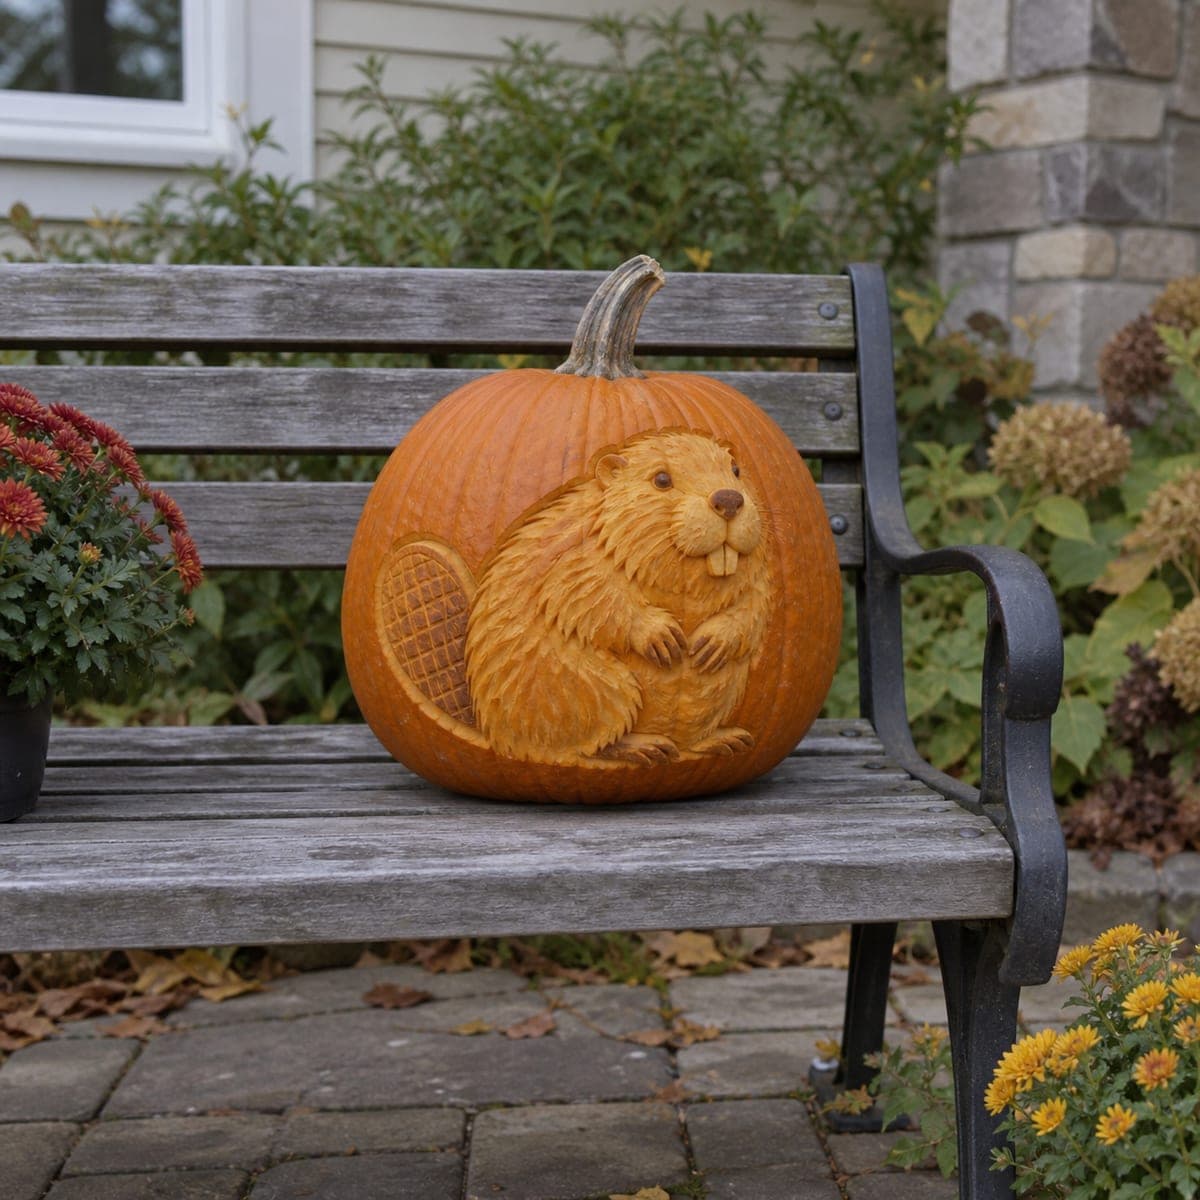
A round, contented beaver sits up with folded paws and a cross-hatched flat tail in this sculptural relief carving. The fur is built from hundreds of short gouge strokes at varying depths, while the tail texture comes from a simple scored grid. Start by cutting the outline about a half inch deep, lower the background evenly, then texture the body last. Display it in daylight on a bench, since relief work like this shows best without interior light.

This is an AI-generated concept image: a realistic, carvable design idea rather than a photo of a finished carve. AI concepts are always labeled and sit out the leaderboard and the contest.

No ratings yet · Sign in to rate
Comments (0)

  • No comments yet — be the first.

Save without an account. Sign in to like or comment.

Our tips for carving a similar design

The whole design lives in the pumpkin skin, not in cut-through holes, so the core trick is shading depth. You lower a smooth background around a raised beaver, then build the body up with hundreds of short gouge strokes while scoring a flat grid onto the tail. This is a daytime relief, so plan for it to read by surface texture and shadow rather than interior light.

Written by PumpkinCarvingIdeas.com, inspired by the image above. These are our suggestions, not instructions from the uploader. This approach to the AI concept has not been tested on a real pumpkin.

From pumpkin to porch

  1. Pick a firm pumpkin and transfer the outline

    Choose a large, round, unblemished pumpkin with an even face for the beaver to sit on. Tape your stencil to the front and poke the outline of the body, paws, and tail with a pin or dotting tool. Go over the fur boundaries and the eyes lightly so you have a clear map. Leave the top and stem intact since you will not be lighting this from inside.

  2. Score the outline about a half inch deep

    With a small detail saw or a sturdy loop tool, follow the beaver and tail outline and cut straight down roughly half an inch. Keep the blade vertical so the raised subject has clean edges. Do not cut all the way through the wall. This scored line is the wall that lets you lower the background without touching the animal.

  3. Lower the background evenly

    Use a ribbon loop tool to shave away the pumpkin skin outside your outline, working down to an even depth all around the beaver. Take thin passes and check often so the background stays flat and consistent. This is where the beaver starts to stand up in relief. Keep your free hand behind the tool, never in its path.

  4. Score the flat tail grid

    Peel just the skin off the tail area so it reads as a paler, dimmer surface. Then use a small V gouge or a knife tip to score a shallow cross-hatch grid over it. Keep the lines even and do not cut deep, since the tail should stay flat and attached. The scored diamonds catch shadow and give that classic beaver-tail texture.

  5. Build the fur with short gouge strokes

    This is the slow, rewarding part. Using a small U gouge, carve many short strokes that follow the direction fur would grow, longer and flowing on the body, tighter around the face and paws. Vary the depth so some strokes catch more light than others, which creates the fluffy, layered look. Save the eyes, nose, and front teeth for last and keep them as small raised bumps with just a shadow line around them.

  6. Clean up and stage in daylight

    Brush out all the loose bits and wipe the carved areas with a damp cloth. Coat the exposed surfaces with a thin layer of petroleum jelly to slow drying and keep the fur looking crisp. Set the pumpkin on a bench in soft daylight where side light will rake across the texture. Skip an interior LED here, since relief work like this shows best lit from outside.

Gather your supplies

Check things off as you get ready.

Work on a stable surface, keep your free hand out of the cutting path, and have an adult handle sharp tools.

Three levels of light

  • Leave intact

    The untouched skin of the beaver's body holds the darkest, deepest orange and gives the fur its shadowed depth.

  • Peel & shade

    The peeled tail and any lightly shaved fur tips glow a softer, paler orange for contrast.

  • Cut through

    Nothing is cut clear through on this design, since it is a surface relief meant for daylight rather than backlighting.

Learn the carving basics

Before you start cutting

Do I need to hollow it out or add a light?

No. This is a relief carving that reads by shadow and texture, so the wall stays thick and solid. Leave the pumpkin whole and display it in daylight. An interior LED would actually wash out the fur detail you worked so hard on.

How do I keep the fur from looking flat?

Vary the depth and length of your gouge strokes and always follow the direction the fur would naturally grow. Longer sweeping strokes on the belly and back, shorter tight ones around the face and paws. Overlapping the strokes in layers builds the fluffy dimension that raking side light will bring out.

How long will a relief carving like this last?

Because you are only carving into the skin and not opening the pumpkin, it can last several days to a week if you seal it. Rub petroleum jelly over the exposed cuts and keep it out of direct sun and heat. If edges start to dry, a light misting and a cool spot overnight helps.

Your take belongs here, too.

Changed a detail? Made it simpler? Share a photo of your version and tell the community what worked.

Share your pumpkin

More pumpkins like this

You've reached the end · 8 pumpkins
The Patch Report

Fresh pumpkins, in your inbox.

The best new carvings, ideas worth stealing, and how-tos for carving season. Short, seasonal, and gone by November.

A short email during carving season. Unsubscribe anytime. See our privacy policy.