Halloween Pumpkin Carving Contest · Starts October 1st · $500 in prizes
← Back to ideas
@ai_concepts
Sep 25, 2026
Stars and Diamonds Tall Skinny Pumpkin CarvingAI
0

Report this carving

Tell us what is wrong. Reports are private.

Stars and Diamonds Tall Skinny Pumpkin Carving

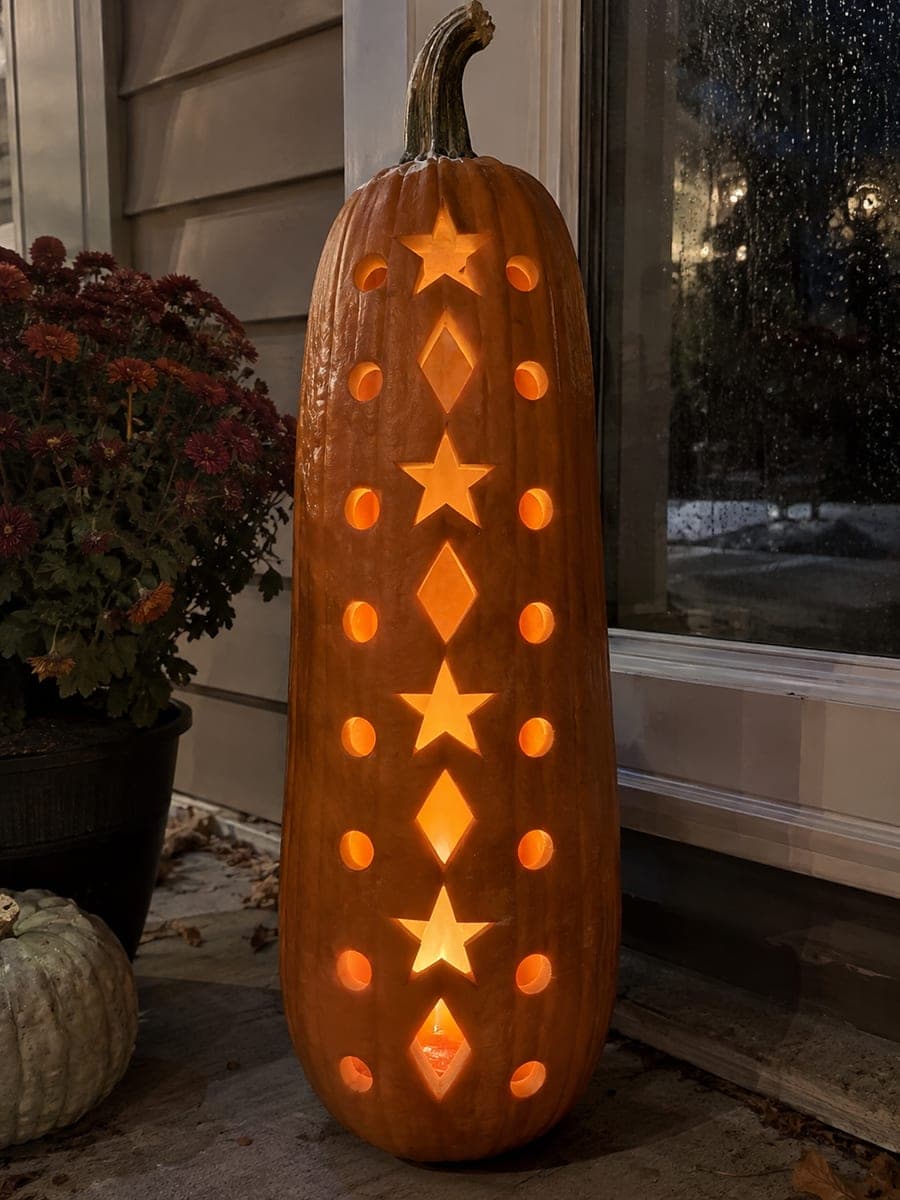
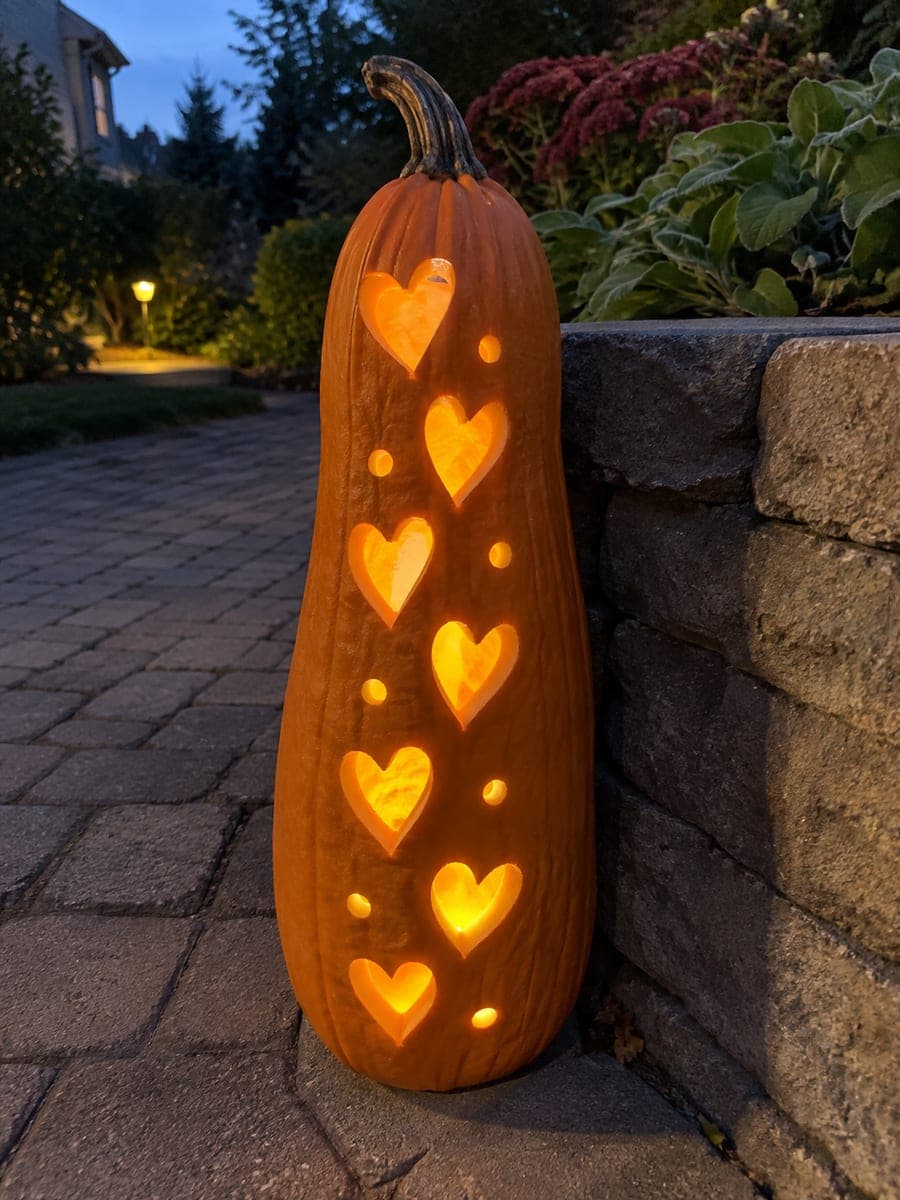
Five stars alternating with four diamonds and twelve drilled circles in two flanking columns fill the face of this 62-centimeter skinny pumpkin with a sky-and-geometry pattern, every opening separate with generous connecting bridges. Number each shape position in pencil before carving to keep the alternating sequence consistent as you work up the narrow face. Cut diamonds and circles before the more complex stars so any small alignment errors are caught early. On a rainy porch the glowing pattern reflects softly in the wet surface below, doubling the visual effect of this tall skinny pumpkin carving idea.

No ratings yet · Sign in to rate
Comments (0)

  • No comments yet — be the first.

Save without an account. Sign in to like or comment.

Our tips for carving a similar design

Five stars alternate with four diamonds down the center of the face while twelve drilled circles form flanking columns on each side. Numbering positions in pencil before cutting ensures the alternating sequence stays consistent. Simpler shapes come first so alignment errors are caught early.

From pumpkin to porch

  1. Prep and number positions

    Scoop the interior to 2 centimeters. Divide the face height into nine intervals for the alternating stars and diamonds, marking each center with a numbered pencil dot. Mark the circle column positions on each side of the central sequence before drawing any actual shapes.

  2. Draw all shapes before cutting anything

    Sketch each star as a five-point shape about 5 centimeters point-to-point. Draw diamonds at about 4 centimeters top to bottom. Keep all circle holes at a consistent 2.5 centimeters diameter. Step back and check the overall balance; adjust any shape that crowds its neighbor.

  3. Drill the circle columns first

    Use a spade bit or hole saw to drill all twelve circles cleanly. Drilling first while the walls are still fully rigid gives you the most accurate placement. Work from the center of the face outward on each side.

  4. Cut the diamond holes next

    Diamonds have clean straight edges that are easier to assess for alignment than the complex star shapes. Cut all four diamonds before any stars to confirm the sequence looks right. Remove each plug by scoring all four sides before pressing inward.

  5. Cut the star holes

    Work each star point by point, cutting from the center to each tip and back. Use a thin detail-saw blade to navigate the inner angles between points. Score each inner valley with a detail knife before sawing to prevent tearing. Take your time; this is the most demanding cutting in the design.

  6. Light and photograph on the porch

    Position the pumpkin on a covered porch beside a rainy window for the doubled-reflection effect described in the design. A tall LED candle centered in the cavity lights all three columns. A wide-angle photo from ground level captures the full 62-centimeter height and the reflection below.

Written with AI to match this design

Gather your supplies

Check things off as you get ready.

Work on a stable surface, keep your free hand out of the cutting path, and have an adult handle sharp tools.

Three levels of light

  • Leave intact

    The broad uncut rind between every shape and along the outer edges of the face stays solid and dark, forming the design's grid.

  • Peel & shade

    None. All apertures are full cutouts.

  • Cut through

    All five stars, all four diamonds, and all twelve drilled circles are cut completely through for full warm glow.

Learn the carving basics

Before you start cutting

How do I cut clean inner angles on a five-point star?

Score each inner valley between star points with a straight detail knife before sawing. This gives the saw blade a channel to follow at the tightest part of the angle. Move slowly through each valley and avoid forcing the blade sideways.

How do I keep the alternating star-diamond sequence consistent across 62 centimeters?

Number each position (1 through 9) on the pumpkin with a soft pencil before drawing shapes. Odd numbers are stars, even numbers are diamonds, or vice versa. This prevents the confusion that comes from eyeballing a long column in progress.

Can I substitute a simpler shape for the stars to reduce difficulty?

Replacing stars with larger diamonds or rounded hexagons makes this a medium-level design while keeping the same alternating column structure. The overall visual rhythm stays intact even without the star points.

Your take belongs here, too.

Changed a detail? Made it simpler? Share a photo of your version and tell the community what worked.

Share your pumpkin

More pumpkins like this

You've reached the end · 8 pumpkins
The Patch Report

Fresh pumpkins, in your inbox.

The best new carvings, ideas worth stealing, and how-tos for carving season. Short, seasonal, and gone by November.

A short email during carving season. Unsubscribe anytime. See our privacy policy.