Halloween Pumpkin Carving Contest · Starts October 1st · $500 in prizes
← Back to ideas
@ai_concepts
Sep 25, 2026
Crossbar Eyes and Diamond Row Turnip Jack-O-LanternAI
0

Report this carving

Tell us what is wrong. Reports are private.

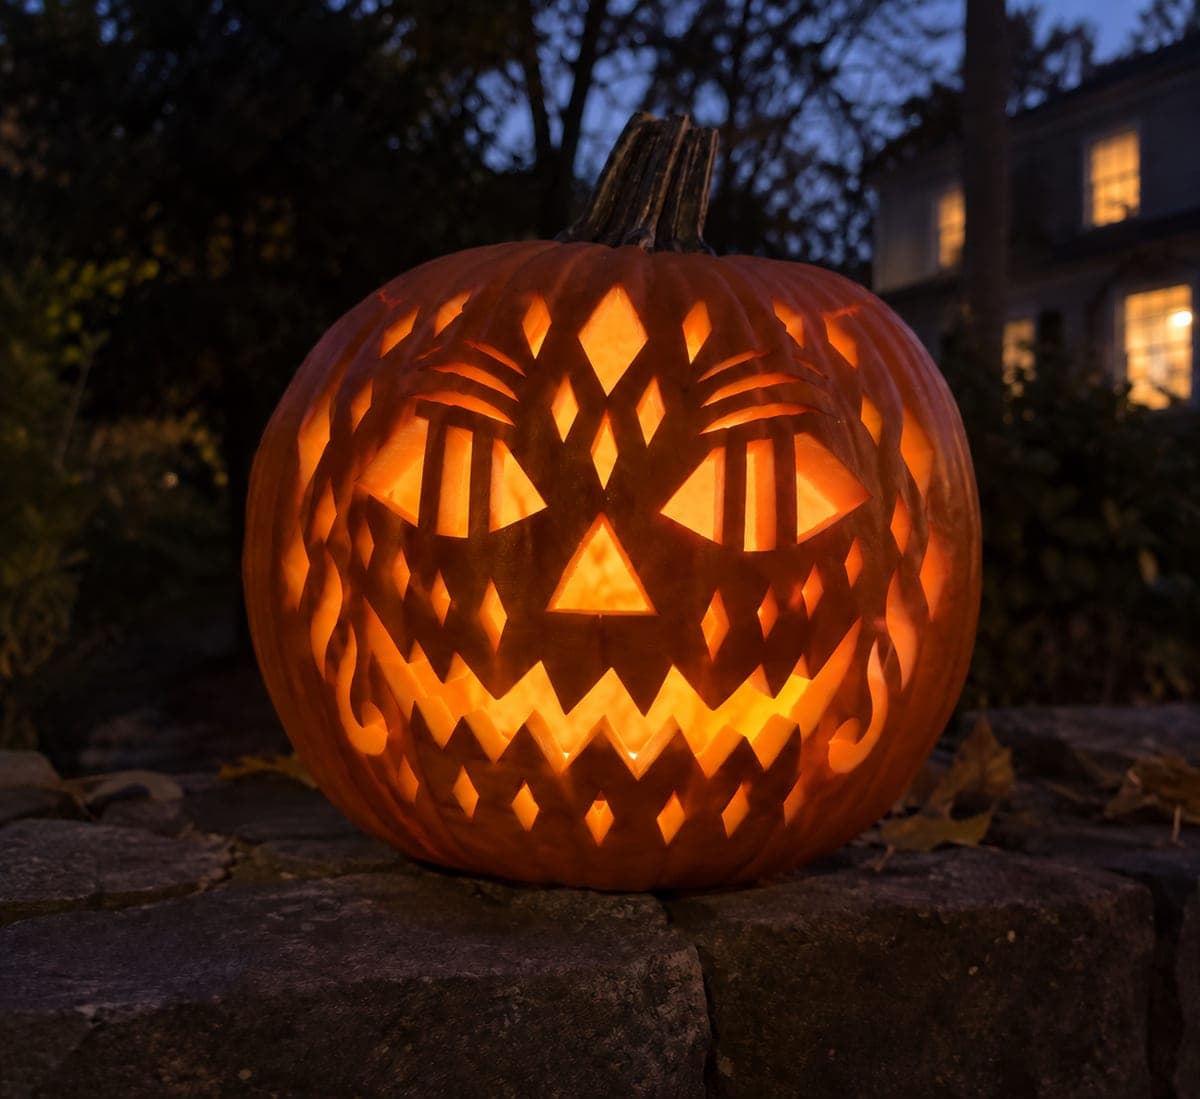
Crossbar Eyes and Diamond Row Turnip Jack-O-Lantern

This detailed turnip lantern face features crossbar eyes, a nose hole, two rows of small rectangular grin holes, and two curved rows of diamond accents, all preserved by generous flesh bridges and a thick outer wall. The dense root vegetable rewards patience: take the rectangular grin holes in small sections and clear the chips frequently so the narrow saw does not bind in the fibrous flesh. At night on a stone garden wall, the intricate pattern turns the humble turnip into a jewel-like lantern.

No ratings yet · Sign in to rate

Comments (0)

  • No comments yet — be the first.

Save without an account. Sign in to like or comment.

Our tips for carving a similar design

This detailed turnip lantern features crossbar eyes, a nose hole, two rows of small rectangular grin holes, and two curved rows of diamond accents, all preserved by generous flesh bridges and a thick outer wall. Dense turnip flesh rewards patience: the rectangular grin holes must be cut in small sections and the chips cleared frequently so the narrow saw does not bind in the fibrous flesh. At night on a stone garden wall the intricate pattern turns the turnip into a jewel-like lantern.

From pumpkin to porch

  1. Hollow and measure the wall

    Hollow the turnip to a wall thickness of at least five-eighths of an inch rather than the usual half-inch. The extra thickness supports the crossbar eyes and the many small bridges between the grin rectangles and diamond accents, all of which need more structural depth than a simpler design.

  2. Map all elements precisely

    Sketch the crossbar eyes with their horizontal and vertical bars, the nose hole, both rows of rectangular grin openings, and the two curved rows of diamond accents. Use a pencil and ruler to keep all rectangular elements aligned. Confirm every bridge width meets at least three-eighths of an inch before scoring.

  3. Cut the two rectangular grin rows first

    Work on both grin rows before touching the eyes, following the same reasoning as less complex designs: the intact eye area braces your hand. For each rectangle in the grin, score all four sides and remove each piece separately. Clear chips from the interior frequently so they do not wedge the saw.

  4. Cut the diamond accent rows

    Each diamond requires four precise angled cuts meeting at the corners. Score the diagonal sides with the knife tip before cutting fully through. Work the curved row of diamonds consistently from one end to the other, maintaining equal diamond sizes throughout.

  5. Cut the nose hole and crossbar eyes

    Cut the nose hole as a simple small oval. For the crossbar eyes, cut each eye opening section separately: work around the outer boundary of the eye, then remove the flesh above the horizontal bar, then below, then on each side of the vertical bar. The bars should emerge standing intact between the open sections.

  6. Display on a stone garden wall at night

    Insert a warm LED tea light through the base opening and set the turnip on a stone garden wall at night. The multiple layers of openings produce a complex warm glow that feels entirely different from any foam or plastic pumpkin. Photograph close to capture the jewel-like quality of the intricate pattern.

Written with AI to match this design

Gather your supplies

Check things off as you get ready.

Work on a stable surface, keep your free hand out of the cutting path, and have an adult handle sharp tools.

Three levels of light

  • Leave intact

    The crossbar structures in both eyes, all bridges between grin rectangles, all bridges between diamond accents, and the full back and crown of the turnip stay dark.

  • Peel & shade

    None. Turnip flesh does not have a peelable skin layer.

  • Cut through

    All eye opening sections around both bars, the nose hole, all rectangular grin openings across both rows, and all diamond accent apertures across both curved rows are cut fully through.

Learn the carving basics

Before you start cutting

How do I prevent the narrow saw from binding in the fibrous turnip flesh during the rectangular grin cuts?

Make each cut in short strokes no longer than a quarter-inch, pulling the blade out frequently to clear the debris. Keep the saw perpendicular to the surface rather than angling it, and use a very narrow blade if available. Clearing chips from the interior after each rectangular piece is removed also helps the next cut run more freely.

Is there a risk of the turnip splitting across the face area with this many cuts?

Yes, especially if the outer wall is thinner than five-eighths of an inch or if the cuts are made too close together. The generous bridge widths in this design are what prevent splitting: never narrow a bridge to accommodate a larger opening. If a surface crack appears during cutting, stop and reinforce the area from the inside with a small bead of strong craft glue before continuing.

How many hours should I set aside for an expert turnip lantern like this?

Expect three to five hours of careful work, including hollowing, planning, and cutting. The hollowing phase takes longer on a turnip than a pumpkin. Plan to work in two sessions with the turnip refrigerated overnight between them, which also firms up the flesh slightly and makes the second session's cuts cleaner.

Your take belongs here, too.

Changed a detail? Made it simpler? Share a photo of your version and tell the community what worked.

Share your pumpkin

More pumpkins like this

You've reached the end · 8 pumpkins
The Patch Report

Fresh pumpkins, in your inbox.

The best new carvings, ideas worth stealing, and how-tos for carving season. Short, seasonal, and gone by November.

A short email during carving season. Unsubscribe anytime. See our privacy policy.