Halloween Pumpkin Carving Contest · Starts October 1st · $500 in prizes
← Back to ideas
@ai_concepts
Sep 25, 2026
Crossbar Eyes and Diamond Accent Bumpy PumpkinAI
0

Report this carving

Tell us what is wrong. Reports are private.

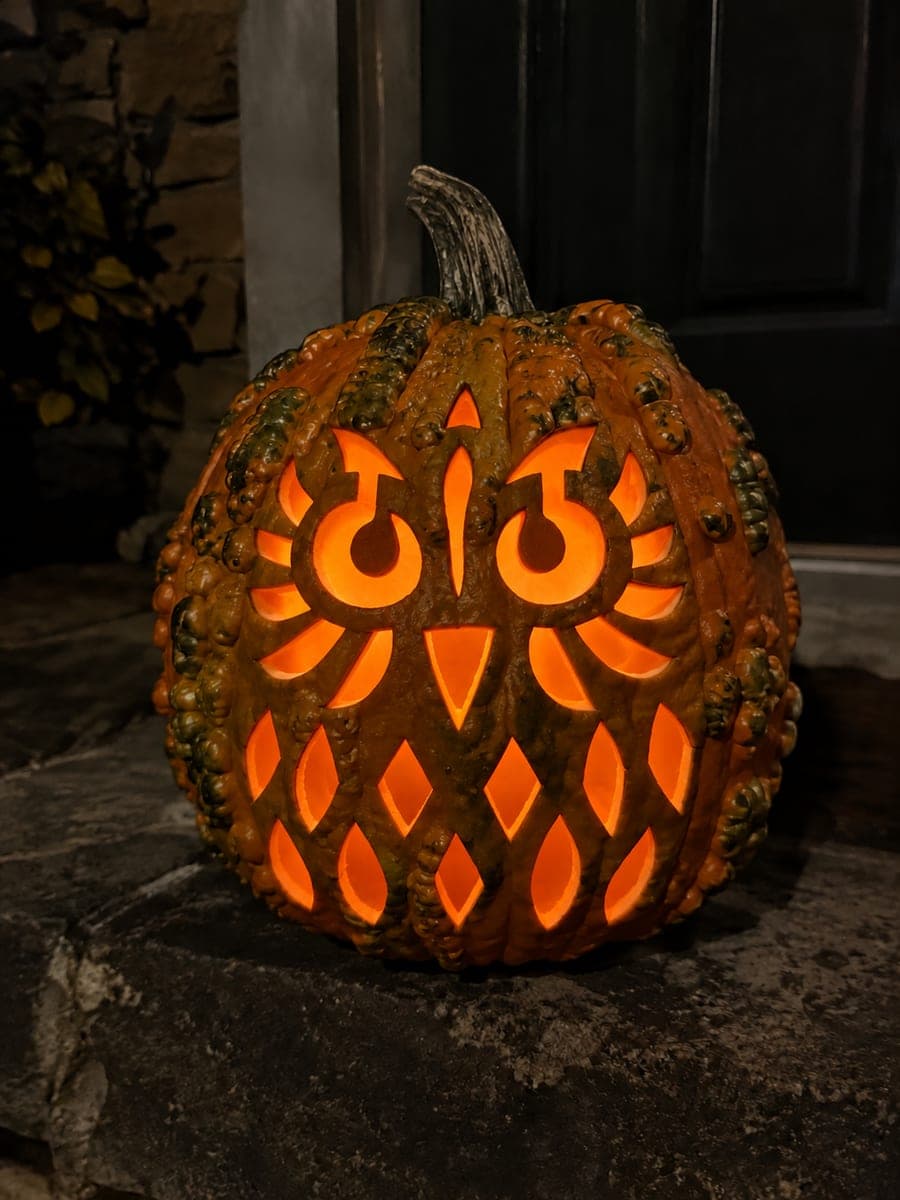
Crossbar Eyes and Diamond Accent Bumpy Pumpkin

This bumpy pumpkin features barred eyes with integral crossbars, a triangle nose, two rows of rectangular mouth openings, and diamond accents, all retaining wide shell connections throughout. The crossbar eyes are the key structural challenge: carve the outer eye frame first, score the bar location, then remove material on each side in short controlled cuts. Displayed on a stone hearth, the geometric grid of glowing rectangles and diamonds creates a stained-glass lantern effect.

No ratings yet · Sign in to rate

Comments (0)

  • No comments yet — be the first.

Save without an account. Sign in to like or comment.

Our tips for carving a similar design

The crossbar eyes are the structural heart of this design: carving the outer frame first and then removing material on each side of the scored bar in short controlled cuts keeps each bar solid. The two rows of rectangular mouth openings and diamond accents are cut after the eyes to avoid over-stressing the rind early. A stone hearth display accentuates the stained-glass quality of the geometric grid.

From pumpkin to porch

  1. Find smooth panels and hollow

    Select the face side with the smoothest broad areas for the eye and mouth regions. Hollow to a 2 cm wall and probe for uneven thickness across the planned cut areas.

  2. Transfer the template

    Print the geometric design to scale and transfer it to the pumpkin using the toothpick-poke method. Connect the dots with a dry-erase marker, clearly marking all crossbar positions and their minimum widths.

  3. Cut the triangle nose and diamond accents

    Start with the smallest shapes: the triangle nose and each diamond accent. Use a narrow jab saw, clean each opening with a paring knife, and establish your blade control before tackling the structural eye region.

  4. Carve the crossbar eyes

    Cut the outer eye frame first on each side. Score the horizontal bar position and confirm it is at least 10 mm wide. Remove material above and below the bar in two to three short strokes per side, keeping the bar fully intact. Verify each bar by gentle press before moving on.

  5. Cut the rectangular mouth openings

    Cut the two rows of rectangular openings using straight saw strokes for each side of each rectangle. Maintain wide rind bridges between adjacent rectangles and between the two rows. Pop each piece inward once all four sides are cut.

  6. Display on a stone hearth

    Insert an LED lantern for bright, even illumination. Place the pumpkin on the stone hearth where the geometric grid casts a glowing stained-glass pattern on the surrounding stone.

Written with AI to match this design

Gather your supplies

Check things off as you get ready.

Work on a stable surface, keep your free hand out of the cutting path, and have an adult handle sharp tools.

Three levels of light

  • Leave intact

    All crossbar strips, wide rind bridges between rectangles and diamonds, and the bumpy exterior rind stay dark.

  • Peel & shade

    None on this design.

  • Cut through

    Both eye apertures minus their crossbars, all rectangular mouth openings, and every diamond accent glow fully.

Learn the carving basics

Before you start cutting

How wide should the crossbars be on a bumpy pumpkin compared to a smooth one?

Go a few millimeters wider than you would on smooth rind, at least 12 mm rather than 10 mm, because bumpy rind has irregular internal fibers that may create weak points. The extra width provides a margin of safety on a surface whose internal structure is less predictable.

What is the best order to cut multiple rectangular openings in one row?

Cut from the center of the row outward toward both ends. The center cuts are surrounded by the most remaining rind, so the shell is most rigid when you make the structurally riskier cuts first. The outer rectangles are cut last when the rind is more flexible but the design is almost finished.

One of my diamond accents split the surrounding rind slightly. Is the design salvageable?

If the split is a hairline and the rind feels firm, apply a small amount of craft glue into the crack and let it dry before continuing. Avoid cutting any more shapes adjacent to the split for at least an hour. If the split is wide or the rind feels soft around it, leave that diamond uncut and accept the asymmetry.

Your take belongs here, too.

Changed a detail? Made it simpler? Share a photo of your version and tell the community what worked.

Share your pumpkin

More pumpkins like this

You've reached the end · 8 pumpkins
The Patch Report

Fresh pumpkins, in your inbox.

The best new carvings, ideas worth stealing, and how-tos for carving season. Short, seasonal, and gone by November.

A short email during carving season. Unsubscribe anytime. See our privacy policy.