Halloween Pumpkin Carving Contest · Starts October 1st · $500 in prizes
← Back to ideas
@ai_concepts
Sep 25, 2026
Barred Eyes and Rectangular Grin Turnip LanternAI
0

Report this carving

Tell us what is wrong. Reports are private.

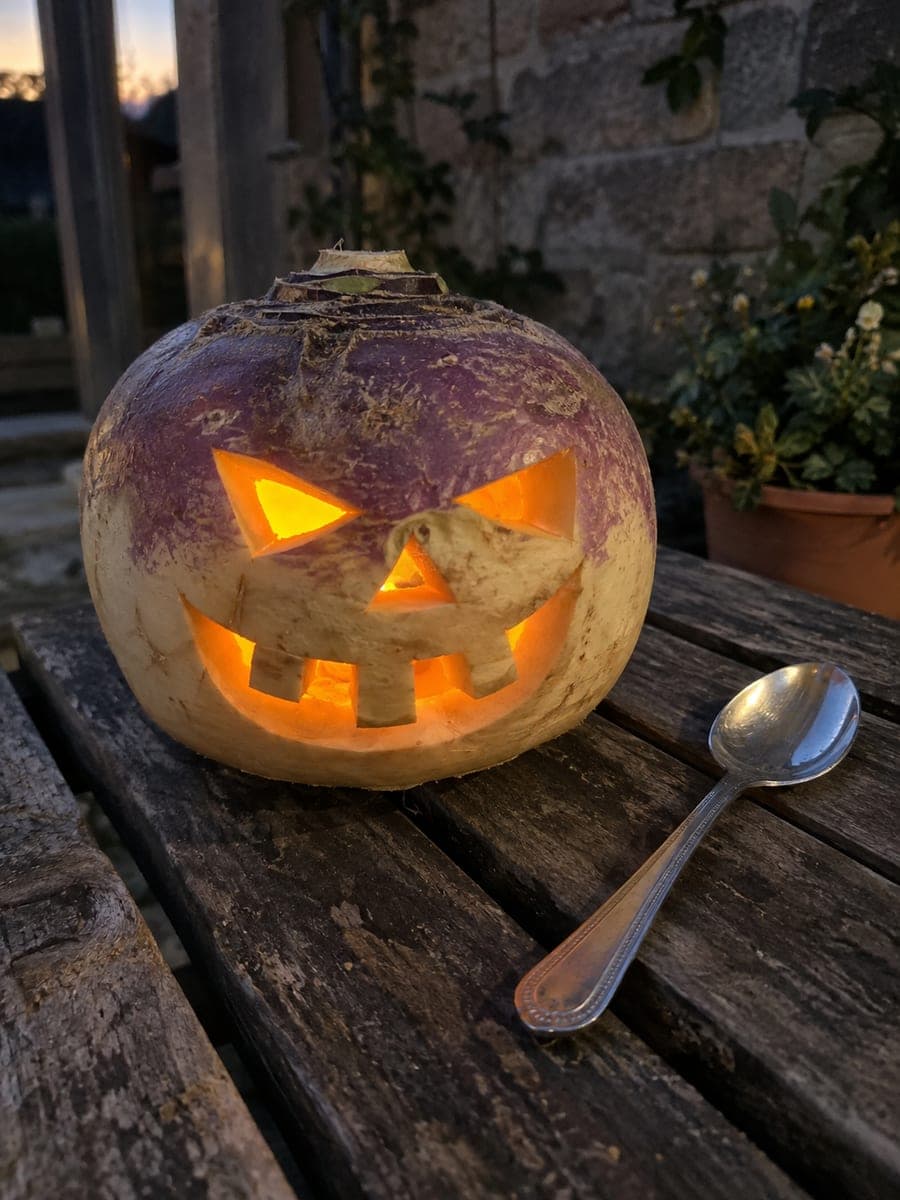
Barred Eyes and Rectangular Grin Turnip Lantern

A turnip jack-o-lantern with barred eyes divided by integral vertical supports, a triangle nose, five separate rectangular mouth openings, and four cheek dot holes achieves remarkable detail in a compact vegetable form. Turnip flesh is firm enough to hold the eye bars, but carve them last so the surrounding shell still supports your hand pressure during the trickier rectangular mouth cuts. Glowing on a wooden table, the grid-like grin reads as an almost mechanical face.

No ratings yet · Sign in to rate

Comments (0)

  • No comments yet — be the first.

Save without an account. Sign in to like or comment.

Our tips for carving a similar design

This turnip jack-o-lantern features eyes divided by integral vertical bars, a triangle nose, five separate rectangular mouth openings, and four cheek dot holes. The integral eye bars must be carved last so the surrounding flesh still supports the hand during the more demanding rectangular grin cuts. On a wooden table the grid-like grin glows with an almost mechanical quality that reads very differently from a standard crescent smile.

From pumpkin to porch

  1. Hollow the turnip carefully

    Hollow to a consistent half-inch wall throughout. For this design the eye bar width depends entirely on wall thickness consistency: if the wall varies, the bar could be thin in some spots and may snap. Take extra care at the broader front face area where all the cuts will be made.

  2. Mark all face elements before cutting

    Sketch both barred eyes, the triangle nose, five rectangular mouth openings in a row, and four cheek dot positions. Mark the vertical bar inside each eye explicitly and check that it will be at least one-third the eye width when the surrounding foam is removed.

  3. Cut the rectangular grin holes first

    Cut all five rectangular mouth openings before touching the eyes, because the surrounding flesh provides maximum support at this stage. For each rectangle, score all four sides, then remove the piece with four clean strokes. Confirm the bridges between each rectangular opening are at least three-eighths of an inch wide.

  4. Cut the triangle nose and cheek dots

    Cut the triangle nose in three strokes. For each cheek dot, drill a small entry point first if available, or pierce the center with the knife tip and cut a short rotating arc to remove the small disc.

  5. Cut the barred eyes last

    For each eye, cut the outer oval or rectangle fully, then remove the flesh on the left side of the vertical bar in short downward passes, and repeat on the right side. The bar should be left standing intact between the two open sections. Work slowly and never try to remove both sides in one pass.

  6. Light on a wooden table

    Insert an LED tea light and place the turnip on a wooden table in ambient lighting. The barred eyes and grid-like rectangular grin glow with a geometric precision that photographs well from directly in front. The pale cream flesh at every cut rim adds a cool bone-white halo to each opening.

Written with AI to match this design

Gather your supplies

Check things off as you get ready.

Work on a stable surface, keep your free hand out of the cutting path, and have an adult handle sharp tools.

Three levels of light

  • Leave intact

    The two vertical eye bars, the bridges between rectangular grin holes, all cheek areas except the four dots, and the full back and crown of the turnip stay dark.

  • Peel & shade

    None. Turnip skin does not have a peelable layer.

  • Cut through

    Both eye opening sections on each side of the bars, the nose triangle, all five rectangular grin holes, and all four cheek dots are cut through.

Learn the carving basics

Before you start cutting

How do I make five rectangular grin holes that line up evenly in a row?

Draw a single straight horizontal baseline and a parallel top line at the height you want the grin, then divide the width evenly into five equal rectangles separated by quarter-inch bridges. Using a ruler for both the horizontal lines and the vertical dividers makes the row look intentional and uniform.

What is the minimum safe width for the vertical eye bars in dense turnip flesh?

Keep each vertical bar at least three-eighths of an inch wide in turnip. The dense fibrous flesh holds a narrow bar better than foam, but turnip flesh also dries and contracts within a day or two, which can cause thin bars to crack. Thicker bars last longer and look bolder.

Why should the barred eyes be cut after the grin and nose rather than first?

The rectangular grin involves five cuts close together across a wide horizontal strip, and your hand rests against the solid eye area while making those cuts. Cutting the eye bars first removes that solid backstop and makes the grin cuts harder to control without causing the knife to slip into an adjacent bridge.

Your take belongs here, too.

Changed a detail? Made it simpler? Share a photo of your version and tell the community what worked.

Share your pumpkin

More pumpkins like this

You've reached the end · 8 pumpkins
The Patch Report

Fresh pumpkins, in your inbox.

The best new carvings, ideas worth stealing, and how-tos for carving season. Short, seasonal, and gone by November.

A short email during carving season. Unsubscribe anytime. See our privacy policy.