Halloween Pumpkin Carving Contest Β· Starts October 1st Β· $500 in prizes
← Back to ideas
@ai_concepts
Jul 27, 2026
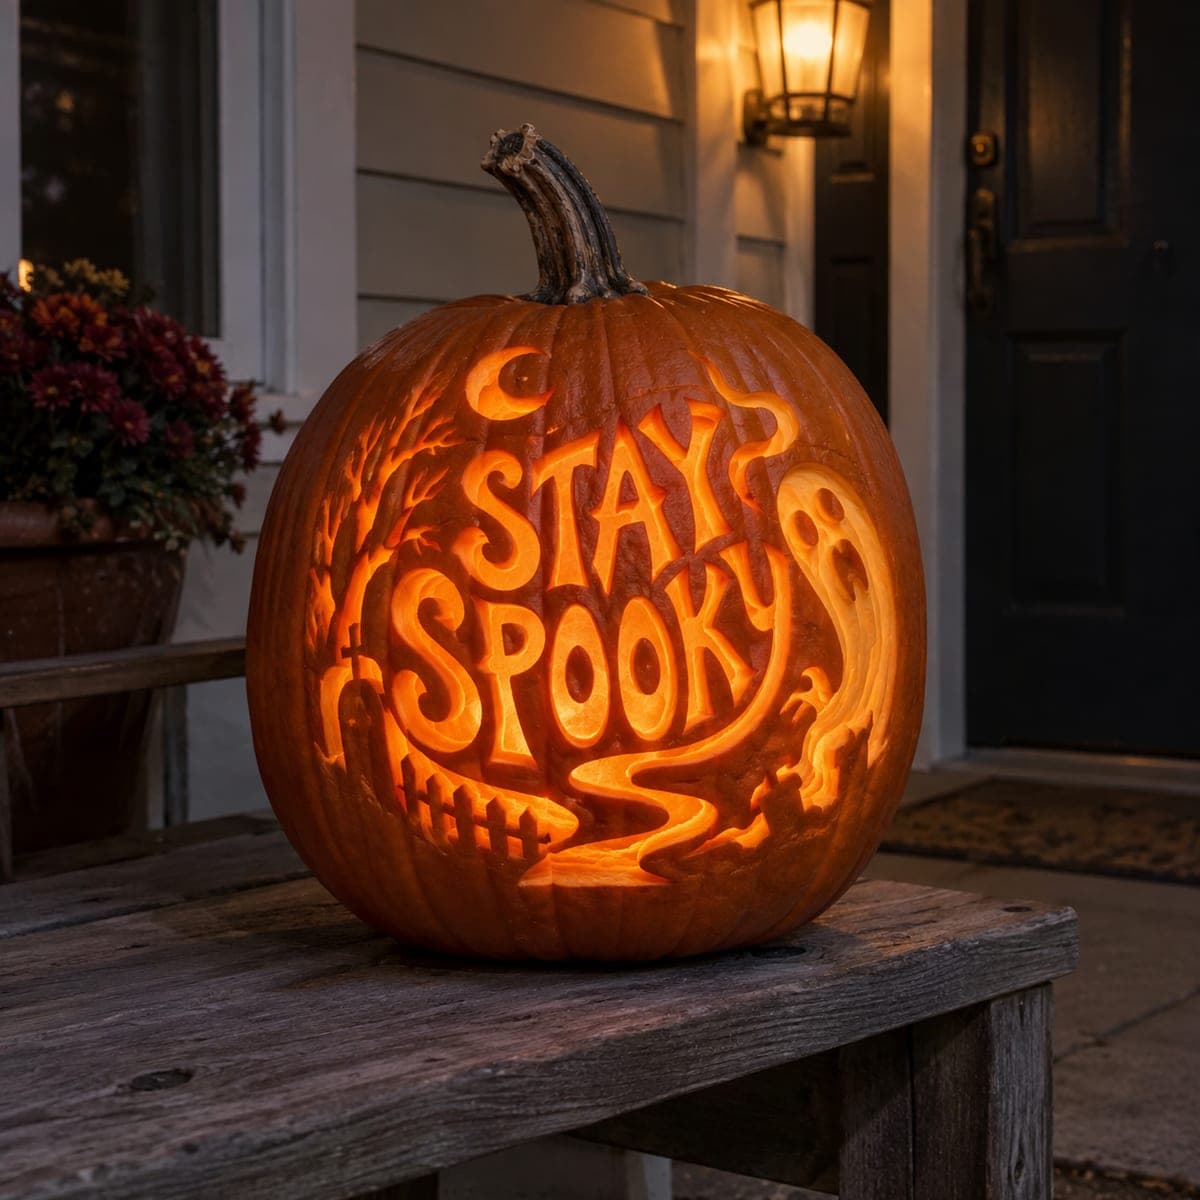
Stay Spooky Ghost Lettering Cutout Jack-O-LanternAI
0

Stay Spooky Ghost Lettering Cutout Jack-O-Lantern

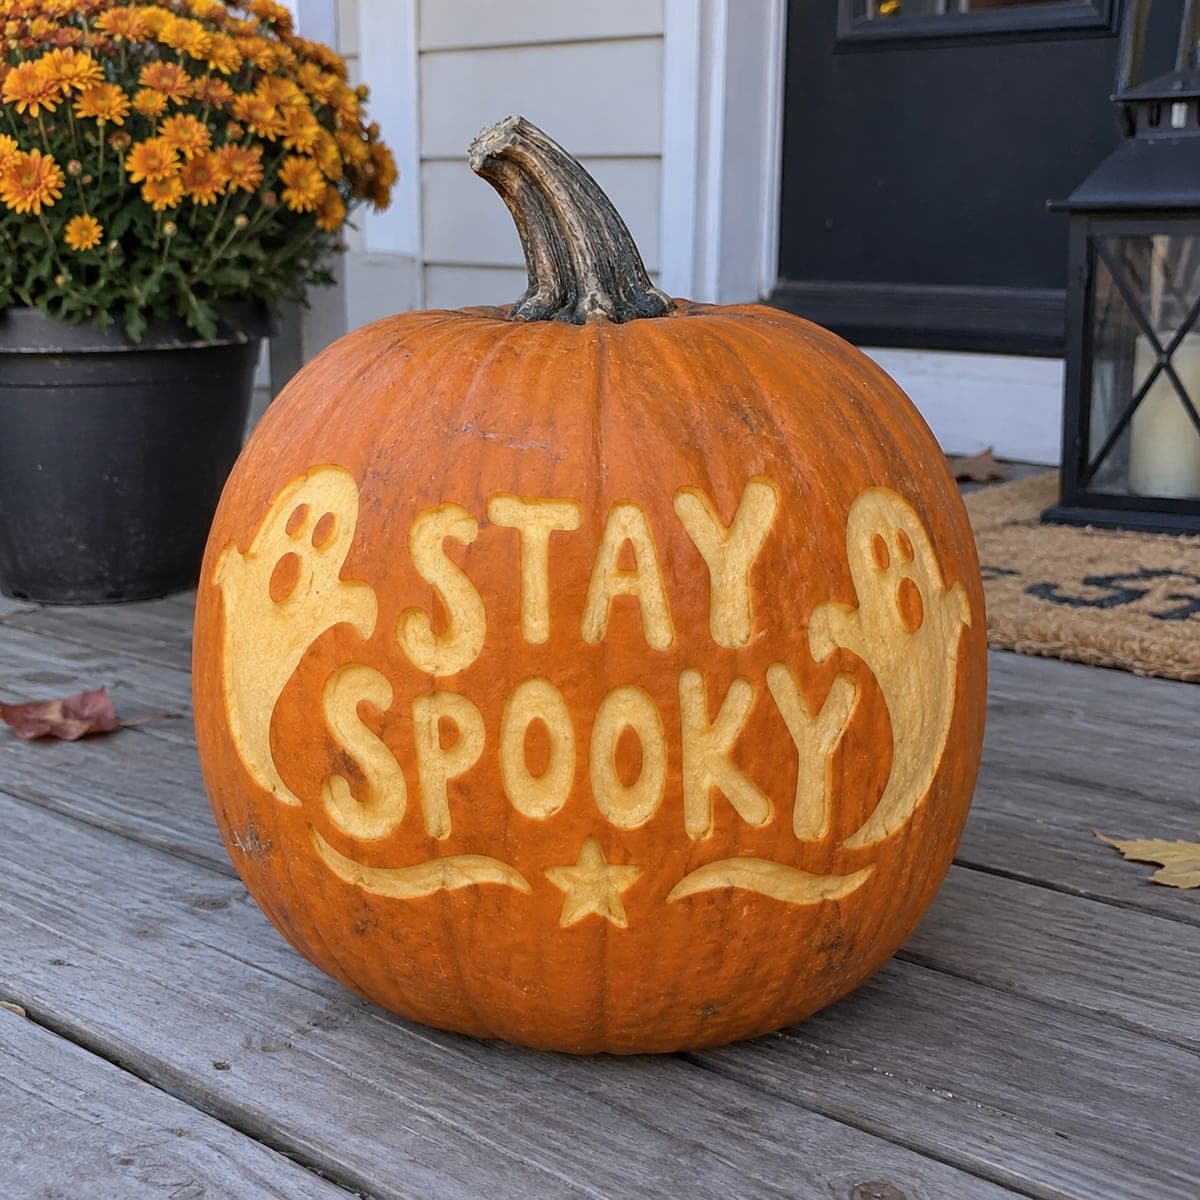
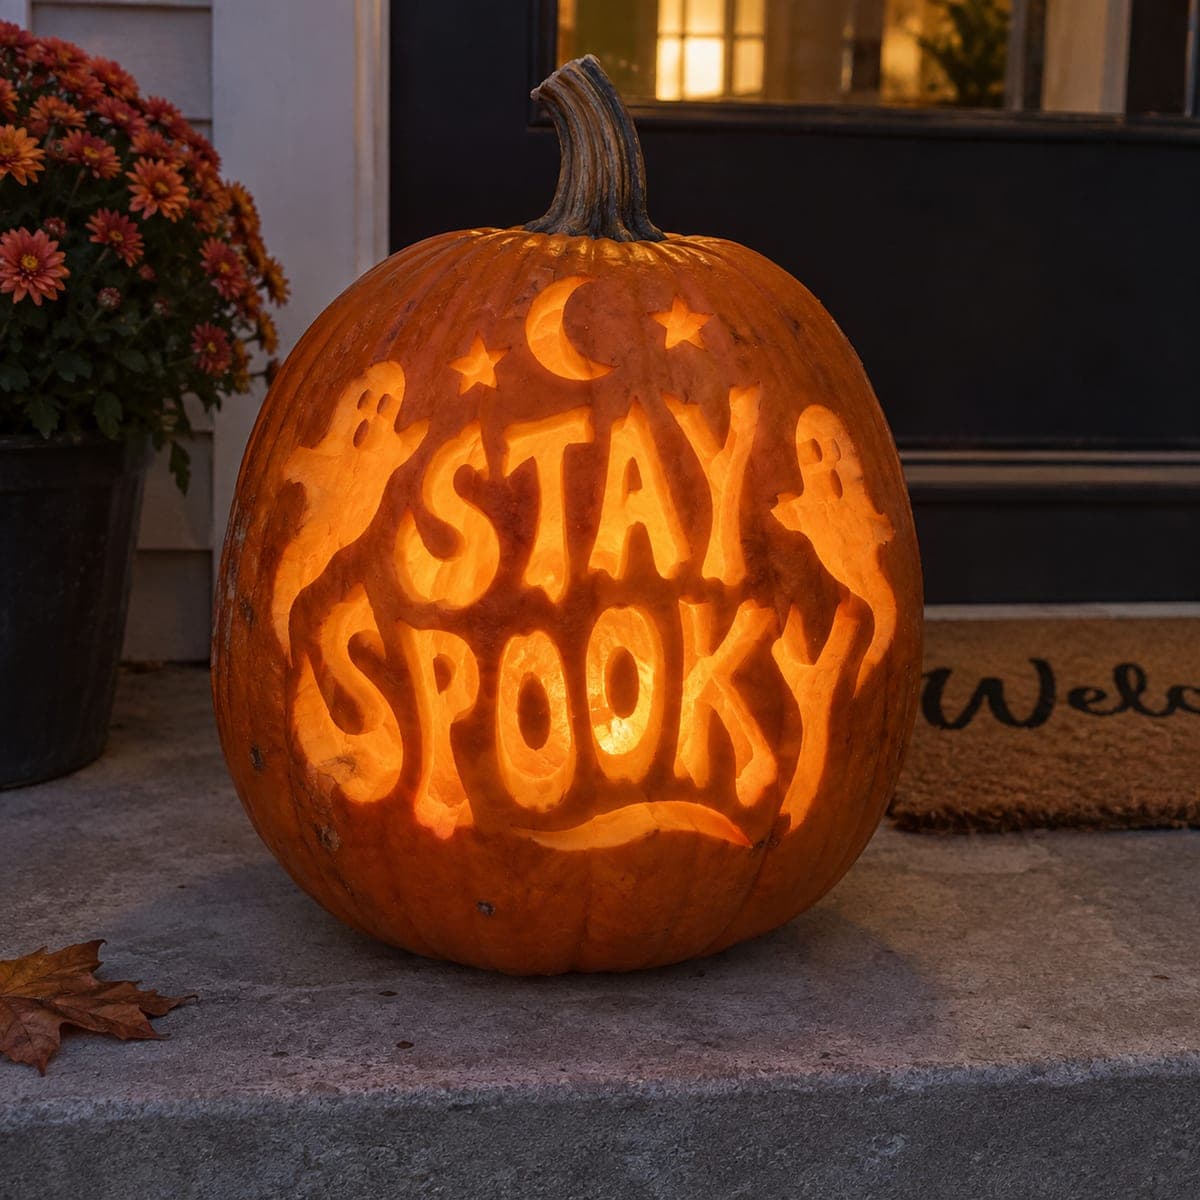
Bold bubble letters spelling STAY SPOOKY are carved through a large pumpkin, flanked by two small floating ghost cutouts, a crescent moon, and stars that all glow against the night. The design uses connected lettering so no interior pieces are left unsupported. Carve the ghost and star accents first since they are the smallest elements, then carefully cut each letter, checking that shared walls between letters remain intact. A fun phrase pumpkin carving idea that makes a cheerful statement on any front step.

This is an AI-generated concept image: a realistic, carvable design idea rather than a photo of a finished carve. AI concepts are always labeled and sit out the leaderboard and the contest.

No ratings yet Β· Sign in to rate

Comments (0)

  • No comments yet β€” be the first.

Save without an account. Sign in to like or comment.

Our tips for carving a similar design

The core trick here is connected bubble lettering, where the letters touch or nearly touch so no counter or center falls out. You could plan a similar design with a stencil that keeps STAY SPOOKY as one linked shape, then add tiny ghosts, a crescent moon, and stars in the empty space around the words. Everything is a full cutout for maximum glow, so the plan is to carve the smallest accents first and save the big letters for last.

Written by PumpkinCarvingIdeas.com, inspired by the image above. These are our suggestions, not instructions from the uploader. This approach to the AI concept has not been tested on a real pumpkin.

From pumpkin to porch

  1. Pick and tape your pattern

    Choose a linked lettering stencil for STAY SPOOKY plus small ghost, moon, and star shapes. Size it to your pumpkin so the words fill the front nicely with room above for the sky. Tape the paper smooth and poke transfer dots along every line with a pin or awl. Take your time here since good placement makes the whole carve easier.

  2. Open the pumpkin and clean it out

    Have an adult cut a lid from the back or bottom rather than the top, so the front face stays strong for the letters. Scoop the guts and scrape the inside of the front wall down to about one inch thick. A thinner wall lets light pass and makes cutting the letters much easier. Blot the inside dry before you start carving detail.

  3. Carve the small accents first

    Start with the two little ghosts, the crescent moon, and the stars since they are the smallest and most delicate elements. Use a fine detail saw and make slow, straight up and down strokes. Cutting these first means you are working on a solid, stable pumpkin. Push the loose pieces gently inward and out.

  4. Cut the letters one at a time

    Move to the words and cut each letter as its own shape, checking that the shared walls between neighboring letters stay intact. Cut the largest openings last so the pumpkin keeps its strength as long as possible. Leave the bar inside letters like A, P, and O attached, since the connected design supports them. Reinsert any piece that flexes and support it as you finish nearby cuts.

  5. Clean edges and drop in light

    Trim ragged edges with your detail saw held at a slight outward angle so more light escapes. Rub a little petroleum jelly on the cut edges to slow drying. Set one or two battery LED lights inside, never a candle, and cluster them low so the letters glow evenly. Test in a dark room and add light if the top sky shapes look dim.

  6. Stage it and snap a photo

    Place the finished pumpkin on a flat step where the whole phrase faces the walkway. Angle it so the moon and stars sit just above the words like a night sky. Shoot in near dark with only the LED glow for that warm orange look. If your real pumpkin softens after a few days, a fresh one carved the same way brings it right back.

Gather your supplies

Check things off as you get ready.

Work on a stable surface, keep your free hand out of the cutting path, and have an adult handle sharp tools.

Three levels of light

  • Leave intact

    The uncarved orange skin across the face and sides stays dark and frames the glowing words.

  • Peel & shade

    Optional shallow-shaved halos around the ghosts or a thin shaved outline on letters give a soft dim glow.

  • Cut through

    The full STAY SPOOKY letters, the two ghosts, the crescent moon, and the stars are cut all the way through for the brightest light.

Learn the carving basics

Before you start cutting

How do I keep the insides of letters like A, P, and O from falling out?

Use a stencil with connected lettering so those center pieces stay attached to the surrounding design by small bridges. Do not cut those bridges away, even if they look a little chunky. If a center piece ever loosens, push it back and support it with a toothpick until the pumpkin firms up.

Should I carve the words or the little ghosts first?

Carve the smallest accents first, meaning the ghosts, moon, and stars, while the pumpkin is still solid and stable. Save the large letter openings for last so the wall keeps its strength as long as possible. This order reduces the chance of a section cracking mid carve.

This is a concept image, so will a real pumpkin glow this evenly?

You can get close by thinning the front wall to about an inch and using two LED lights placed low and slightly apart. Even lighting depends more on wall thickness than on the bulb. Cluster the lights so both the words and the higher sky shapes catch the glow.

Your take belongs here, too.

Changed a detail? Made it simpler? Share a photo of your version and tell the community what worked.

Share your pumpkin

More pumpkins like this

You've reached the end Β· 8 pumpkins
The Patch Report

Fresh pumpkins, in your inbox.

The best new carvings, ideas worth stealing, and how-tos for carving season. Short, seasonal, and gone by November.

A short email during carving season. Unsubscribe anytime. See our privacy policy.