Halloween Pumpkin Carving Contest · Starts October 1st · $500 in prizes
← Back to ideas
@ai_concepts
Aug 3, 2026
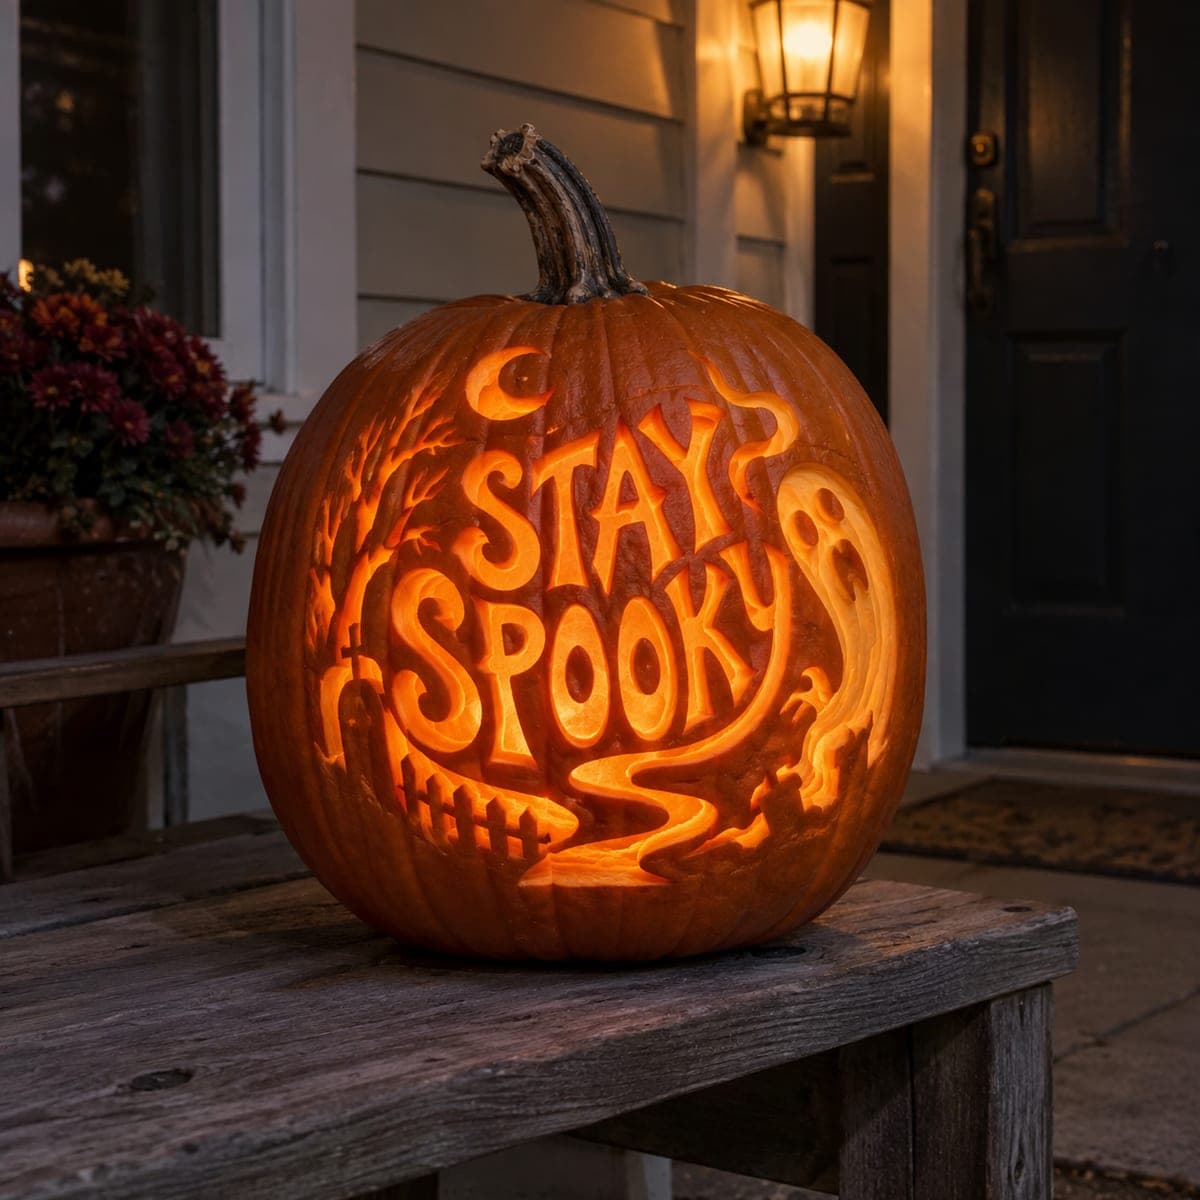
Stay Spooky Lettering Pumpkin With Ghost and GraveyardAI
0

Stay Spooky Lettering Pumpkin With Ghost and Graveyard

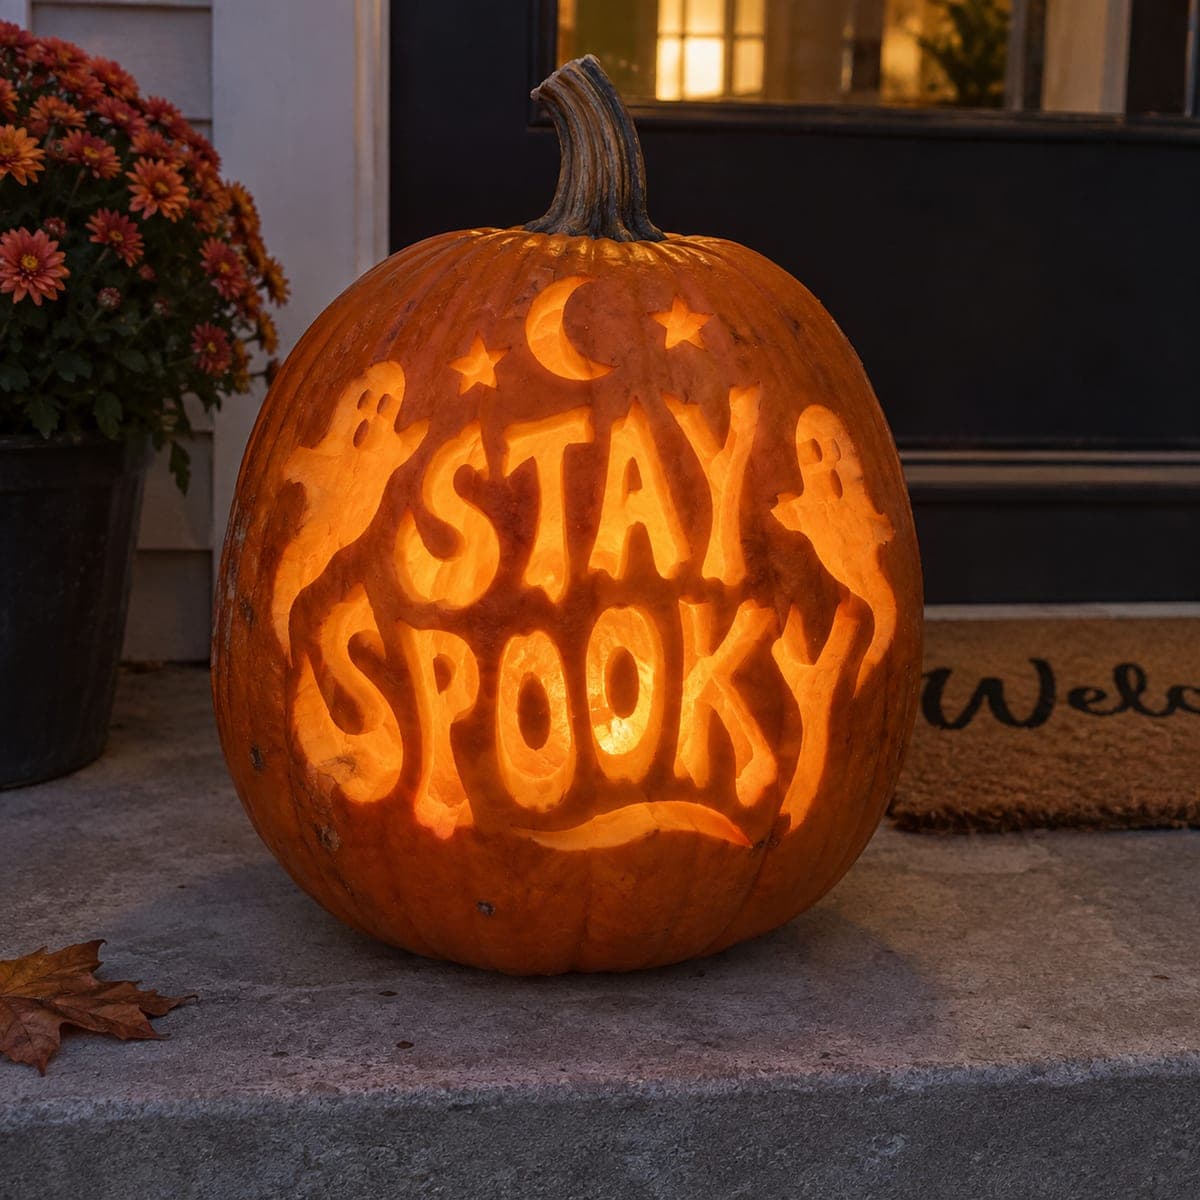
The words STAY SPOOKY glow in chunky hand-lettered capitals across this pumpkin, surrounded by a full etched scene: a waving ghost, crescent moon, bare tree, picket fence, and a winding path. Lettering is the make-or-break element, so transfer the phrase from a printed template and carve each letter as a shallow etch rather than cutting through, which keeps the counters of the S and O intact. Fill in the scenery afterward at varied depths for a storybook glow.

This is an AI-generated concept image: a realistic, carvable design idea rather than a photo of a finished carve. AI concepts are always labeled and sit out the leaderboard and the contest.

No ratings yet · Sign in to rate
Comments (0)

  • No comments yet — be the first.

Save without an account. Sign in to like or comment.

Our tips for carving a similar design

The core trick here is treating the letters as shallow etches instead of full cutouts, so the counters inside the S and O stay solidly attached and the whole phrase reads cleanly. Transfer the words from a printed template first, carve those, then fill the background with a graveyard scene at varied depths. Deeper cuts read brighter, giving the storybook glow around the words.

Written by PumpkinCarvingIdeas.com, inspired by the image above. These are our suggestions, not instructions from the uploader. This approach to the AI concept has not been tested on a real pumpkin.

From pumpkin to porch

  1. Pick a smooth pumpkin and clean it out

    Choose a tall, round pumpkin with a wide, unblemished front panel to hold all the lettering and scenery. Cut a lid or a bottom access hole and scoop the walls on the carving side down to about one inch thick. A thinner wall makes etching and shading far easier and lets the light spread evenly. Pat the inside and the surface dry before you transfer anything.

  2. Transfer the full template

    Print the STAY SPOOKY phrase and the surrounding scene at the right size and tape it snugly to the front. Poke closely spaced dots along every letter edge and scene outline with a transfer tool or pin. Pay special attention to the enclosed counters in the S, A, P, O, and Y so those islands stay marked. Peel the paper and connect the dots lightly with a marker if the pattern is faint.

  3. Etch the lettering first

    Using a small shading loop or gouge, scrape away just the outer skin of each letter to expose the pale flesh, going only a few millimeters deep. Keep the depth even so all the letters glow with the same warm tone. Do not cut through and do not carve away the little bridges that hold the counters of the S and O in place. Work slowly around tight curves and check your spacing as you go.

  4. Build the scene at varied depths

    Add the crescent moon, bare tree branches, picket fence, and winding path around the words. Etch the faint background elements like distant branches shallowly, and carve the moon and path a little deeper so they read brighter. Keep the bare tree branches connected to a trunk line so no thin piece floats free. Vary your depth intentionally, since deeper flesh passes more light.

  5. Shape the ghost last

    Carve the waving ghost on the right side with a smooth shallow etch for its body and slightly deeper scoops for the mouth and eye holes. Save any small full cutouts, like a bright spot in the moon or the ghost's eyes, for the very end so the surface stays strong while you work. Cutting big openings last keeps the pumpkin from flexing and tearing. Clean up ragged edges with the tip of your knife.

  6. Light it and photograph

    Drop in a battery LED light or two and set the pumpkin in a dim spot to check the balance. If a letter looks dull, scrape it a touch thinner from the front until it glows to match. Photograph it on a porch at dusk with the LED as the main light for that warm storybook look. Swap the batteries before a long night out and keep it out of the rain.

Gather your supplies

Check things off as you get ready.

Work on a stable surface, keep your free hand out of the cutting path, and have an adult handle sharp tools.

Three levels of light

  • Leave intact

    The untouched orange skin forms the dark background between letters and behind the scene.

  • Peel & shade

    The etched letters, bare tree, fence, and ghost body glow a soft mid orange from skin removed down to the flesh.

  • Cut through

    Any small full cutouts, like the moon accent or the ghost's eyes, punch through for the brightest points.

Learn the carving basics

Before you start cutting

How do I keep the insides of the S and O from falling out?

Because the letters are etched rather than cut through, the counters never separate in the first place. You are only scraping the surface skin, so the pale flesh inside each letter stays fully attached to the wall. Just avoid the temptation to cut all the way through any letter.

This is a concept image, so can a real pumpkin actually glow like this?

Yes, this look is achievable on a real pumpkin because it relies on shallow etching rather than fragile floating pieces. Thin the wall to about an inch and keep the tree branches and fence attached to solid lines. The even glow comes from etching all the letters to a consistent depth.

What if my lettering comes out uneven?

Etch every letter to the same shallow depth first, then hold the lit pumpkin in a dark room to spot dull areas. Scrape any dim letter a little thinner from the front until its glow matches the rest. Work in small passes, since you can always remove more flesh but cannot put it back.

Your take belongs here, too.

Changed a detail? Made it simpler? Share a photo of your version and tell the community what worked.

Share your pumpkin

More pumpkins like this

You've reached the end · 8 pumpkins
The Patch Report

Fresh pumpkins, in your inbox.

The best new carvings, ideas worth stealing, and how-tos for carving season. Short, seasonal, and gone by November.

A short email during carving season. Unsubscribe anytime. See our privacy policy.