Halloween Pumpkin Carving Contest · Starts October 1st · $500 in prizes
← Back to ideas
@ai_concepts
Aug 3, 2026
Haunted Graveyard and Gnarled Tree Pumpkin SceneAI
0

Haunted Graveyard and Gnarled Tree Pumpkin Scene

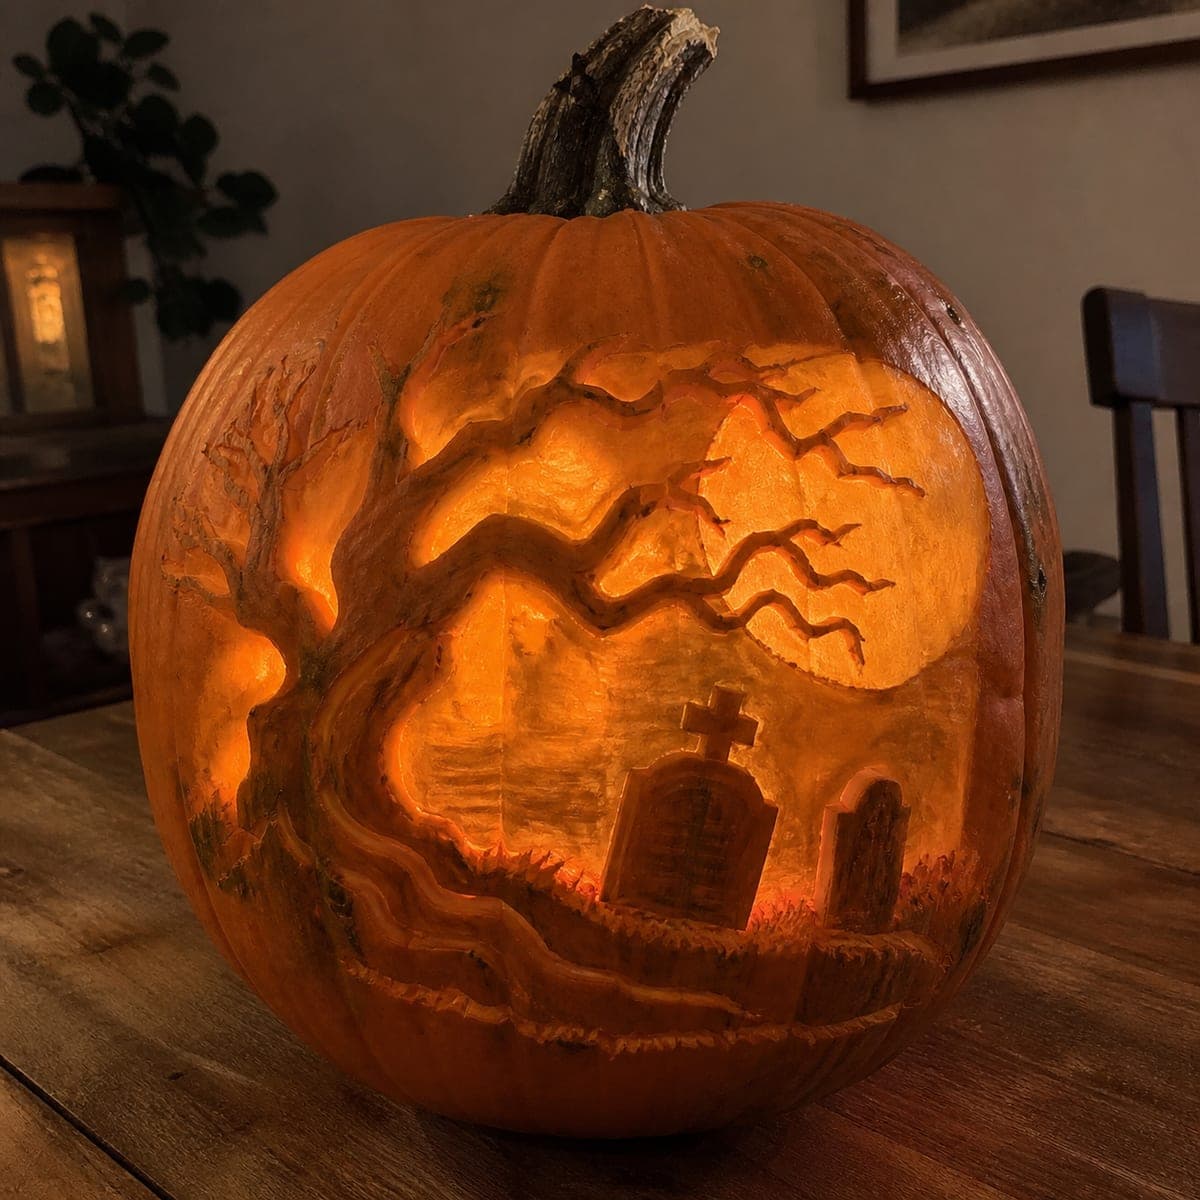
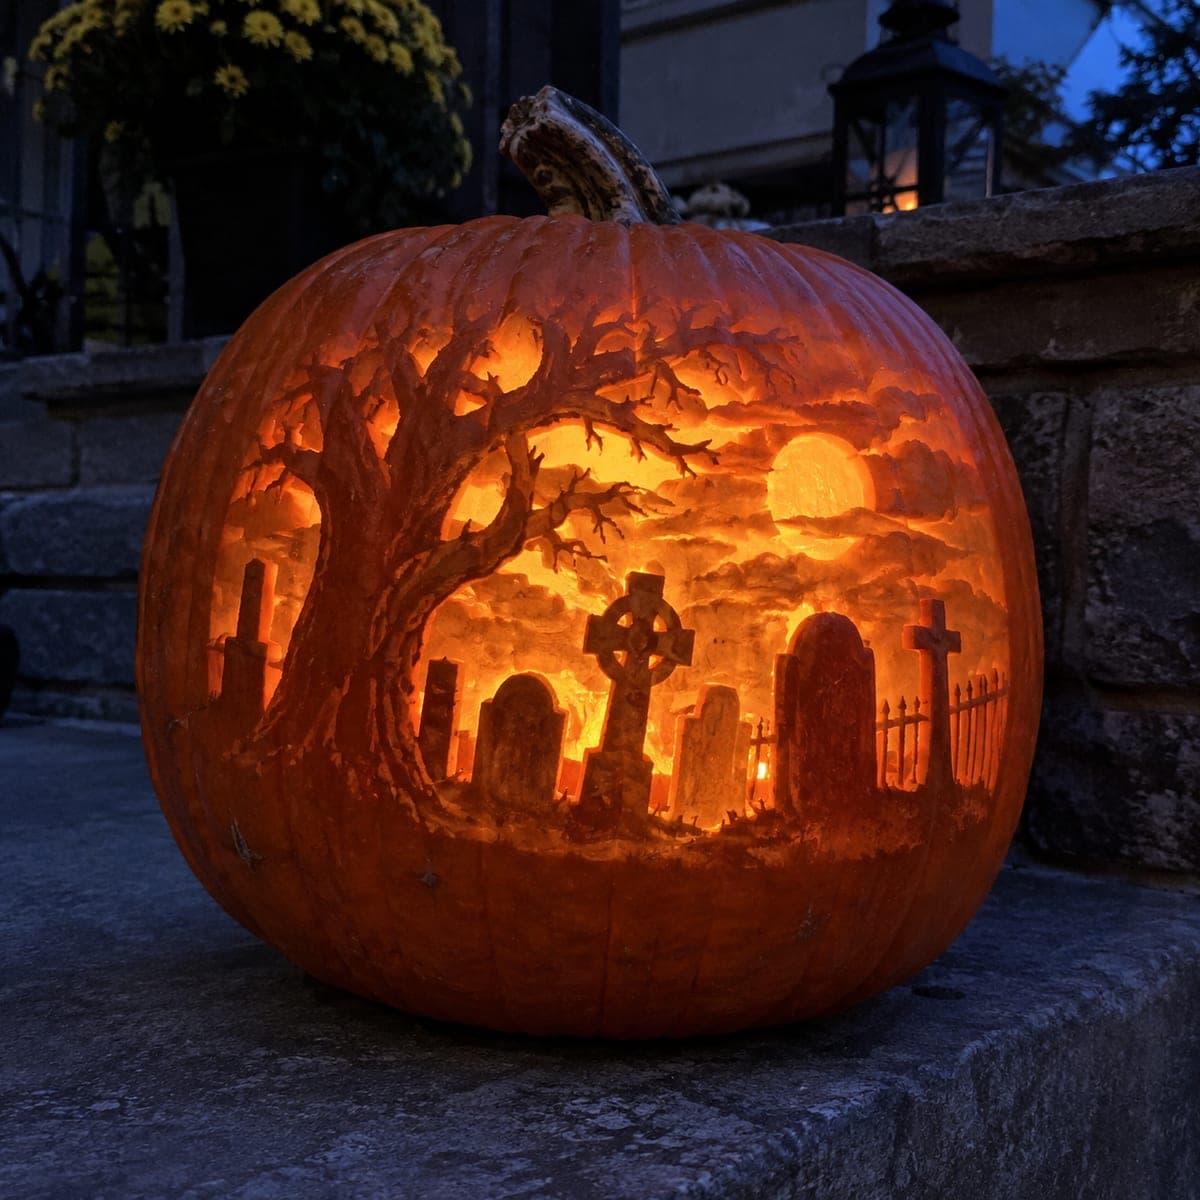
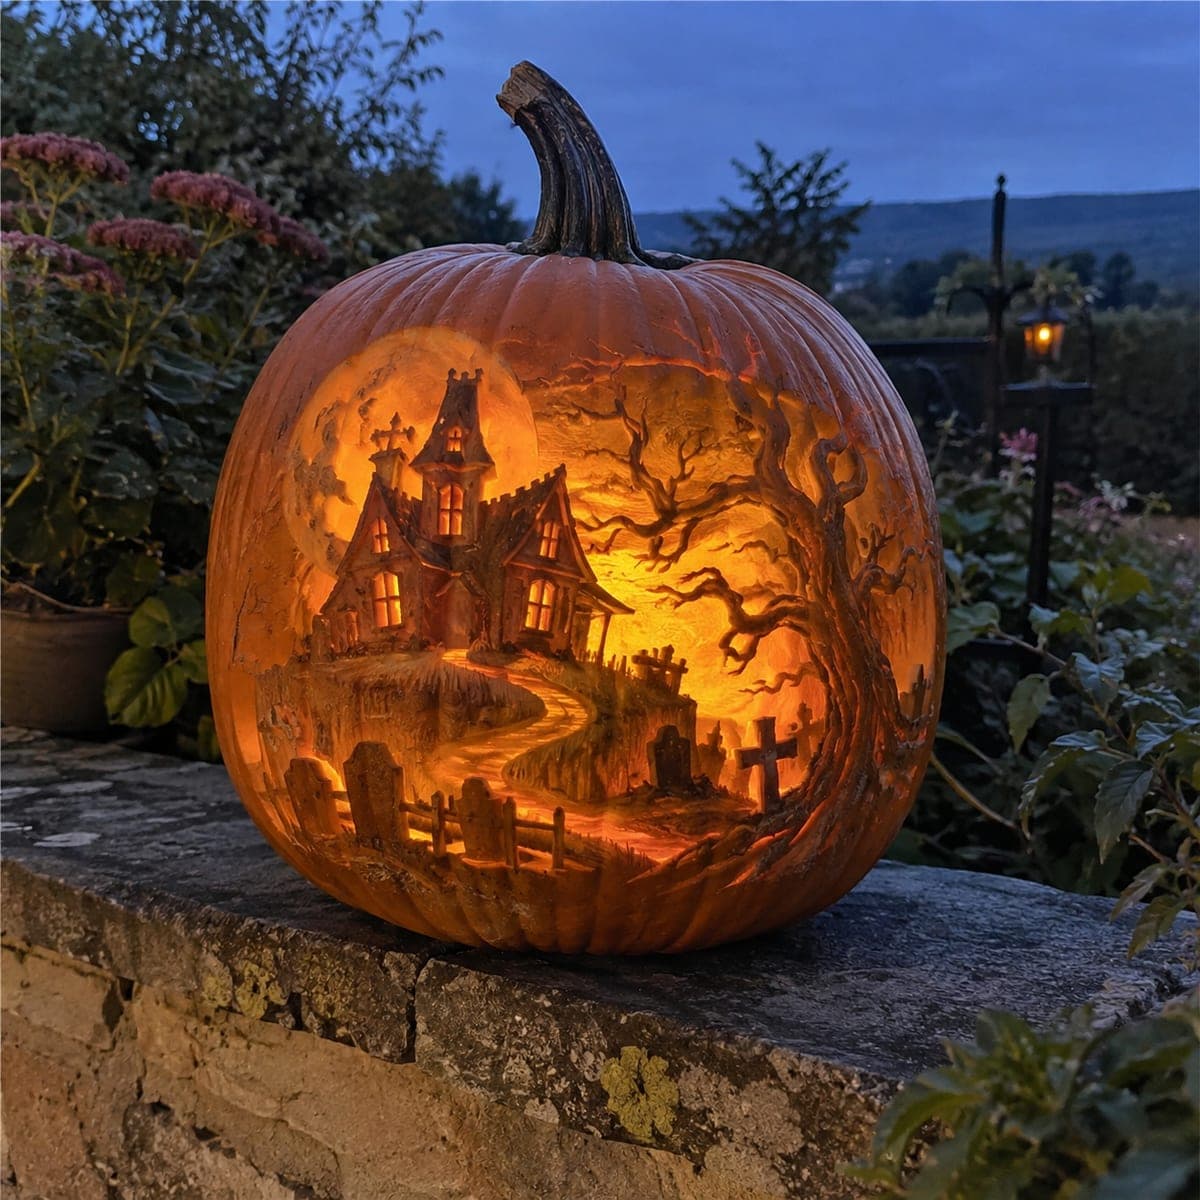
An entire moonlit graveyard fills one face of this pumpkin, with a gnarled bare tree arching over tombstones, a Celtic cross, and an iron fence. The sky is etched thin so it burns bright behind the darker raised foreground, giving the scene real depth. Carve the background clouds first, then cut the tree and stones shallower so they stay in shadow, and light it with a warm flickering candle for atmosphere.

This is an AI-generated concept image: a realistic, carvable design idea rather than a photo of a finished carve. AI concepts are always labeled and sit out the leaderboard and the contest.

No ratings yet · Sign in to rate
Comments (0)

  • No comments yet — be the first.

Save without an account. Sign in to like or comment.

Our tips for carving a similar design

The whole trick here is depth from light, not from cutting all the way through. You peel the sky and clouds thin so they glow while leaving the tree, tombstones, and fence as darker raised silhouettes in front. Only the full moon gets cut fully open for a bright anchor, so plan your layers from back to front before you touch a blade.

Written by PumpkinCarvingIdeas.com, inspired by the image above. These are our suggestions, not instructions from the uploader. This approach to the AI concept has not been tested on a real pumpkin.

From pumpkin to porch

  1. Transfer and plan your layers

    Pick the flattest, widest face and clean the inside wall down to about an inch thick so light passes evenly. Tape your stencil on and poke through the outlines with a pin, marking sky, moon, tree, stones, and fence as separate depth zones. Note which parts stay skin, which get thinned, and which get cut all the way. A quick color-code on the stencil keeps you from over-cutting the fine tree branches later.

  2. Open the moon first as your bright anchor

    Cut the full moon all the way through with a small saw blade, since it is the only true opening in this design. Keep the edge clean and round so it reads as a moon and not a hole. Everything else will be judged against how bright this spot is, so get it right early. Set the pumpkin over your LED now and again to check the glow as you work.

  3. Peel the sky and clouds thin

    Using a ribbon or lino gouge, shave away just the outer skin across the sky, going deeper where you want brighter cloud breaks and shallower where clouds should stay dim. Do not cut through; you are thinning the wall so light bleeds through as a soft orange wash. Feather the edges of the clouds so they blend rather than look stamped. This layer is where the whole scene gets its glow, so take your time.

  4. Leave the tree, stones, and fence as dark shapes

    Keep the gnarled tree, the tombstones, the Celtic cross, and the iron fence as untouched or barely scratched skin so they stay in shadow against the bright sky. Carve tiny bridges into the thin branches and fence rails so nothing snaps off or falls loose. Only lightly scratch the bark texture and stone cracks for detail, never pierce them. These raised dark shapes are what give the scene its layered, stage-set depth.

  5. Refine texture and edges

    Go back with a detail knife and clean up the branch tips, the fence points, and the carved lettering suggestion on the stones. Soften a few cloud edges further if the sky looks too flat, and deepen any spot that stays too dark under the light. Wipe away crumbs and dab cut edges so they read crisp. Step back a few feet to check the silhouette reads as a graveyard at a glance.

  6. Light it and photograph

    Drop in a warm flickering LED, not a candle, since the thin walls and fine branches make an open flame risky. Set the pumpkin on a step at dusk and shoot from slightly below so the moon and glowing sky carry the frame. A little coating of petroleum jelly on the cut moon edge slows drying and keeps the glow crisp for a few days. Refrigerate it overnight to stretch its display life.

Gather your supplies

Check things off as you get ready.

Work on a stable surface, keep your free hand out of the cutting path, and have an adult handle sharp tools.

Three levels of light

  • Leave intact

    The gnarled tree, tombstones, Celtic cross, and iron fence stay as untouched skin so they read as dark silhouettes.

  • Peel & shade

    The sky and drifting clouds get skin-peeled to different depths for a soft, uneven orange glow behind the scene.

  • Cut through

    Only the full moon is cut all the way through for the single brightest spot in the design.

Learn the carving basics

Before you start cutting

How do I keep the thin tree branches and fence from breaking?

Do not cut fully around them; leave them as raised skin with only light surface scratching. Where a branch or fence rail looks separated on the stencil, keep small skin bridges connecting it to the body. On this AI concept the branches look delicate, so in a real pumpkin you would thicken them slightly for strength.

Why cut the moon but only thin the sky?

A single true opening gives you one bright anchor without washing out the whole scene. If you cut the sky through too, the tree and stones would lose their dark contrast and the depth would flatten. Thinning the sky lets a dimmer glow sit behind the foreground so the layers separate.

What light works best for a thin-walled scene like this?

Use a warm flickering LED puck rather than a candle. The walls here are shaved thin and the branches are fragile, so an open flame is both a fire and heat-warping risk. A bright warm LED gives you steady glow and lets you reposition it to hit the moon and clouds evenly.

Your take belongs here, too.

Changed a detail? Made it simpler? Share a photo of your version and tell the community what worked.

Share your pumpkin

More pumpkins like this

You've reached the end · 8 pumpkins
The Patch Report

Fresh pumpkins, in your inbox.

The best new carvings, ideas worth stealing, and how-tos for carving season. Short, seasonal, and gone by November.

A short email during carving season. Unsubscribe anytime. See our privacy policy.