Halloween Pumpkin Carving Contest · Starts October 1st · $500 in prizes
← Back to ideas
@ai_concepts
Jul 31, 2026
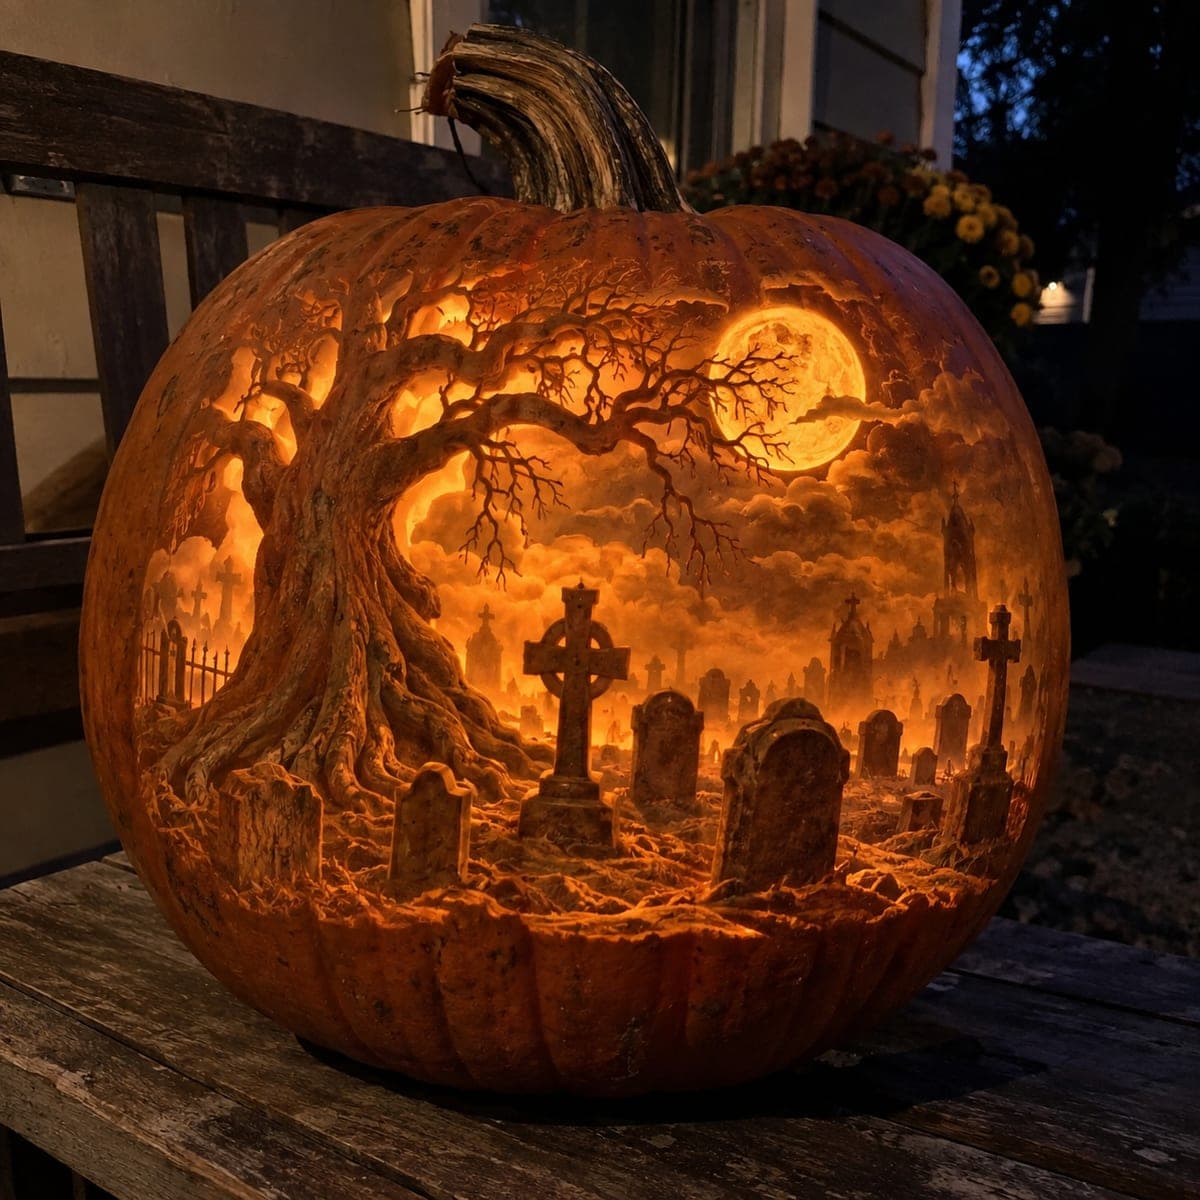
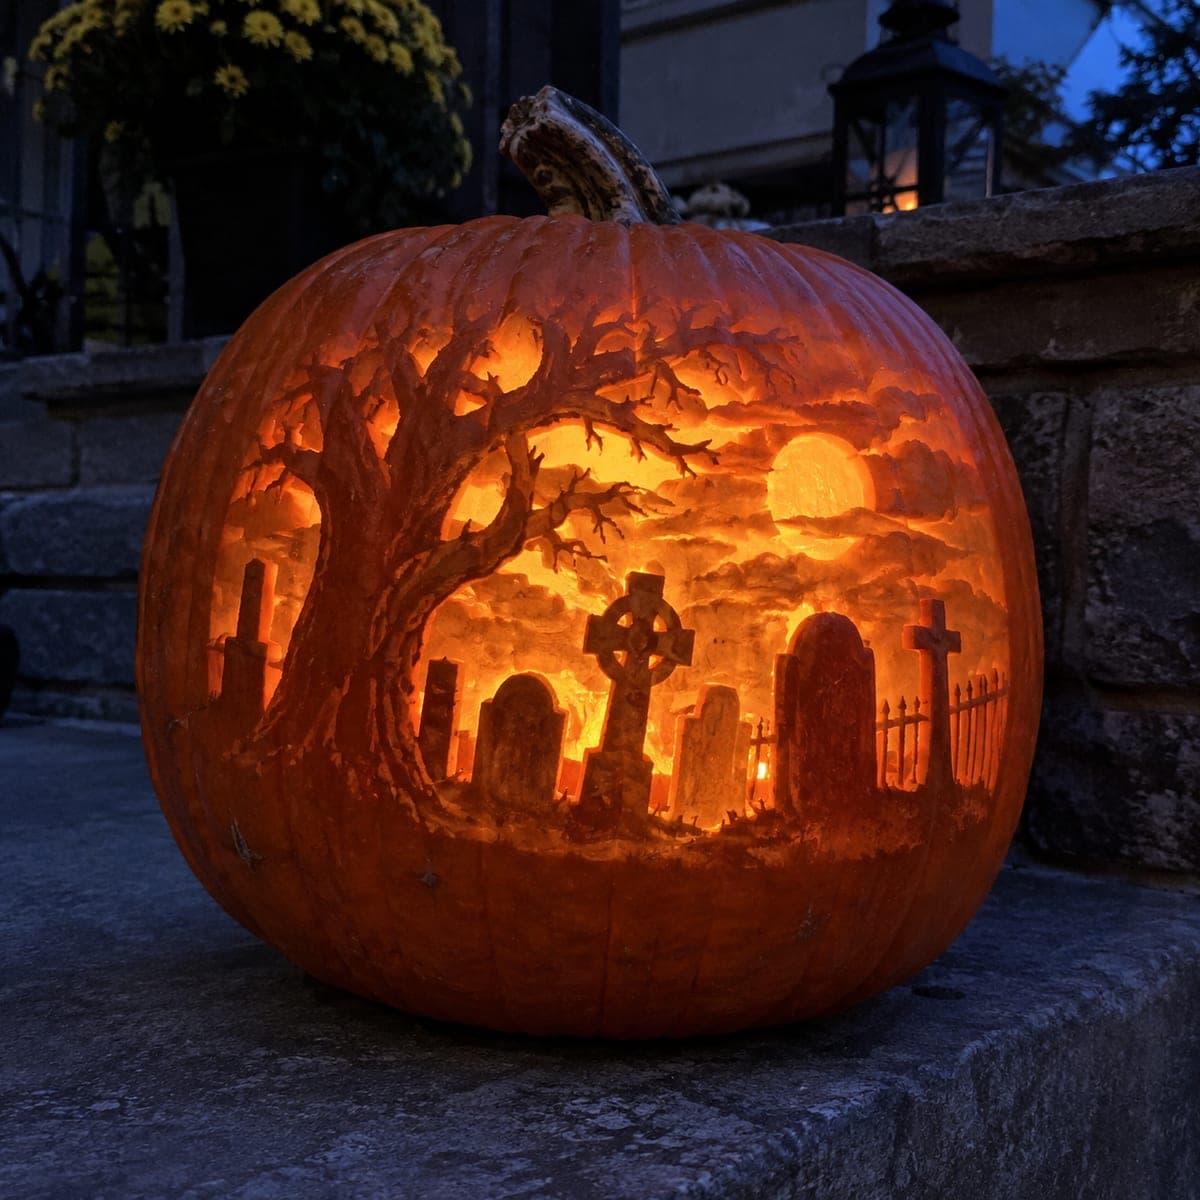
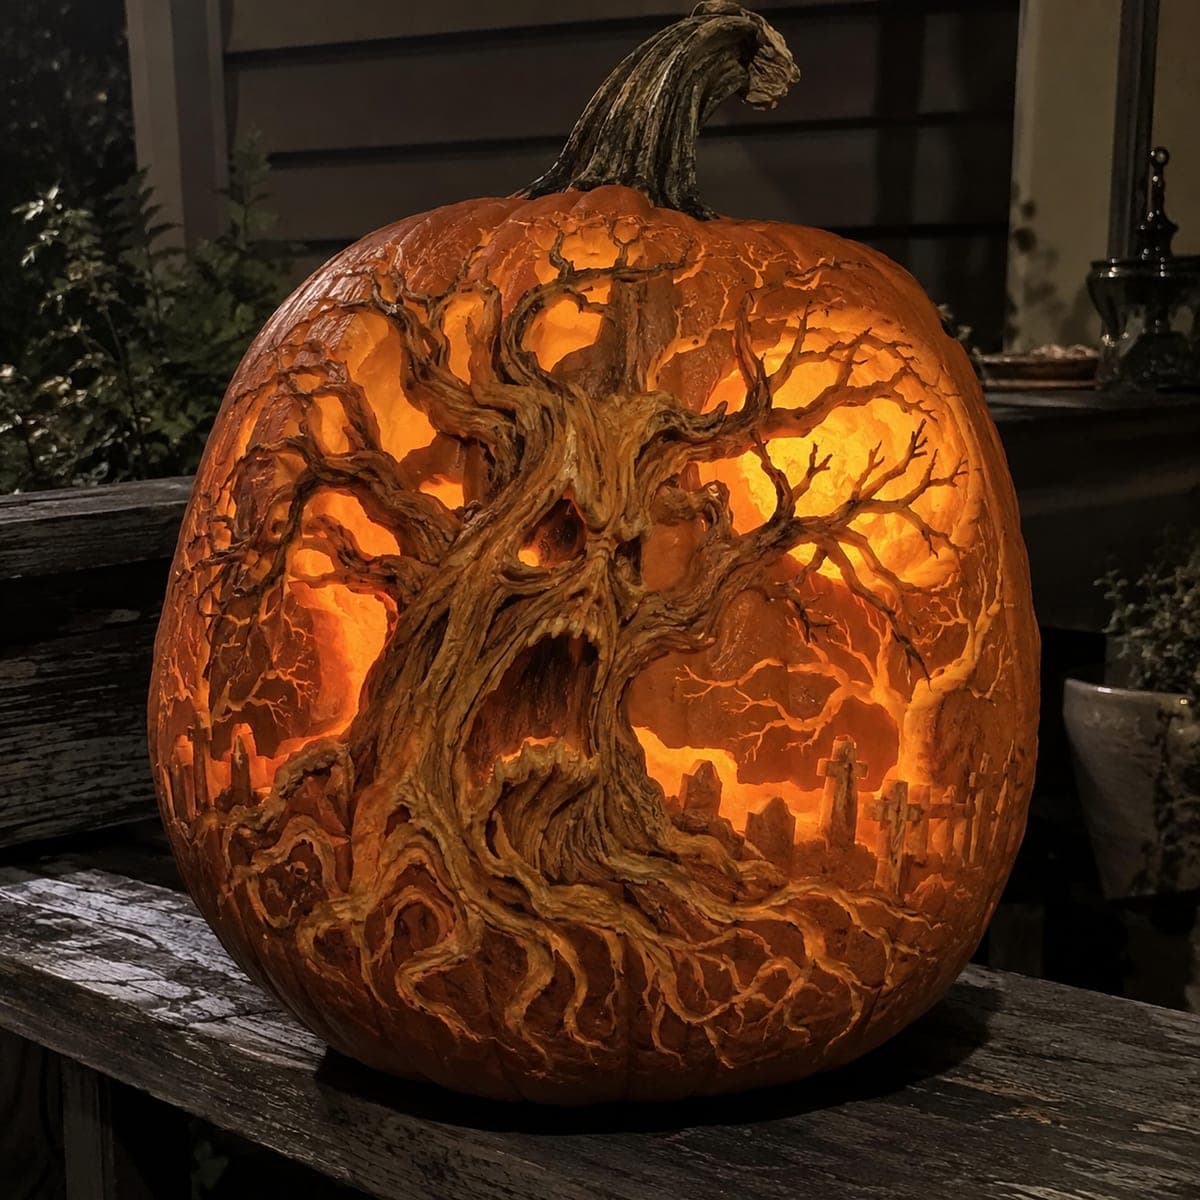
Moonlit Graveyard Under an Ancient Oak Pumpkin CarvingAI
0

Moonlit Graveyard Under an Ancient Oak Pumpkin Carving

An ancient oak arches over a moonlit graveyard in this museum-level pumpkin carving, with clouds, Celtic crosses, and rows of headstones etched in astonishing depth. Every element is shaded rather than pierced, so the whole scene glows in warm grays and ambers. A project like this takes hours of loop-tool work; rough in the big shapes first, then build detail from background to foreground. Two LED lights inside keep the glow even across the scene.

This is an AI-generated concept image: a realistic, carvable design idea rather than a photo of a finished carve. AI concepts are always labeled and sit out the leaderboard and the contest.

No ratings yet · Sign in to rate
Comments (0)

  • No comments yet — be the first.

Save without an account. Sign in to like or comment.

Our tips for carving a similar design

The core trick here is relief carving, where nearly the whole scene is shaded into peeled skin rather than cut clean through, so the pumpkin glows in soft grays and ambers instead of hard silhouettes. Only the full moon reads as a bright, deeper cut. The plan is to rough in the big oak and horizon first, then build depth from the far clouds forward to the tombstones and gnarled roots.

Written by PumpkinCarvingIdeas.com, inspired by the image above. These are our suggestions, not instructions from the uploader. This approach to the AI concept has not been tested on a real pumpkin.

From pumpkin to porch

  1. Prep the pumpkin and cut a base access hole

    Pick a tall, wide pumpkin with a smooth face for the scene. Since the design is a front relief, cut a hole in the bottom rather than the top so you can set the pumpkin over two LED lights. Scrape the inside wall behind the scene down to about one inch thick so light passes through evenly. A thinner wall makes shading glow much more readily.

  2. Transfer the scene and rough in the big shapes

    Tape your stencil on and poke or trace the main outlines: the arching oak, the moon, the horizon line of headstones, and the cloud bank. Remove the paper and use a large loop tool to lightly scoop the sky and cloud areas first. Work only the top skin layer at this stage to establish where light will and will not travel. Keep the trunk and foreground untouched for now since they stay darkest.

  3. Build the sky, clouds, and moon

    Peel the cloud shapes to a medium depth so they glow dim amber, leaving thin ridges of skin between them for definition. Carve the full moon deeper, almost to a cutout, so it becomes the single brightest point on the pumpkin. Feather the edges of the clouds where they pass in front of the moon so the transition looks soft. Step back often to check the glow balance from a few feet away.

  4. Shade the oak and its branches

    Leave the trunk and the thickest limbs as untouched dark skin so they read as strong silhouettes against the sky. For the fine twig network, shade shallow grooves rather than piercing, which keeps every branch structurally attached and avoids weak thin spans. Vary your pressure so nearer branches glow a touch brighter than the ones behind. This layered depth is what sells the ancient oak.

  5. Carve the graveyard from back to front

    Work the distant church spires and far headstones as faint, shallow shading so they sit deep in the fog. Bring the Celtic crosses and near tombstones forward with crisper edges and slightly deeper peels on their lit faces. Texture the ground and exposed roots with short loop-tool strokes for a tangled, overgrown feel. Save any small true cutouts, like gaps in the iron fence, for last so the surface stays firm while you work.

  6. Light it and photograph

    Set the pumpkin over two LED lights spaced apart so the glow spreads evenly across the wide scene rather than pooling in one spot. Warm white LEDs suit the amber mood best. Shoot at dusk with the background dark so the shading depth shows. Mist the cut surfaces lightly and refrigerate between displays to slow drying and keep the fine relief crisp.

Gather your supplies

Check things off as you get ready.

Work on a stable surface, keep your free hand out of the cutting path, and have an adult handle sharp tools.

Three levels of light

  • Leave intact

    The oak trunk, thick limbs, and the closest tombstones stay as untouched dark skin for strong silhouettes.

  • Peel & shade

    The clouds, distant spires, ground texture, and twig network are peeled to varying mid depths for soft amber glow.

  • Cut through

    The full moon is cut nearly through for the single brightest point, along with tiny gaps in the iron fence.

Learn the carving basics

Before you start cutting

This is shown as a concept image, so can a real pumpkin actually glow this evenly?

Yes, if you thin the inner wall behind the scene to about an inch and use two spaced LED lights. Even shading depends far more on wall thickness and light placement than on any single trick. Test the glow as you go and scrape thin any spots that stay too dark.

How do I keep all those fine oak branches from breaking off?

Shade them as shallow grooves in the skin instead of cutting through, so the surface stays continuous and strong. True open cuts on twig-thin lines would crumble almost immediately. Reserve piercing for larger, well-supported shapes like the moon.

Should I cut a lid on top or open the bottom?

Open the bottom for this design. The scene wraps the front face, and a top lid would break the arching oak branches and sky. A base hole also lets you lower the pumpkin over the lights and hide the cords.

Your take belongs here, too.

Changed a detail? Made it simpler? Share a photo of your version and tell the community what worked.

Share your pumpkin

More pumpkins like this

You've reached the end · 8 pumpkins
The Patch Report

Fresh pumpkins, in your inbox.

The best new carvings, ideas worth stealing, and how-tos for carving season. Short, seasonal, and gone by November.

A short email during carving season. Unsubscribe anytime. See our privacy policy.