Halloween Pumpkin Carving Contest · Starts October 1st · $500 in prizes
← Back to ideas
@ai_concepts
Aug 14, 2026
Moonlit Graveyard No-Carve Pumpkin SceneAI
0

Moonlit Graveyard No-Carve Pumpkin Scene

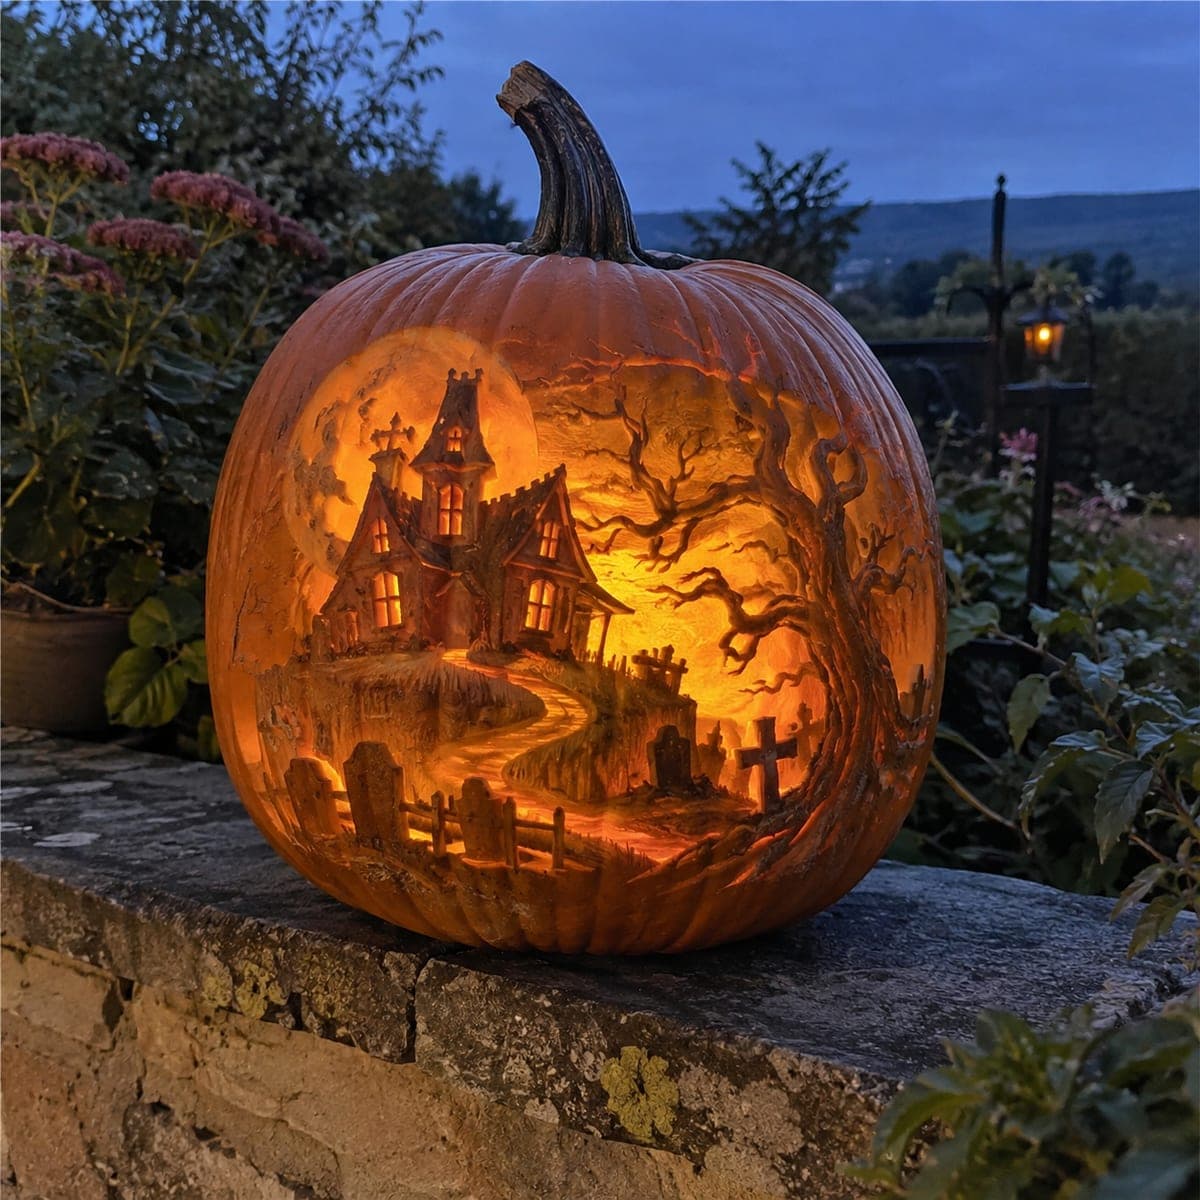
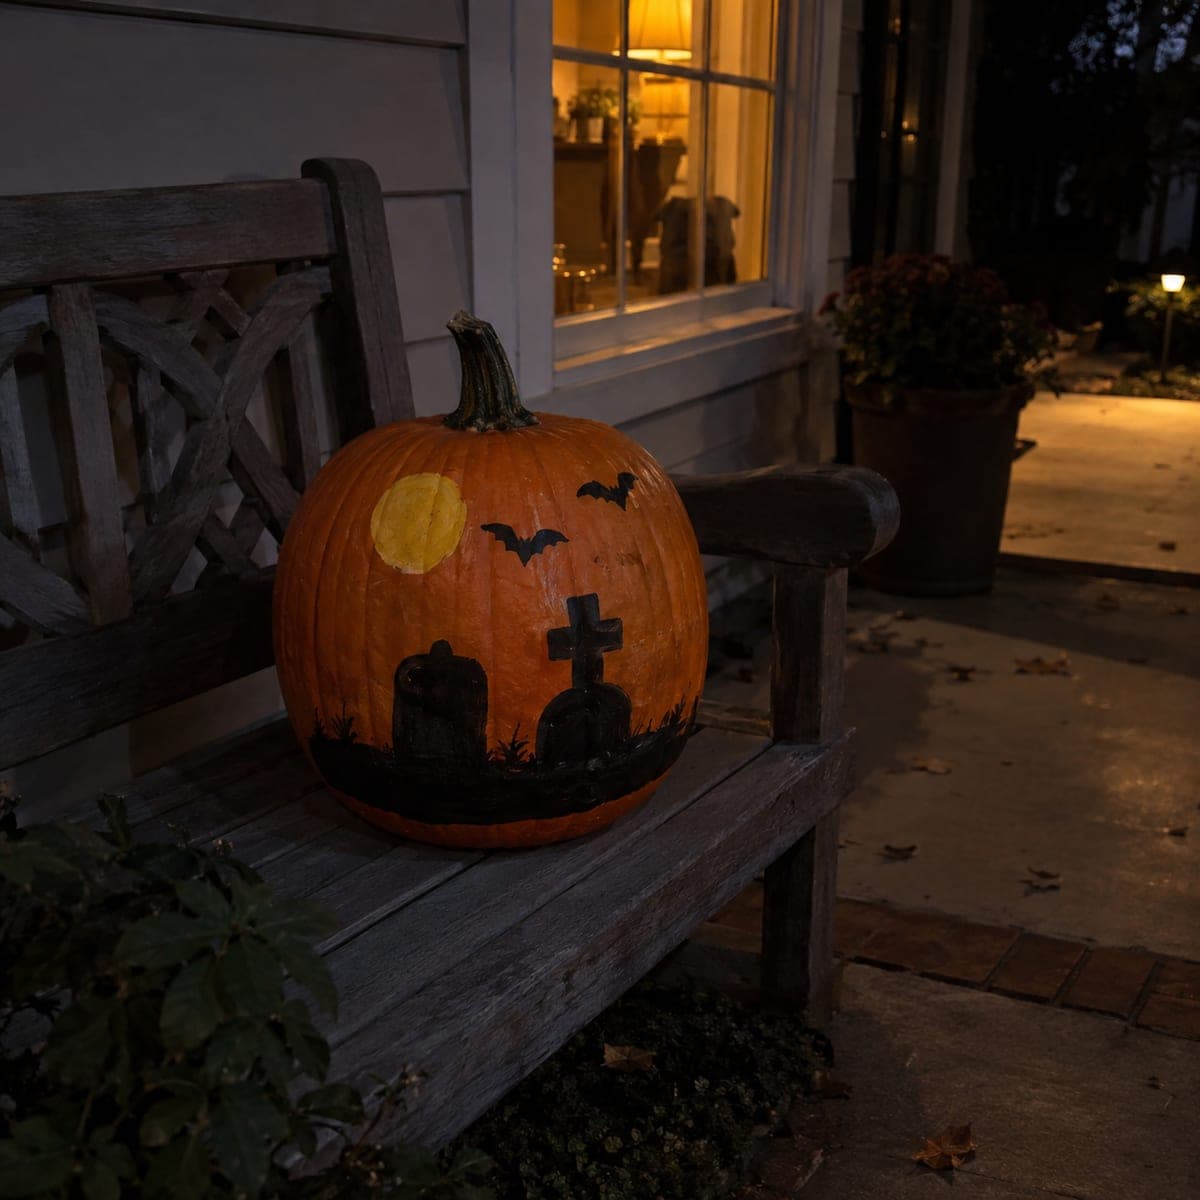
Black tombstones, a leaning cross, and a pair of bats swoop beneath a yellow moon in this painted graveyard pumpkin. The silhouette style makes it one of the easiest spooky scenes to pull off, since ragged edges just read as weathered stone. Paint the moon first, add the black horizon line and stones with a flat brush, and set the finished pumpkin on a bench or step where porch light can catch it.

This is an AI-generated concept image: a realistic, carvable design idea rather than a photo of a finished carve. AI concepts are always labeled and sit out the leaderboard and the contest.

No ratings yet · Sign in to rate

Comments (0)

  • No comments yet — be the first.

Save without an account. Sign in to like or comment.

Our tips for carving a similar design

The core trick here is silhouette painting, where flat black shapes read instantly as tombstones and bats against the pumpkin's natural orange. Since this is a no-carve design, you keep the pumpkin whole and let a big yellow moon anchor the scene. Ragged brush edges actually help, because they make the stone look old and weathered.

Written by PumpkinCarvingIdeas.com, inspired by the image above. These are our suggestions, not instructions from the uploader. This approach to the AI concept has not been tested on a real pumpkin.

From pumpkin to porch

  1. Wipe down and sketch

    Wash the pumpkin with mild soap and water, then dry it fully so paint will grip. Pick the smoothest, flattest face as your canvas. Lightly sketch the moon, a low horizon line, two or three tombstones, a leaning cross, and a couple of bats with a pencil. Keep the horizon in the lower third so the moon and bats have open sky above.

  2. Paint the moon first

    Load a round brush with yellow acrylic and fill in a solid circle up in the sky area. Two thin coats look better than one thick one, so let the first dry before adding the second. A hint of pale orange or white blended at the edge gives it a soft glow. Painting the moon before the black keeps stray dark strokes off your brightest shape.

  3. Lay down the horizon and grass

    Switch to a flat brush and paint a solid black band along your horizon line to form the ground. Let the top edge stay a little uneven so it looks like a low ridge. While that dries, flick a few short upward strokes for grass tufts poking above the line. This dark base is what your tombstones will appear to stand on.

  4. Build the tombstones and cross

    Paint each stone as a simple black block rising from the horizon, keeping the shapes chunky and slightly irregular. Add a taller cross by crossing one vertical stroke with a shorter horizontal one, and tilt it a touch so it looks like it is leaning. Do not worry about crisp edges, since rough outlines read as weathered stone. Let everything dry before touching up any thin spots.

  5. Add the bats and details

    With the tip of a round brush, paint two small bats in the sky as flattened M shapes near the moon. Keep them tiny so they feel far away and give the scene depth. Once fully dry, brush on a coat of clear acrylic sealer to protect the paint outdoors.

  6. Set it where the light catches

    Place the finished pumpkin on a bench, step, or porch table where existing porch light or a small LED spotlight rakes across the face. Angle the painted side toward the light source so the moon and silhouettes stand out after dark. Snap your photo at dusk when the sky is deep blue for the moodiest shot.

Gather your supplies

Check things off as you get ready.

Work on a stable surface, keep your free hand out of the cutting path, and have an adult handle sharp tools.

Three levels of light

  • Leave intact

    The bare orange pumpkin skin stays as the night sky and the dim ground between stones.

  • Peel & shade

    For an optional glow, lightly scrape the skin inside the moon circle before painting so it catches more light.

  • Cut through

    If you want real brightness, cut only the moon as a full opening and back it with a warm LED, saving that cut for last.

Learn the carving basics

Before you start cutting

Do I need to carve anything at all for this design?

No, this is a fully painted no-carve scene, so a whole uncut pumpkin works perfectly. If you want a little extra pop, you can carve just the moon and light it from inside. Everything else stays flat paint on the surface.

What paint holds up best on a pumpkin outdoors?

Acrylic craft paint sticks well to clean, dry pumpkin skin and dries fast between coats. Finish with a clear acrylic sealer so dew and light rain do not smear your black shapes. Keep the pumpkin under a covered porch when you can to make it last longer.

How do I make the tombstones look weathered instead of sloppy?

Lean into rough, uneven edges rather than fighting for clean lines. A slightly dry flat brush leaves streaky, chipped-looking strokes that read as old stone. Tilting the cross and varying the stone heights also makes the graveyard feel natural.

Your take belongs here, too.

Changed a detail? Made it simpler? Share a photo of your version and tell the community what worked.

Share your pumpkin

More pumpkins like this

You've reached the end · 8 pumpkins
The Patch Report

Fresh pumpkins, in your inbox.

The best new carvings, ideas worth stealing, and how-tos for carving season. Short, seasonal, and gone by November.

A short email during carving season. Unsubscribe anytime. See our privacy policy.