The 2026 contest winners are inGrand Prize, People's Choice and Most Creative, all crowned.
@ai_concepts
Sep 25, 2026
Triclops the Three-Eyed Monster PumpkinAI
0

Report this carving

Tell us what is wrong. Reports are private.

Triclops the Three-Eyed Monster Pumpkin

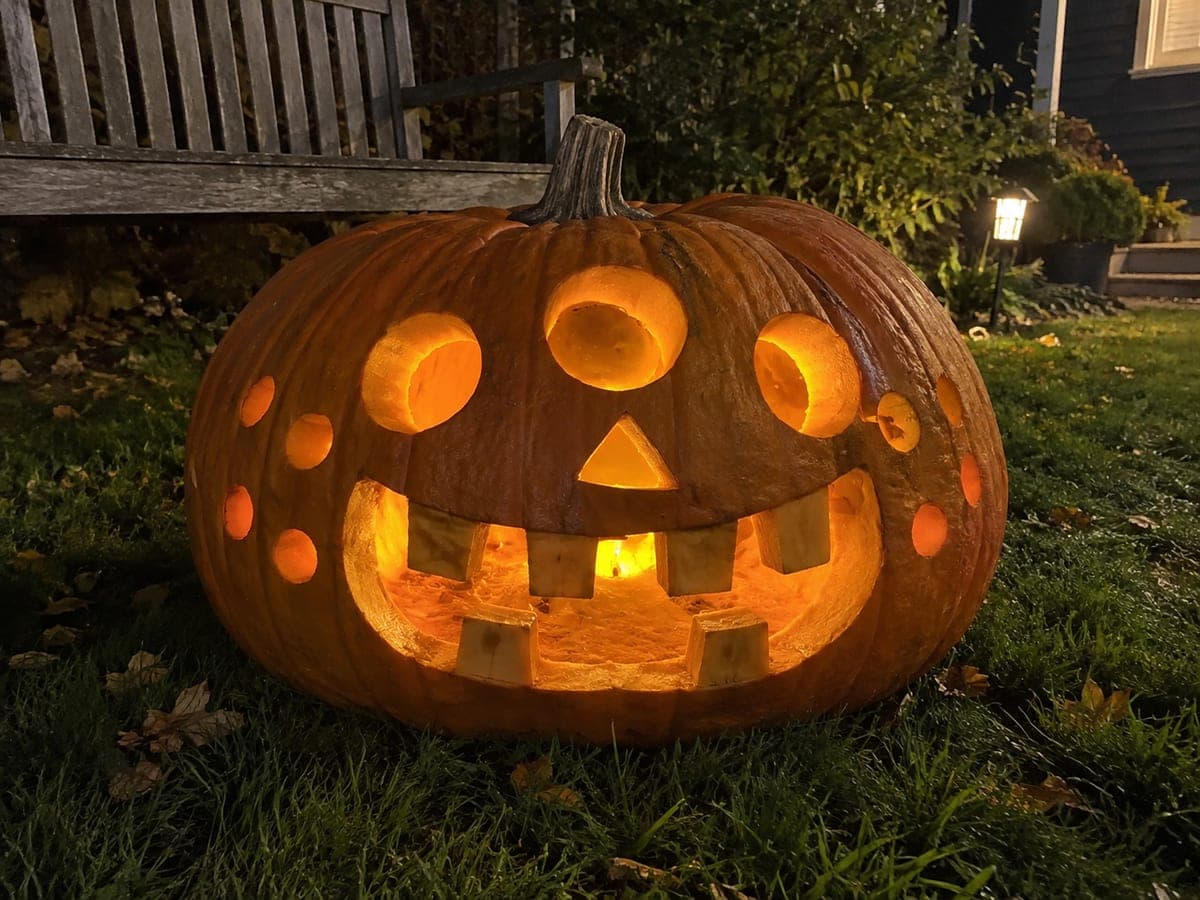
Three big circular eyes, a triangular nose, a large open mouth with five thick square teeth, and eight round cheek holes turn this 100-centimeter giant pumpkin into a friendly neighborhood monster. Use a long boning knife or jigsaw with a wood blade for the mouth since the span is wide and the rind is thick. Carve all three round eyes with the same hole-saw bit for consistent size, and keep at least 3 centimeters of rind between every opening.

No ratings yet · Sign in to rate
IntermediateFacesClassicClassic Cutout
giantfacelargeclassicmonsterthree-eyedround-eyecheek-dot

Save this design for carving night, then share a photo of your own jack-o'-lantern once it's glowing.

Comments (0)

  • No comments yet. Be the first.

Our tips for carving a similar design

Three matching circular eyes, a triangular nose, a wide mouth with five thick square teeth, and eight round cheek holes turn a 100-centimeter giant pumpkin into a friendly monster. A hole-saw bit delivers consistent eye circles, and a jigsaw or long boning knife handles the wide mouth opening efficiently. Keeping at least 3 centimeters of rind between every opening is essential at this scale.

From pumpkin to porch

  1. Hollow the giant pumpkin

    Cut a wide angled lid with a long serrated knife and scoop out all seeds and fiber using a large ice cream scoop. Scrape the interior walls to about 3 cm for even glow across all three eyes and the cheek holes. An adult handles all cutting throughout.

  2. Mark all feature positions

    Mark three equal-sized circles for the eyes, a triangle for the nose, the mouth rectangle with five tooth islands, and eight cheek dot positions. Confirm every opening has at least 3 cm of clear rind between it and the nearest neighbor before cutting anything.

  3. Drill all three eyes with a hole-saw bit

    Using the same hole-saw bit for all three eyes guarantees consistent size, which is what makes the triple-eye design read as intentional. Make a pilot indentation at each eye center with an awl first to prevent the bit from skating on the curved rind.

  4. Cut the triangular nose

    Use a long serrated knife or a jigsaw for the three straight nose cuts. Keep the nose proportionally small relative to the three eyes so the face reads as a monster rather than a standard jack-o-lantern.

  5. Cut the mouth with the five tooth islands

    Use a jigsaw or long boning knife to cut the outer mouth perimeter first. Then cut the sections between and around the five square teeth, leaving each tooth rooted to either the upper or lower edge. All five teeth must stay attached; free-floating teeth in a giant pumpkin carry significant weight and will fall.

  6. Drill cheek holes and light on the lawn

    Drill the eight round cheek holes with the same hole-saw bit used for the eyes, or a smaller bit for scale contrast. Loop a string of warm battery LED lights inside and set the pumpkin on the lawn. At 100 cm across, the glowing monster face is visible from the street.

Written with AI to match this design

Gather your supplies

Check things off as you get ready.

Work on a stable surface, keep your free hand out of the cutting path, and have an adult handle sharp tools.

Three levels of light

  • Leave intact

    All rind between the face features, the five rooted tooth islands, and the back and sides of the pumpkin stay solid and dark.

  • Peel & shade

    None; no skin peeling is used on this design.

  • Cut through

    All three circular eye holes, the triangular nose, the full mouth opening (with tooth islands), and all eight cheek dot holes are cut or drilled completely through.

Learn the carving basics

Before you start cutting

How do I make all three eyes exactly the same size?

A hole-saw bit is the most reliable method. Once you choose a bit size, all three eyes are guaranteed to be identical. Mark the center point of each eye with an awl pilot hole before drilling so the bit engages at exactly the right spot.

Five rooted square teeth sounds complex. What is the easiest way to cut them?

Cut the straight top and bottom lines of the mouth opening first, then cut the vertical lines that define each tooth gap. Work slowly along each vertical cut so you leave a clean flat-topped tooth attached to the upper edge. Thick square teeth at giant scale are actually forgiving because they are so wide.

How do I move a 100 cm pumpkin from the carving table to the lawn?

Carve it in place on a tarp or wheeled platform if possible. If you must move it, two people carry it by cradling the bottom; never lift by the stem. A 100 cm pumpkin can weigh 50 kg or more, so plan the final display location before you start carving.

Your take belongs here, too.

Changed a detail? Made it simpler? Share a photo of your version and tell the community what worked.

Share your pumpkin

Want more designs like this? Browse our full library of pumpkin carving ideas, or pick a free printable stencil. Every pattern and template in our own collection is free to print at home.

More pumpkins like this

You've reached the end · 8 pumpkins
The Patch Report

Fresh pumpkins, in your inbox.

The best new carvings, ideas worth stealing, and how-tos for carving season. Short, seasonal, and gone by November.

A short email during carving season. Unsubscribe anytime. See our privacy policy.