Halloween Pumpkin Carving Contest · Starts October 1st · $500 in prizes
← Back to ideas
@ai_concepts
Sep 25, 2026
Castle Giant Pumpkin Lantern With Arched WindowsAI
0

Report this carving

Tell us what is wrong. Reports are private.

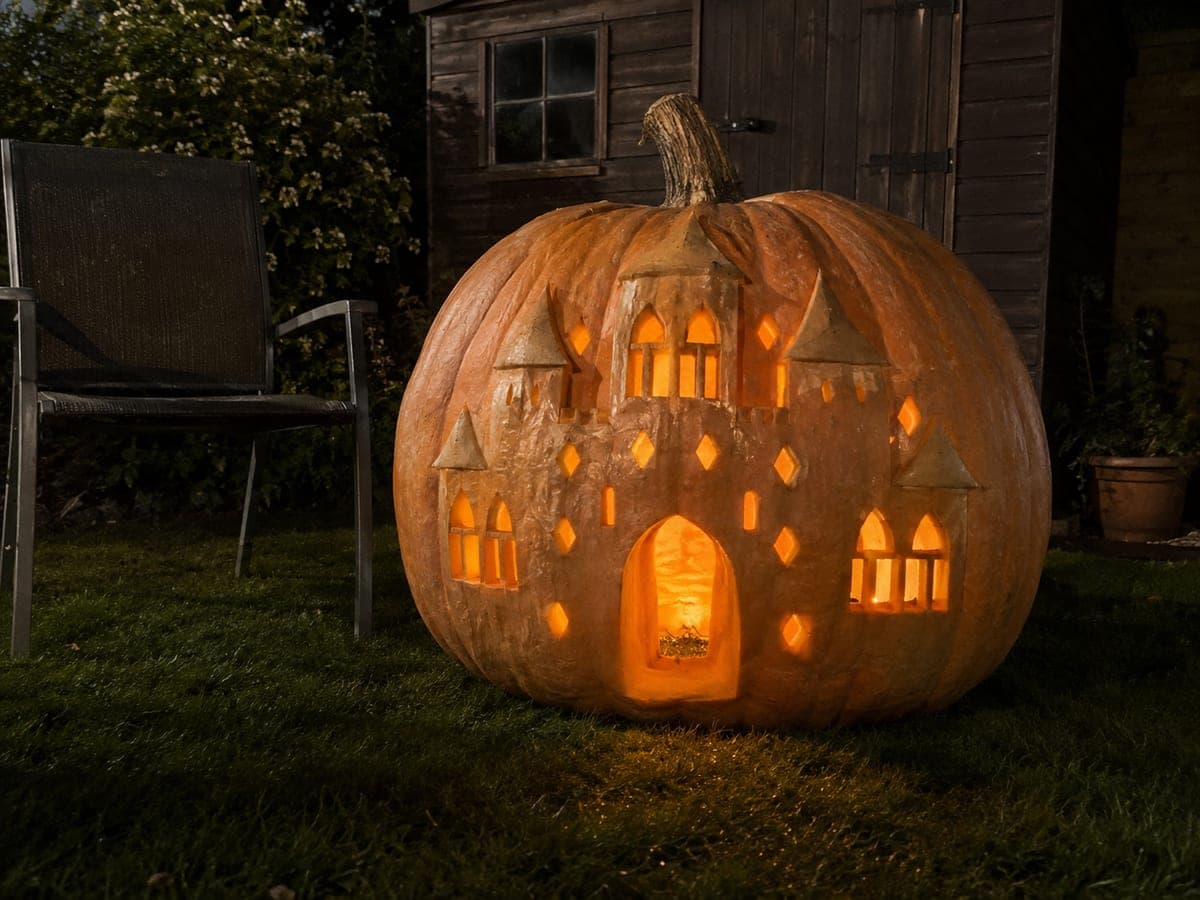
Castle Giant Pumpkin Lantern With Arched Windows

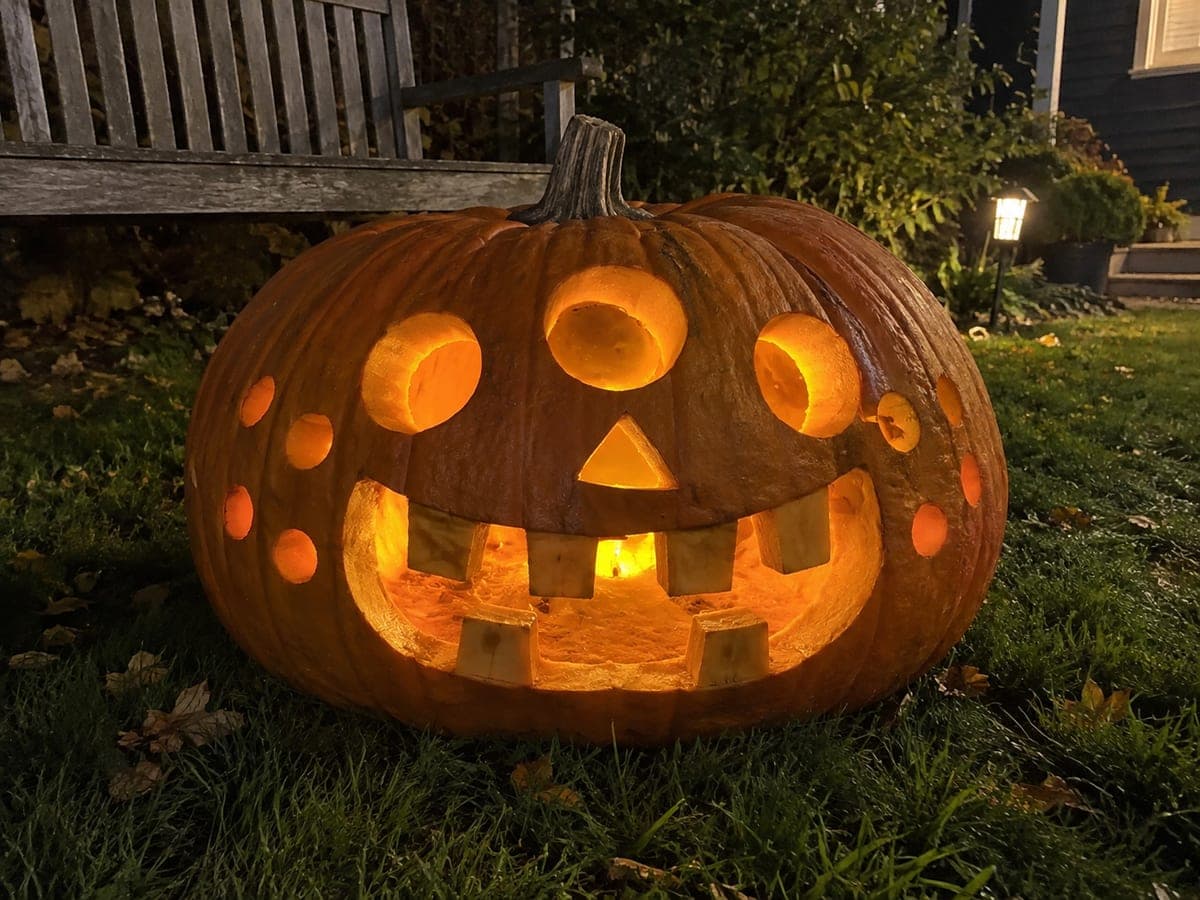
A carved castle covers this giant pumpkin with open arched windows fitted with connected crossbars, a glowing doorway, and diamond accent holes, while rooftop and wall details are shallow surface-carved areas backed by solid flesh so they glow dimly rather than fully through. Cut the through-apertures before the surface carvings, since removing material from outside gives you better leverage on the large shell. Window crossbars must connect to the outer frame on all sides; test each bar for rigidity before moving on. Beside a garden chair at night, this giant pumpkin carving idea looks like a miniature illuminated castle keep.

No ratings yet · Sign in to rate
Comments (0)

  • No comments yet — be the first.

Save without an account. Sign in to like or comment.

Our tips for carving a similar design

Castle windows, a glowing doorway, diamond accent holes, and shallow surface carvings for rooftop and wall details combine cut-through apertures with skin-scraped sections that glow dimly rather than fully through. Cutting all through-apertures before the surface carvings is the key sequence, since the leverage and structural support are greatest at that stage. Every window crossbar must connect to its outer frame on all sides or it will crack under the rind weight.

From pumpkin to porch

  1. Hollow and thin the rind strategically

    Cut a wide angled lid on this giant pumpkin and scoop out all seeds and fiber thoroughly. Scrape the overall interior to about 3 cm, but identify the rooftop and wall surface-carve areas and scrape those zones down to about 5 to 6 mm so they will glow dimly. An adult handles all cutting.

  2. Plan the castle layout on paper

    Draw the castle face showing window positions with crossbars, the doorway opening, diamond accents, and the surface-carved roof and wall zones. Confirm every window crossbar arm is at least 10 mm wide and connects to the outer frame at all four sides.

  3. Transfer the full design

    Toothpick-poke all outlines from the paper layout onto the pumpkin surface. Connect poke marks with a fine-tip marker, clearly labeling surface-carve zones as distinct from through-cut zones to prevent accidental full cuts in the wrong areas.

  4. Cut all through-apertures first

    Start with the doorway as the largest opening, which provides interior access for debris removal. Then cut the arched window frames and carefully remove the material around each crossbar, leaving all four crossbar attachment points intact. Cut the diamond holes last among the through-cuts.

  5. Surface-carve the roof and wall details

    Use a loop gouge or large spoon to scrape the pre-thinned rooftop and wall zones from outside, reducing them to a consistent 5 to 6 mm of remaining flesh. Work in smooth overlapping passes and check from inside with a flashlight to confirm an even faint glow without cutting through.

  6. Light and display beside the garden chair

    Loop warm battery LED strings inside for full cavity coverage. Replace the lid and set beside the garden chair at night. The brighter window and doorway light contrasts with the softer surface-carved wall glow to create a convincing miniature illuminated castle keep effect.

Written with AI to match this design

Gather your supplies

Check things off as you get ready.

Work on a stable surface, keep your free hand out of the cutting path, and have an adult handle sharp tools.

Three levels of light

  • Leave intact

    All thick outer rind of the castle walls and all rind between windows stays fully dark.

  • Peel & shade

    Rooftop and wall detail zones are scraped to 5 to 6 mm from outside, creating a soft diffused glow in those areas.

  • Cut through

    All arched window apertures (around the crossbars), the glowing doorway opening, and all diamond accent holes are cut fully through for bright light.

Learn the carving basics

Before you start cutting

How do I avoid accidentally cutting through a surface-carve zone when I am working nearby?

Label each surface-carve zone clearly with a circled S in marker before starting, and keep your blade angle very shallow when working in those areas. A loop gouge scrapes laterally rather than driving inward, which is inherently safer than a knife in surface-carve zones.

My window crossbars feel wobbly after I cut the surrounding arch. Is there a way to reinforce them?

Yes. Thin a small strip of clean rind from inside and press it against the back of the crossbar as a splint, held in place with a small amount of non-toxic craft glue. This adds meaningful structural support without affecting the visual of the window from outside.

How do I get clean arch curves on a giant rind that is 4 cm thick?

Score the arch outline with a detail knife on the first pass to create a clean guide groove, then follow it with a longer blade or jigsaw on the second pass. The scored groove keeps the blade from wandering and gives a precise arch edge even in deep rind.

Your take belongs here, too.

Changed a detail? Made it simpler? Share a photo of your version and tell the community what worked.

Share your pumpkin

More pumpkins like this

You've reached the end · 8 pumpkins
The Patch Report

Fresh pumpkins, in your inbox.

The best new carvings, ideas worth stealing, and how-tos for carving season. Short, seasonal, and gone by November.

A short email during carving season. Unsubscribe anytime. See our privacy policy.