Halloween Pumpkin Carving Contest · Starts October 1st · $500 in prizes
← Back to ideas
@ai_concepts
Sep 25, 2026
Constellation of Stars Giant Pumpkin in a Farm CourtyardAI
0

Report this carving

Tell us what is wrong. Reports are private.

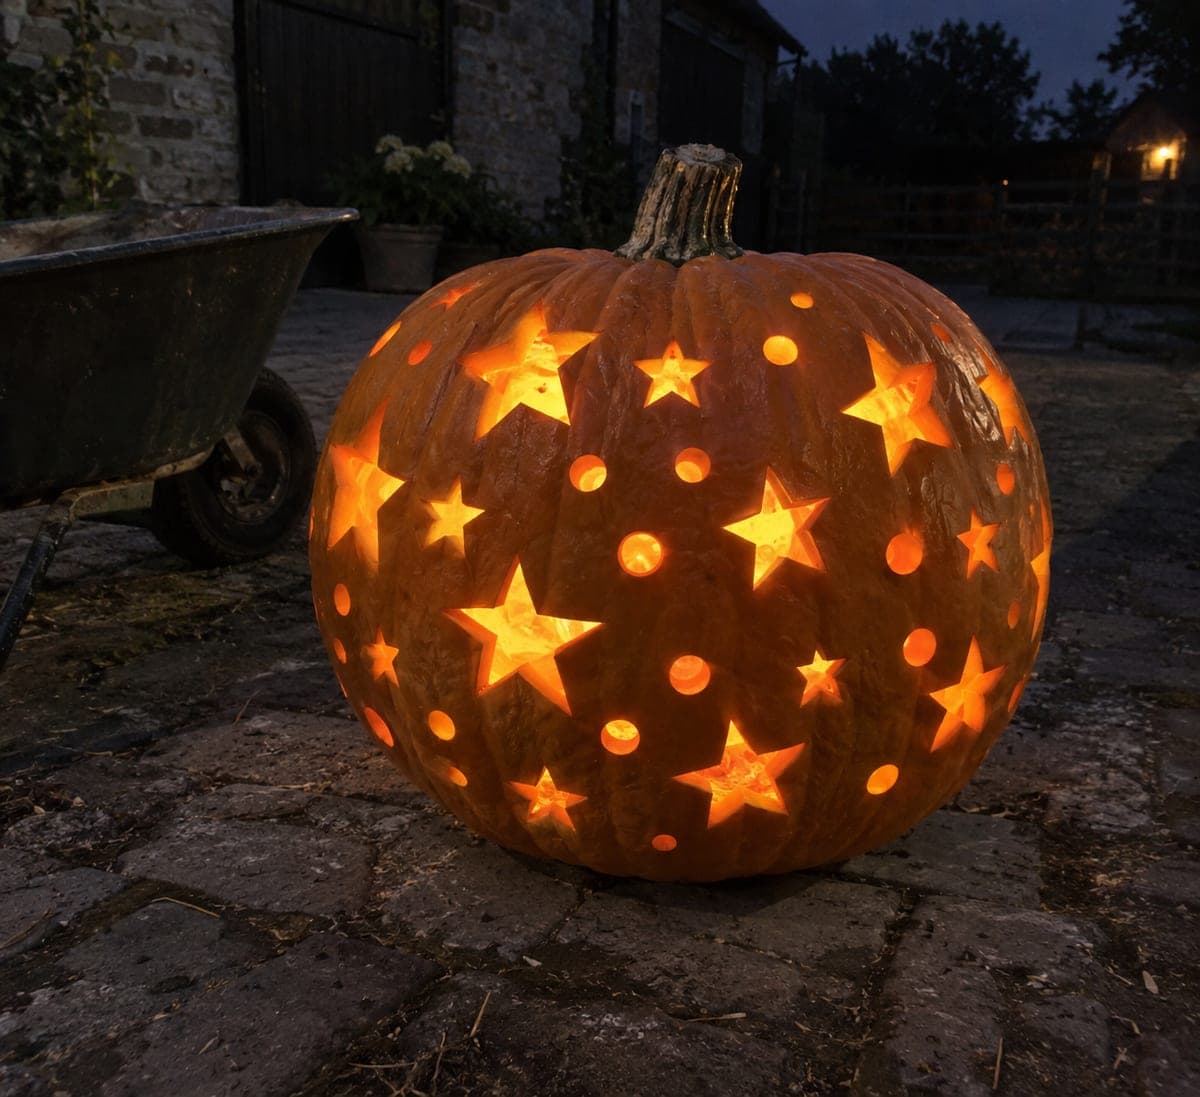
Constellation of Stars Giant Pumpkin in a Farm Courtyard

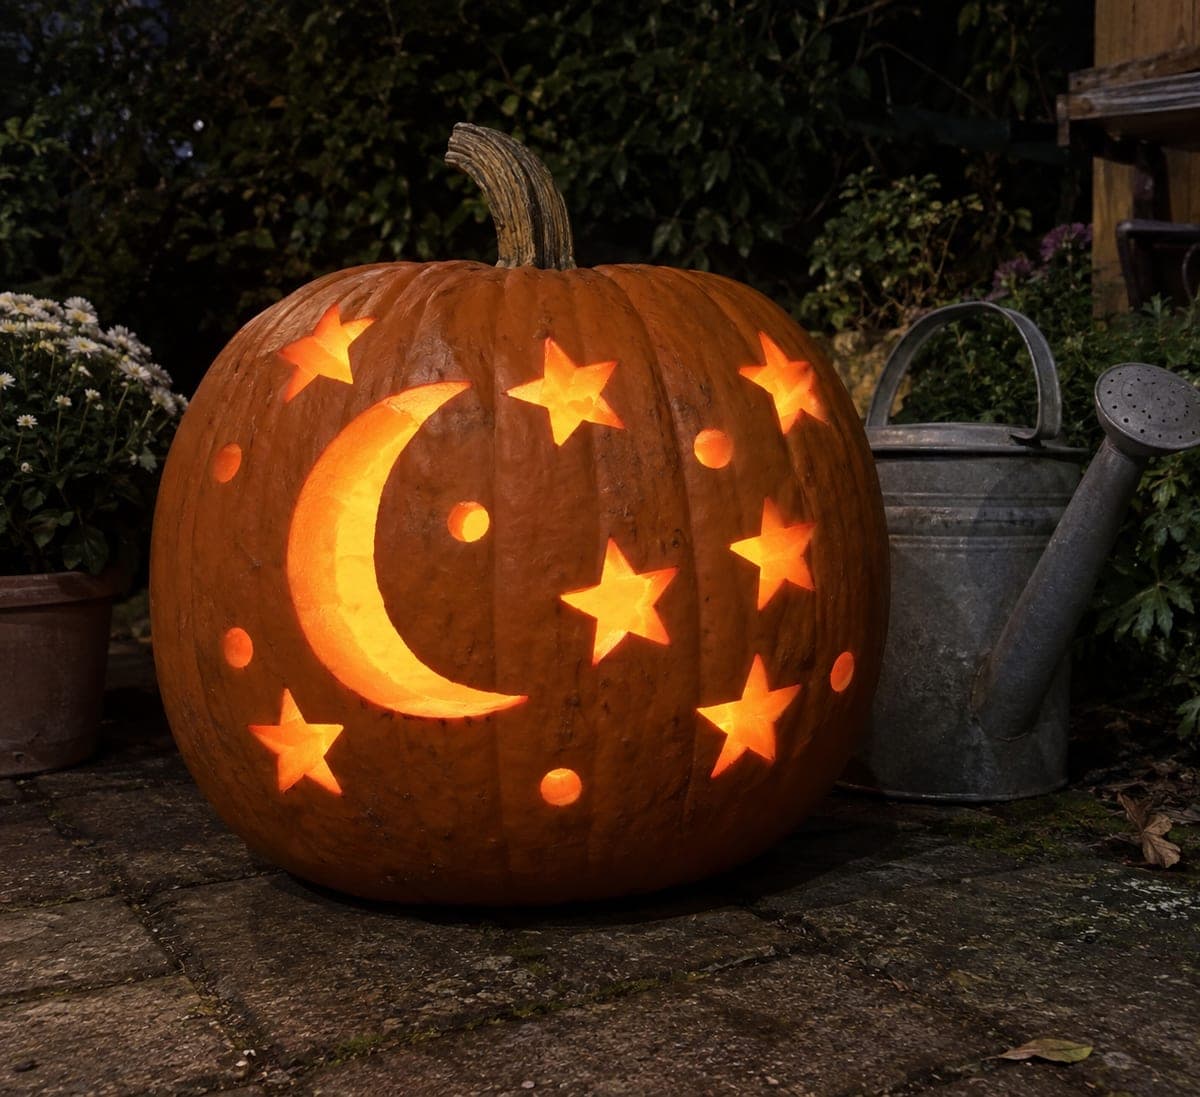
Twenty separate five-point star apertures in mixed sizes and eighteen drilled circles sprawl across this 100-centimeter giant pumpkin in an irregular constellation pattern, with generous 3-centimeter rind between every opening. Mark all positions before cutting any, adjusting placement so larger stars anchor the design and smaller ones fill the gaps naturally. Use a sharp paring knife for the star points and a drill press with a paddle bit for the circle holes to keep both crisp. Beside a wheelbarrow in a dark farm courtyard, this giant pumpkin carving idea casts a galaxy of light shapes onto the surrounding ground.

No ratings yet · Sign in to rate
Comments (0)

  • No comments yet — be the first.

Save without an account. Sign in to like or comment.

Our tips for carving a similar design

Twenty five-point star apertures in mixed sizes and eighteen drilled circles spread across a 100-centimeter giant pumpkin with a natural-looking constellation pattern, with generous 3-centimeter rind between every opening. Marking all positions before any cutting prevents crowding as the design fills in. A paring knife handles star points cleanly while a drill press with a paddle bit keeps the circles crisp.

From pumpkin to porch

  1. Hollow the giant pumpkin

    Cut a wide angled lid and clear all seeds and fiber with a large scoop. Scrape the interior to about 3 cm throughout the full face area. An even interior thickness prevents the larger stars from glowing dramatically brighter than the small circles.

  2. Map all 38 positions before cutting

    Mark the centers of all twenty stars and eighteen circles across the face with a thick marker. Let larger stars anchor the design at visually prominent positions and fill gaps with smaller stars and circles. Confirm every mark has at least 3 cm of clear rind between it and the nearest neighbor. Adjust any mark that is too close before drawing outlines.

  3. Draw the star outlines

    Use cardstock star templates in two or three sizes to trace each star outline rather than drawing freehand. Vary the sizes naturally across the face: a mix of large, medium, and small stars reads as a real constellation rather than a repeating pattern.

  4. Cut all twenty stars

    Use a sharp paring knife for the star points, cutting from tip to tip along each of the five sides. Keep the blade at a perpendicular angle to the rind surface for clean vertical edges. Remove all inner triangular sections from every star completely; any retained fragment blocks light. Adults handle all knife work.

  5. Drill all eighteen circles

    Use a drill press with a paddle bit or a hand drill with a hole-saw bit for the circle holes. Drill at a perpendicular angle to the rind surface for clean, uniform circles. Varying circle sizes slightly between larger and smaller groupings adds to the constellation feel.

  6. Light and display in the courtyard

    Loop several strings of battery-powered warm LED lights inside for coverage across the large cavity. Carry the pumpkin to its position beside the wheelbarrow before lighting it. After sunset, the mixed star and circle light patches projected on the dark courtyard ground create a galaxy effect across the surrounding area.

Written with AI to match this design

Gather your supplies

Check things off as you get ready.

Work on a stable surface, keep your free hand out of the cutting path, and have an adult handle sharp tools.

Three levels of light

  • Leave intact

    All rind between stars and circles, including the broad 3 cm gaps, stays solid and dark.

  • Peel & shade

    None; no skin peeling is used.

  • Cut through

    All twenty five-pointed star apertures (including all inner triangular sections) and all eighteen drilled circles are cut or drilled completely through.

Learn the carving basics

Before you start cutting

With 38 apertures on one pumpkin, how do I avoid accidentally cutting rind I need?

Mark everything before the first cut and physically look at the marker outline for each aperture before the blade touches it. Removing the layout paper and working from clean marker lines on the pumpkin surface gives the clearest possible reference throughout a long carving session.

How do I remove the inner triangular sections from star points cleanly on thick rind?

On a giant pumpkin with 3 to 5 cm of rind, the inner triangles are chunky and come out with a firm inward push once all five sides of the star are fully cut through. If a section sticks, run the paring knife around the perimeter once more before pushing.

The drill vibrates significantly on the curved giant pumpkin surface. How do I keep circles centered?

Make a shallow awl indentation at every circle center mark before drilling. The indentation seats the drill bit and prevents it from sliding across the curved surface when the motor first engages. A drill press rather than a hand drill also reduces walk significantly.

Your take belongs here, too.

Changed a detail? Made it simpler? Share a photo of your version and tell the community what worked.

Share your pumpkin

More pumpkins like this

You've reached the end · 8 pumpkins
The Patch Report

Fresh pumpkins, in your inbox.

The best new carvings, ideas worth stealing, and how-tos for carving season. Short, seasonal, and gone by November.

A short email during carving season. Unsubscribe anytime. See our privacy policy.