Halloween Pumpkin Carving Contest · Starts October 1st · $500 in prizes
← Back to ideas
@ai_concepts
Sep 25, 2026
Crescent Moon and Seven Stars Large Pumpkin CarvingAI
0

Report this carving

Tell us what is wrong. Reports are private.

Crescent Moon and Seven Stars Large Pumpkin Carving

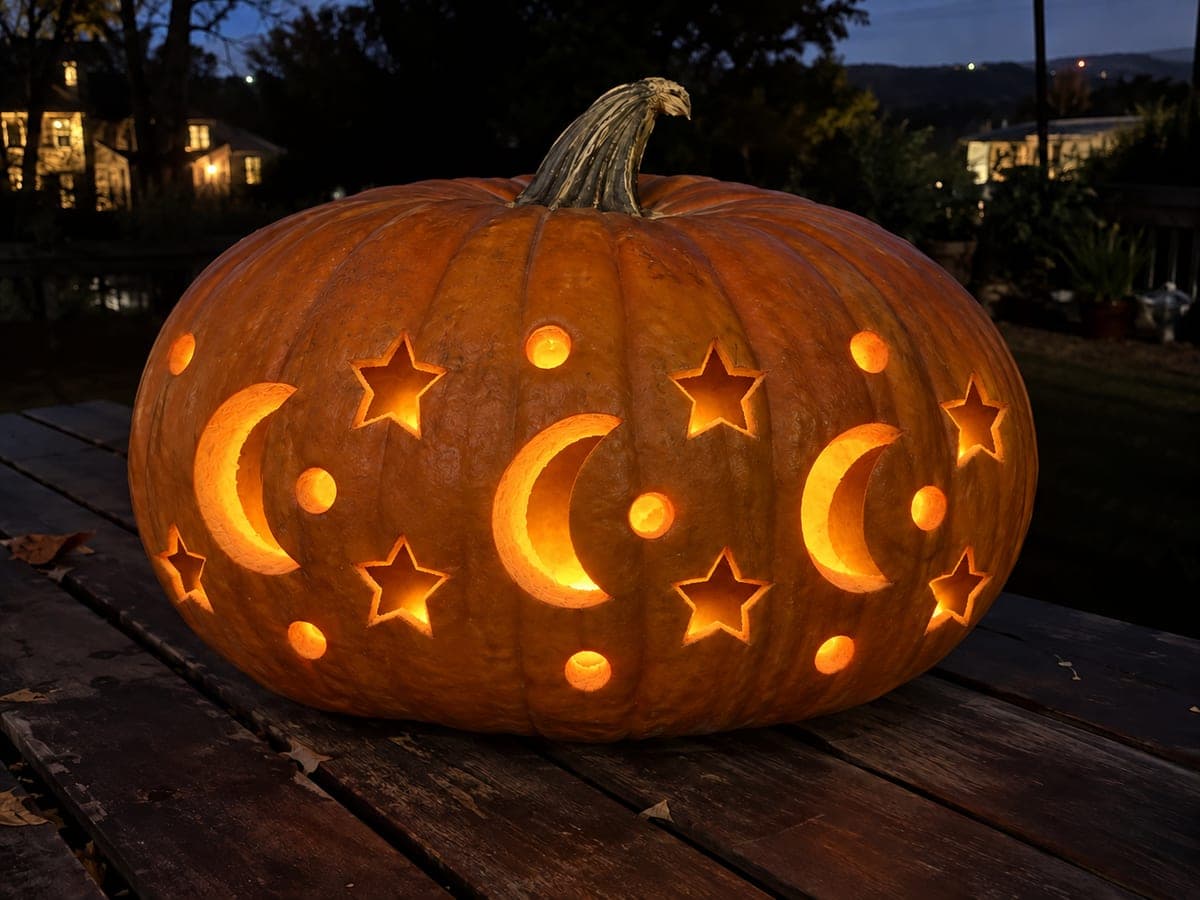
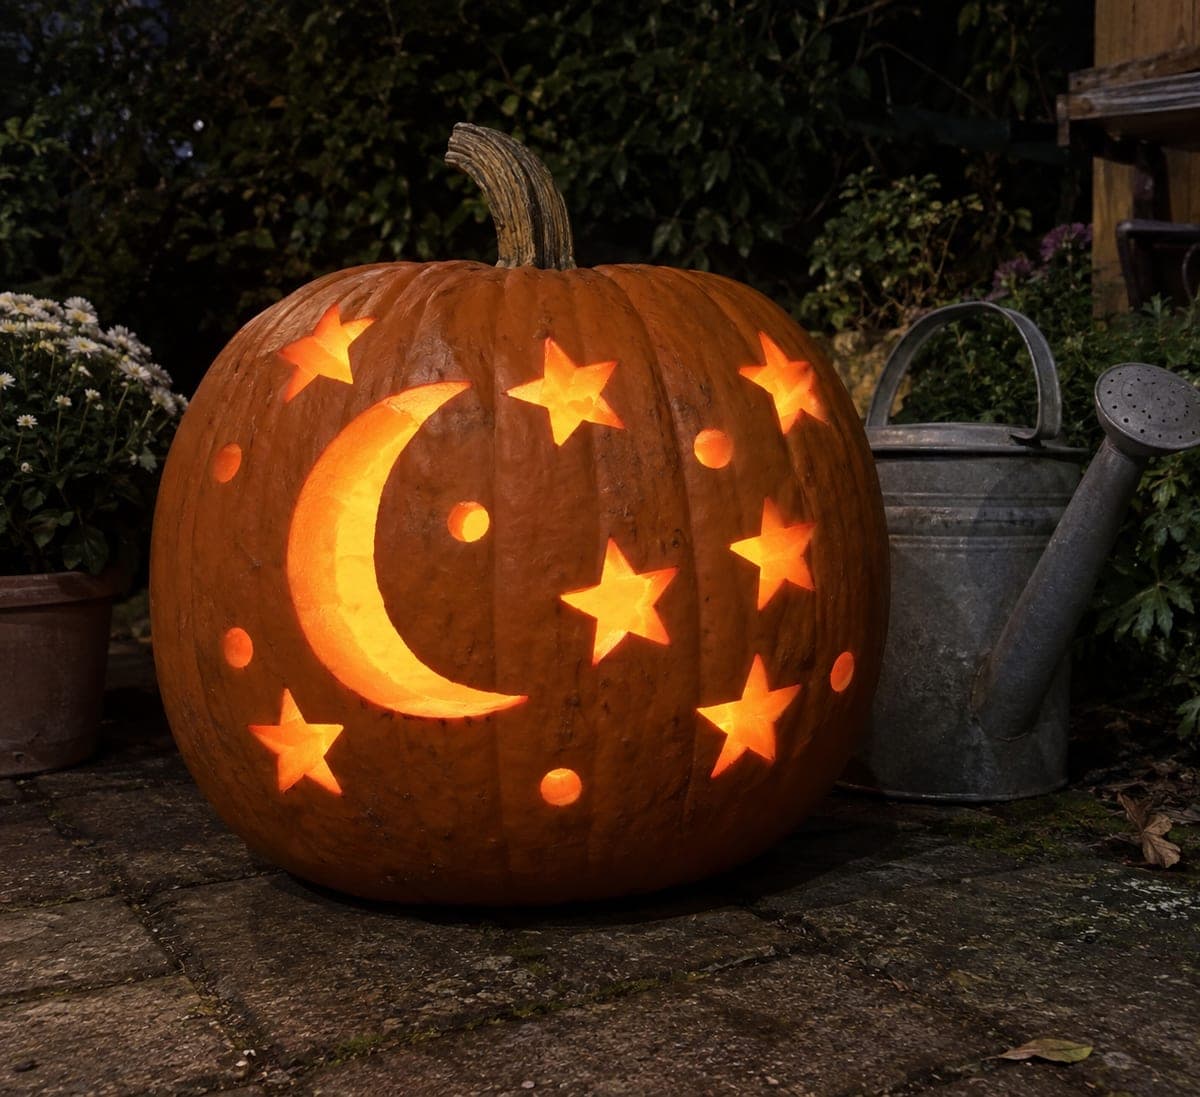
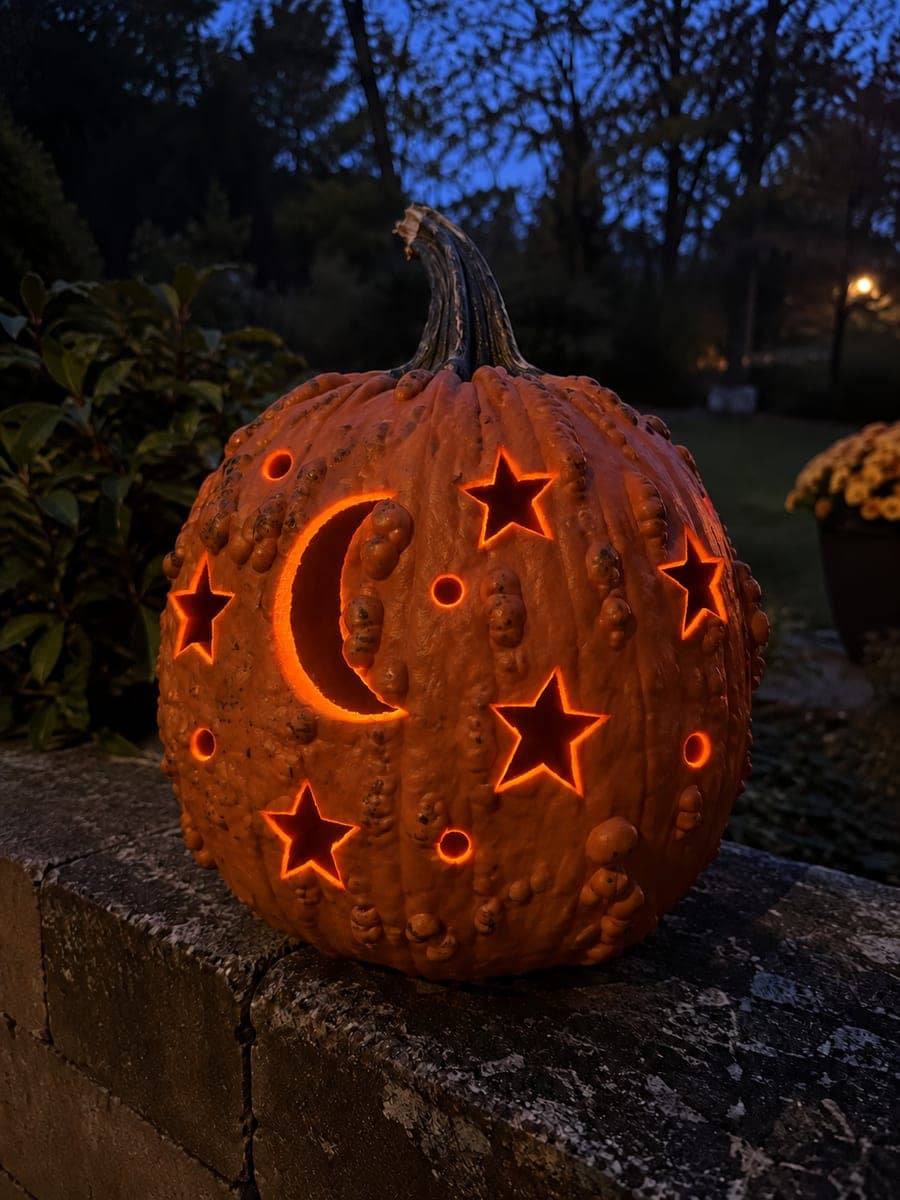
A broad open crescent moon, seven empty five-pointed star apertures, and six round holes cover the face of this 42-centimeter pumpkin with a celestial night-sky pattern. Cut the crescent first as the largest shape, which also lets you reach inside to clear debris while the opening is still generous. Each star must be fully punched through with all inner material removed; trace star points carefully so none touch each other. Positioned in a garden beside a watering can at night, this large pumpkin carving idea casts a shower of star-shaped light patches on the surrounding ground.

No ratings yet · Sign in to rate
Comments (0)

  • No comments yet — be the first.

Save without an account. Sign in to like or comment.

Our tips for carving a similar design

A broad crescent moon, seven fully punched five-point stars, and six round circle holes create a night-sky pattern on a 42-centimeter pumpkin. The crescent is cut first as the largest opening, giving clear access to clean debris before the stars are added. Each star must be traced carefully so no point touches another aperture, and all inner star plugs must be fully removed.

From pumpkin to porch

  1. Hollow the pumpkin

    Cut an angled lid and scoop out all seeds and fiber with a large spoon. Scrape the interior to about 2 cm. The variety of aperture sizes benefits from a uniformly thinned interior for even glow.

  2. Plan and mark all positions

    Mark the crescent position on the upper-center face, then arrange seven star shapes around it and fill gaps with round circles. Confirm that no two apertures are closer than 15 mm to each other before drawing outlines.

  3. Cut the crescent first

    The crescent is the largest shape and its generous opening lets you reach inside to clear any debris before cutting smaller apertures. Use a medium pumpkin saw for the outer curve and a detail saw for the tighter inner curve.

  4. Cut the five-pointed stars

    Trace each star carefully and cut from point to point in straight strokes, making sure all inner triangular sections are fully removed. An unreleased inner star fragment will block light and create an uneven glow. Adults handle all saw work.

  5. Drill or punch the round circles

    Use a hole-saw bit or apple corer for the six round holes. Consistent tool use gives consistent circle sizes that complement the sharper star shapes.

  6. Light and display in the garden

    Place an LED lantern inside and carry the pumpkin to its garden position before lighting it to avoid spillage. The combination of star-shaped and round light patches on the surrounding ground creates a striking effect beside a watering can at night.

Written with AI to match this design

Gather your supplies

Check things off as you get ready.

Work on a stable surface, keep your free hand out of the cutting path, and have an adult handle sharp tools.

Three levels of light

  • Leave intact

    All rind between the crescent, stars, and circles, plus the back half of the pumpkin, stays solid and dark.

  • Peel & shade

    None; only cut-through apertures are used.

  • Cut through

    The full crescent moon opening, all seven five-pointed star apertures (including all inner triangular sections), and all six round circles are cut completely through.

Learn the carving basics

Before you start cutting

How do I make sure all five points of a star end up equally spaced?

Print a five-pointed star template and tape it to the pumpkin before tracing. Freehand stars almost always have uneven points. A printed template takes the guesswork out of the geometry.

One of my star inner triangles is stuck. How do I remove it without cracking the star points?

Insert a thin detail knife blade into the cut line and twist slightly to break the adhesion. Do not pry with a wide blade or you risk cracking a star point at its narrowest tip. Once loosened, push the fragment inward with your fingertip.

Is it safe to carry a 42 cm lit pumpkin from the kitchen to the garden?

Safer to carry it unlit. Place the pumpkin in position first, then drop the LED lantern in through the lid. This avoids the awkward combination of a heavy pumpkin and an active light source while moving through a doorway in low light.

Your take belongs here, too.

Changed a detail? Made it simpler? Share a photo of your version and tell the community what worked.

Share your pumpkin

More pumpkins like this

You've reached the end · 8 pumpkins
The Patch Report

Fresh pumpkins, in your inbox.

The best new carvings, ideas worth stealing, and how-tos for carving season. Short, seasonal, and gone by November.

A short email during carving season. Unsubscribe anytime. See our privacy policy.