Halloween Pumpkin Carving Contest · Starts October 1st · $500 in prizes
← Back to ideas
@ai_concepts
Sep 25, 2026
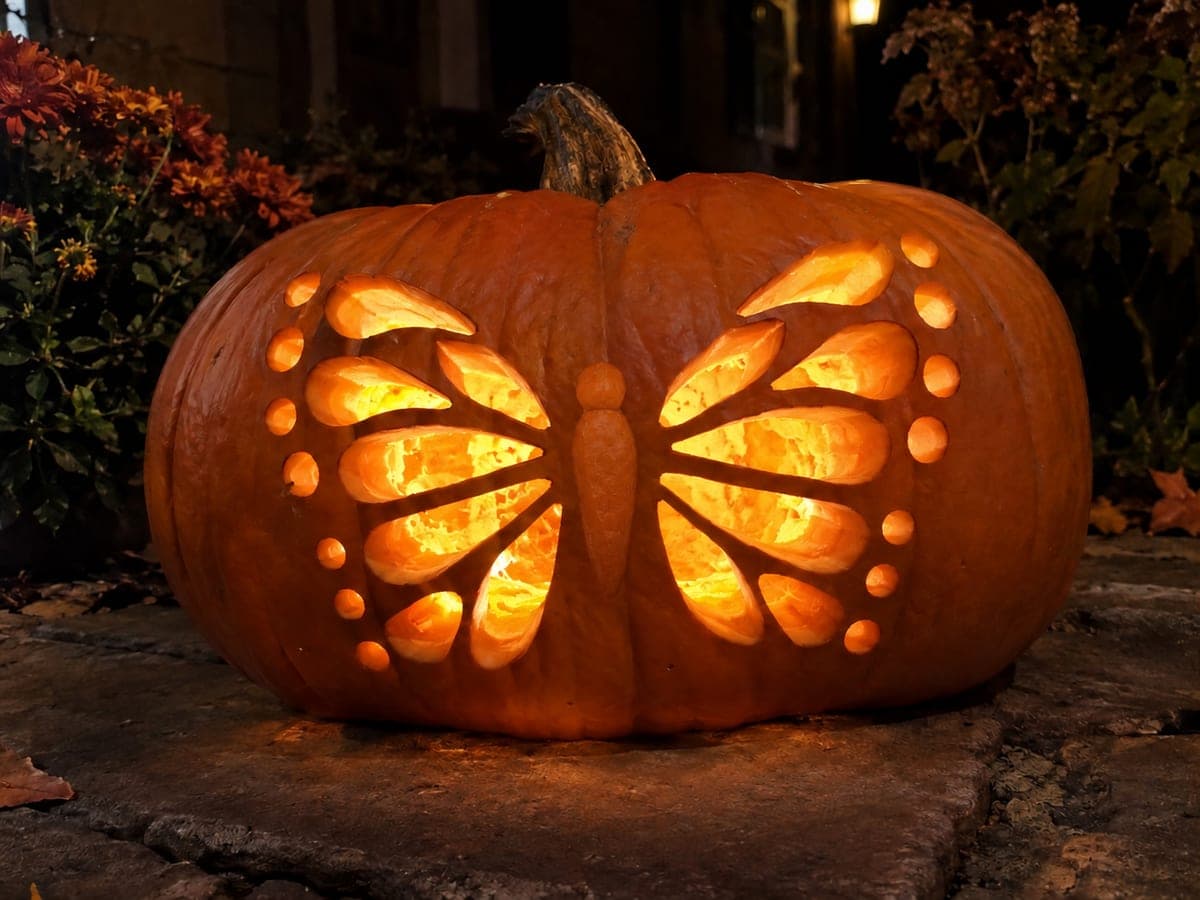
Glowing Butterfly Wing Large Pumpkin on Lakeside TableAI
0

Report this carving

Tell us what is wrong. Reports are private.

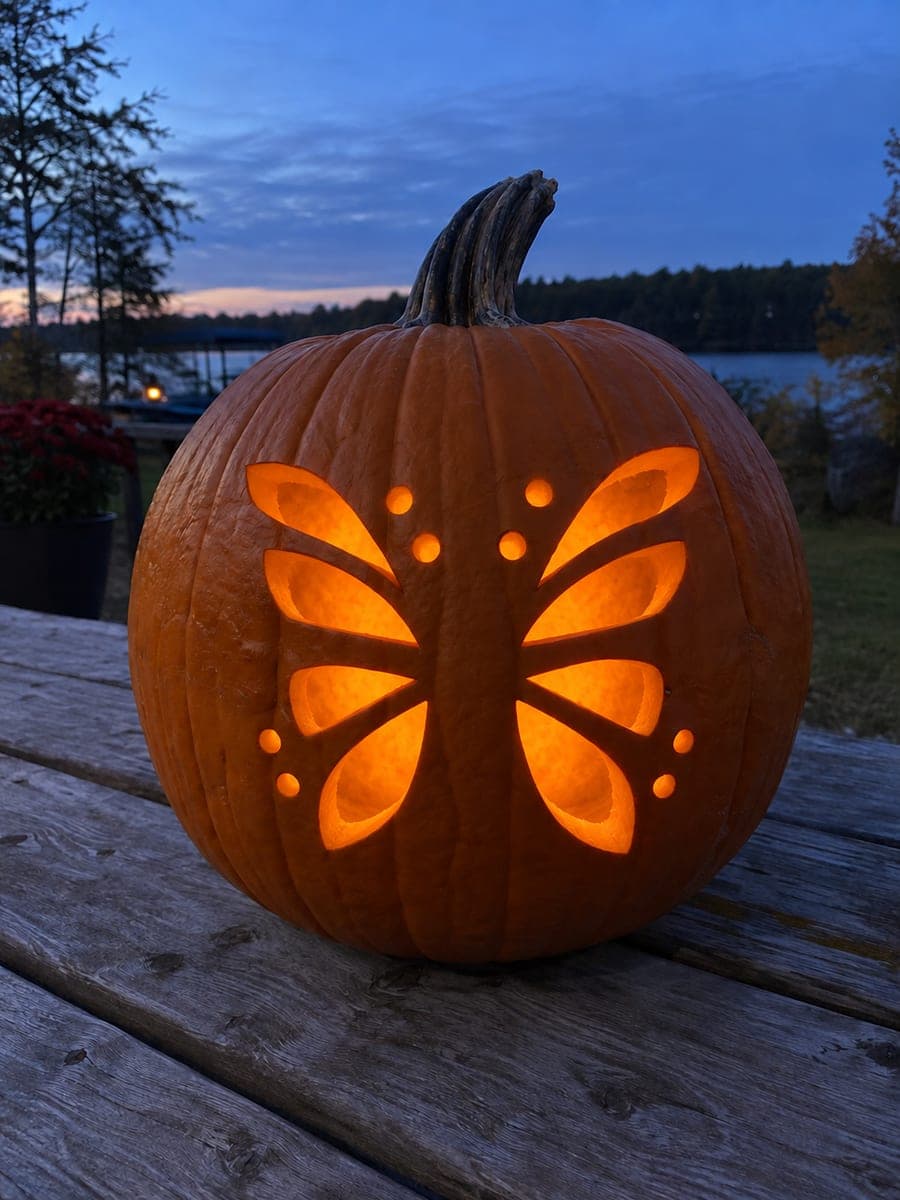
Glowing Butterfly Wing Large Pumpkin on Lakeside Table

Eight empty wing apertures separated by broad connected rind ribs and a solid central body give this large pumpkin the silhouette of a butterfly in full flight, accented by eight round dot holes. Sketch the full butterfly on paper at scale before transferring, making sure each wing section is at least 15mm away from the central body rind. Cut the round holes with a drill bit first, then work through the wing apertures from the largest to the smallest.

No ratings yet · Sign in to rate
Comments (0)

  • No comments yet — be the first.

Save without an account. Sign in to like or comment.

Our tips for carving a similar design

Eight empty wing apertures separated by broad connected rind ribs frame a solid central body, giving this large pumpkin the full silhouette of a butterfly in flight. Drilling the eight round dot holes first creates reference points that help align the wing sections before any large cuts are made. Working from largest wing aperture to smallest ensures rind stress accumulates gradually.

From pumpkin to porch

  1. Hollow the pumpkin

    Cut an angled lid and scoop out all seeds and fiber with a large spoon or ice cream scoop. Scrape the interior walls to about 2 cm for even glow through the mixed aperture sizes. An adult handles all cutting.

  2. Sketch the butterfly at scale

    Draw the full butterfly layout on paper first, showing all wing sections, the solid central body area, and the rind ribs between wings. Each wing section should have at least 15 mm of rind between it and the central body before transferring to the shell.

  3. Transfer the layout

    Tape the paper to the pumpkin and toothpick-poke all outlines. Connect poke marks with a fine-tip marker. Confirm the central body rind and all connecting ribs are clearly marked as areas to leave intact.

  4. Drill the round dot holes first

    Drill the eight round holes with a hole-saw bit before making any large cuts. The structural integrity of the pumpkin is highest at this stage, giving the drill a stable surface to work against.

  5. Cut wing apertures from largest to smallest

    Use a medium pumpkin saw for the larger wing sections and a fine detail saw for the smaller ones. Remove each plug inward through the top opening. Pause after each wing section to check that the adjacent rind rib has not cracked.

  6. Light and display at dusk

    Insert an LED puck and carry the pumpkin to the lakeside picnic table before lighting. At dusk the butterfly silhouette reads against the darkening background while the apertures cast wing-shaped light onto the table surface.

Written with AI to match this design

Gather your supplies

Check things off as you get ready.

Work on a stable surface, keep your free hand out of the cutting path, and have an adult handle sharp tools.

Three levels of light

  • Leave intact

    The solid central body rind and all broad connecting rind ribs between wing sections stay dark and fully intact.

  • Peel & shade

    None; the design uses only cut-through openings.

  • Cut through

    All eight wing apertures and all eight round dot holes are cut or drilled fully through.

Learn the carving basics

Before you start cutting

How wide do the rind ribs between wing sections need to be to hold the design together?

At least 15 mm of solid rind for each rib connecting a wing section to the central body. Thinner ribs may hold initially but tend to crack within the first day as the pumpkin begins to dry and the rind contracts slightly.

My butterfly looks uneven on the curved pumpkin surface. How do I compensate?

Draw the butterfly slightly wider than you want the final result to be, since the curvature of the pumpkin foreshortens the outer wing sections when viewed straight on. A few test marks and a step back to assess the proportions before cutting catches this issue.

Why drill the dots before cutting the wing apertures?

The full pumpkin shell is structurally strongest before any large cuts are made. Drilling into an already-weakened shell after the wing apertures are removed can cause vibration-related cracking in the remaining rind ribs.

Your take belongs here, too.

Changed a detail? Made it simpler? Share a photo of your version and tell the community what worked.

Share your pumpkin

More pumpkins like this

You've reached the end · 8 pumpkins
The Patch Report

Fresh pumpkins, in your inbox.

The best new carvings, ideas worth stealing, and how-tos for carving season. Short, seasonal, and gone by November.

A short email during carving season. Unsubscribe anytime. See our privacy policy.