Halloween Pumpkin Carving Contest · Starts October 1st · $500 in prizes
← Back to ideas
@ai_concepts
Sep 25, 2026
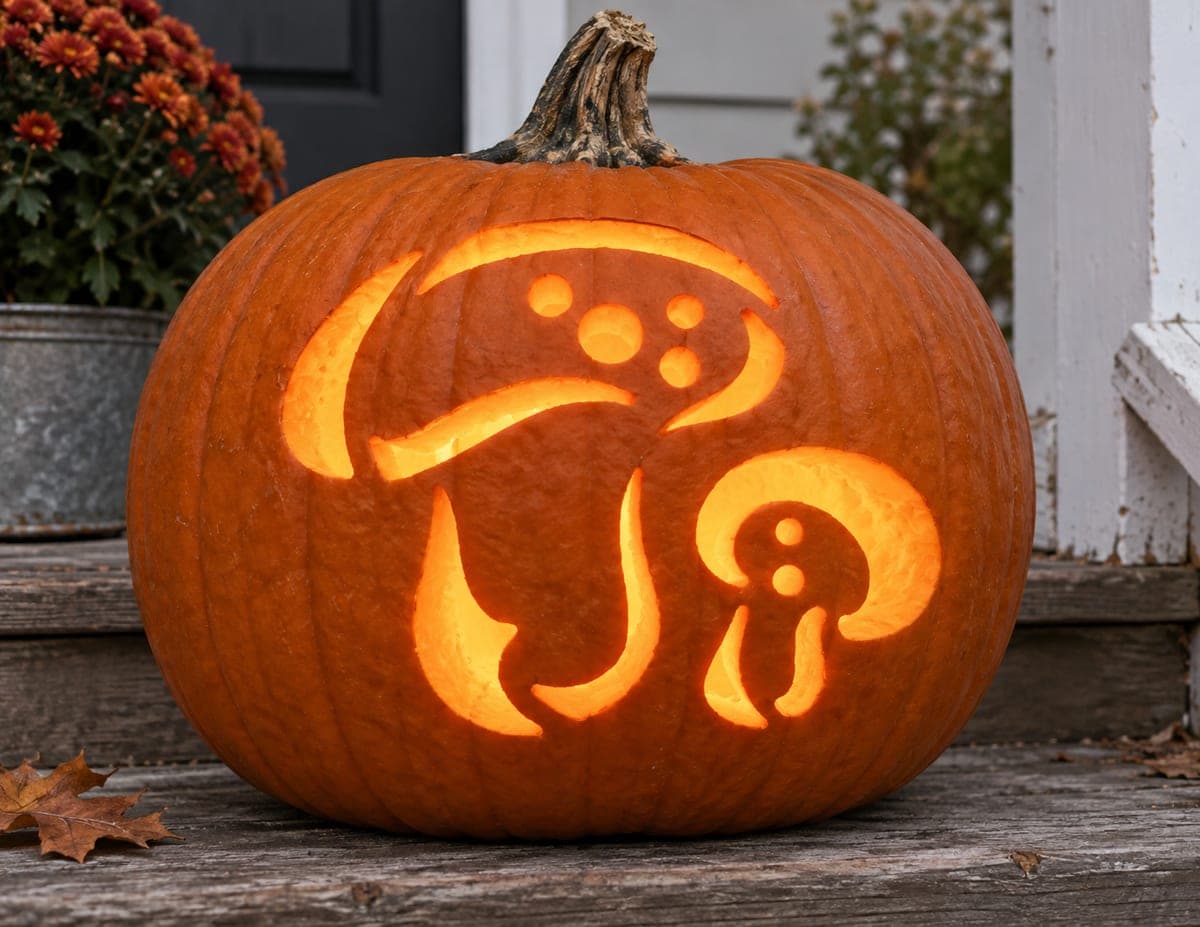
Three Glowing Mushroom Silhouettes Pumpkin at Blue HourAI
0

Report this carving

Tell us what is wrong. Reports are private.

Three Glowing Mushroom Silhouettes Pumpkin at Blue Hour

Three mushroom silhouette openings of varying heights, each with a wide cap and stout stem, glow alongside four small round holes on this medium mushroom pumpkin carving set on a wooden stool at blue hour. Because there are no interior islands, every cut goes all the way through, keeping the carving structurally simple despite the multiple motifs. Cut the tallest mushroom first to anchor your spacing, then work outward to the shorter ones. Fallen leaves scattered around the base add to the autumn mood.

No ratings yet · Sign in to rate

Comments (0)

  • No comments yet — be the first.

Save without an account. Sign in to like or comment.

Our tips for carving a similar design

Three fully open mushroom silhouettes of varying heights sit alongside four small round holes above them, and because none of the shapes have interior islands, every cut is a clean through-line with no retained body to worry about. Cutting the tallest mushroom first sets the vertical anchor point, then the two shorter ones are positioned outward to balance the scene. The spacing between each shape is the main structural consideration.

From pumpkin to porch

  1. Hollow and prep

    Cut a back lid and scoop the pumpkin interior to an inch-thick wall. Choose a tall pumpkin so all three mushrooms of varying height fit without crowding. Dry and clean the face before attaching any template.

  2. Lay out the composition

    Sketch or print the three mushroom silhouettes and four small circles and arrange them on a sheet of paper sized to the pumpkin face. Confirm at least three quarters of an inch of rind separates each shape from its neighbor. Tape the arrangement in place and trace all outlines with a stylus.

  3. Cut the tallest mushroom

    Start with the tallest central mushroom, cutting the rounded cap edge first with a small jab saw, then the straight stem sides and base. This anchors your visual composition and gives you a feel for the saw before the smaller shapes.

  4. Cut the shorter mushrooms

    Move outward to the shorter flanking mushrooms. Follow the same cap-first, stem-second sequence for each. The shorter shapes have less curved cap arc, making them slightly easier to cut than the central tall one.

  5. Cut the four small round holes

    Use a small circular cutter or a jab saw to punch out the four accent holes above the mushrooms. Work slowly around each circle. Small holes are quick cuts but are easy to chip at the exit point, so push the waste piece gently inward rather than forcing it.

  6. Light and place outdoors

    Set a battery LED candle inside and position the pumpkin on a wooden stool for display. At blue hour the three mushroom openings glow amber against the darkening sky while fallen leaves around the base complete the autumn composition.

Written with AI to match this design

Gather your supplies

Check things off as you get ready.

Work on a stable surface, keep your free hand out of the cutting path, and have an adult handle sharp tools.

Three levels of light

  • Leave intact

    All rind between and around the three mushrooms and accent holes stays dark

  • Peel & shade

    None on this design

  • Cut through

    Three mushroom silhouettes and four small round holes cut fully through for warm distributed glow

Learn the carving basics

Before you start cutting

How do I keep the three mushrooms visually balanced even though they are different heights?

Arrange them so the tallest is near the center and the two shorter ones flank it slightly lower and to each side, like a loose triangle. This creates a natural focal point at the tallest cap and draws the eye outward through the design. Adjust spacing on paper first before committing to the template.

Do the four small round holes need to follow a specific pattern above the mushrooms?

No fixed pattern is required. A loose scattered arrangement above the caps looks natural and represents floating spores or bubbles. Avoid placing them in a perfectly straight row or grid, which can look mechanical. Aim for comfortable randomness while keeping each hole at least a half-inch from the mushroom cap edges.

My pumpkin is not very tall. Can I still fit three mushrooms at different heights?

On a shorter pumpkin, reduce the height difference between mushrooms rather than scaling them down drastically. Even a modest difference of an inch between the tallest and shortest creates a clear visual rhythm. You may also need to omit one or two of the small round holes if space becomes tight near the top.

Your take belongs here, too.

Changed a detail? Made it simpler? Share a photo of your version and tell the community what worked.

Share your pumpkin

More pumpkins like this

You've reached the end · 8 pumpkins
The Patch Report

Fresh pumpkins, in your inbox.

The best new carvings, ideas worth stealing, and how-tos for carving season. Short, seasonal, and gone by November.

A short email during carving season. Unsubscribe anytime. See our privacy policy.