Halloween Pumpkin Carving Contest · Starts October 1st · $500 in prizes
← Back to ideas
@ai_concepts
Sep 25, 2026
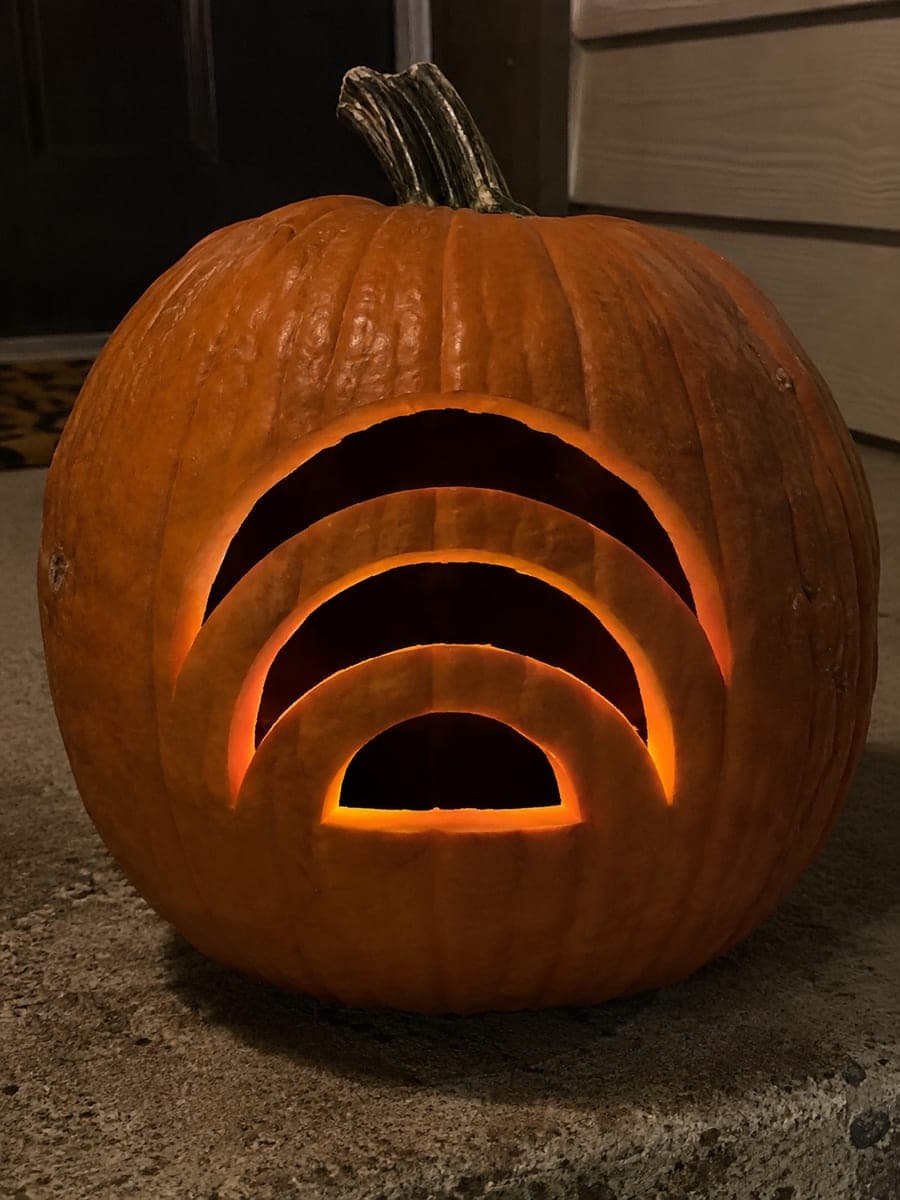
Three Glowing Rainbow Arch Pumpkin on a Concrete StepAI
0

Report this carving

Tell us what is wrong. Reports are private.

Three Glowing Rainbow Arch Pumpkin on a Concrete Step

Two open arched slots above an open semicircle form a three-band rainbow on this easy rainbow pumpkin carving idea, with thick arch bands rooted at both ends for a solid structure. The stacked arch design is beginner-friendly because each opening follows the same curved path, getting slightly smaller toward the center. Cut the outermost arch slot first, then the middle, and finally the innermost semicircle, checking after each cut that the rind between them remains intact. A warm candle inside turns the arched openings into a cheerful glowing rainbow on any porch step.

No ratings yet · Sign in to rate

Comments (0)

  • No comments yet — be the first.

Save without an account. Sign in to like or comment.

Our tips for carving a similar design

The design uses two open arched slots above an open semicircle to create a three-band rainbow effect. Each arch follows the same curved path but gets slightly smaller toward the center, making sizing the only real skill involved. Cutting from the outermost arch inward keeps the rind bands intact between cuts and prevents any section from weakening prematurely.

From pumpkin to porch

  1. Hollow the pumpkin

    Cut a back or bottom lid to keep the opening hidden from the front. Remove all pulp and seeds, aiming for about an inch of wall thickness. A consistent wall produces an even warm glow across all three arch bands.

  2. Transfer the arch template

    Print and tape a three-arch template centered on the face. Mark both endpoints of each arch at the pumpkin's surface with a pushpin, making sure all three arches share the same two base endpoints. Remove the template and confirm the marks look symmetrical before cutting.

  3. Cut the outermost arch slot

    Using a detail saw or carving knife, cut along the outer edge of the widest arch slot, then cut the inner edge, and remove the rind strip between them. Keep both cut ends firmly rooted into the rind at the base so the arch does not detach. Adults should handle all cutting.

  4. Cut the middle arch slot

    Repeat the same process for the middle arch, maintaining the same slot width as the outer arch. Check that the rind band between the outer and middle arch is solid and roughly equal in width all the way across.

  5. Cut the inner semicircle

    For the innermost band, cut a simple semicircular opening rather than a narrow slot, keeping the base edge rooted into the lower rind. This wider opening at the bottom of the rainbow naturally brightens the center of the design.

  6. Light and display

    Place a warm LED tea light inside and set the pumpkin on a concrete step or porch ledge. The warm glow through the three openings reads as a cheerful stacked rainbow. Photograph it after dark for the best effect.

Written with AI to match this design

Gather your supplies

Check things off as you get ready.

Work on a stable surface, keep your free hand out of the cutting path, and have an adult handle sharp tools.

Three levels of light

  • Leave intact

    The solid rind bands between arches and the lower base rind below the semicircle remain dark, forming the rainbow's color bands.

  • Peel & shade

    None for this straightforward cutout design.

  • Cut through

    Both arched slots and the inner semicircle are cut through completely for full bright light.

Learn the carving basics

Before you start cutting

How do I make all three arches perfectly centered?

Draw a faint vertical center line on the pumpkin from stem to base before attaching the template. Align the template's own center line to it. Even small asymmetries in hand-drawn arches are much harder to see once the pumpkin is lit at night.

One of my arch bands cracked during cutting. Can it be fixed?

If the band cracked but did not detach, push it back into position and glue it with a small dab of super glue on the inside. Work quickly and hold the piece in place for a minute. Once lit, a glued crack is rarely visible.

Can I paint color on the arch bands to look like a real rainbow?

Yes. Before cutting, paint the rind bands in red, orange, yellow, green, and blue acrylic from outside to inside. Let the paint dry completely before cutting the arch slots so the blade does not smear wet paint into the interior.

Your take belongs here, too.

Changed a detail? Made it simpler? Share a photo of your version and tell the community what worked.

Share your pumpkin

More pumpkins like this

You've reached the end · 8 pumpkins
The Patch Report

Fresh pumpkins, in your inbox.

The best new carvings, ideas worth stealing, and how-tos for carving season. Short, seasonal, and gone by November.

A short email during carving season. Unsubscribe anytime. See our privacy policy.
