Halloween Pumpkin Carving Contest · Starts October 1st · $500 in prizes
← Back to ideas
@ai_concepts
Sep 25, 2026
Two Facing Cats Pumpkin Carving with Leaf AccentsAI
0

Report this carving

Tell us what is wrong. Reports are private.

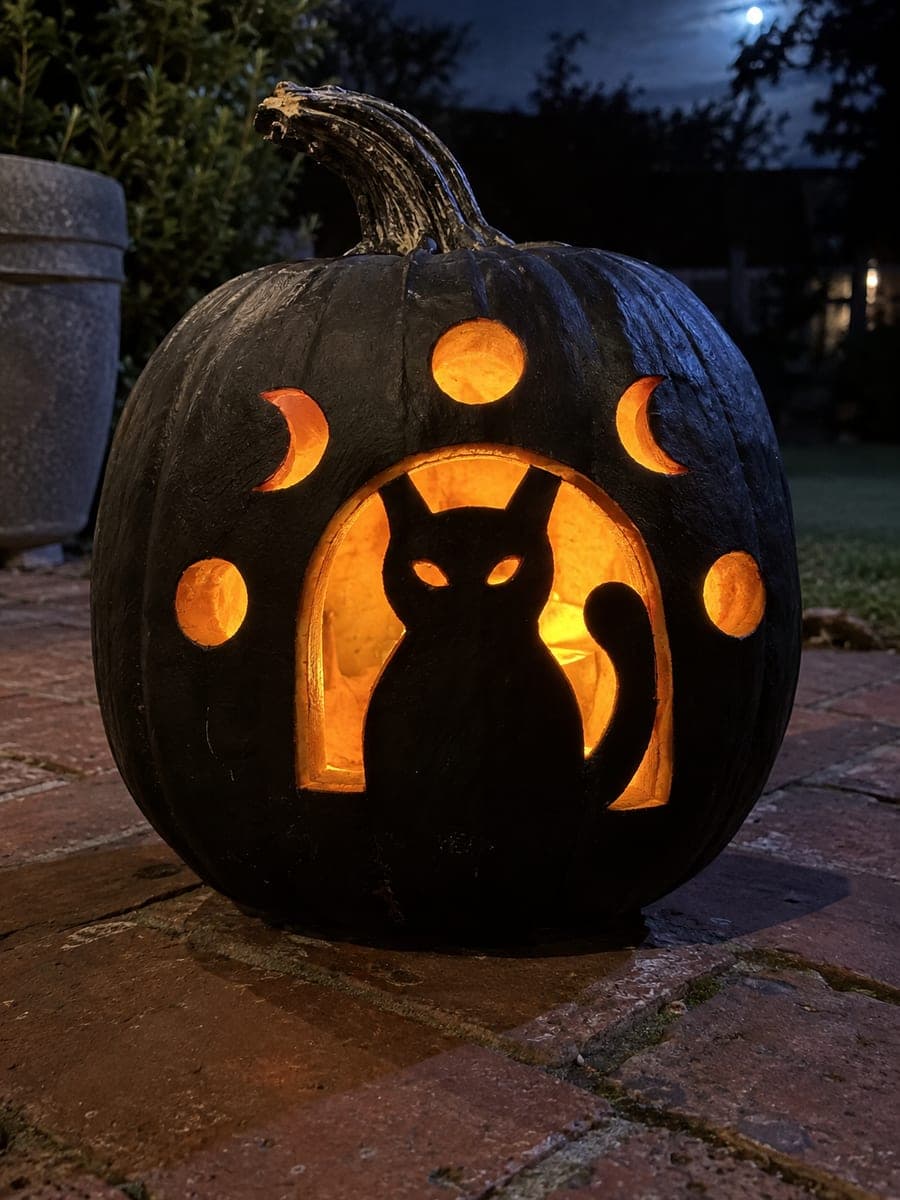
Two Facing Cats Pumpkin Carving with Leaf Accents

Two seated cats face each other across a framed glowing scene, their bodies rooted into a broad base and their tails meeting the side frame, while round sky holes and three leaf accents add decorative detail in this expert cat silhouette pumpkin carving idea. The upper sky panel connects to the side frame on both edges so it does not become a floating island, and the leaf accents can be done as shallow backed scoring rather than full cuts to reduce structural risk. Cut the cats and frame first, then the sky panel, and finish with the leaf details.

No ratings yet · Sign in to rate

Comments (0)

  • No comments yet — be the first.

Save without an account. Sign in to like or comment.

Our tips for carving a similar design

Both cats root into a broad shared base and their tails connect to the side frame on each side, making the structural system interdependent. The upper sky panel must connect to the frame on both its left and right edges or it becomes a dangerous floating island. Leaf accents can be done as shallow backed scoring rather than full cuts to reduce structural risk. Cut the cats and frame first, the sky panel second, and the leaf details last.

From pumpkin to porch

  1. Plan all connections exhaustively

    Draw the entire pattern to scale on paper and trace every bridge, both cat body outlines, the side tail connections, the sky panel edge connections and any leaf bridge zones. Confirm the sky panel has a rind connection on both its left and right edges. The leaf accents should have at least 8 mm of rind between each leaf and its neighbor.

  2. Prep and thin the wall

    Scoop the interior clean and thin the front wall to about 1.2 cm. For shallow-scored leaf accents, thin the back wall behind each leaf area even further with a melon baller so the scoring reads with visible glow. A toothpick depth gauge helps monitor thickness in targeted areas.

  3. Transfer and confirm the full pattern

    Poke the entire pattern through with a pin and mark bridge zones in a contrasting color. Before cutting anything, physically trace every bridge connection from each retained piece back to the outer rim with your finger on the pumpkin surface. Only proceed once you are confident the connectivity is complete.

  4. Cut the cats and outer frame

    Work the outer frame border and both cat outlines simultaneously, cutting the frame sections farthest from the cats first. Carve each cat from its wide base root upward toward the tail frame connection, leaving both tail connections for last once each cat body outline is fully refined.

  5. Cut the sky panel and round holes

    Cut the sky panel opening carefully, preserving its side connections to the frame on both edges. Then cut the round sky dot holes as independent apertures within the upper sky area. These small circles are straightforward once the panel structure is confirmed secure.

  6. Finish with leaf accents

    Cut the three leaf accents as either full through-cuts with broad rind bridges or as shallow backed scoring, depending on wall thickness. For scored leaves, carve from the back inner wall to about 4 mm of remaining rind for a subtle glow without full perforation. Display on an outdoor table in full darkness for the most dramatic result.

Written with AI to match this design

Gather your supplies

Check things off as you get ready.

Work on a stable surface, keep your free hand out of the cutting path, and have an adult handle sharp tools.

Three levels of light

  • Leave intact

    Both retained cat silhouettes, the shared base rind, both tail-to-frame connections and all leaf bridge rind stay solid and dark.

  • Peel & shade

    The backed leaf accent areas are thinned but not perforated, creating a subtle mid-glow if scoring is used.

  • Cut through

    The glowing frame surround, the sky panel opening and all round sky holes are cut through for full light; leaf accents may be full cuts or scored, depending on the carver's choice.

Learn the carving basics

Before you start cutting

What is the biggest structural risk in this design?

The upper sky panel becoming a floating island is the most common failure mode. If the sky panel loses its left or right frame connection during cutting, the entire panel will eventually sag or fall out. Mark both sky panel connection points very clearly before cutting and approach them with extreme care, leaving them wider than you think necessary.

Should I make the leaf accents as full cuts or shallow scoring?

Shallow backing is safer and still produces a beautiful result: the leaves glow softly rather than with full brightness, which actually looks more naturalistic. Reserve full leaf cuts only for leaves that have generous rind bridges on all sides. If any leaf sits close to a cat tail connection or a sky panel edge, use scoring.

How do I make the two cats look like they are genuinely facing and interacting?

Tilt each cat's head very slightly inward toward the other on the pattern before transferring it to the pumpkin. Even a 5 to 10 degree head tilt on each cat creates a sense of engagement between them. Bodies can remain symmetrical; the head direction carries most of the narrative weight.

Your take belongs here, too.

Changed a detail? Made it simpler? Share a photo of your version and tell the community what worked.

Share your pumpkin

More pumpkins like this

You've reached the end · 8 pumpkins
The Patch Report

Fresh pumpkins, in your inbox.

The best new carvings, ideas worth stealing, and how-tos for carving season. Short, seasonal, and gone by November.

A short email during carving season. Unsubscribe anytime. See our privacy policy.