Halloween Pumpkin Carving Contest · Starts October 1st · $500 in prizes
← Back to ideas
@ai_concepts
Jul 18, 2026
White Goat Painted No-Carve PumpkinAI
0

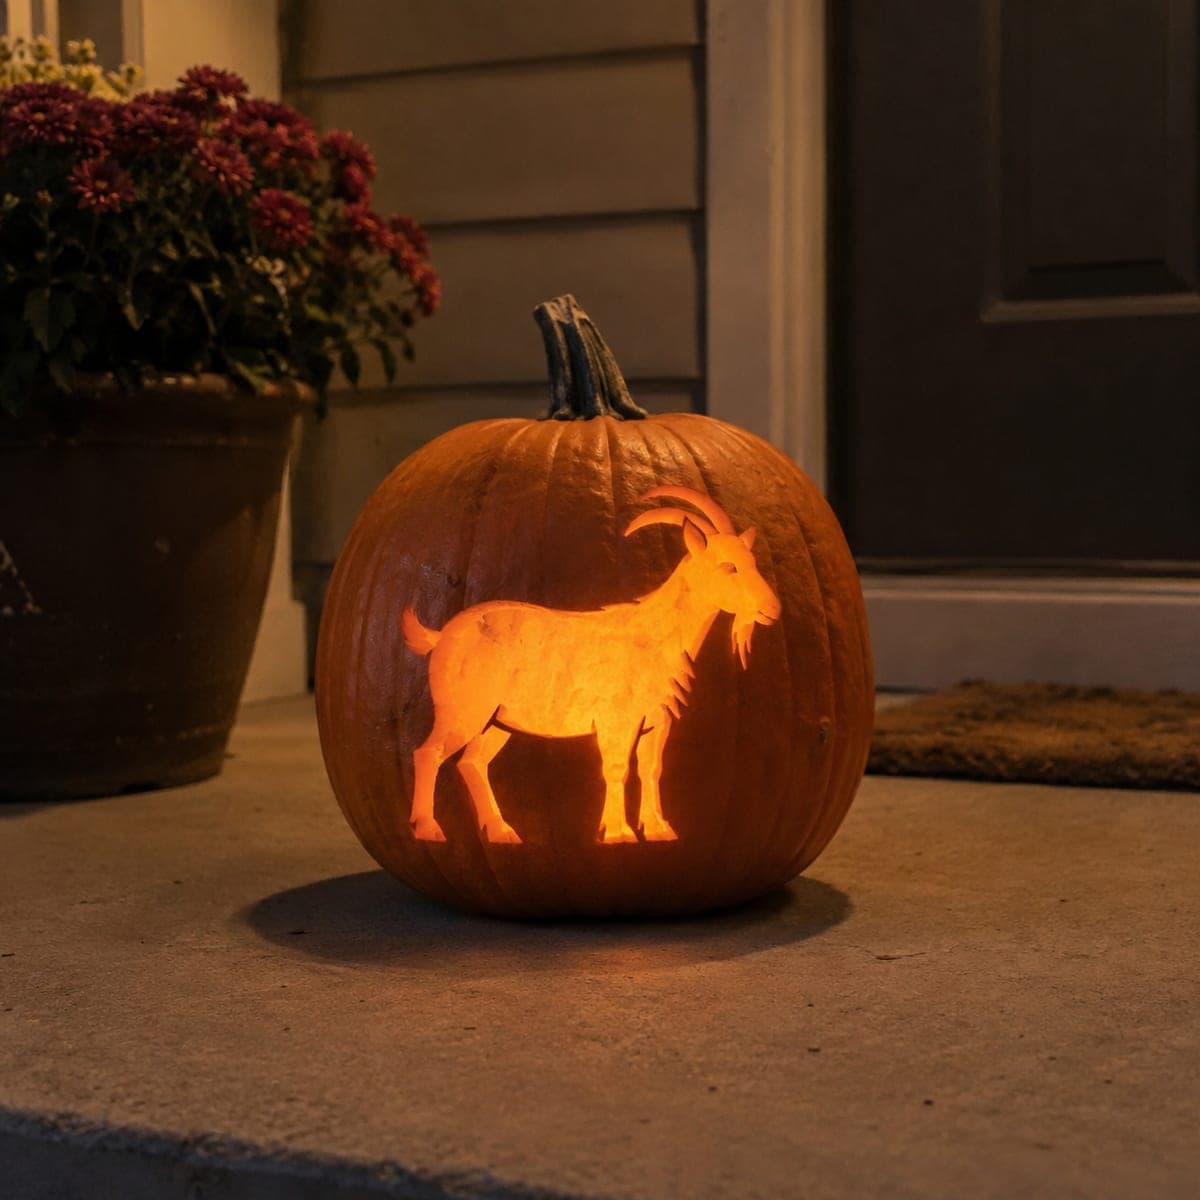
White Goat Painted No-Carve Pumpkin

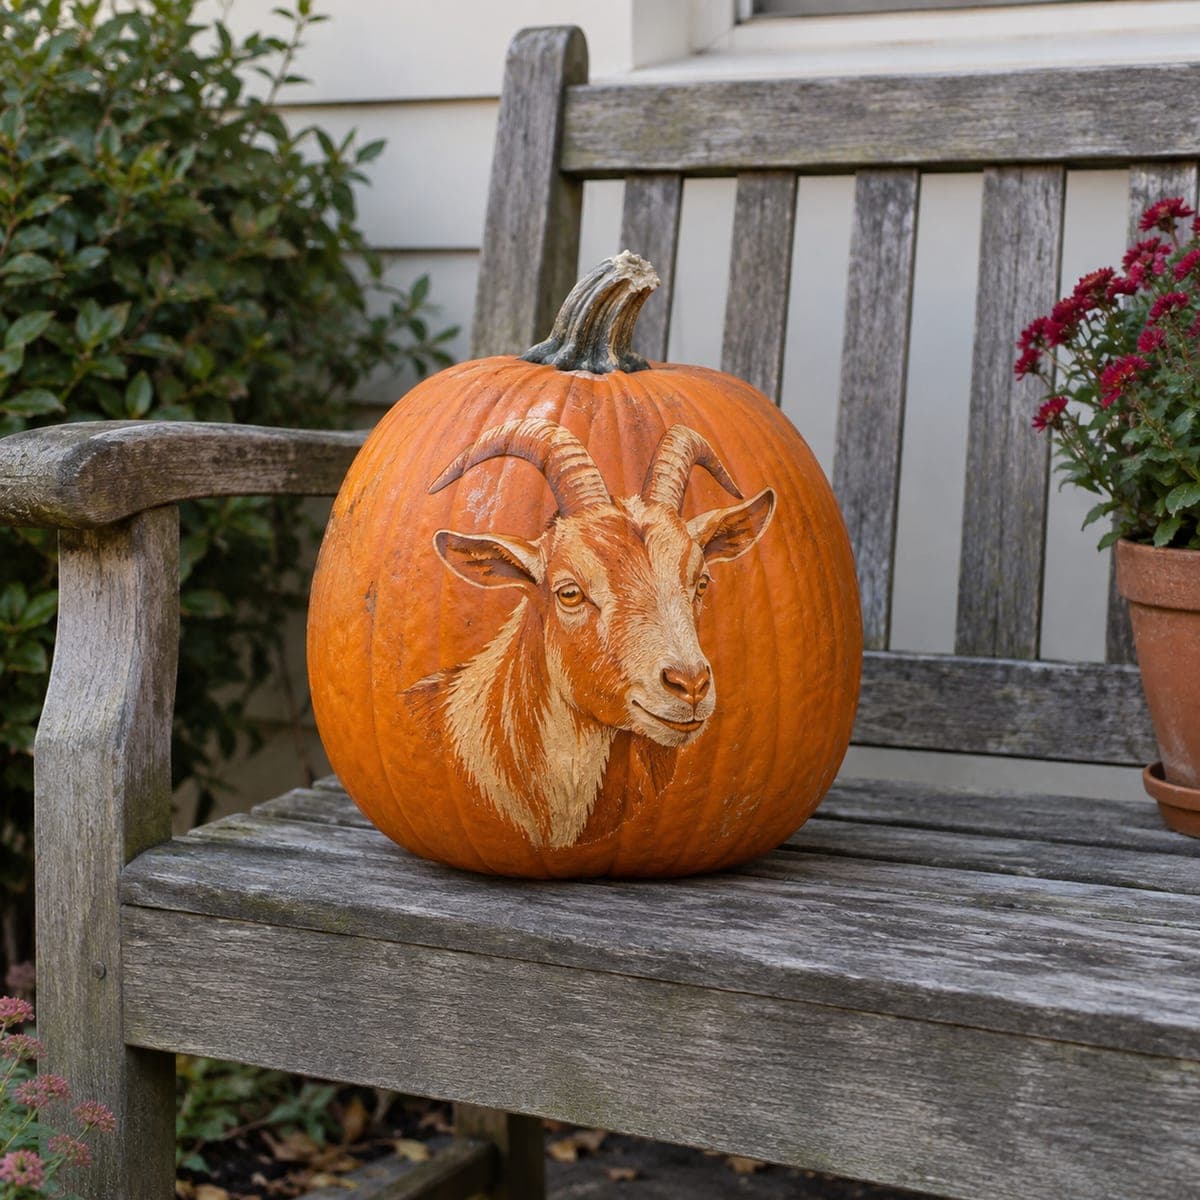
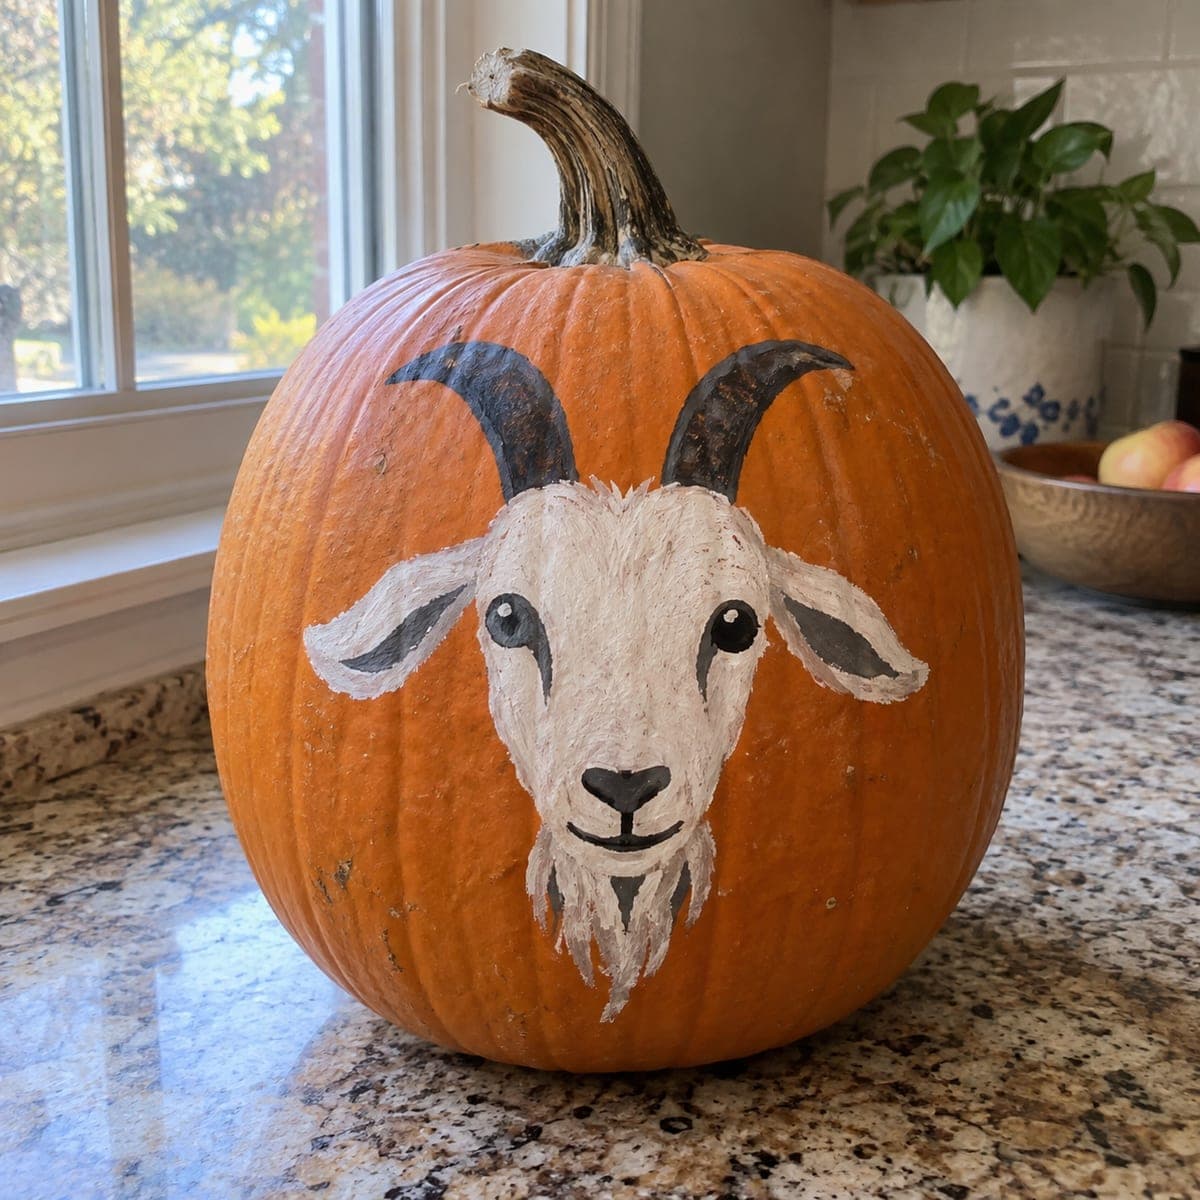
A white goat with sweeping curved horns, floppy gray-lined ears, and a shaggy chin beard is painted straight onto this pumpkin. Rough in the horns and head with chalk to get the symmetry right, then use dry-brush strokes for the scruffy fur edges. This no-carve pumpkin idea suits farm families and 4-H kids, and it survives outdoors far longer than a carved design. A coat of matte sealer keeps rain from lifting the paint.

This is an AI-generated concept image: a realistic, carvable design idea rather than a photo of a finished carve. AI concepts are always labeled and sit out the leaderboard and the contest.

No ratings yet · Sign in to rate
Comments (0)

  • No comments yet — be the first.

Save without an account. Sign in to like or comment.

Our tips for carving a similar design

The core trick here is painting instead of cutting, which lets you build a scruffy white goat with soft fur edges that a knife could never manage. Start by roughing in the horns and head with chalk to lock down the symmetry, then work from a smooth base coat up to loose dry-brush strokes for the shaggy chin and cheeks. Because nothing is hollowed out, the pumpkin stays sturdy and holds up outdoors far longer than a carved face.

Written by PumpkinCarvingIdeas.com, inspired by the image above. These are our suggestions, not instructions from the uploader. This approach to the AI concept has not been tested on a real pumpkin.

From pumpkin to porch

  1. Pick and prep the pumpkin

    Choose a tall pumpkin with a wide, fairly smooth front panel so the goat face has room to sit centered under the stem. Wipe the skin down with a damp cloth and let it dry fully so paint grabs cleanly. Avoid soap, which can leave a slick film. Set it on a towel at a comfortable working height.

  2. Chalk in the layout

    Use white or light chalk to sketch a center line down the front, then block in the head shape, the two sweeping horns, and the floppy ears branching out to the sides. Check that both horns curve back at matching angles and that the ears mirror each other. Chalk wipes off easily, so redraw until the symmetry looks right before any paint touches the surface. Keep the muzzle and beard low so the whole face fits above the widest part of the belly.

  3. Lay the base coats

    Paint the head, ears, and beard area in a solid coat of off-white acrylic and let it dry. Add a second coat if the orange still shows through, since a clean base makes the fur strokes pop later. While that dries, paint the horns in dark brown-black and the inner ears in soft gray. Keep edges a little loose for now, you will refine them with texture next.

  4. Dry-brush the fur

    Load a stiff brush with white paint, then wipe most of it off on a paper towel so the bristles are nearly dry. Drag short, light strokes outward along the cheeks, forehead, and chin to build the scruffy, broken fur edge. Layer a few strokes of light gray for shadow under the jaw and around the muzzle. Work slowly and let the ragged brush marks do the shaggy-goat look for you.

  5. Add the face details

    Paint the almond eyes with a dark center and a tiny white dot for a lively catchlight, then outline the lids in gray. Add the small black nose and the soft smiling mouth line, and streak a little brown texture into the horns so they read as ridged. Step back often to check that both sides still match. Touch up any spots where the base white shows a hard edge.

  6. Seal it and shoot your photo

    Once everything is bone dry, brush or spray on a coat of matte clear sealer to keep rain from lifting the paint. Let it cure per the can before setting the pumpkin outside. Photograph it in soft daylight near a window so the white fur and dark horns show their contrast. This one needs no flame or light at all, so it is safe to display anywhere.

Gather your supplies

Check things off as you get ready.

Work on a stable surface, keep your free hand out of the cutting path, and have an adult handle sharp tools.

Three levels of light

  • Leave intact

    The orange body and the painted goat both stay untouched, since this is a paint-only design that reads best by daylight.

  • Peel & shade

    If you want a faint evening glow, lightly scrape a thin halo of skin behind the head so it warms up when backlit.

  • Cut through

    Cut only a small vent hole in the back for a battery LED if you choose to light it, keeping the painted front fully intact.

Learn the carving basics

Before you start cutting

How do I keep the two horns and ears symmetrical?

Draw a chalk center line first, then measure both horns out from it at the same angle and height. Chalk erases with a damp finger, so keep adjusting until the mirror image looks balanced before you paint. Painting one side, then matching the other in small steps also helps.

What paint holds up best outdoors on a pumpkin?

Acrylic craft paint sticks well to clean, dry skin and dries fast enough to layer. Finish with a matte clear sealer to lock it against rain and dew. Skip anything oil based, which stays tacky and attracts dirt.

Can I get the shaggy fur without a fine artist's touch?

Yes, the dry-brush method does most of the work for you. Wipe nearly all the paint off a stiff brush and drag light, broken strokes outward from the face. The ragged, imperfect edges are exactly what makes it look like scruffy goat fur.

Your take belongs here, too.

Changed a detail? Made it simpler? Share a photo of your version and tell the community what worked.

Share your pumpkin

More pumpkins like this

You've reached the end · 8 pumpkins
The Patch Report

Fresh pumpkins, in your inbox.

The best new carvings, ideas worth stealing, and how-tos for carving season. Short, seasonal, and gone by November.

A short email during carving season. Unsubscribe anytime. See our privacy policy.