Halloween Pumpkin Carving Contest · Starts October 1st · $500 in prizes
← Back to ideas
@ai_concepts
Sep 14, 2026
Wide-Mouthed Cartoon Singer PumpkinAI
0

Wide-Mouthed Cartoon Singer Pumpkin

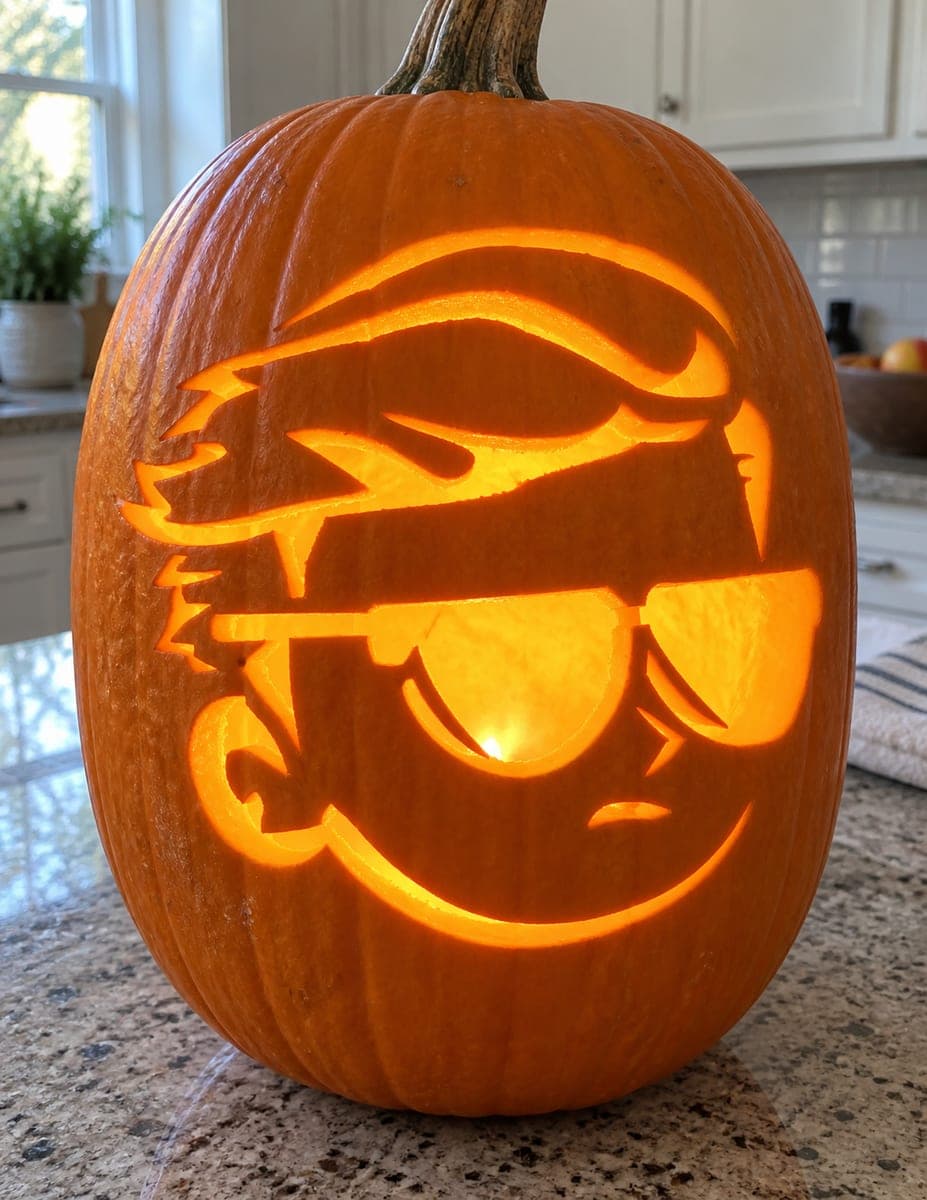
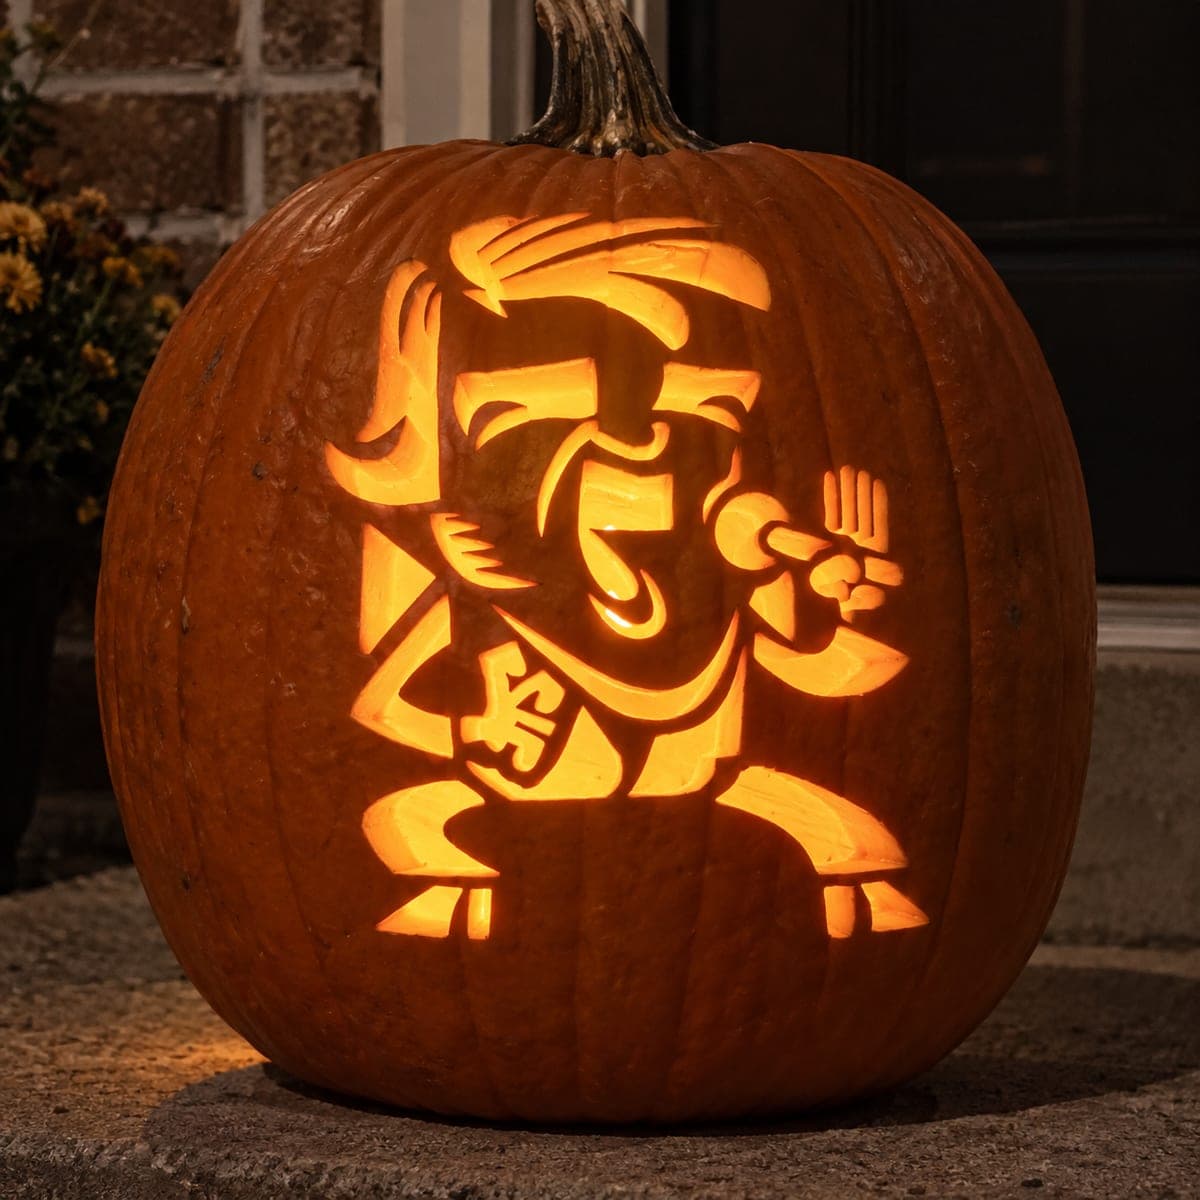
A wide-mouthed cartoon singer pumpkin carving idea shows an energetic performer with spiky swept hair, narrowed eyes, and a dramatically oversized open mouth stretched nearly the full width of the figure while gripping a microphone in one hand. The cutout technique removes the mouth interior and other openings completely so the jack-o-lantern glows most intensely from the huge gaping mouth. Because the upper lip forms a thin horizontal bridge over the mouth opening, carve the inner mouth first from the corners inward so the bridge doesn't warp before the surrounding cuts are finished.

This is an AI-generated concept image: a realistic, carvable design idea rather than a photo of a finished carve. AI concepts are always labeled and sit out the leaderboard and the contest.


No ratings yet · Sign in to rate

Comments (0)

  • No comments yet — be the first.

Save without an account. Sign in to like or comment.

Our tips for carving a similar design

The whole effect rides on that huge open mouth, which glows brightest because it is a full cutout, so treat it as the anchor of the design. The tricky part is the thin upper lip that bridges across the top of the mouth, so you free the inner mouth first and save the big surrounding cuts for last. Everything else, from the spiky hair to the microphone, is a mix of cutouts and shading that frames that shouting grin.

Written by PumpkinCarvingIdeas.com, inspired by the image above. These are our suggestions, not instructions from the uploader. This approach to the AI concept has not been tested on a real pumpkin.

From pumpkin to porch

  1. Prep the pumpkin and mount the pattern

    Pick a large pumpkin with a broad, flat front face so the wide mouth has room to stretch. Cut a lid from the bottom or the back rather than the top so the stem stays put and the figure sits centered. Scrape the inside wall behind the design down to about one inch thick so light passes through easily. Tape the printed stencil flat and poke closely spaced transfer dots along every line, especially around the mouth and the thin upper lip.

  2. Score all the lines before removing anything

    With the dots as your map, lightly score the full outline with a small serrated carving saw or a craft knife. Trace the hair spikes, the eyes, the microphone, and the outline of the mouth so you can see the whole figure. Do not push through yet. Having every line scored first keeps the thin upper lip supported by surrounding pumpkin while you plan your cutting order.

  3. Carve the inner mouth first from the corners in

    Start the full cutouts with the mouth interior, working from each corner toward the center as the caption technique advises. This releases the biggest opening while the pumpkin around the thin upper lip is still solid and stable, so the lip bridge will not warp or snap. Remove the mouth in a few smaller pieces rather than one giant chunk to keep control. Keep that horizontal upper lip intact as a bridge across the top of the opening.

  4. Cut the remaining openings and details

    Now free the other full cutouts: the narrowed eyes, the gaps in the spiky hair, the microphone, and the raised hand. Cut the smaller detail openings before the largest ones so the face keeps its rigidity as long as possible. Angle your blade slightly outward as you cut so the light spreads through each opening. Support the pumpkin from underneath with your free hand, not with fingers near the blade path.

  5. Peel the shading areas for a dim glow

    Use a lino or ribbon tool to skin off just the outer skin on areas you want softly lit, such as the inner cheeks, the shirt folds, and shading along the hair. Removing skin without cutting through gives a warm mid orange glow that separates these shapes from the untouched dark outlines. Go shallow and even, checking the depth often. This shading is what makes the cartoon face read as more than flat cutouts.

  6. Light it and take your photo

    Drop in a bright battery LED, never a candle, and set it low and slightly behind the figure so the mouth blazes. Rotate the light until the gaping mouth is the clear focal point and the peeled areas read as a soft secondary glow. Wipe the cut edges and rub a little petroleum jelly on them to slow drying. Shoot in the dark on a porch step with the LED as your only light source.

Gather your supplies

Check things off as you get ready.

Work on a stable surface, keep your free hand out of the cutting path, and have an adult handle sharp tools.

Three levels of light

  • Leave intact

    The bold outlines of the hair, face, and shirt stay as untouched dark skin so the cartoon lines pop.

  • Peel & shade

    The inner cheeks, shirt folds, and hair shading get skin-peeled for a soft mid orange glow.

  • Cut through

    The oversized open mouth, the narrowed eyes, the microphone, and the raised hand are cut clean through for the brightest light, with the mouth glowing hardest.

Learn the carving basics

Before you start cutting

How do I keep the thin upper lip from breaking?

Score every line first so the surrounding pumpkin stays solid, then carve the mouth interior from the corners inward before touching the cuts around the lip. That way the lip is supported by firm pumpkin the whole time you are removing the large opening. Only after the mouth is done should you cut the areas next to the lip.

This is an AI concept image, so can a design like this really be carved?

Yes, the shapes here are all achievable on a real pumpkin as long as you keep the upper lip as a genuine bridge with pumpkin on both sides. Do not thin the microphone or the fingers down to fragile slivers; leave them wide enough to hold together. Cut the biggest opening, the mouth, last in your sequence for that area.

Why does the mouth glow more than everything else?

Full cutouts pass the most light, and the mouth is the largest open area in the design. Keeping the eyes and hand smaller openings and using peeled shading elsewhere lets the mouth dominate. Position your LED low and central so its brightest throw lands right at that gaping grin.

Your take belongs here, too.

Changed a detail? Made it simpler? Share a photo of your version and tell the community what worked.

Share your pumpkin

More pumpkins like this

You've reached the end · 8 pumpkins
The Patch Report

Fresh pumpkins, in your inbox.

The best new carvings, ideas worth stealing, and how-tos for carving season. Short, seasonal, and gone by November.

A short email during carving season. Unsubscribe anytime. See our privacy policy.