Halloween Pumpkin Carving Contest · Starts October 1st · $500 in prizes
← Back to ideas
@ai_concepts
Sep 14, 2026
Yikes Exclamation Speech Bubble PumpkinAI
0

Yikes Exclamation Speech Bubble Pumpkin

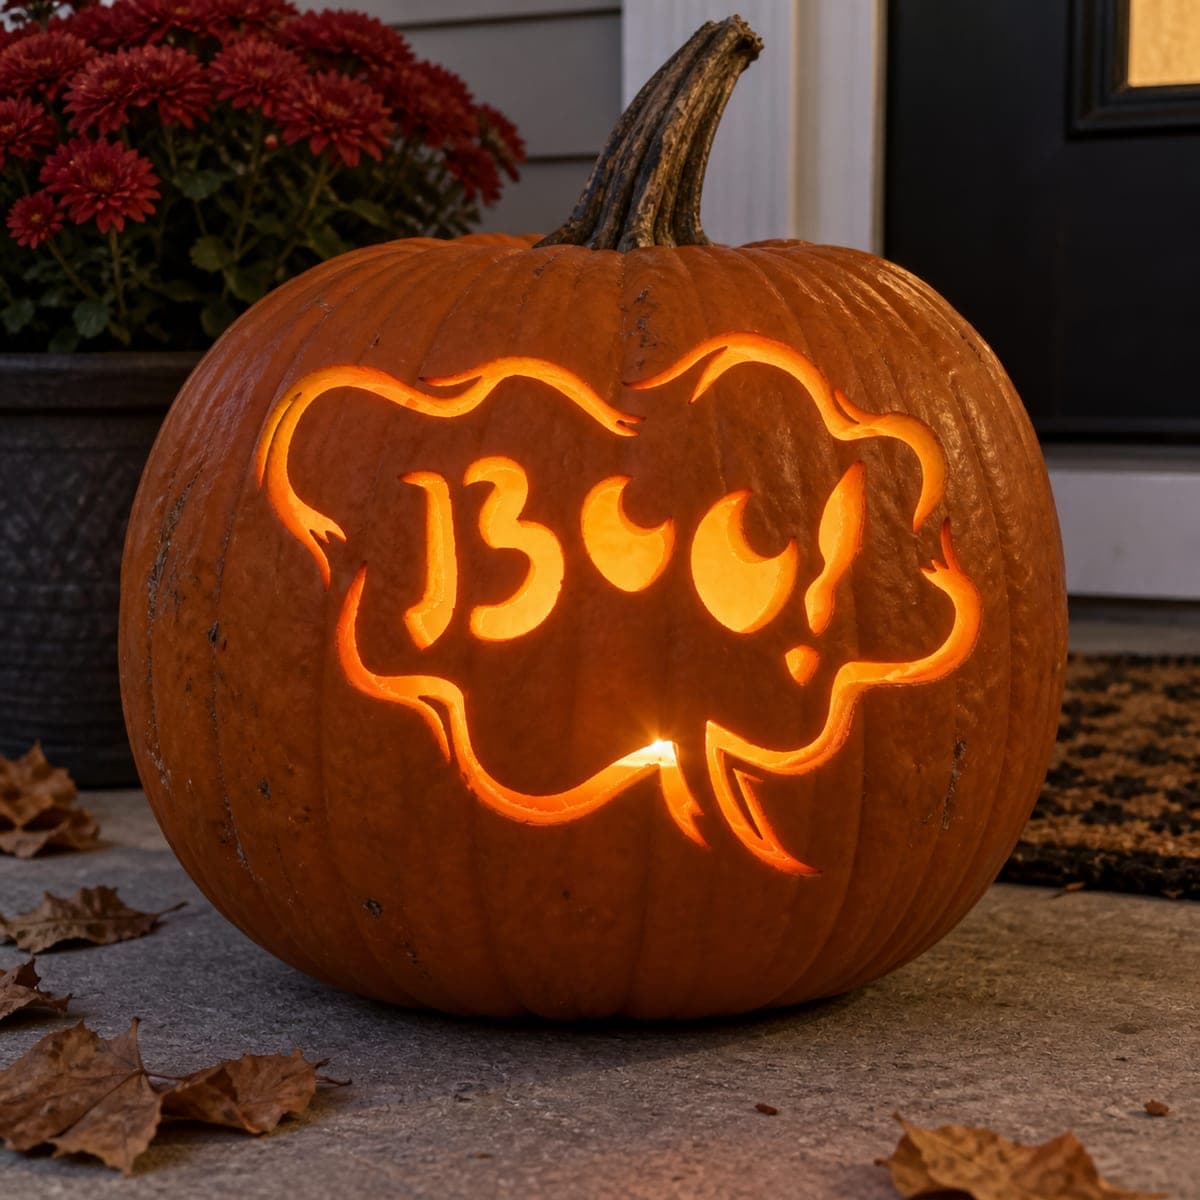
Large block YIKES! lettering with an exclamation point fills a wide oval speech bubble with a small triangular pointer at the bottom in this funny Halloween word pumpkin carving idea set against a cozy interior backdrop. Every letter is cut through, so the whole phrase blazes with warm light on a dark coffee table or mantel. Because the oval border sits close to the letters, carve the letters first to make sure they stay centered, then cut the oval outline around them as the final step. The two K shapes are the trickiest letters since their diagonal strokes intersect near the center, so cut each arm separately and meet in the middle rather than trying to follow the full K in one motion.

This is an AI-generated concept image: a realistic, carvable design idea rather than a photo of a finished carve. AI concepts are always labeled and sit out the leaderboard and the contest.
No ratings yet · Sign in to rate

Comments (0)

  • No comments yet — be the first.

Save without an account. Sign in to like or comment.

Our tips for carving a similar design

The core trick here is treating each letter as its own cut-through opening so the whole word glows, then framing it all with an oval speech bubble carved last. Because the border sits close to the letters, you lay out and cut the lettering first to keep everything centered, and only then outline the bubble and its little triangular pointer. Plan the spacing on paper before any blade touches the pumpkin.

Written by PumpkinCarvingIdeas.com, inspired by the image above. These are our suggestions, not instructions from the uploader. This approach to the AI concept has not been tested on a real pumpkin.

From pumpkin to porch

  1. Prep the pumpkin and open the back

    Pick a wide, fairly flat-faced pumpkin so the oval has room to sit. Cut an access hole in the back rather than the top so the stem stays intact for display. Scoop the insides and thin the front carving wall to about one inch with a scraper. A thinner wall makes the block letters much easier to push a blade through cleanly.

  2. Transfer and center the design

    Print the YIKES! stencil sized to your pumpkin and tape it flat, snipping the edges so it hugs the curve. Poke the outlines with a pin or a transfer tool, marking every letter and the oval border. Step back and check that the word looks centered inside the bubble before you cut. Since the border hugs the letters, getting the spacing right now saves trouble later.

  3. Cut the letters first

    Start with the interior letters and work outward, cutting each one fully through with a small detail saw. Take the two K shapes slowly, cutting each diagonal arm as its own stroke and meeting in the middle instead of chasing the whole letter in one pass. Leave the exclamation point dot for last and keep steady pressure so it does not crack away. Push scraps out toward the hollow center as you go.

  4. Add the oval bubble outline

    With every letter cut, carve the oval border as a full cutout ring around the word. Move in short, connected strokes and rotate the pumpkin rather than twisting your wrist. Keep the ring an even width the whole way around so the frame reads as a clean speech bubble. Big continuous openings like this are always safer cut last, once the smaller detail work is done.

  5. Carve the pointer tail

    Add the small triangular pointer at the bottom of the oval so it reads as a comic speech bubble. Cut it as a simple three-sided opening that connects to the ring. Keep the point modest in size so the thin tip of pumpkin flesh stays supported and does not snap. Clean up any ragged edges with a gentle scrape.

  6. Light it and photograph

    Drop a battery LED puck inside and skip open flame, since all these cutouts pull in air and dry the flesh fast. Set the pumpkin on a dark surface so the glowing letters pop against the shadow. Dim the room lamps, then shoot a few photos from straight on to catch the full phrase. Share it with the community when you are happy with it.

Gather your supplies

Check things off as you get ready.

Work on a stable surface, keep your free hand out of the cutting path, and have an adult handle sharp tools.

Three levels of light

  • Leave intact

    The broad orange face of the pumpkin around and between the letters stays as untouched skin, holding the dark background of the speech bubble.

  • Peel & shade

    For an optional soft halo, lightly skin-peel a thin band just outside the oval so a dim glow frames the bubble.

  • Cut through

    Every letter of YIKES!, the exclamation point, the oval ring, and the triangular pointer are cut fully through for the brightest light.

Learn the carving basics

Before you start cutting

How do I keep the letters from wobbling out of place near the tight border?

Cut all the lettering first, before the oval ring, exactly because the border sits so close. With the letters set, you can trace the oval to match their actual position instead of guessing. Check your centering against the traced marks before making any border cut.

What is the safest way to handle the two tricky K shapes?

Do not try to follow the whole K in one continuous motion. Cut each diagonal arm as a separate short stroke and let them meet cleanly in the middle near the letter's center. Thinning the wall to about an inch first makes these angled cuts far less likely to tear.

Since this is a concept image, will a real pumpkin hold up with everything cut through?

Yes, if you keep the wall about an inch thick and the counters between letters reasonably wide. Cut the large oval ring and the pointer last so the face stays rigid while you do the fine letter work. Keep the pointer tip modest so that thin section of flesh stays supported.

Your take belongs here, too.

Changed a detail? Made it simpler? Share a photo of your version and tell the community what worked.

Share your pumpkin

More pumpkins like this

You've reached the end · 8 pumpkins
The Patch Report

Fresh pumpkins, in your inbox.

The best new carvings, ideas worth stealing, and how-tos for carving season. Short, seasonal, and gone by November.

A short email during carving season. Unsubscribe anytime. See our privacy policy.