Halloween Pumpkin Carving Contest · Starts October 1st · $500 in prizes
← Back to ideas
@ai_concepts
Sep 14, 2026
EEEK Comic Speech Bubble PumpkinAI
0

EEEK Comic Speech Bubble Pumpkin

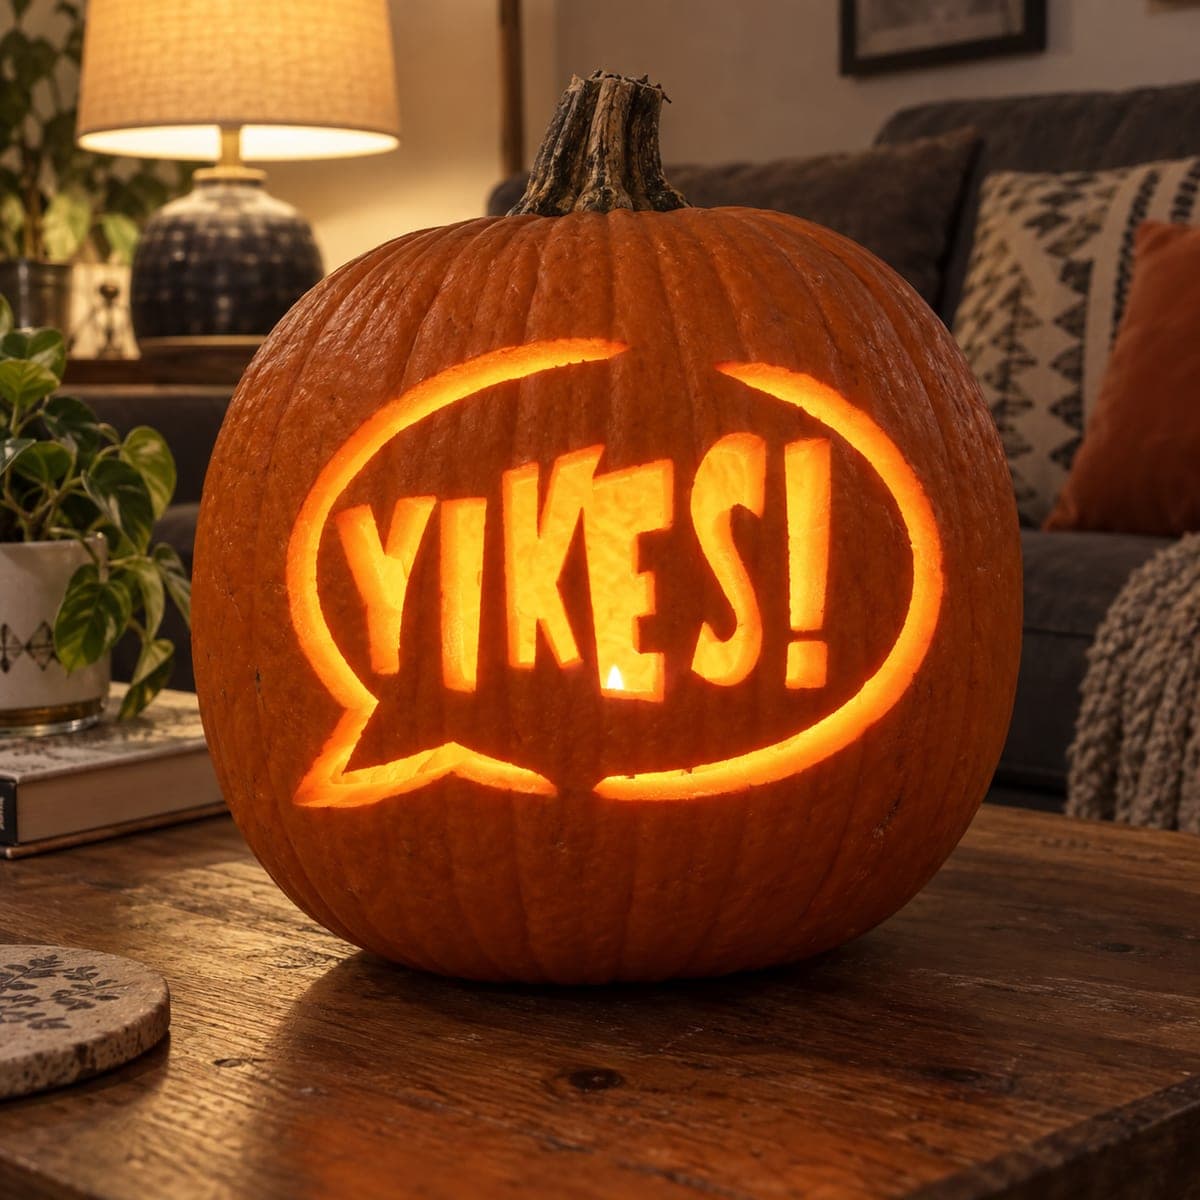
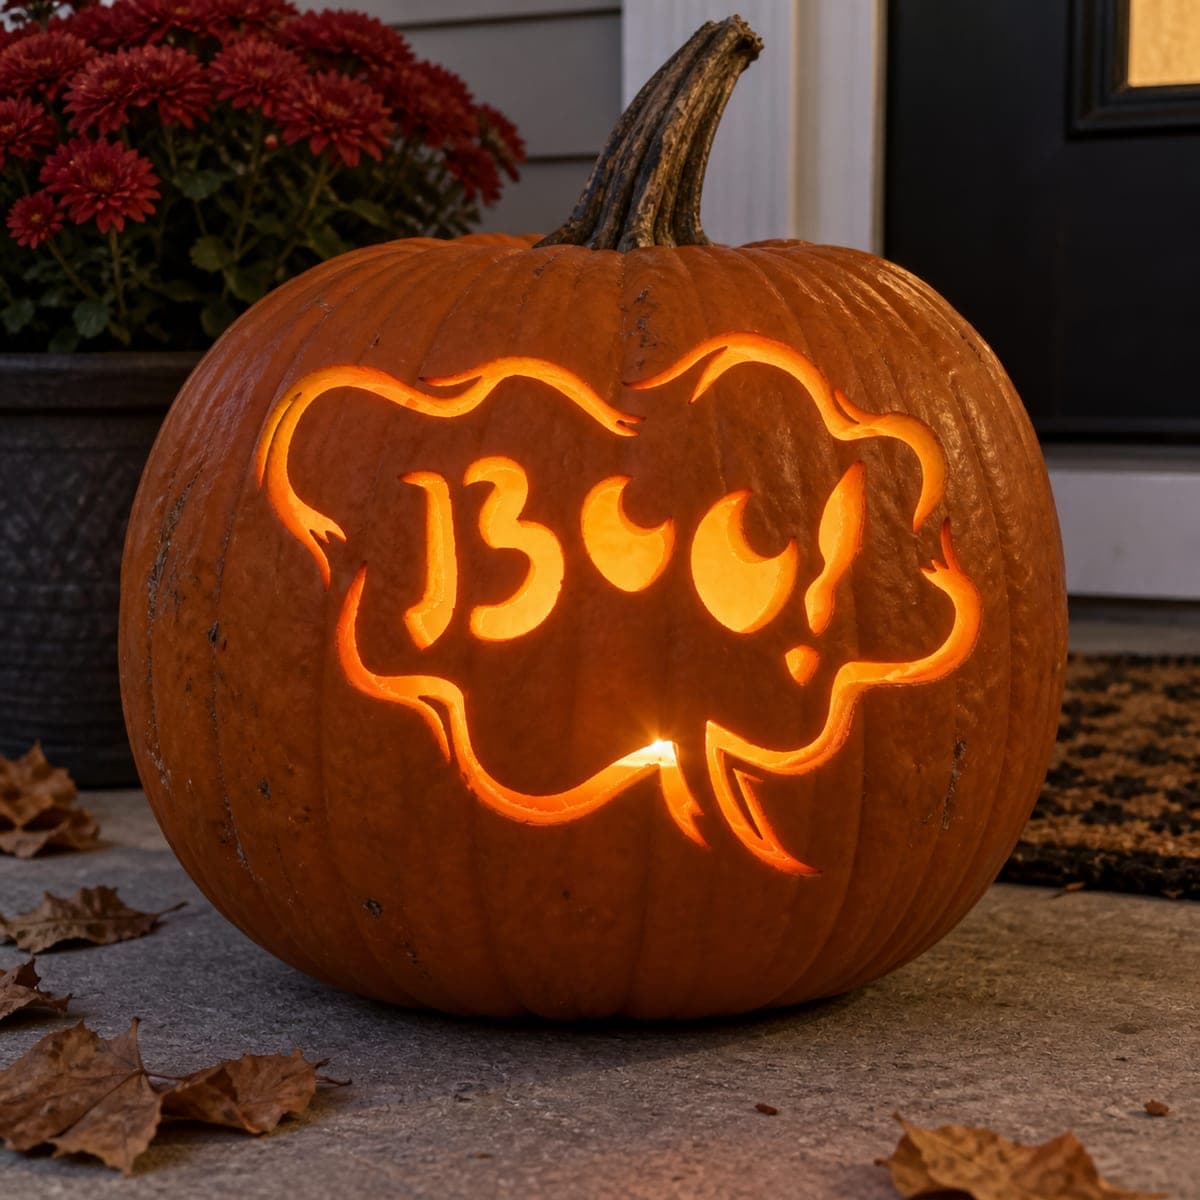
Bold block-letter EEEK! with a clean exclamation point sits inside an oval comic speech bubble with a pointed lower-left tail in this simple funny pumpkin carving idea that reads from across the street. The oval shape and all-caps letters make this one of the cleaner word carving options, with fewer enclosed counters to worry about. Position the speech bubble to span the widest part of the pumpkin's face, then trace the oval outline before marking the letters so the spacing stays centered. Cut the E's inner crossbar cutouts first to confirm they sit evenly, then open the full letters and finally the bubble oval, leaving the tail as the last cut.

This is an AI-generated concept image: a realistic, carvable design idea rather than a photo of a finished carve. AI concepts are always labeled and sit out the leaderboard and the contest.
No ratings yet · Sign in to rate

Comments (0)

  • No comments yet — be the first.

Save without an account. Sign in to like or comment.

Our tips for carving a similar design

The core trick here is a clean oval comic bubble that frames chunky all-caps letters, so the word reads clearly from a distance. Plan it by tracing the oval first, spacing the letters inside, then cutting the small crossbar gaps before opening the full letters. Save the big bubble outline and the pointed tail for last so the face stays sturdy while you work.

Written by PumpkinCarvingIdeas.com, inspired by the image above. These are our suggestions, not instructions from the uploader. This approach to the AI concept has not been tested on a real pumpkin.

From pumpkin to porch

  1. Prep and plan the layout

    Since this is an AI concept, you are recreating the look on a real pumpkin of your own. Pick a pumpkin with a wide, smooth front and cut a lid or a base opening so you can reach in to clean and light it. Scoop the inside until the front wall is about one inch thick, which makes carving letters far easier. Wipe the face dry before you mark anything.

  2. Trace the bubble and letters

    Tape your stencil over the widest part of the face so the oval sits centered. Poke the outline of the oval, the letters EEEK, and the exclamation point with a pin or transfer tool. Add the pointed tail at the lower left of the oval. Step back and check that the letter spacing looks even before you cut.

  3. Cut the small crossbar gaps first

    Start with the short inner cutouts of each E, since those small pieces confirm your letters are sitting evenly. Use a fine saw and gentle pressure, letting the blade do the work. Removing these tiny bits first keeps the surrounding skin stable while you commit to the rest. If a piece feels loose, leave a thin bridge of skin to hold it.

  4. Open the full letters

    Carve out each full letter shape and the exclamation point, working from the center of the word outward. Keep the strokes thick and blocky so they stay strong and read from the street. Cut cleanly through the wall so light passes fully. Round any rough inside edges with the tip of your saw.

  5. Cut the oval and the tail last

    Now open the large bubble outline, which is the biggest cut and should come after the letters. Work slowly around the oval so the letters inside stay supported by the surrounding skin. Cut the pointed lower-left tail as your final stroke. Take your time on this last opening since the face is thinnest now.

  6. Light it and photograph

    Drop a battery LED puck or string light inside and skip real candles, which can scorch thin letters. Set the pumpkin at the widest angle toward your walkway so the whole bubble shows. Test it after dark and clear away any inner pulp blocking the glow. Snap your photo from straight on so the letters stay crisp.

Gather your supplies

Check things off as you get ready.

Work on a stable surface, keep your free hand out of the cutting path, and have an adult handle sharp tools.

Three levels of light

  • Leave intact

    The main pumpkin skin and the flat interior of the bubble stay untouched and dark.

  • Peel & shade

    Shave a thin ring around the oval outline for a soft mid glow that frames the bubble.

  • Cut through

    Cut fully through the EEEK letters, the exclamation point, and the pointed tail for the brightest light.

Learn the carving basics

Before you start cutting

How do I keep the letters from breaking apart?

Keep each stroke thick and blocky rather than thin, and cut the small crossbar gaps before the full letters. Leave the big oval outline for last so the surrounding skin supports the letters while you work. If a piece feels wobbly, add a small skin bridge to hold it.

Should I carve the tail before the oval?

No, cut the tail as your very last stroke. It sits at the edge of the largest opening, so carving it early weakens the whole lower bubble. Finishing with the tail keeps the face stable throughout.

How do I get the letter spacing centered?

Trace the full oval outline first, then mark the letters inside it so you can judge the spacing before any cutting. Center the word on the widest part of the face and step back to eyeball it. Adjust the pin marks until it looks balanced, then commit.

Your take belongs here, too.

Changed a detail? Made it simpler? Share a photo of your version and tell the community what worked.

Share your pumpkin

More pumpkins like this

You've reached the end · 8 pumpkins
The Patch Report

Fresh pumpkins, in your inbox.

The best new carvings, ideas worth stealing, and how-tos for carving season. Short, seasonal, and gone by November.

A short email during carving season. Unsubscribe anytime. See our privacy policy.