Similar to This
View all stencils →About this stencil
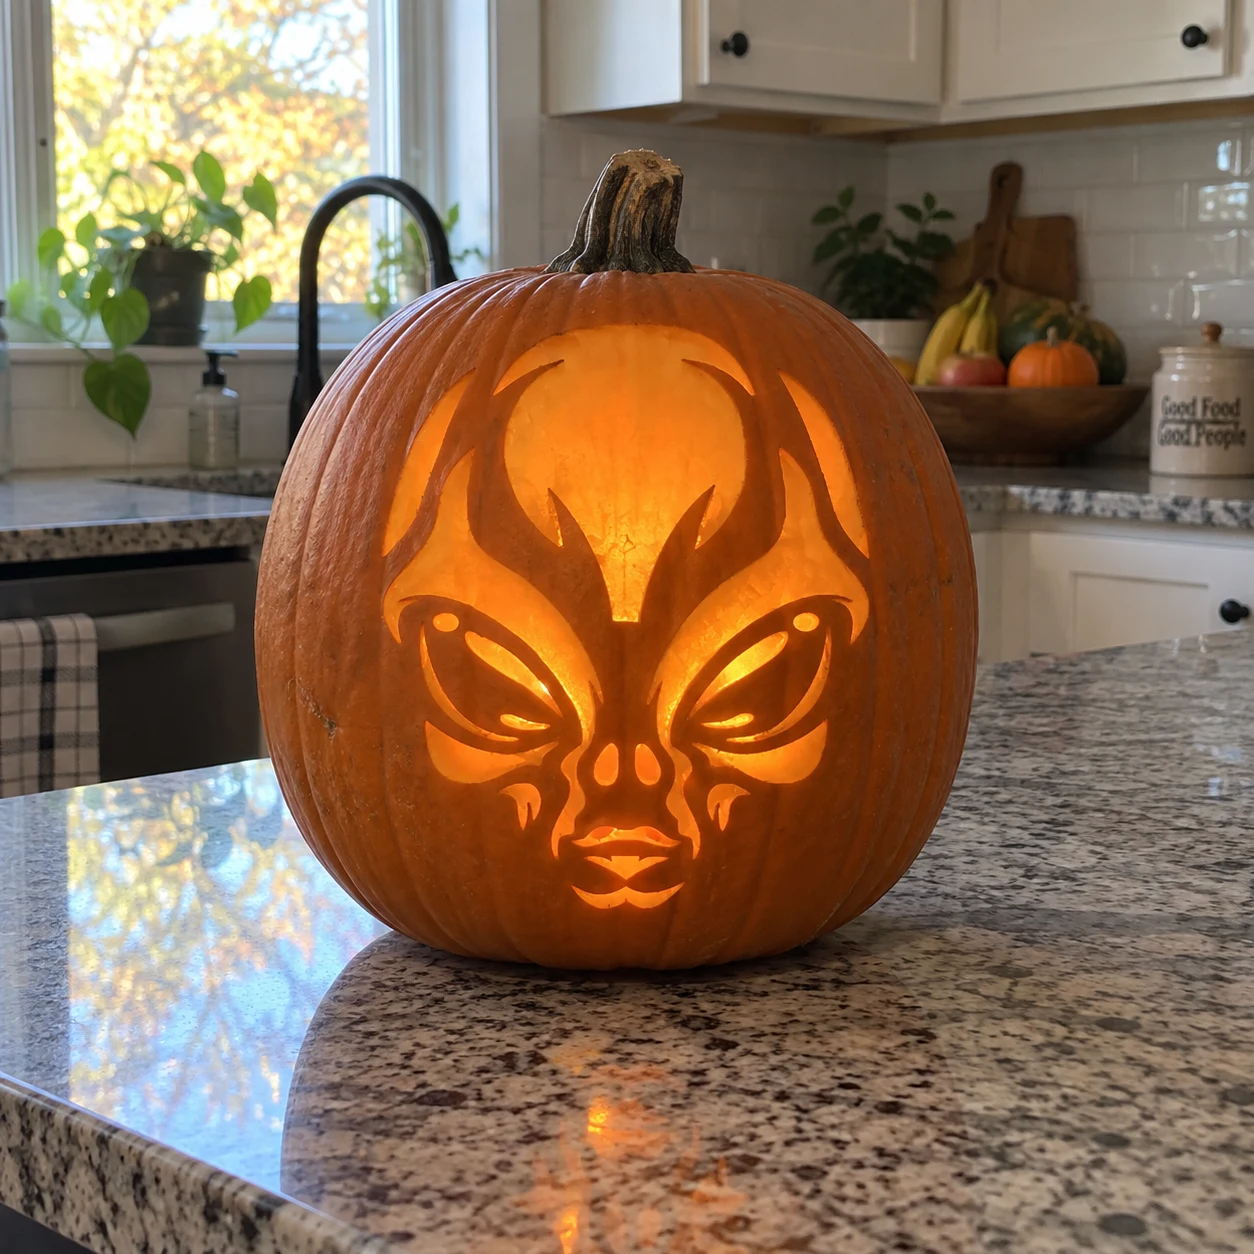
An alien face with a massive domed cranium, huge almond-shaped eyes with small round irises, a vestigial nose, and thin lips fills the stencil from chin to crown, flanked by flame-like protrusions from the skull. The large dome is carved open, while the eyes are cut as open ovals with small solid iris nubs, and a series of small petal shapes around the chin and cheeks add texture. Lit from inside, the open skull dome blazes brightest and the eye shapes glow along the lower half, giving the face an eerie two-zone lighting effect. To keep the narrow iris nubs centered inside the eye ovals, cut the outer eye shape before removing the interior. This design is rated Advanced and takes most carvers around 150 minutes from trace to glow. Multi-layer cuts with skin-peel shading. Plan your cuts first.
Pumpkin size guide
- 🎃 Small (5–7") — print at 80%
- 🎃 Medium (7–10") — print at 100% (recommended)
- 🎃 Large (11–13") — print at 130%
- 🎃 Giant (14"+) — print at 150% on tabloid paper
Frequently asked questions
Can I resize this stencil?▾
Yes. The PDF is vector so it scales cleanly. Print at 100% for a 7–10 inch pumpkin, 130% for 11–13 inch, or 150% for a giant. Use your printer's "Fit to page" or "Custom scale" setting.
What kind of paper works best?▾
Standard 20 lb letter or A4 printer paper is fine. Heavier paper is harder to bend around the pumpkin curve. If your printer supports it, set the quality to 'best' so the lines are crisp.
How long will the carved pumpkin last?▾
Usually 5–10 days. Coat all cut surfaces with petroleum jelly and store the pumpkin somewhere cool overnight. Avoid direct sun. Battery tea lights produce no heat and double the lifespan.
Can I sell pumpkins carved with this stencil?▾
Yes, the carved pumpkin you make is yours. The license covers personal and small-scale commercial carving (selling carved pumpkins, photographing them, posting on social). You may not resell the PDF file itself.
What if my printer doesn't print the whole stencil?▾
Set 'Page scaling' to 'Fit' in the print dialog and uncheck 'Auto-rotate'. If it still cuts off, the design includes 0.25" of safe-area margin so a small crop won't ruin it.
How to carve this stencil
- Transfer the pattern, paying extra attention to the small iris circles nested inside each eye oval.
- Cut the large dome opening at the top of the skull first to relieve pressure on the pumpkin wall.
- Carve each eye oval next, stopping just inside the iris nub boundary.
- Carefully cut around each iris nub to free the oval while leaving the nub attached.
- Remove the small chin and cheek petal shapes, working outward from center.
- Cut the flame-spike protrusions at the skull sides last using short controlled strokes to avoid snapping the tips.
Tools you'll need
For a advanced carve like this you'll want a linoleum cutter set, x-acto knife, peel tool, and pin transfer wheel. Here's the kit we reach for — start with whatever you already own.

Elmchee Pumpkin Carving Kit
13-piece kit with carrying case
Saws for the larger cutouts, plus a scoop for hollowing. Covers both jobs in one kit.
View on Amazon ↗
Speedball 4131 Lino Cutter Set
Handle + 5 interchangeable cutters
Interchangeable cutters for peeling and shading the face. Useful for the finer details.
View on Amazon ↗
Homemory LED Tea Lights
24-pack of battery-operated lights
Battery-operated, flickering lights for a candle-like glow inside your finished pumpkin.
View on Amazon ↗
Community Pumpkin Carving Ideas
Carving ideas that use stencils like this one.
Related stencils
Carvers who liked this one also downloaded these.
- Beginner-friendly
Flying Saucer Pumpkin Stencil
A flying saucer in classic 1950s style beams down a tractor ray in this pumpkin stencil, featuring a domed disc with a small fin on top, a row of oval porthole cuts across the hull, a central undercarriage dome, and a wide triangular tractor beam with three internal vertical ribs extending down to a landing ellipse. The portholes, beam sections, and surrounding sky area are pierced through. Carve the small oval portholes along the saucer rim first to keep the disc structure stable before opening the large tractor beam below.
- Advanced
Flying Saucer Pumpkin Stencil
A classic flying saucer seen from a three-quarter angle fills this hard space pumpkin stencil. The domed cockpit on top, the wide flat disc with a raised rim, three small round indicator lights on the underside, and three diverging tractor-beam rays below all read clearly as carved shapes. The beam rays are solid pumpkin strips between large open triangular cutouts, so lit from inside the beam glows as three bright triangular shafts pointing downward. Carve the three beam triangles first since they are the largest open areas, then work upward through the disc details and finish with the small circular indicator lights.
- Beginner-friendly
Bat and Moon Pumpkin Stencil
A crescent moon curves across the upper half of the design with a small bat silhouette flying in front of it, both cut through as a single pumpkin stencil. The crescent is a wide sweeping arc and the bat sits slightly below center within the curve, its wings spread and ears pointed. The bat's body stays connected to the moon's surface by a thin shared border; carve the crescent first and leave the bat's outer wing edges touching the moon arc so the bat doesn't shift before you finish the interior.
- Beginner-friendly
Alien Face Pumpkin Stencil
An alien face with a wide oval cranium fills this pumpkin stencil, featuring two large bulging almond-shaped eyes with small hooked inner corners, a two-dot nose, a curved smile, and a rounded forehead band rendered as arcing cut-through lines. The eye shapes and facial features are each separate pierces, while the outer oval head outline is also cut away, framing everything in open light. The narrow forehead arc is the most fragile element, so score it fully before pushing through to avoid it snapping midway.
- Advanced
Crescent Moon Pumpkin Stencil
A crescent moon shape faces left, its body filled with a texture of small irregular cut-out marks that suggest the pitted surface of the moon, while a faint face profile is visible along the inner curve of the crescent. The large crescent itself is the main pierced shape, and the small interior texture dots pepper the body, creating a glowing stippled effect when lit from inside. To keep the many small interior marks from causing the crescent body to crumble, carve the outer crescent boundary first, then pick out the texture dots from largest to smallest using a small round drill bit or detail blade.
- Beginner-friendly
Alien Face Pumpkin Stencil
An alien face with oversized teardrop eyes, a broad domed cranium, and subtle nostril and lip details fills this space pumpkin stencil as a single large cut-out with internal skin bridges defining the facial features. The large eyes are open negative spaces separated from the head background by thin arching brow ridges, which are easily the most fragile element. Carve the outer head silhouette first, then remove the large eye areas, keeping the blade tight against the brow-ridge boundary to preserve that thin curved strip of pumpkin skin.