Similar to This
View all stencils →About this stencil
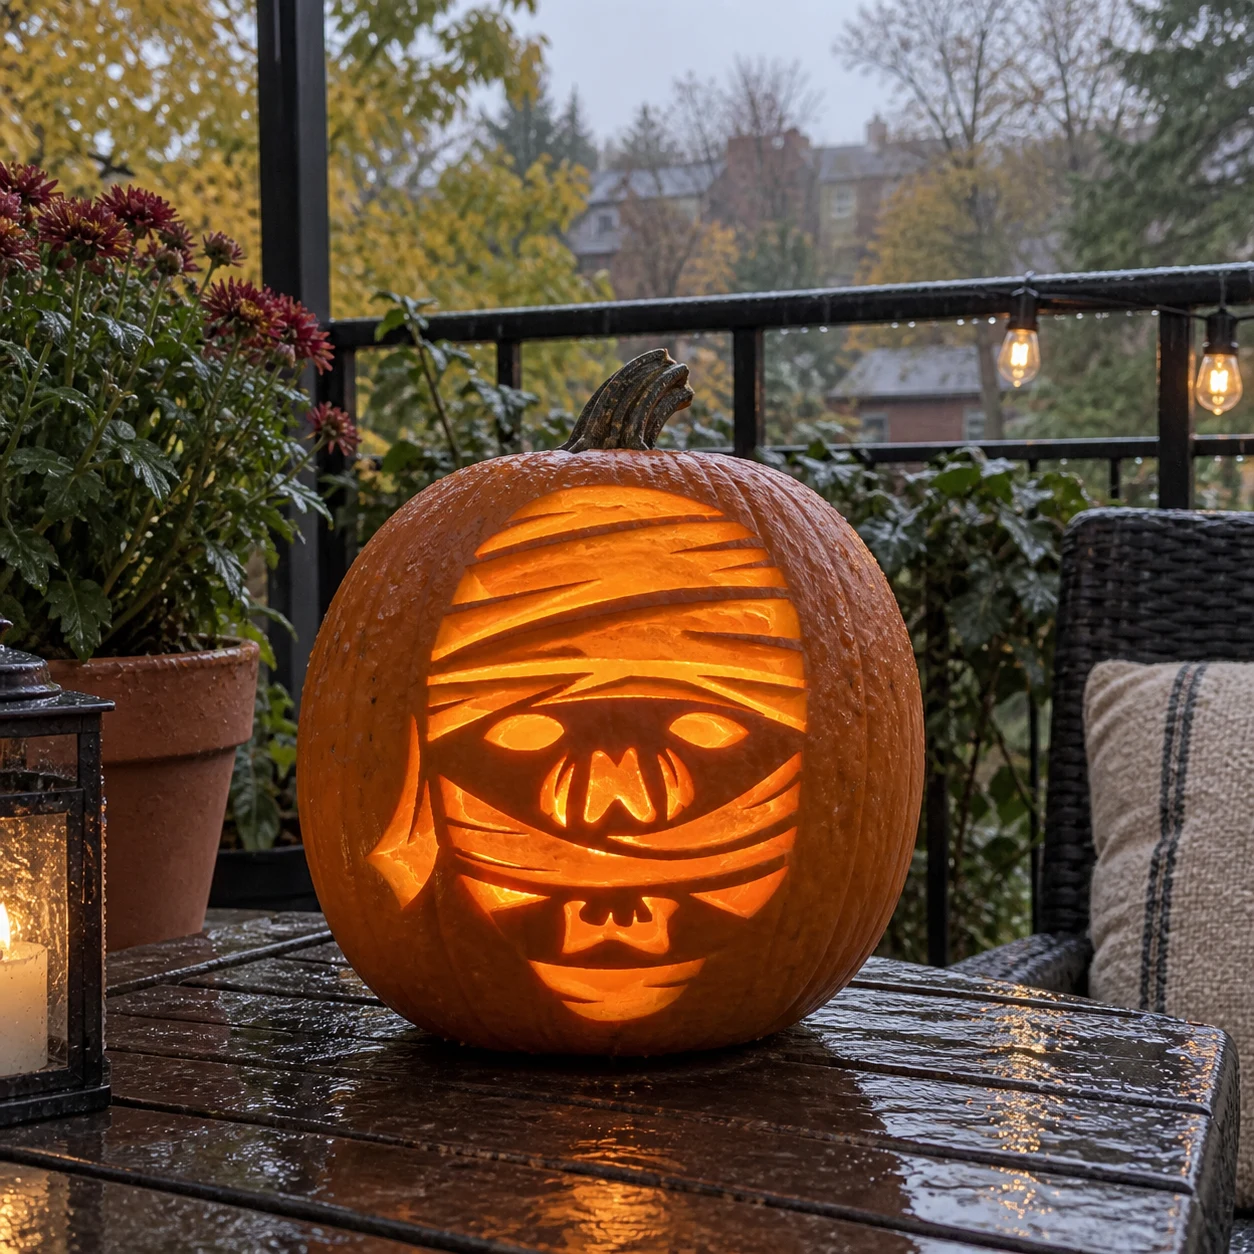
A mummy face fills this pumpkin stencil, built from horizontal overlapping bandage strips that cross the forehead, bridge over hollow oval eye sockets, and wrap beneath a grimacing mouth with small exposed teeth. The bandage layers are the solid orange pumpkin wall while the gaps between them are pierced through, so candlelight reads as stripes of light across a dark face. Cut the eye socket ovals first, then work upward through the bandage gaps from the chin to the crown, keeping each horizontal bridge intact until the cut on either side of it is complete. This design is rated Advanced and takes most carvers around 150 minutes from trace to glow. Multi-layer cuts with skin-peel shading. Plan your cuts first.
Pumpkin size guide
- 🎃 Small (5–7") — print at 80%
- 🎃 Medium (7–10") — print at 100% (recommended)
- 🎃 Large (11–13") — print at 130%
- 🎃 Giant (14"+) — print at 150% on tabloid paper
Frequently asked questions
Can I resize this stencil?▾
Yes. The PDF is vector so it scales cleanly. Print at 100% for a 7–10 inch pumpkin, 130% for 11–13 inch, or 150% for a giant. Use your printer's "Fit to page" or "Custom scale" setting.
What kind of paper works best?▾
Standard 20 lb letter or A4 printer paper is fine. Heavier paper is harder to bend around the pumpkin curve. If your printer supports it, set the quality to 'best' so the lines are crisp.
How long will the carved pumpkin last?▾
Usually 5–10 days. Coat all cut surfaces with petroleum jelly and store the pumpkin somewhere cool overnight. Avoid direct sun. Battery tea lights produce no heat and double the lifespan.
Can I sell pumpkins carved with this stencil?▾
Yes, the carved pumpkin you make is yours. The license covers personal and small-scale commercial carving (selling carved pumpkins, photographing them, posting on social). You may not resell the PDF file itself.
What if my printer doesn't print the whole stencil?▾
Set 'Page scaling' to 'Fit' in the print dialog and uncheck 'Auto-rotate'. If it still cuts off, the design includes 0.25" of safe-area margin so a small crop won't ruin it.
How to carve this stencil
- Transfer the full design with a pin tool before removing the paper.
- Cut the two oval eye sockets cleanly, as they anchor your spatial reference for the rest of the face.
- Work from the bottom up, removing each gap between bandage strips row by row so the wall above stays thick and rigid.
- Cut the small exposed-teeth shapes inside the mouth area carefully with a detail blade.
- Remove the chin strip last, as it is the widest cut and spans the most vulnerable lower wall.
- Place a candle or LED inside and view from a slight distance so all the bandage bridges read as continuous wrapping.
Tools you'll need
For a advanced carve like this you'll want a linoleum cutter set, x-acto knife, peel tool, and pin transfer wheel. Here's the kit we reach for — start with whatever you already own.

Elmchee Pumpkin Carving Kit
13-piece kit with carrying case
Saws for the larger cutouts, plus a scoop for hollowing. Covers both jobs in one kit.
View on Amazon ↗
Speedball 4131 Lino Cutter Set
Handle + 5 interchangeable cutters
Interchangeable cutters for peeling and shading the face. Useful for the finer details.
View on Amazon ↗
Homemory LED Tea Lights
24-pack of battery-operated lights
Battery-operated, flickering lights for a candle-like glow inside your finished pumpkin.
View on Amazon ↗
Community Pumpkin Carving Ideas
Carving ideas that use stencils like this one.
Related stencils
Carvers who liked this one also downloaded these.
- Expert / Pro
Pharaoh Death Mask Pumpkin Stencil
An Egyptian pharaoh death mask stares straight out of this expert pumpkin stencil, showing the broad striped nemes headdress with its pleated side panels and forehead uraeus cobra, plus a detailed face with almond-shaped eyes, straight brows, a defined nose, and a zigzag collar at the neck. The face details are held in thin skin bridges while the headdress stripes and surrounding areas are pierced through. Carve the delicate uraeus cobra at the top first since it is the most isolated element and easiest to cut without torque on neighboring sections.
- Expert / Pro
Bandaged Mummy Pumpkin Stencil
A stout, squat mummy character dominates this expert pumpkin stencil, its entire body layered in spiraling bandage wraps that read as a dense web of curved negative-space cuts. Two round eyes peek out as small circles near the top, and wild tattered bandage ends fly from both arms and along the ground line. The arms, made up of irregular claw-like bandage shreds, are the most fragile sections; cut them after the body core is fully carved so the pumpkin stays stable throughout.
- Advanced
Cartoon Mummy Pumpkin Stencil
A squat cartoon mummy stands front-facing in this pumpkin stencil, its head wrapped in bandage strips that curl into decorative scrolls above, while a broad grinning skull mouth with large square teeth is cut through below. The wrapped body, arms, and stubby legs are defined by horizontal bandage-strip negative spaces that blaze with light when carved. Cut the curved scroll shapes at the top of the head before tackling the body strips, as the scrolls are the most delicate elements here.
- Advanced
Chibi Mummy Pumpkin Stencil
A chibi-style mummy pumpkin stencil showing a squat, round-headed figure wrapped head-to-toe in curved bandage strips, with two large oval eyes cut through the face and a small triangular nose below. The character stands in a wide-legged stance with stubby arms held out to the sides. Lit from inside, the big eye circles and the gaps between bandage strips all glow independently, so start by cutting the largest background sections on the torso before moving to the small curved wrapping strips, keeping at least two bandage bridges intact on each limb to prevent them from falling free.