Similar to This
View all stencils →About this stencil
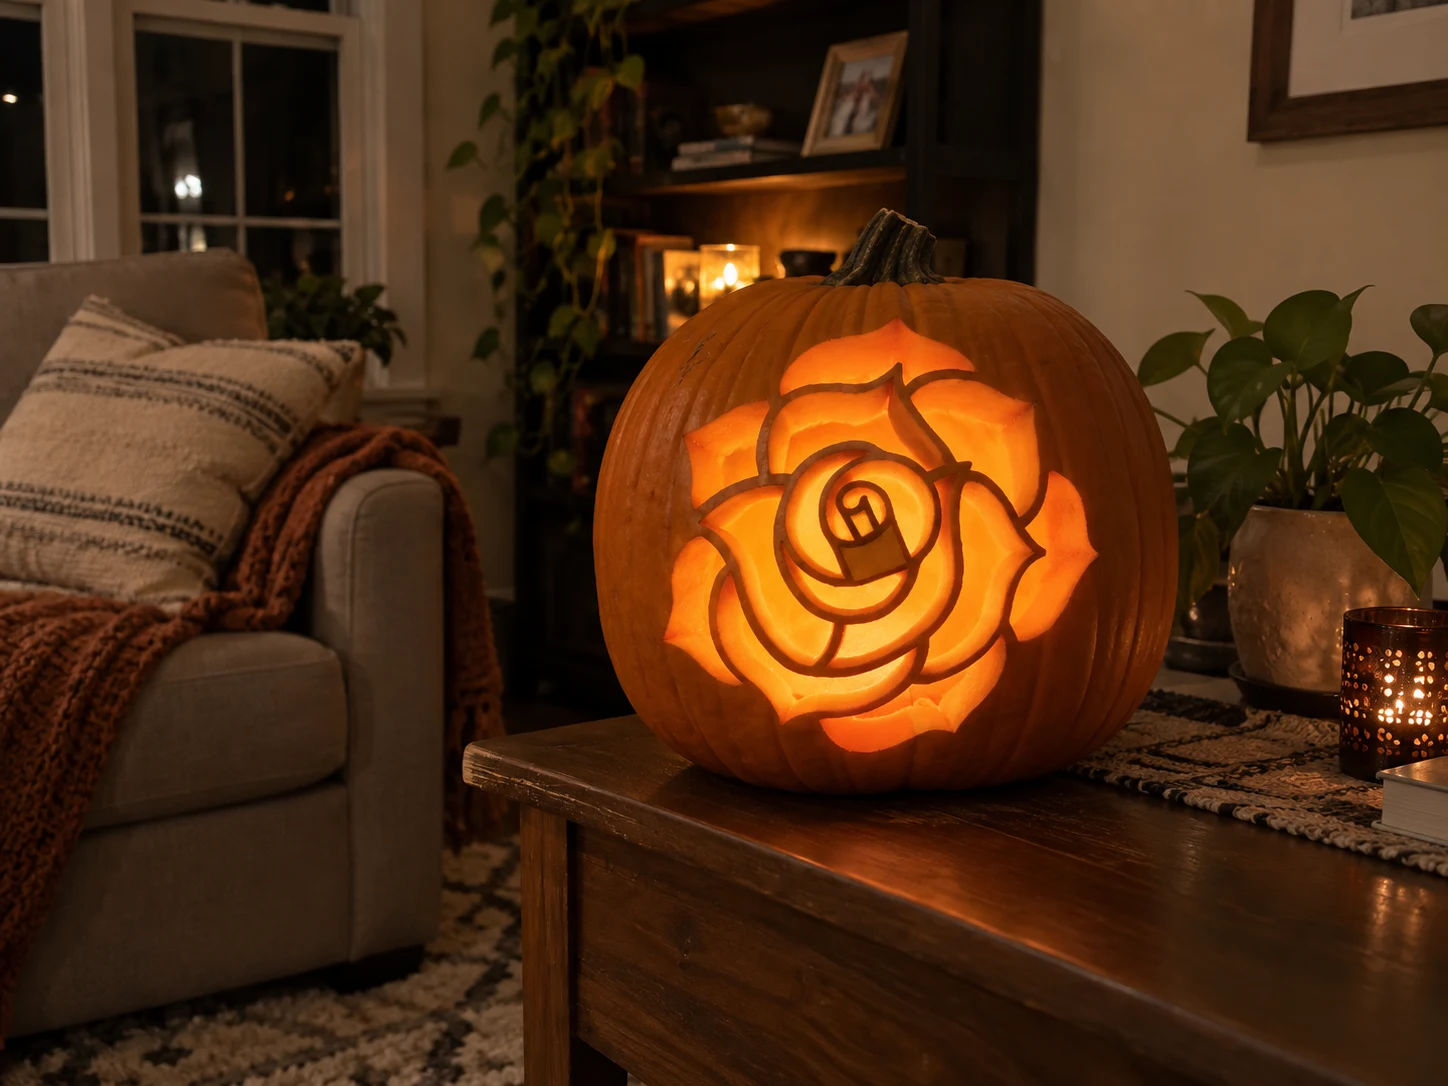
A fully open rose bloom fills this pumpkin stencil edge to edge, with layered outer petals that taper to pointed tips and a tight spiral center bud defined by two curved cut lines. Most of the design is cut away, leaving the petal-edge outlines and spiral as thin orange pumpkin bridges floating in a large illuminated background. The center spiral is the most fragile element, so trace its two curved cuts first with a sharp fine blade before opening the surrounding petal fields that would otherwise leave it unsupported. This design is rated Expert / Pro and takes most carvers around 240 minutes from trace to glow. Sculpting-grade work. Three or more depth layers, fine detail.
Pumpkin size guide
- 🎃 Small (5–7") — print at 80%
- 🎃 Medium (7–10") — print at 100% (recommended)
- 🎃 Large (11–13") — print at 130%
- 🎃 Giant (14"+) — print at 150% on tabloid paper
Frequently asked questions
Can I resize this stencil?▾
Yes. The PDF is vector so it scales cleanly. Print at 100% for a 7–10 inch pumpkin, 130% for 11–13 inch, or 150% for a giant. Use your printer's "Fit to page" or "Custom scale" setting.
What kind of paper works best?▾
Standard 20 lb letter or A4 printer paper is fine. Heavier paper is harder to bend around the pumpkin curve. If your printer supports it, set the quality to 'best' so the lines are crisp.
How long will the carved pumpkin last?▾
Usually 5–10 days. Coat all cut surfaces with petroleum jelly and store the pumpkin somewhere cool overnight. Avoid direct sun. Battery tea lights produce no heat and double the lifespan.
Can I sell pumpkins carved with this stencil?▾
Yes, the carved pumpkin you make is yours. The license covers personal and small-scale commercial carving (selling carved pumpkins, photographing them, posting on social). You may not resell the PDF file itself.
What if my printer doesn't print the whole stencil?▾
Set 'Page scaling' to 'Fit' in the print dialog and uncheck 'Auto-rotate'. If it still cuts off, the design includes 0.25" of safe-area margin so a small crop won't ruin it.
How to carve this stencil
- Transfer all lines including the fine spiral center and every petal edge before removing the stencil.
- Cut the two curved spiral lines at the center of the bud first, using a fine blade and rotating the pumpkin to follow each arc.
- Remove the innermost petal sections immediately surrounding the spiral.
- Work outward petal ring by petal ring, cutting each pointed tip carefully to avoid splitting.
- Save the large outermost petal fields for last, as they are the biggest open areas and removing them first would leave the center unanchored.
- Use a bright LED inside to show every petal bridge as a glowing orange outline against the open background.
Tools you'll need
For a expert / pro carve like this you'll want a full ribbon tool set, clay sculpting loops, x-acto knife, and dremel (optional). Here's the kit we reach for — start with whatever you already own.

Elmchee Pumpkin Carving Kit
13-piece kit with carrying case
Saws for the larger cutouts, plus a scoop for hollowing. Covers both jobs in one kit.
View on Amazon ↗
Speedball 4131 Lino Cutter Set
Handle + 5 interchangeable cutters
Interchangeable cutters for peeling and shading the face. Useful for the finer details.
View on Amazon ↗
Homemory LED Tea Lights
24-pack of battery-operated lights
Battery-operated, flickering lights for a candle-like glow inside your finished pumpkin.
View on Amazon ↗
Community Pumpkin Carving Ideas
Carving ideas that use stencils like this one.
Related stencils
Carvers who liked this one also downloaded these.
- Expert / Pro
Sunflower Pumpkin Stencil
A large sunflower with roughly twenty lance-shaped petals radiating from a solid circular center disk fills this expert pumpkin stencil. Each petal is an individual pierce-through slot, separated from adjacent petals by a thin curved wall of pumpkin, and the disk center is also carved out. The lit jack-o-lantern blazes like a radiant wheel of light with the petal gaps glowing and the petal walls casting narrow spokes of shadow. Begin carving at the inner petal bases nearest the center disk before working toward the tips, keeping the disk cut for last so the petal ring retains its structural support.
- Advanced
Rose Bloom Pumpkin Stencil
A fully open rose bloom fills this pumpkin stencil, rendered as a set of curved, teardrop-shaped petals radiating from a tight spiral center. The cut-out segments are separated by thin pumpkin-flesh bridges that hold the design together, so when lit the candle glow traces the swirling petal arrangement. Carve the smallest center pieces first to avoid cracking the surrounding petals, and keep a damp cloth nearby to prevent the thin bridges from drying out mid-session.
- Advanced
Rose Pumpkin Stencil
A full rose with a spiraling center bud, layered outer petals, and a thin stem with two small leaves is the subject of this flower pumpkin stencil. The petals are rendered as irregular organic cut sections that radiate from the tight center spiral outward to ragged outer edges, while the stem and leaves below are smaller separate pieces. Lit from inside, the solid pumpkin between cuts reads as petal ridges framing windows of light. Cut the innermost spiral bud sections first so the outer petals remain attached and sturdy while you navigate the tightest curves.
- Advanced
Lily Flower Pumpkin Stencil
A single lily blossom fills the design with five broad sweeping petals, each separated by thin white lines, and a cluster of slender stamen stalks topped with teardrop anthers at the center. The large petal areas are cut through while the stamen cluster creates a spray of small isolated islands at the heart of the flower. Carve the petals from the outermost tip of each down toward the flower center, then tackle the stamen teardrops last so the surrounding petal wall gives you a stable grip while working on those tiny pieces.
- Advanced
Chamomile Flower Pumpkin Stencil
A daisy-like chamomile flower with a round center disc, about fourteen smooth rounded petals radiating outward, a curving stem, and two smooth teardrop-shaped leaves forms this flower pumpkin stencil, with each petal and the leaves cut as individual open shapes separated by thin skin ridges. When lit, the individual petals glow like a ring of light around the solid center button, and the stem and leaves add a botanical silhouette below. Cut the two leaf shapes at the base first so the stem is fully supported, then work petal by petal around the flower head from bottom to top to avoid rotating the pumpkin repeatedly over a weakened stem area.