Similar to This
View all stencils →About this stencil
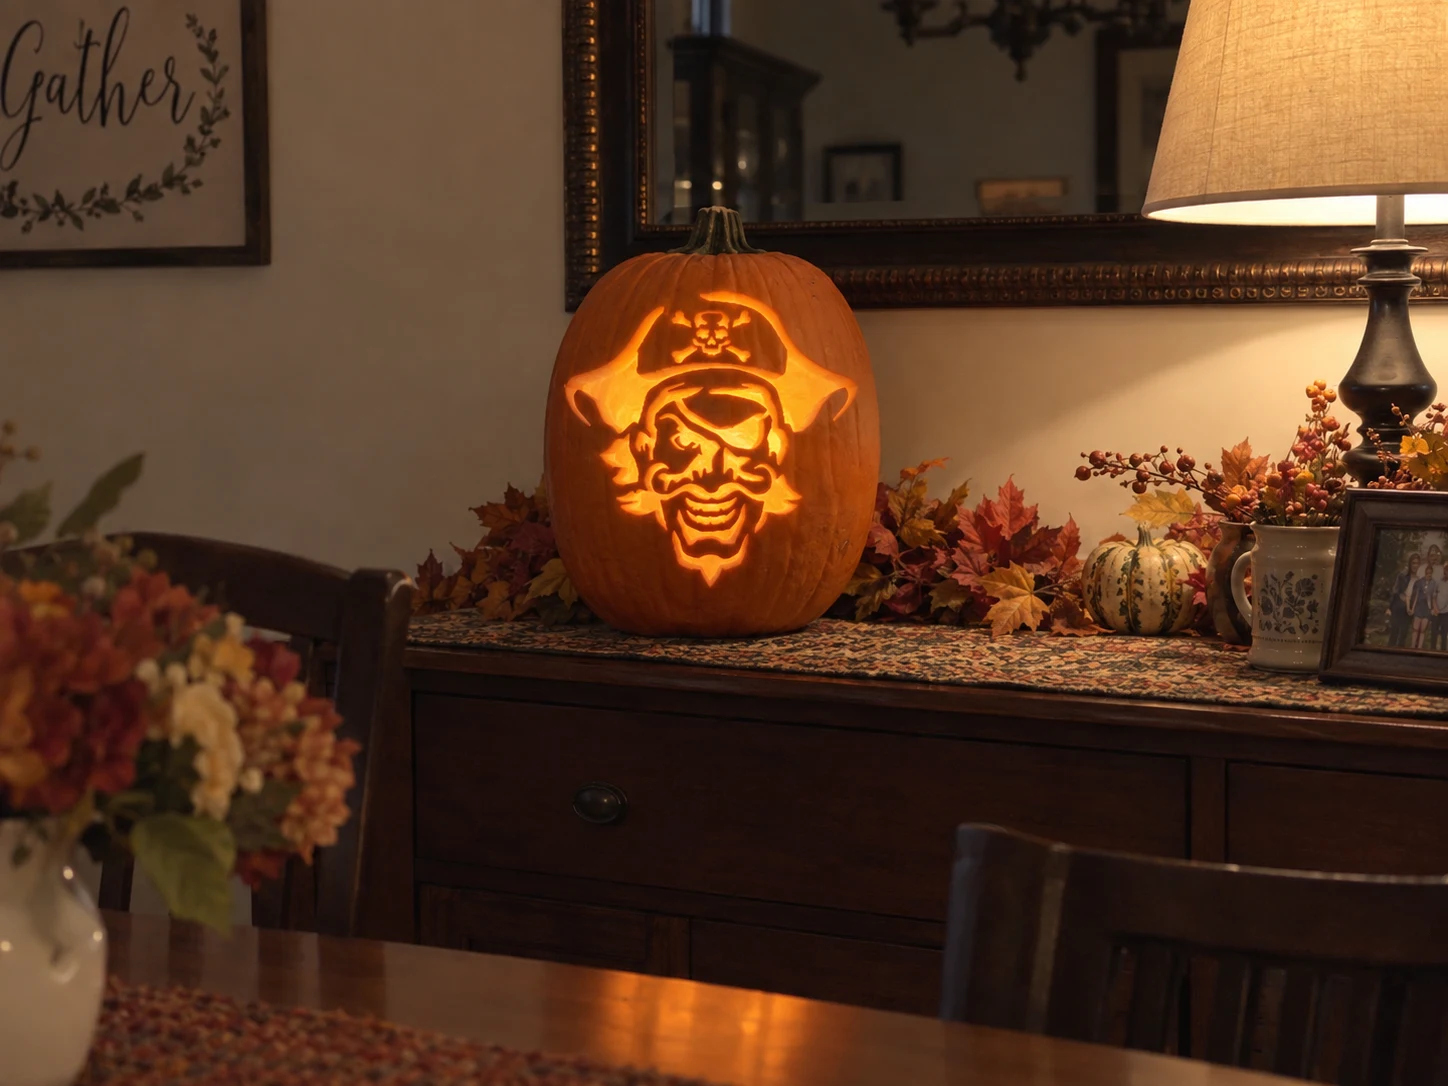
A grinning pirate face topped by a tricorn hat is the subject of this hard pumpkin stencil: a skull-and-crossbones badge on the hat brim, a round-brimmed hat spreading wide, a leather eye patch over one eye, a weathered face with deep laugh lines, a broad toothy smile, and a pointed goatee at the chin. The lit design reveals a cheerful swashbuckler portrait full of character. Cut the small skull-and-crossbones elements on the hat first while the surrounding skin is firm, then work down through the face, saving the wide hat brim last. This design is rated Advanced and takes most carvers around 150 minutes from trace to glow. Multi-layer cuts with skin-peel shading. Plan your cuts first.
Pumpkin size guide
- 🎃 Small (5–7") — print at 80%
- 🎃 Medium (7–10") — print at 100% (recommended)
- 🎃 Large (11–13") — print at 130%
- 🎃 Giant (14"+) — print at 150% on tabloid paper
Frequently asked questions
Can I resize this stencil?▾
Yes. The PDF is vector so it scales cleanly. Print at 100% for a 7–10 inch pumpkin, 130% for 11–13 inch, or 150% for a giant. Use your printer's "Fit to page" or "Custom scale" setting.
What kind of paper works best?▾
Standard 20 lb letter or A4 printer paper is fine. Heavier paper is harder to bend around the pumpkin curve. If your printer supports it, set the quality to 'best' so the lines are crisp.
How long will the carved pumpkin last?▾
Usually 5–10 days. Coat all cut surfaces with petroleum jelly and store the pumpkin somewhere cool overnight. Avoid direct sun. Battery tea lights produce no heat and double the lifespan.
Can I sell pumpkins carved with this stencil?▾
Yes, the carved pumpkin you make is yours. The license covers personal and small-scale commercial carving (selling carved pumpkins, photographing them, posting on social). You may not resell the PDF file itself.
What if my printer doesn't print the whole stencil?▾
Set 'Page scaling' to 'Fit' in the print dialog and uncheck 'Auto-rotate'. If it still cuts off, the design includes 0.25" of safe-area margin so a small crop won't ruin it.
How to carve this stencil
- Transfer all lines including the small skull-and-crossbones detail at the top of the hat.
- Cut the skull and crossbones cutouts on the hat badge first; these are the smallest pieces and need firm surrounding skin.
- Cut the eye patch opening and the eye on the unpatched side.
- Work through the facial laugh lines and cheek cutouts, rotating around the face rather than completing one side at a time.
- Cut the teeth openings inside the wide smile, then the chin and goatee shapes below.
- Cut the wide hat brim sections last, since removing them earlier would destabilize the upper half of the design.
Tools you'll need
For a advanced carve like this you'll want a linoleum cutter set, x-acto knife, peel tool, and pin transfer wheel. Here's the kit we reach for — start with whatever you already own.

Elmchee Pumpkin Carving Kit
13-piece kit with carrying case
Saws for the larger cutouts, plus a scoop for hollowing. Covers both jobs in one kit.
View on Amazon ↗
Speedball 4131 Lino Cutter Set
Handle + 5 interchangeable cutters
Interchangeable cutters for peeling and shading the face. Useful for the finer details.
View on Amazon ↗
Homemory LED Tea Lights
24-pack of battery-operated lights
Battery-operated, flickering lights for a candle-like glow inside your finished pumpkin.
View on Amazon ↗
Community Pumpkin Carving Ideas
Carving ideas that use stencils like this one.
Related stencils
Carvers who liked this one also downloaded these.
- Beginner-friendly
Game Over Pumpkin Stencil
"GAME OVER" fills this easy pumpkin stencil in two stacked rows of chunky 8-bit pixel font lettering, each character built from squared-off rectangular blocks with notched corners that read unmistakably as retro video game text. Every letter interior is cut through, and the negative space between characters is narrow but distinct. The squared notches at the corners of each letter are the trickiest spots to keep clean; use the tip of a narrow blade to score those inside corners before opening the main letter body.
- Advanced
Grim Reaper Pumpkin Stencil
A flowing Grim Reaper figure grips a long scythe at chest height, its hooded skull face glowing with hollow eye sockets as the ragged robe billows outward below. The curved scythe blade arcs dramatically across the top of the composition. Lit from within, the open robe hem, skeletal hands, and skull interior create a layered halo of light around the solid hood shape. Carve the large open robe sections last so the scythe blade, the most slender element, stays braced by the surrounding pumpkin wall while you work.
- Advanced
Kawaii Mushroom Pumpkin Stencil
A kawaii-style mushroom character fills this hard pumpkin stencil, with a broad spotted cap, small horns or fins at the sides, and a round face below it showing large anime eyes and a tiny curved mouth. The cap spots are solid orange circles against a pierced cap background, and the face details are fine interior cuts within the solid round head. Carve the small circular spots on the cap before removing the large open cap area, so those circles have firm pumpkin wall behind them while you make the precise cuts.
- Beginner-friendly
Flying Owl Pumpkin Stencil
A front-facing owl in full wing spread fills this easy pumpkin stencil, the entire bird rendered as a single solid silhouette with ear tufts visible at the top of the head and feathered wingtips fanning wide on both sides. The whole shape is pierced as one large cutout, so the lit jack-o-lantern throws a bold bright owl outline with no interior detail to worry about. Thin the pumpkin wall evenly behind the wing tips before cutting, since the long feather edges can crack if the wall is too thick when you remove the large central section.
- Beginner-friendly
Spider Emblem Pumpkin Stencil
A stylized spider rendered as a graphic emblem fills this easy stencil: the body is split into a large oval abdomen and a smaller rounded head kept solid as orange pumpkin, while the eight legs radiate outward as broad curved blades that taper to sharp points, all backed by cut-out negative space. The overall silhouette has a bold, almost logo-like quality that glows dramatically when lit. Leave the narrow waist bridge connecting the head to the abdomen until last, since removing adjacent leg gaps early can put stress on that small connector.
- Advanced
Rat Pumpkin Stencil
A rat rearing up on its hind legs fills this Halloween pumpkin stencil, its long curved tail sweeping to one side and multiple whiskers fanning from both sides of the snout. The body is largely solid orange pumpkin skin framed by a pierced silhouette, so candlelight outlines the creature's claws and ragged chest fur in warm amber. Cut the whisker lines early while the stencil is anchored: there are three to four per side, so work from the snout outward on each side before opening the larger body area.