Similar to This
View all stencils →About this stencil
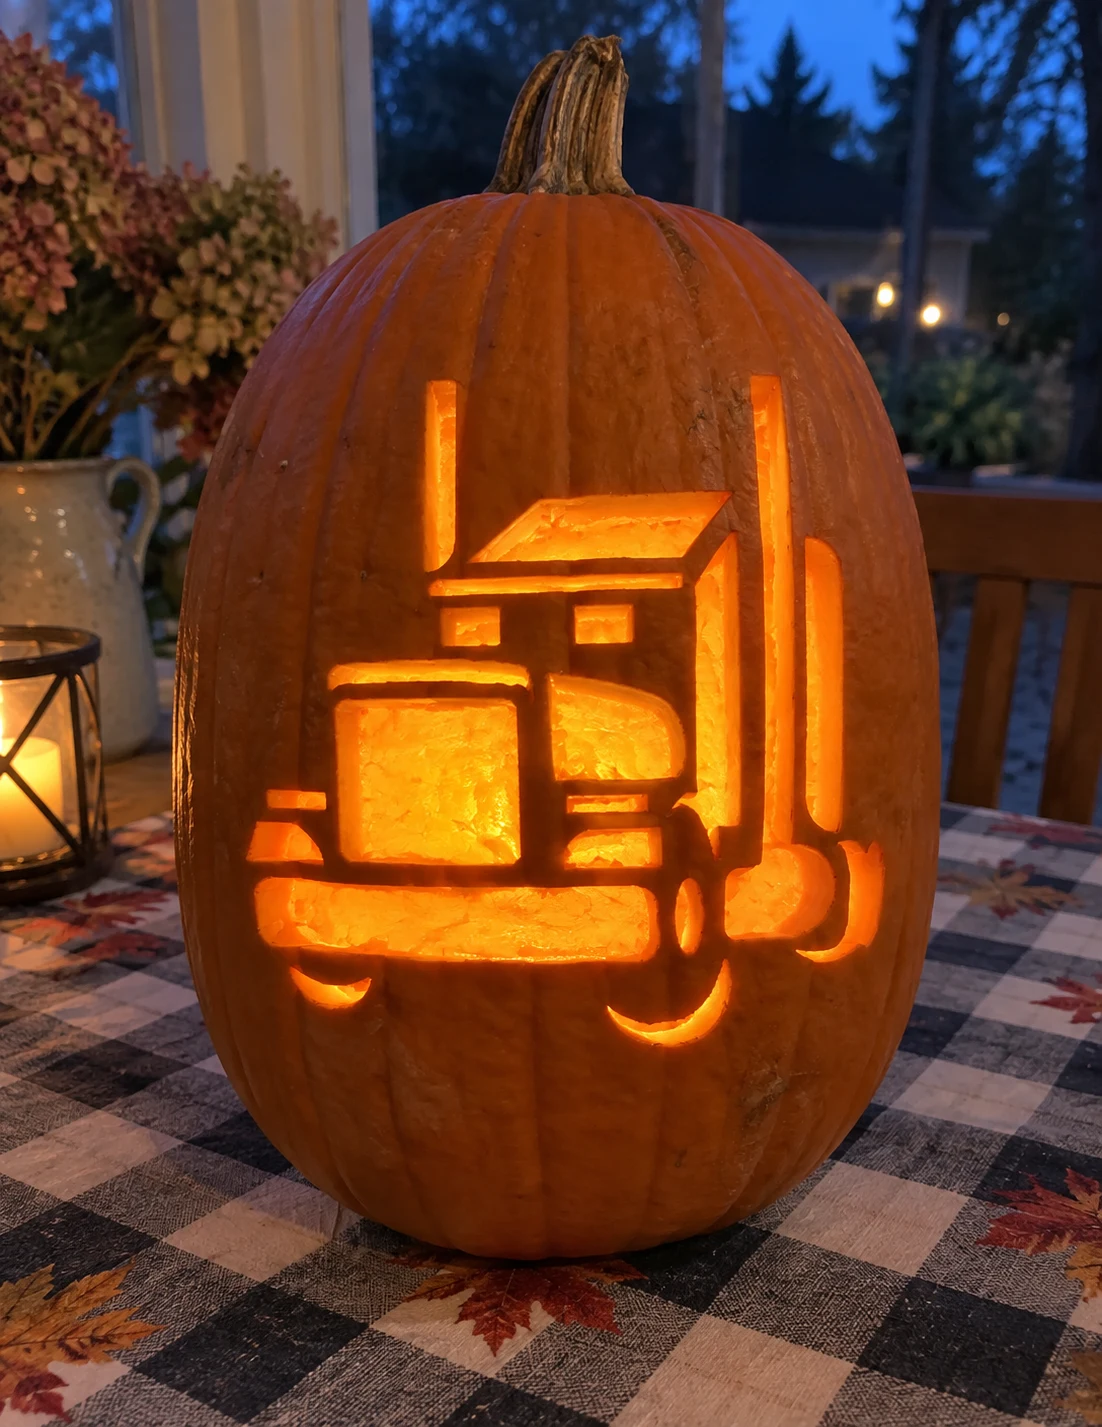
A classic eighteen-wheeler semi-truck cab shown in side profile fills this hard pumpkin stencil: a tall exhaust stack, a flat-topped sleeper cab with rectangular window cutouts, a step board, side mirrors, dual front headlights, and two large open wheel wells with small oval lug-nut details. The design reads as a cleanly geometric vehicle silhouette when lit, with the cab windows and wheel openings glowing brightest. Start with the cab window rectangles and the small mirror cutout before opening the large wheel wells, which would flex the lower pumpkin skin if cut first. This design is rated Advanced and takes most carvers around 150 minutes from trace to glow. Multi-layer cuts with skin-peel shading. Plan your cuts first.
Pumpkin size guide
- 🎃 Small (5–7") — print at 80%
- 🎃 Medium (7–10") — print at 100% (recommended)
- 🎃 Large (11–13") — print at 130%
- 🎃 Giant (14"+) — print at 150% on tabloid paper
Frequently asked questions
Can I resize this stencil?▾
Yes. The PDF is vector so it scales cleanly. Print at 100% for a 7–10 inch pumpkin, 130% for 11–13 inch, or 150% for a giant. Use your printer's "Fit to page" or "Custom scale" setting.
What kind of paper works best?▾
Standard 20 lb letter or A4 printer paper is fine. Heavier paper is harder to bend around the pumpkin curve. If your printer supports it, set the quality to 'best' so the lines are crisp.
How long will the carved pumpkin last?▾
Usually 5–10 days. Coat all cut surfaces with petroleum jelly and store the pumpkin somewhere cool overnight. Avoid direct sun. Battery tea lights produce no heat and double the lifespan.
Can I sell pumpkins carved with this stencil?▾
Yes, the carved pumpkin you make is yours. The license covers personal and small-scale commercial carving (selling carved pumpkins, photographing them, posting on social). You may not resell the PDF file itself.
What if my printer doesn't print the whole stencil?▾
Set 'Page scaling' to 'Fit' in the print dialog and uncheck 'Auto-rotate'. If it still cuts off, the design includes 0.25" of safe-area margin so a small crop won't ruin it.
How to carve this stencil
- 1Print it
Download the PDF and print at 100% scale on letter or A4 paper.
- 2Prep the pumpkin
Cut the lid at an angle, scoop the guts, thin the wall to ~1 inch.
- 3Tape it on
Snip darts in the paper so it lies flat against the curve.
- 4Transfer the design
Poke along every line — about one dot every 1/8 inch.
- 5Carve it
Connect the dots with short straight cuts. Center first, work outward.
- 6Light it up
Drop in a battery tea light and you're done.
Tools you'll need
For a advanced carve like this you'll want a linoleum cutter set, x-acto knife, peel tool, and pin transfer wheel. Here's the kit we reach for — start with whatever you already own.

Elmchee Pumpkin Carving Kit
13-piece kit with carrying case
Saws for the larger cutouts, plus a scoop for hollowing. Covers both jobs in one kit.
View on Amazon ↗
Speedball 4131 Lino Cutter Set
Handle + 5 interchangeable cutters
Interchangeable cutters for peeling and shading the face. Useful for the finer details.
View on Amazon ↗
Homemory LED Tea Lights
24-pack of battery-operated lights
Battery-operated, flickering lights for a candle-like glow inside your finished pumpkin.
View on Amazon ↗
Community Pumpkin Carving Ideas
Carving ideas that use stencils like this one.
Related stencils
Carvers who liked this one also downloaded these.
- Advanced
Farm Tractor Pumpkin Stencil
A side-view farm tractor fills this hard-level pumpkin stencil: a large rear wheel with a circular hub and cross-spoke cutouts, a small front wheel with a curved fender, a boxy cab section with cut-out windows, a squared hood, and a vertical exhaust stack. The rear wheel dominates the lower half of the composition and has the most intricate internal detail. Cut the cab windows and exhaust stack openings first while the pumpkin is still fully intact, then work on the large rear wheel spokes last, since removing them will flex the surrounding skin considerably.
- Expert / Pro
Monster Truck Pumpkin Stencil
A side-view monster truck with massive knobby tires dominates this expert pumpkin stencil: two oversized wheels with five-spoke rims, a high-clearance suspension chassis visible between the tires, a boxy cab with window cutouts, a wide front bumper, and flame or dragon graphics on the door panel. The many narrow bridges connecting the chassis rails and the spoke details inside each wheel make this a demanding carve. Cut the interior cab windows and bumper slots first, then tackle the five spokes of each wheel one at a time, always working away from the thin axle hub at the center.
- Beginner-friendly
Fighter Jet Pumpkin Stencil
A military fighter jet viewed from a three-quarter above angle is silhouetted as a single connected cutout in this vehicles pumpkin stencil, with swept delta wings, twin tail fins, and a detailed cockpit bump all readable in the clean outline. The narrow tail fins at the rear are the most fragile elements of the design. Score and cut those tail fin points before opening the large body void, so the thin tips have the full wall's rigidity behind them while the blade passes through.
- Expert / Pro
Formula Race Car Pumpkin Stencil
A detailed open-wheel formula racing car stretches across the full width of this pumpkin stencil in a low side profile, showing the nose cone, cockpit canopy, front and rear wings, and large exposed tires. The design keeps the car body as solid orange pumpkin wall with the negative space cut away around it, so the lit jack-o-lantern presents the car as an orange silhouette in a dark field. The nose cone and rear wing tips extend to very narrow points, so cut those extremities last once the large background sections have been removed and the remaining wall is light and flexible.
- Advanced
Motorcycle Pumpkin Stencil
A side-profile motorcycle fills this hard pumpkin stencil with mechanical detail: the front fork and handlebars, a sculpted fuel tank, streamlined seat fairing, and two large concentric-ring wheels. The design uses a mix of solid pumpkin bridges and open cut areas so the bike reads as a crisp silhouette when the jack-o-lantern is lit. The thin fork tubes and the thin strip separating the seat from the rear fairing are the most fragile elements. Carve the two large wheel ring sections first to establish the bottom of the composition before working inward through the frame details.
- Beginner-friendly
Airplane Pumpkin Stencil
A commercial jet airliner shown from a three-quarter overhead angle is rendered as one clean silhouette: swept wings, twin engines under each wing, a small T-tail, and a stubby nose all read instantly when lit. The entire plane shape is carved away as a single large negative space, so the pumpkin wall forms a crisp orange outline around the aircraft. Because the wingtip points are narrow and fragile, score those corners last and use a fresh blade to keep the tips from tearing.