Pumpkin carving templates
1155 free printable stencils. Download, print, trace, carve.
318 results · Page 4 of 9
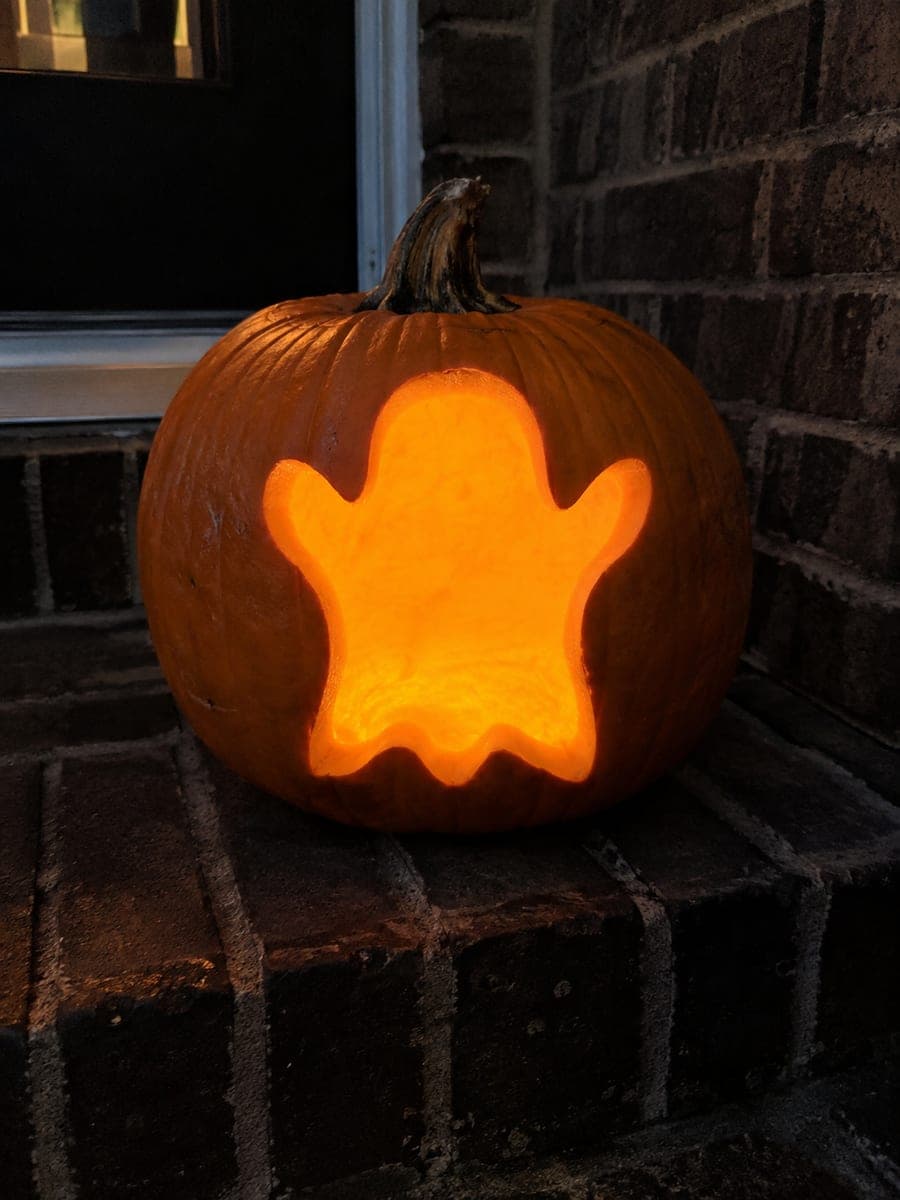
Ghost with Three Uneven Points
A single billowy ghost with two raised arms and a wavy hem ending in three uneven points, carved as one big glowing cutout. The entire ghost silhouette is pierced through, so candlelight fills the friendly specter from arms to tail. This easy one-piece design suits squat pumpkins with plenty of front surface; cut the smooth outer curves first and finish with the scalloped bottom points, which are the only fiddly bits.
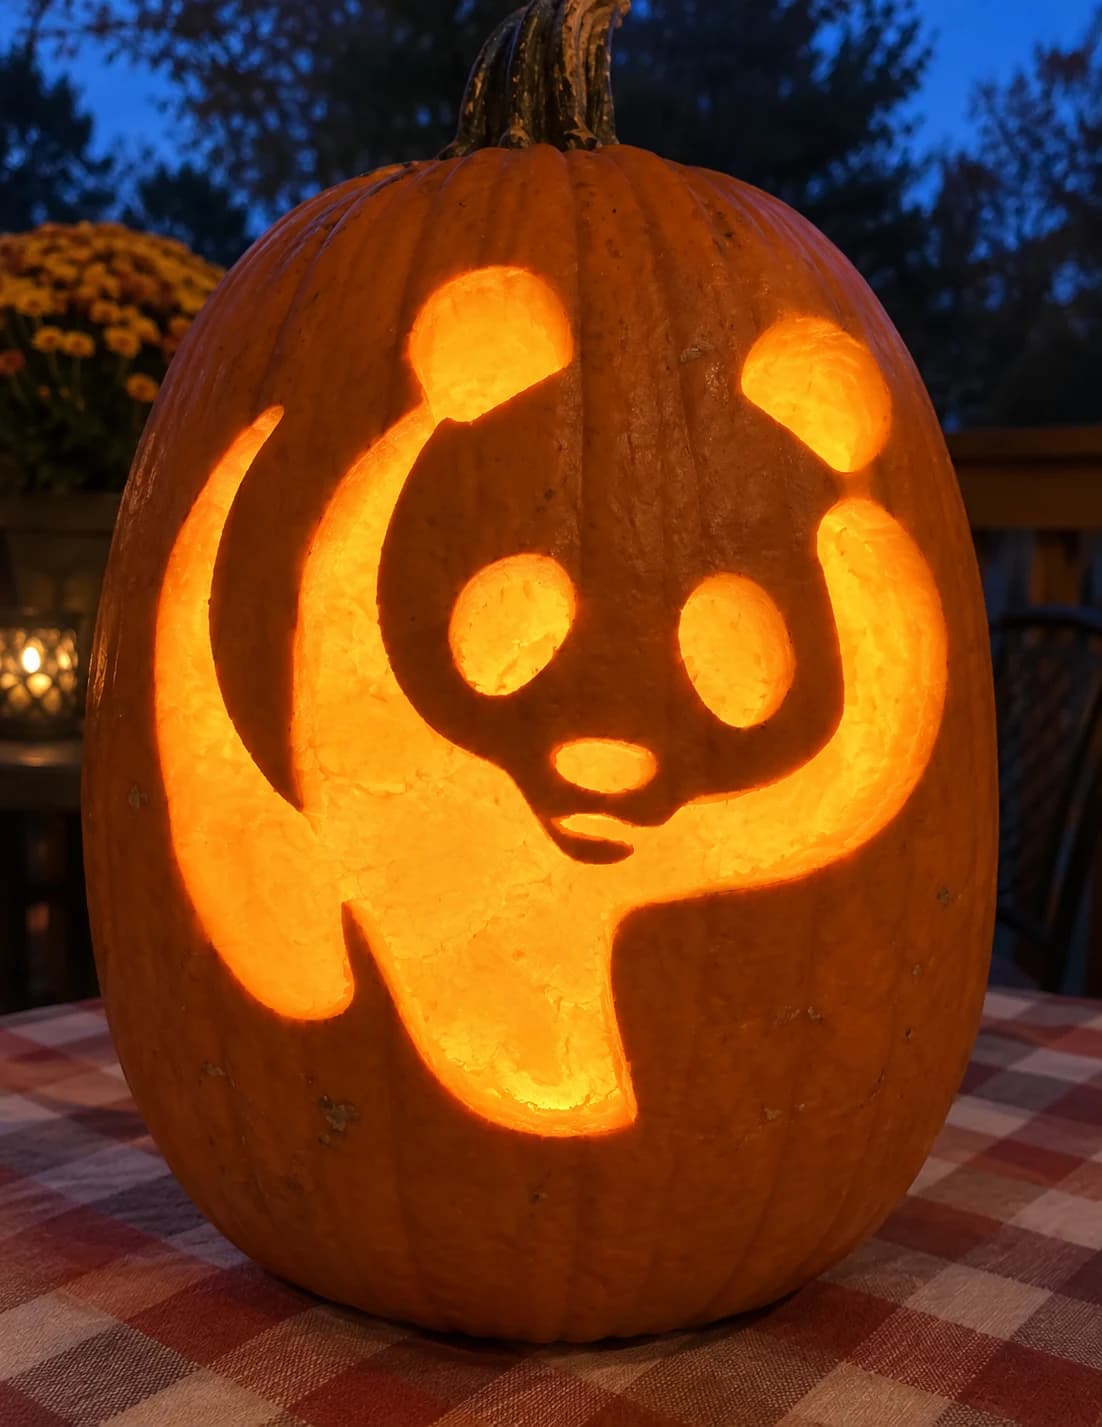
Giant Panda Pumpkin Stencil
A giant panda sits upright in this easy pumpkin stencil, its chunky arms raised wide, rounded ears perched on top, and oval eye patches, a small nose, and a belly spot forming the face and body markings. The large body shape, the eye patches, and the surrounding negative space are cut through in layers, while the connecting bridges between ears and head and between arms and body stay solid. Carve the smaller eye patch ovals before the large outer body cut to avoid the face area shifting while you work the perimeter.
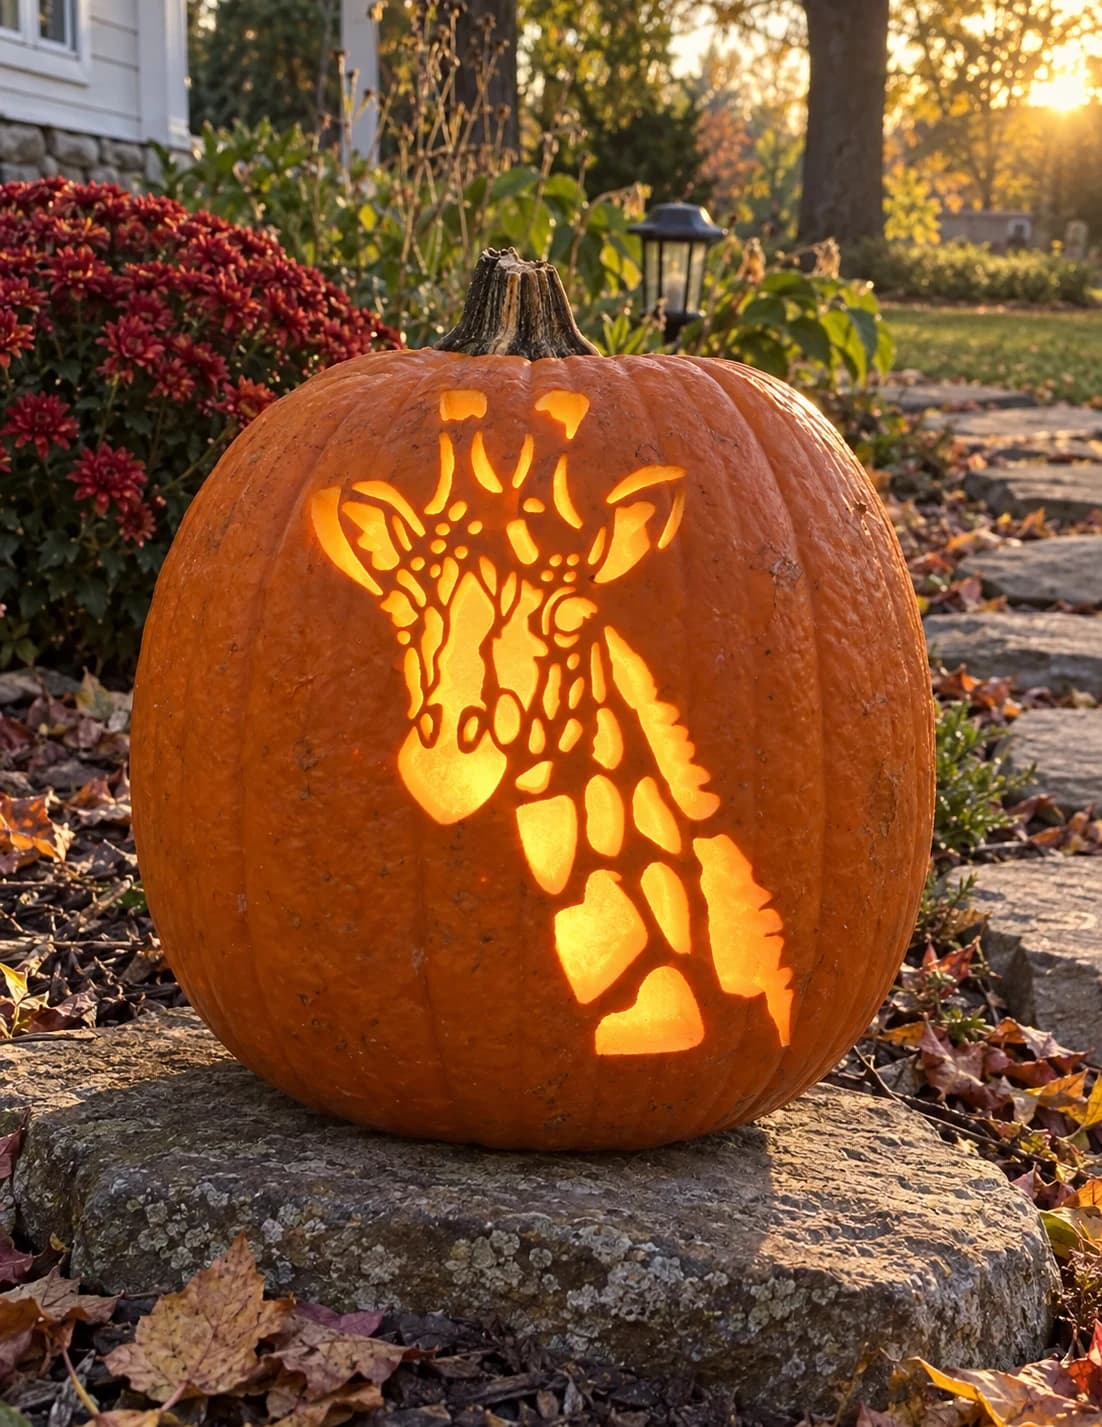
Giraffe Pumpkin Stencil
A giraffe's elongated head and neck fill this pumpkin stencil from top to bottom, its distinctive coat pattern recreated as dozens of organic blob-shaped spots scattered across the neck and face. Each spot is a separate pierced-through opening, so when lit the jack-o-lantern glows with a constellation of irregular patches that read unmistakably as giraffe markings. Because many spots sit close together, cut the smallest spots near the top of the head first and work downward toward the larger neck patches, so the thin walls between neighboring openings stay supported longest.
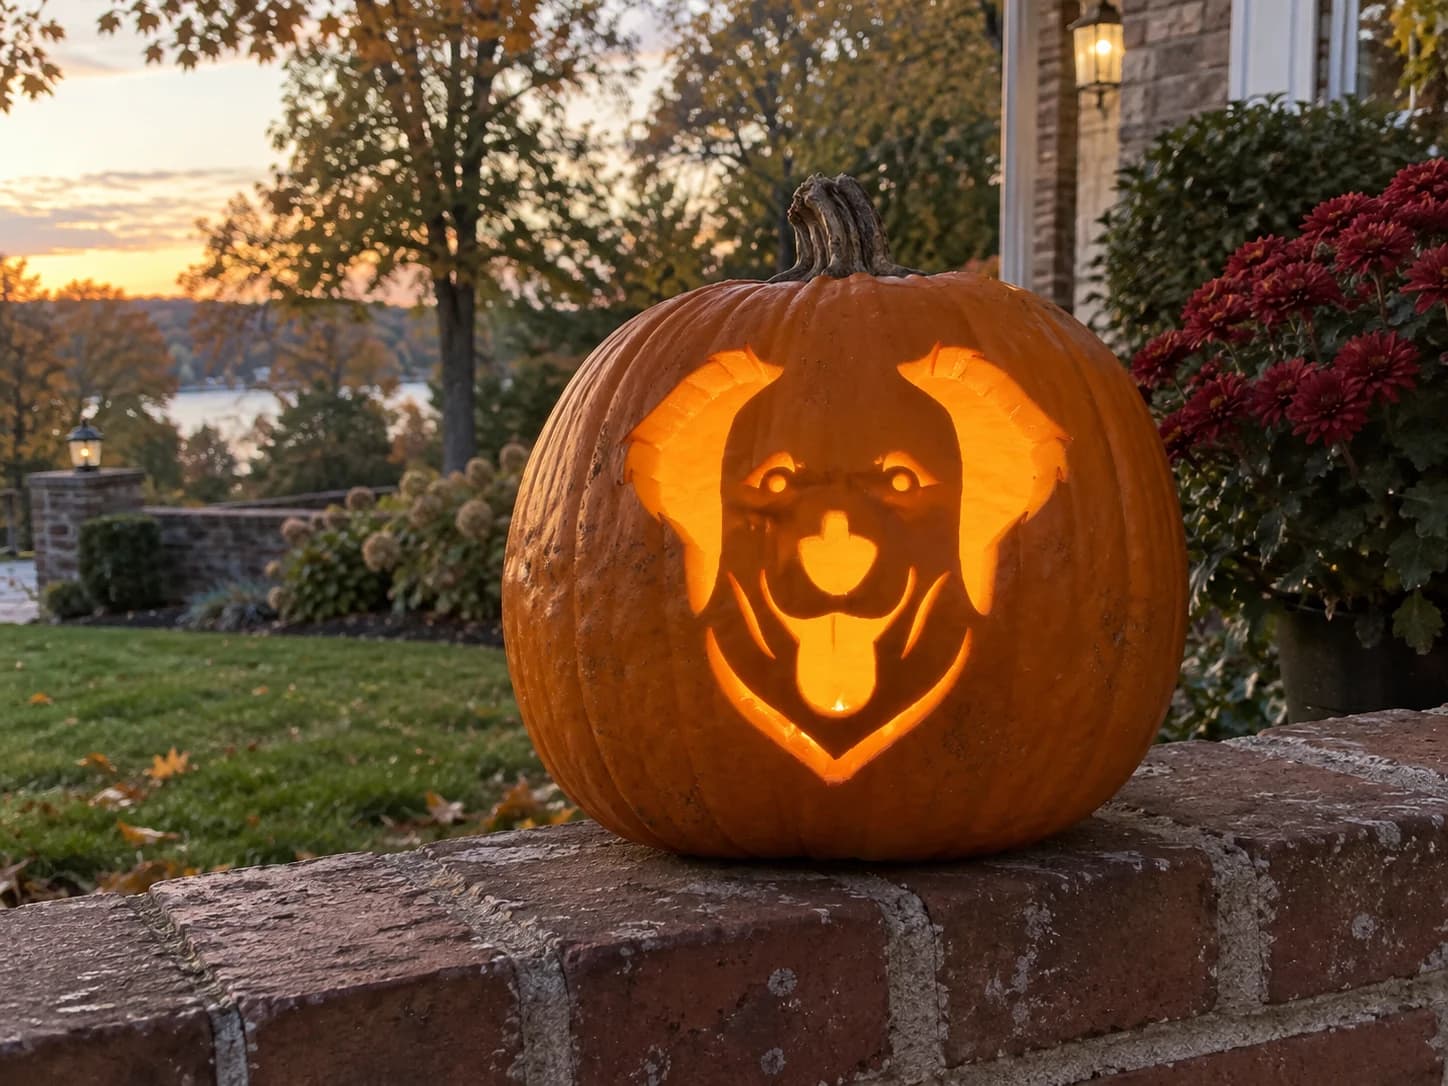
Golden Retriever Pumpkin Stencil
A golden retriever's face looks straight out from this easy pumpkin stencil: wide floppy ears, a broad forehead, round eyes with small arched brows above them, a large nose, and a happy open mouth with tongue showing are all carved as pierce-throughs. The ears are the largest cut areas and frame the face with an even glow. When the pumpkin is lit, the dog's expression reads as warm and friendly. Carve the small eyebrow arches before removing the large ear sections, since the brows are thin and easy to lose once the nearby wall flexes.
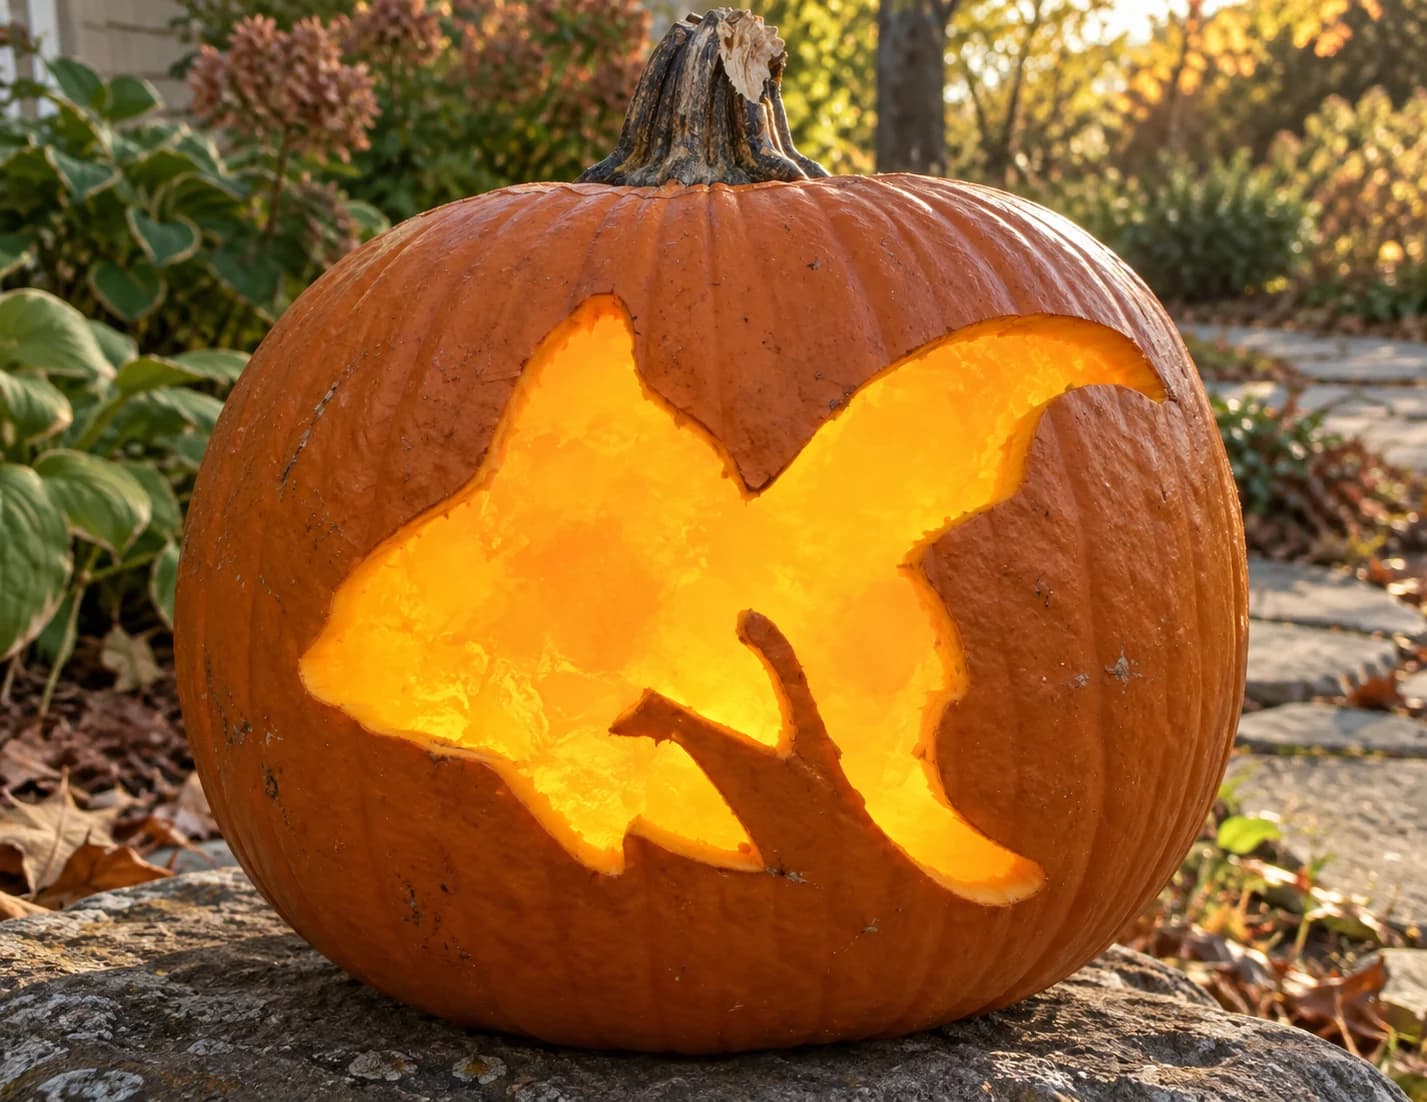
Goldfish Pumpkin Stencil
A plump goldfish shown in profile swims to the right: a rounded body, a large flowing tail fin swept back dramatically, a smaller dorsal fin on top, and a single pectoral fin near the belly. A small negative-space teardrop inside the body suggests the gill line. The whole fish is a single connected cut-out, so the lit pumpkin casts one glowing fish silhouette against the dark wall. Keep the narrow pectoral fin intact as long as possible and cut it free only after the main body is removed.
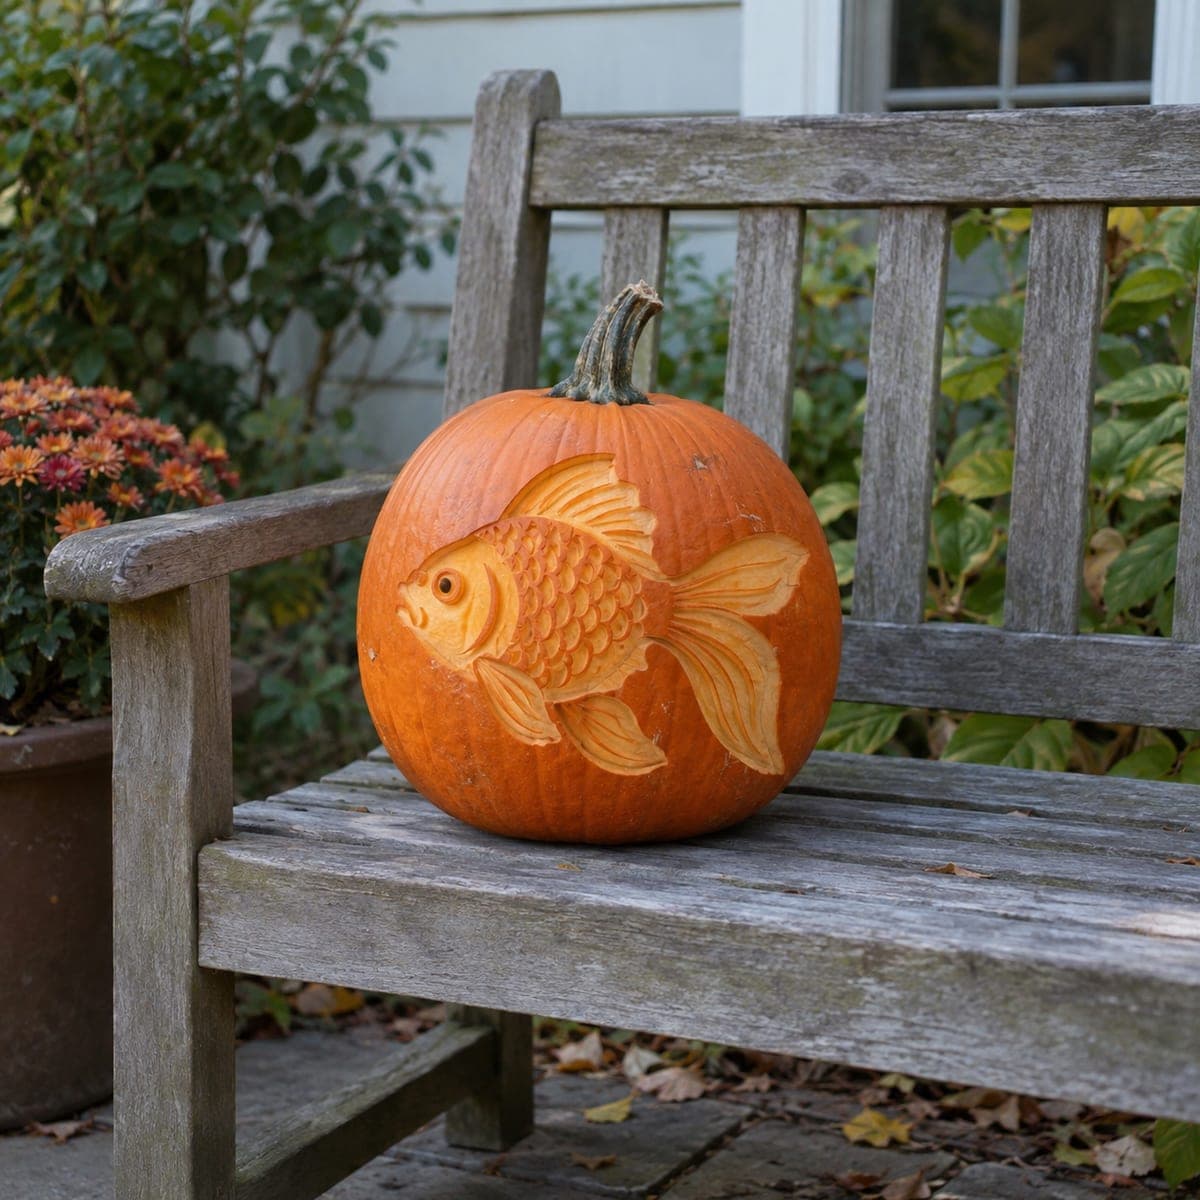
Goldfish with Flowing Fins
A fancy fantail goldfish glides across the pumpkin with billowing fins, a sweeping double tail, and a body covered in overlapping scale rows. This is a continuous-wall shading design: the skin is shaved away at varying depths so fins glow softly and each scale reads in relief, with no pierced holes. Rated hard for its texture work, it goes best if you outline the fish first, clear the background layer, then carve the scales one row at a time.
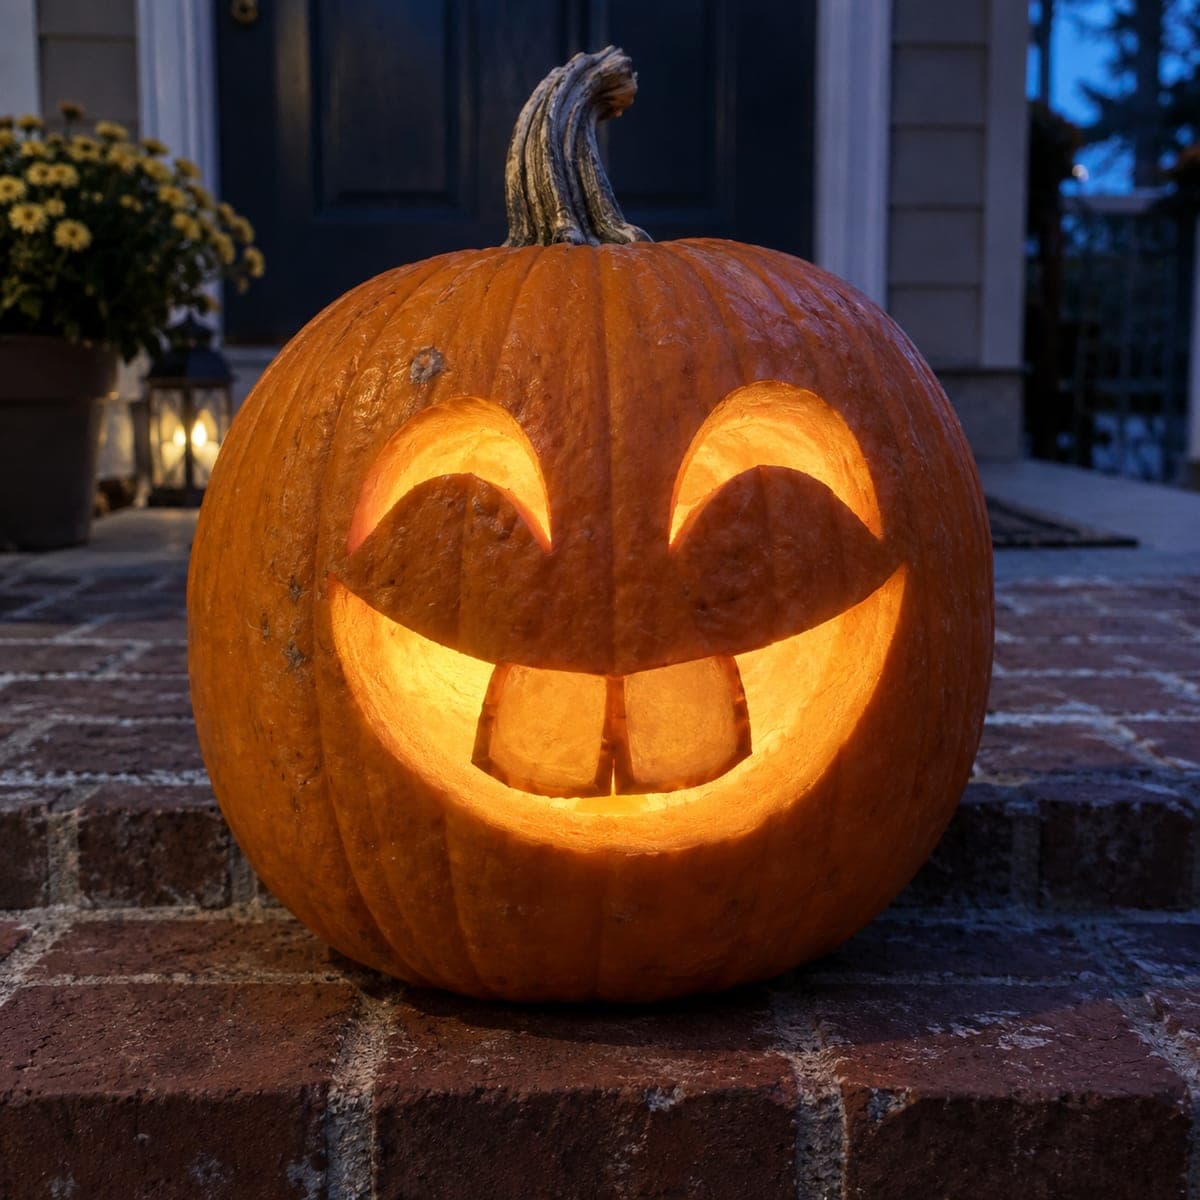
Goofy Buck-Toothed Smile
A cheerful jack-o'-lantern face built from two tall arched crescent eyes and a huge open grin anchored by a pair of oversized buck teeth. Every shape is cut all the way through, so the eyes and smile glow brightly while the goofy overbite stays as solid pumpkin. This is an easy first carve; saw slowly around each tooth from the mouth opening inward so the narrow tooth tabs never snap.
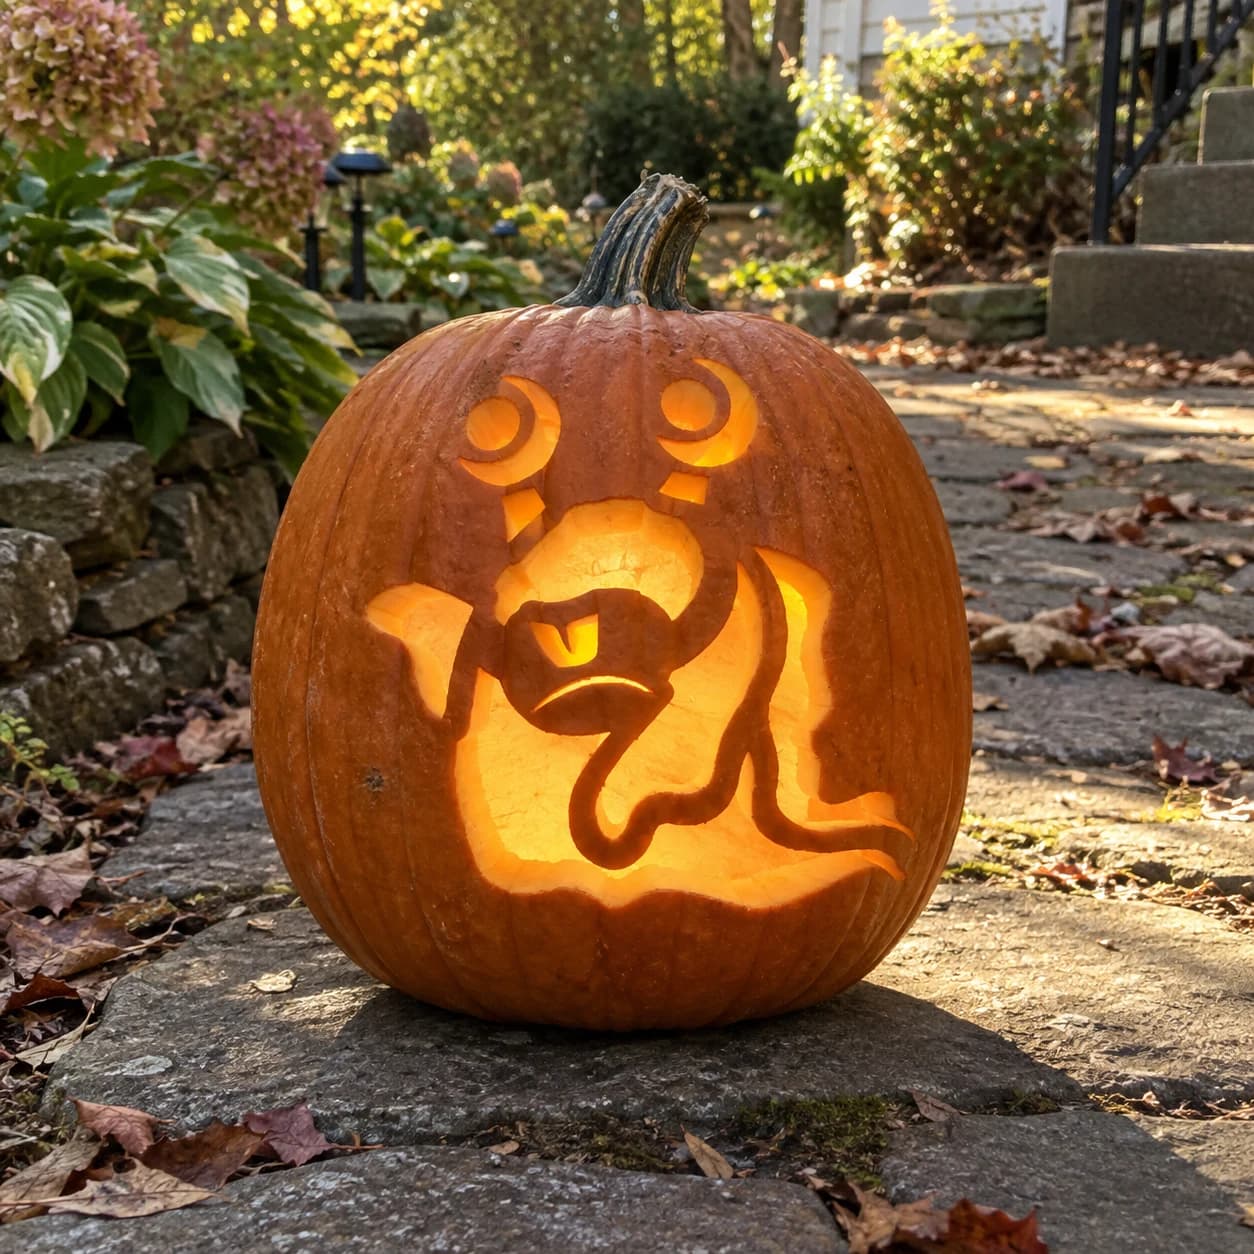
Googly-Eyed Ghost Pumpkin Stencil
A cartoonish goggle-eyed creature with a wide open mouth and trailing ghost-like body fills this pumpkin stencil: two circular eyes each orbit a crescent-shaped eyelid, and a broad flowing torso dissolves into wispy tendrils at the base. The large open area of the body is pierced through entirely, while the eye elements and a small beak-like mouth cutout remain as floating islands bridged by thin pumpkin walls. Cut the smallest interior eye details before the large body opening so the bridges stay supported and the delicate crescent lids don't snap under tool pressure.
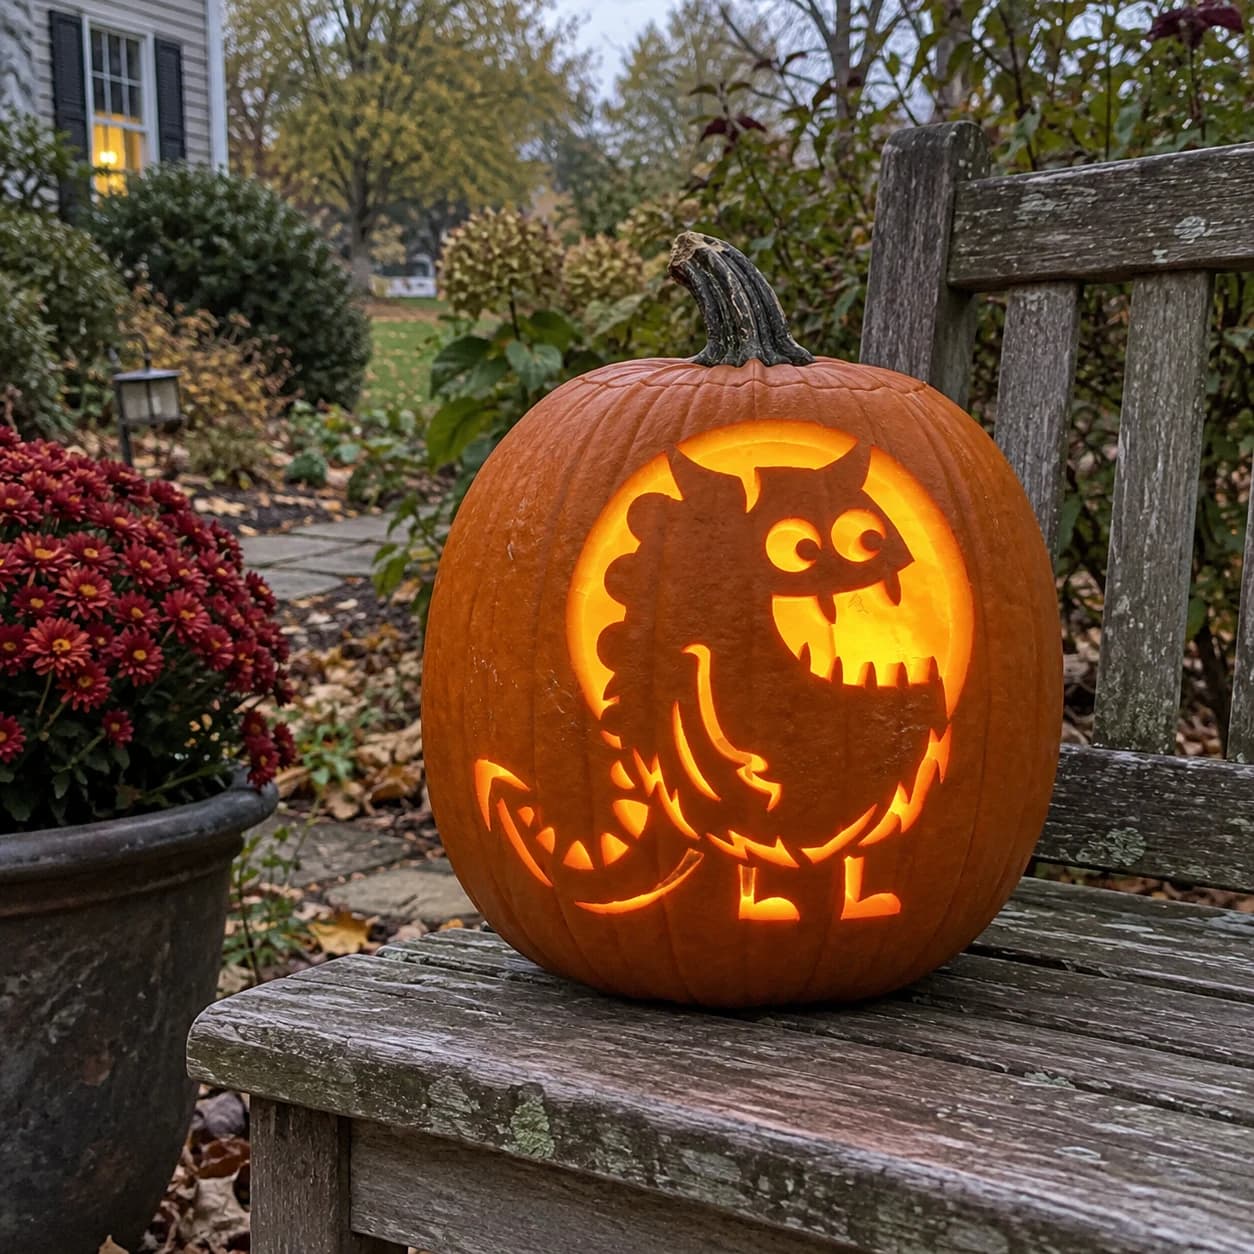
Grinning Baby Dragon Pumpkin Stencil
A round cartoon dragon chick with large round eyes, stubby clawed feet, and a toothy grin fills this hard dragon pumpkin stencil, its body encircled by a looping scaly tail. The large circular body void and the face features are pierced through, while the narrow tail arc and the skin between the eyes form the connecting bridges. Cut the small interior eye and teeth details before opening up the large body circle, so those tiny islands are still supported by the surrounding wall.
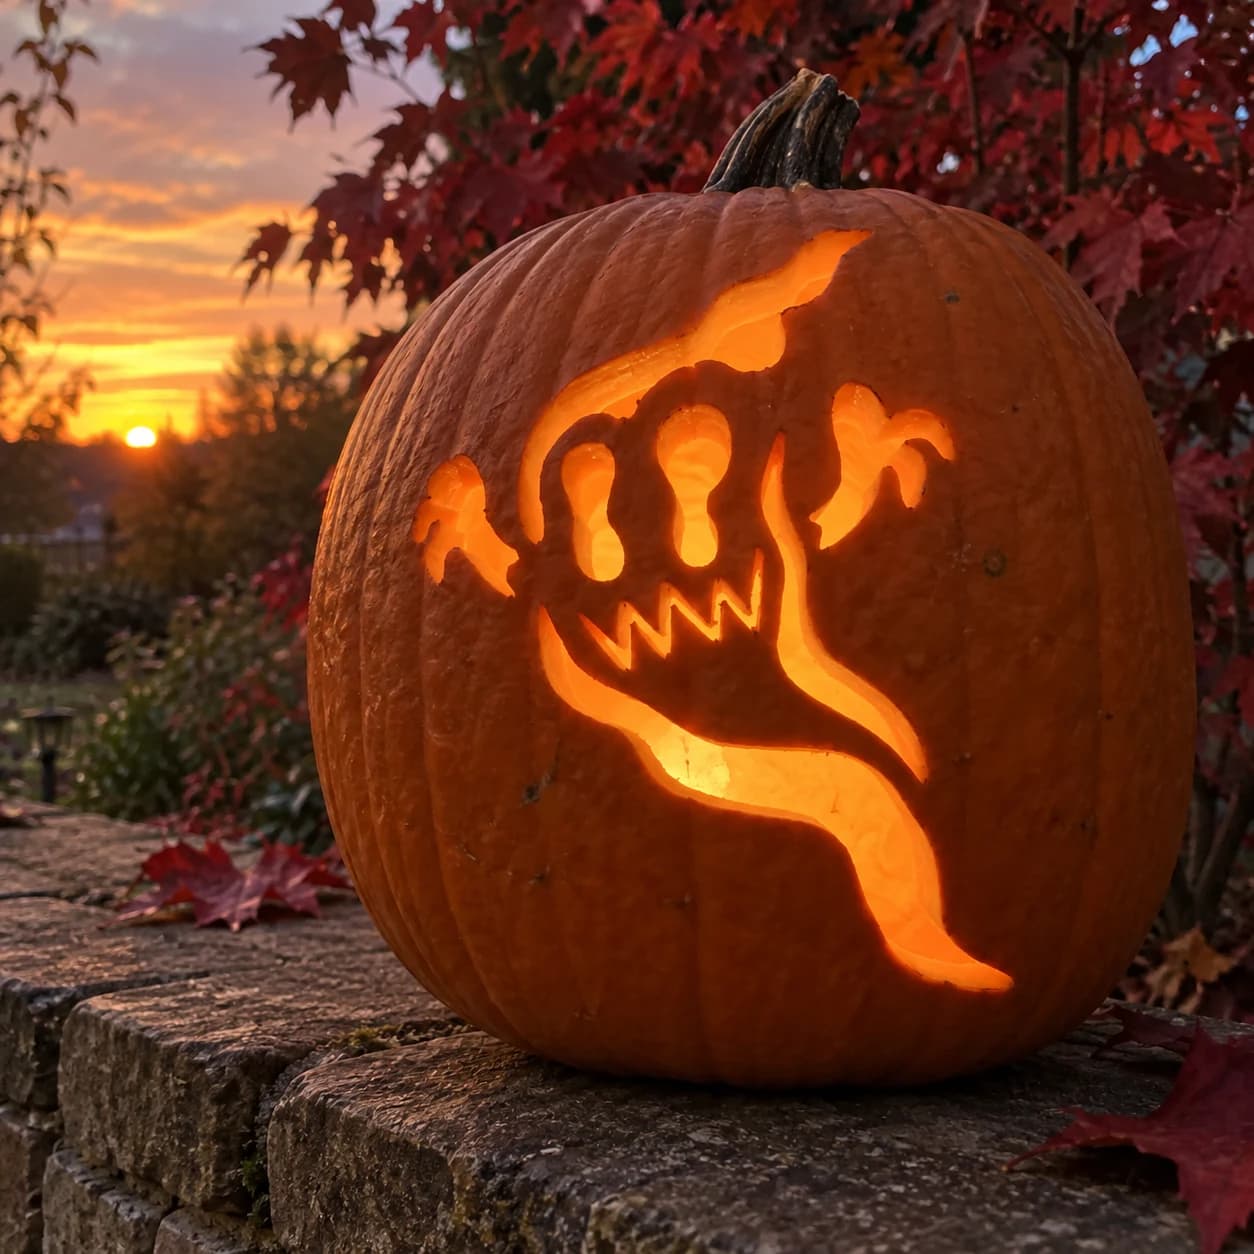
Grinning Ghost Pumpkin Stencil
A cartoonish ghost with a jagged, wide-open grin full of pointed teeth flies across this easy pumpkin stencil. Wild claw-like hands reach out from the sides, and a wisp of tail curls below. The ghost body and the negative spaces inside the grin are both cut through, while the pointed teeth are left as solid pumpkin wall. When lit, the teeth appear as dark orange spikes floating in the glowing mouth. Carve the jagged mouth points with slow, deliberate strokes rather than trying to follow the zigzag in one continuous cut.
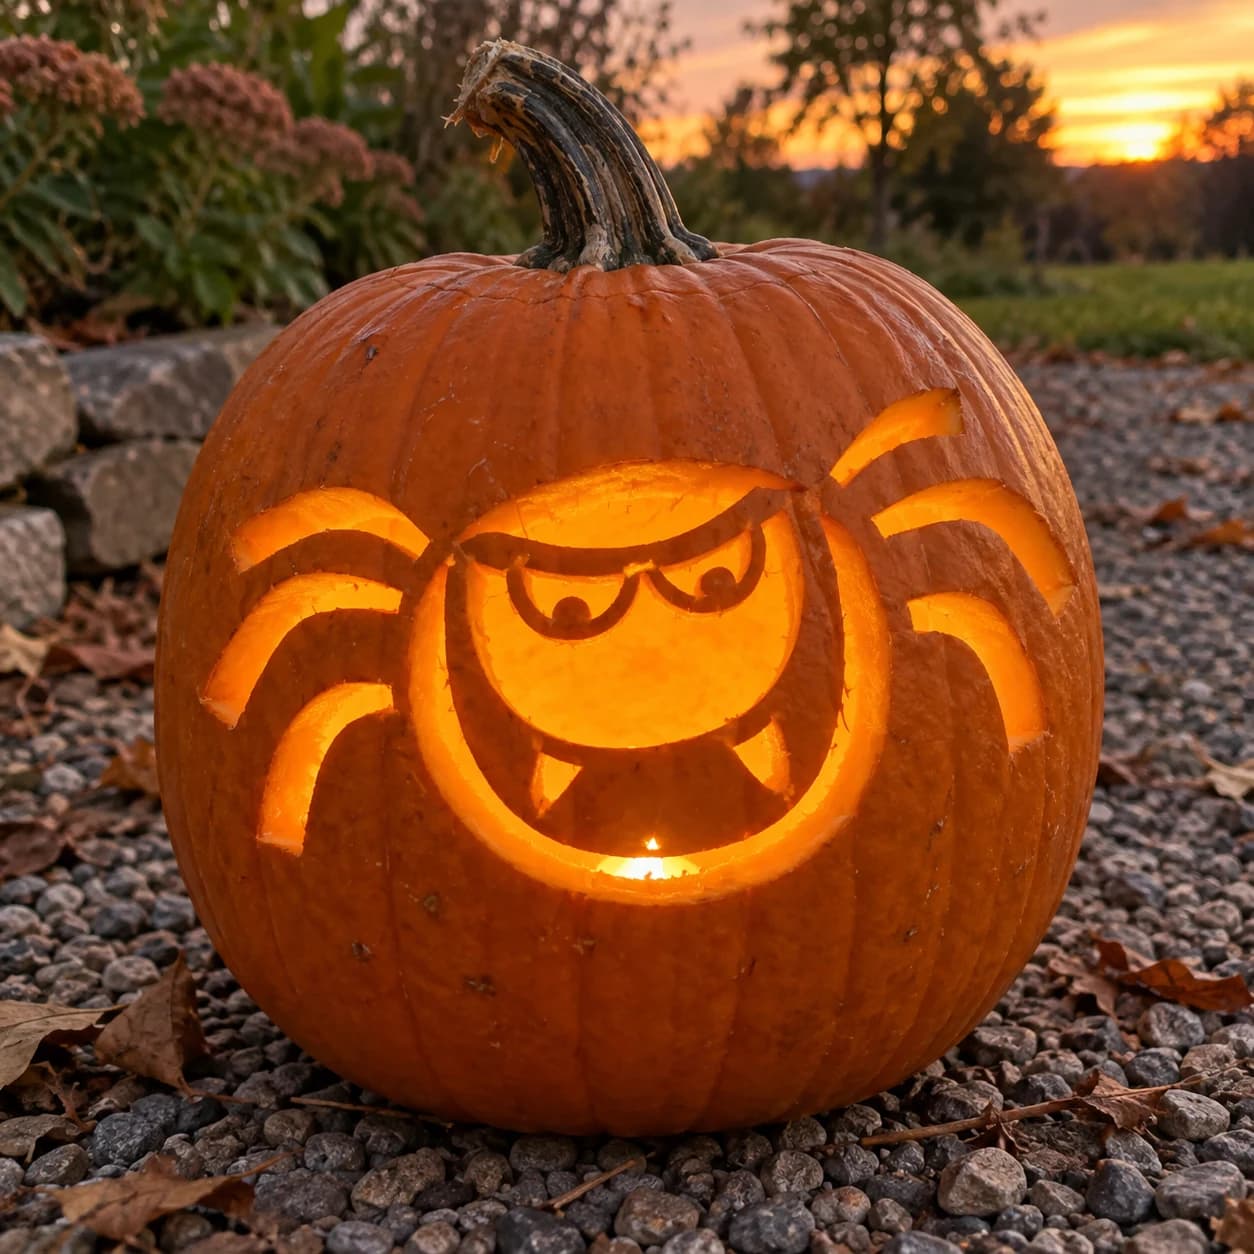
Grumpy Cartoon Spider Pumpkin Stencil
A chubby cartoon spider with a scowling face fills this easy pumpkin stencil, its round body cut away at the center while the angry brow, fang, and eye pupils remain as uncut pumpkin. Four stubby curved legs arc outward on each side, each one a separate pierced cutout that glows individually when lit. Because the legs are disconnected islands of cuts, carve the body cavity first to anchor your alignment, then cut each leg segment outward so none of the narrow pumpkin bridges between legs get accidentally snapped.

Happy Arches and Two Teeth
A joyful jack-o'-lantern with two happy crescent arch eyes, curved like eyes squeezed shut in a laugh, above a wide smile interrupted by two square teeth hanging from the upper lip. The eye arches and mouth are cut through while the two teeth remain as attached blocks of pumpkin wall. An easy, forgiving carve: cut the mouth outline first, then carefully saw around each square tooth so its corners stay crisp.
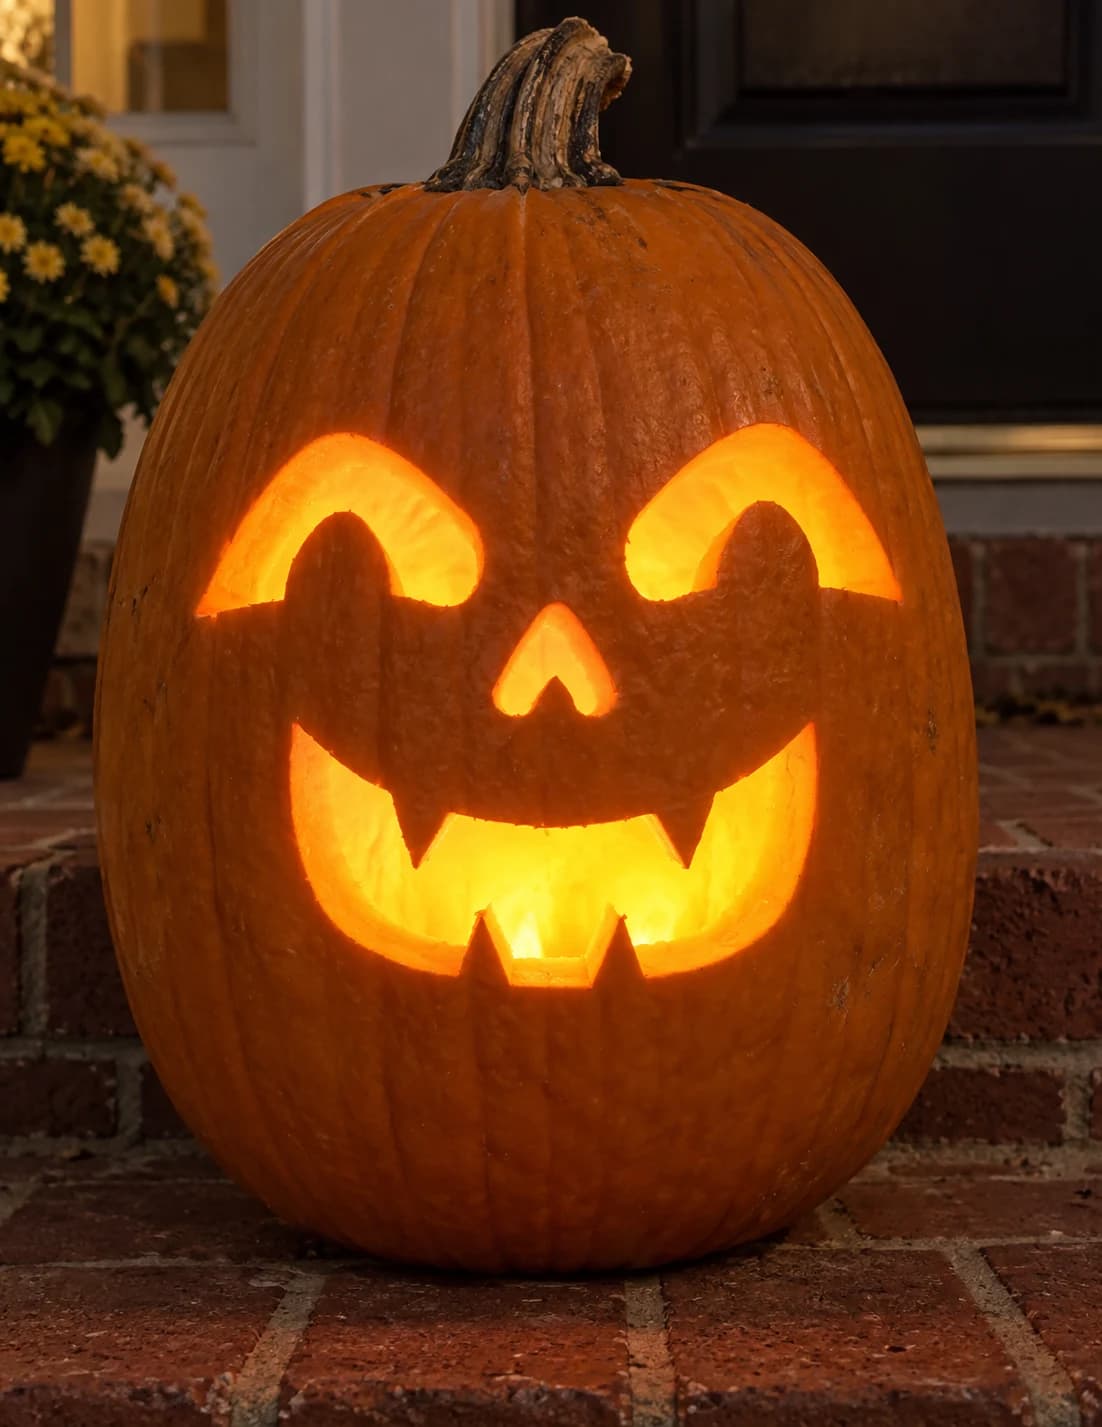
Happy Vampire Pumpkin Stencil
A cheerful jack-o-lantern face with vampire character fills this beginner-friendly pumpkin stencil: two large arching eye openings each cradle a small solid half-moon pupil, a small heart-shaped nose cutout sits in the center, and a wide grinning mouth shows two prominent pointed fangs flanked by rows of square teeth. Each feature is a distinct pierced-through shape separated by solid pumpkin bridges. Start with the heart-shaped nose and the small pupil islands inside each eye before opening the bigger eye arches, so those internal solid pieces stay anchored while you work.
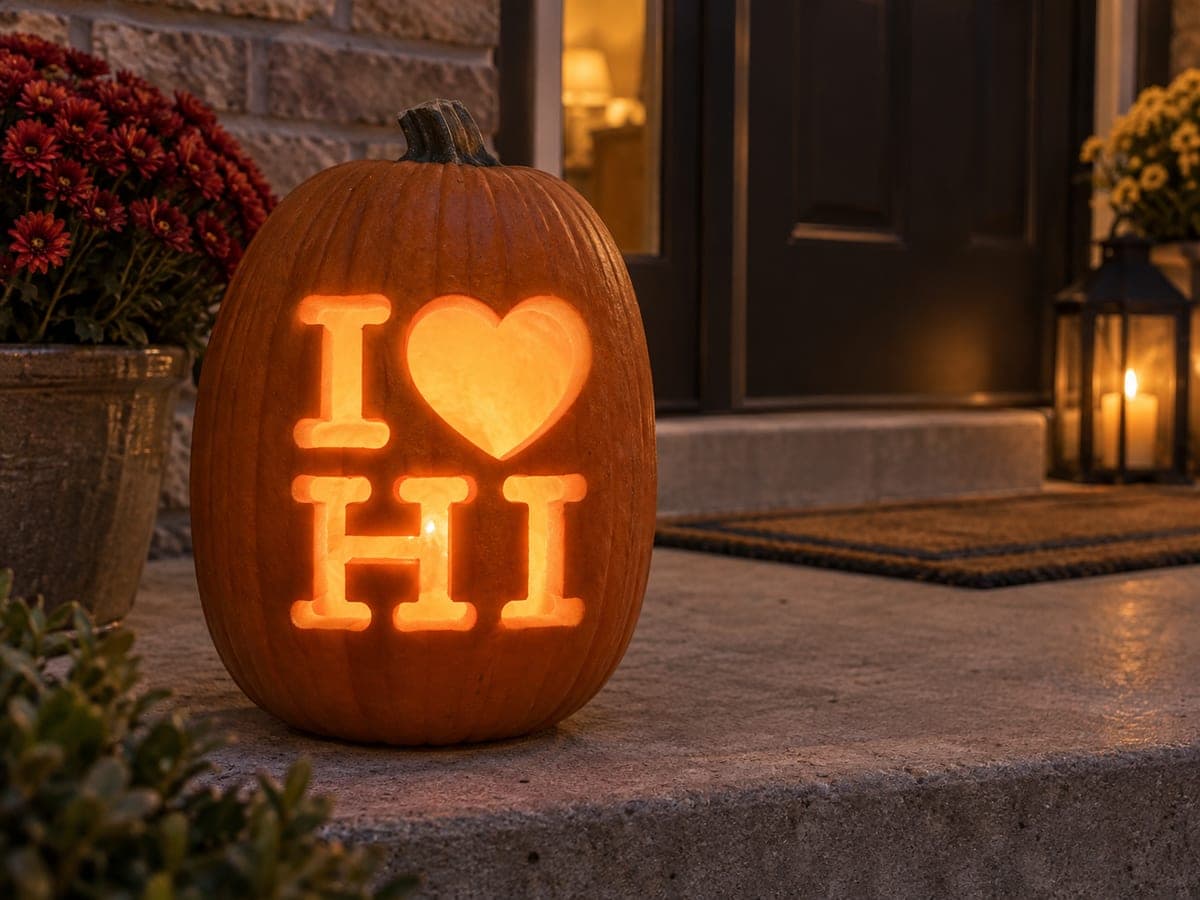
Hawaii Heart Lettering
Block letters spell out I, heart, H, I in two stacked rows, with a solid heart standing in for the word love. Every letter and the heart are individual cut-through shapes, so your aloha pride glows in tidy typography. Serif letters like the I and H have delicate inside corners; cut into each corner from both directions rather than twisting the blade to turn.

Heart Cheeks and Eight Dots
An irresistibly cute kawaii face: two tall oval eyes, a tiny curved smile, a heart-shaped blush on each cheek, and eight little sparkle dots scattered around the edges. Every element is a small pierced opening, and the wide spacing across a squat pumpkin gives it that classic sticker-art charm. At medium difficulty the hearts and dots demand patience; use a drill bit or apple corer for the round sparkles to keep them perfectly circular.

Heart Eyes and Seventeen Gems
The heart-eyes emoji comes to life with two big heart-shaped eyes, arched brows, and a wide toothy smile, all surrounded by seventeen small hearts and diamond accents scattered across the shell. Every heart, brow, tooth gap, and diamond is pierced through, so the whole pumpkin twinkles. Carve the large central face first while the shell is strongest, then work outward through the border hearts from biggest to smallest.
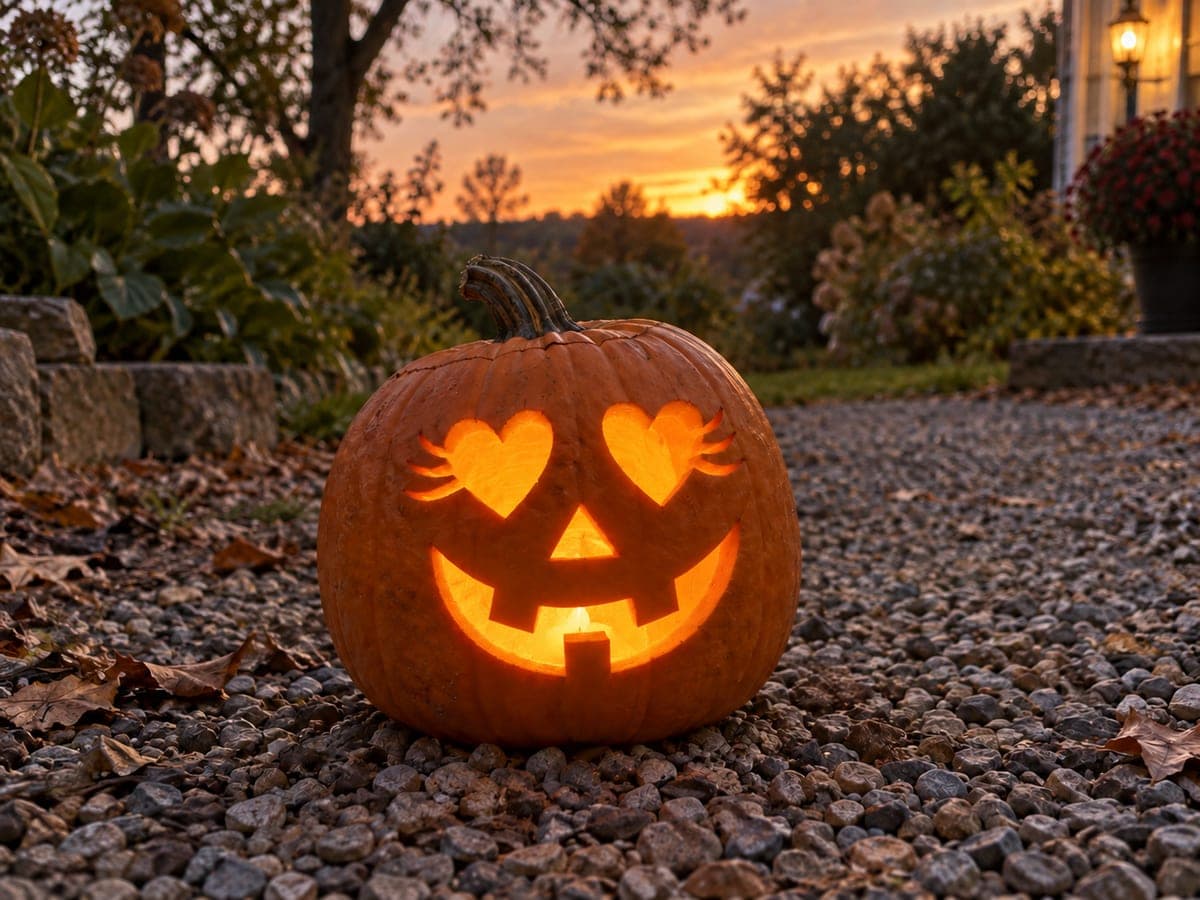
Heart Eyes and Three Teeth
Two big heart shaped eyes with curling lash accents beam above a small triangle nose and a wide grin broken by three square teeth. Every shape is cut all the way through, so candlelight pours out of the hearts and the toothy smile. Take the lash flicks slowly with a fine saw, since those narrow tips are the only fiddly part of this medium design.
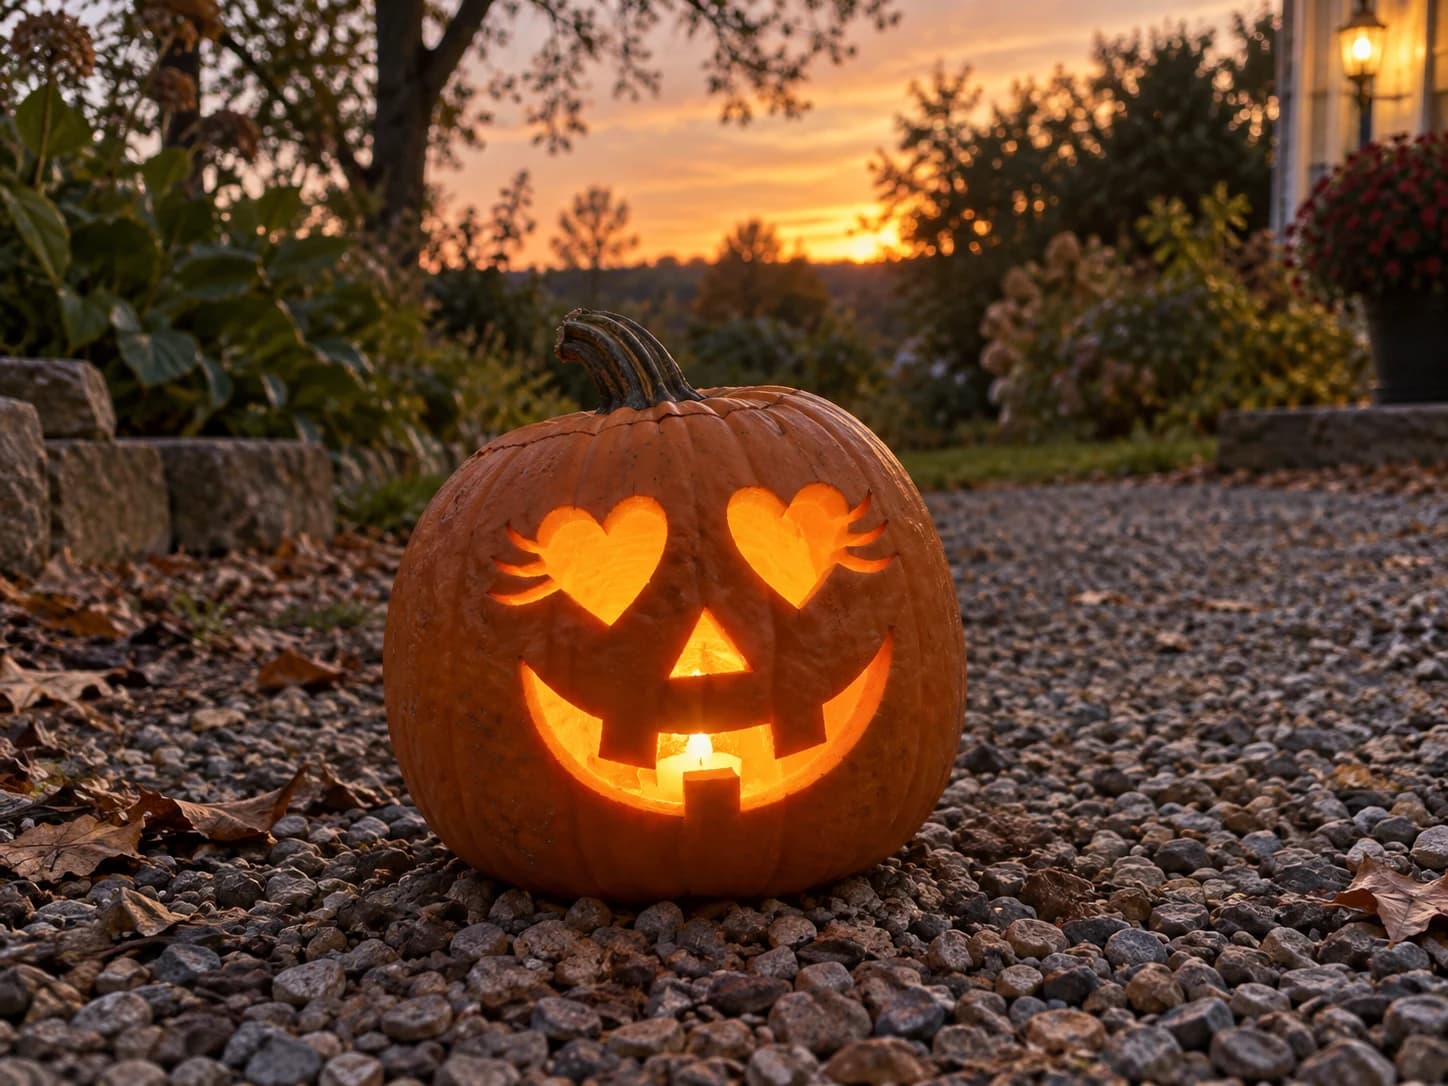
Heart Eyes Jack-o-Lantern Pumpkin Stencil
A classic jack-o-lantern face gets a romantic twist: two heart-shaped cutouts replace the usual triangle eyes, each framed by three curling eyelash strokes, above a wide crescent grin with three rectangular tooth gaps. The design is beginner-level with large, easy-to-cut openings and gentle curves throughout. Cut each heart eye from the inner point downward and around the lobes rather than starting at the curved top, which helps you keep the heart shape symmetrical on the pumpkin's curved surface.
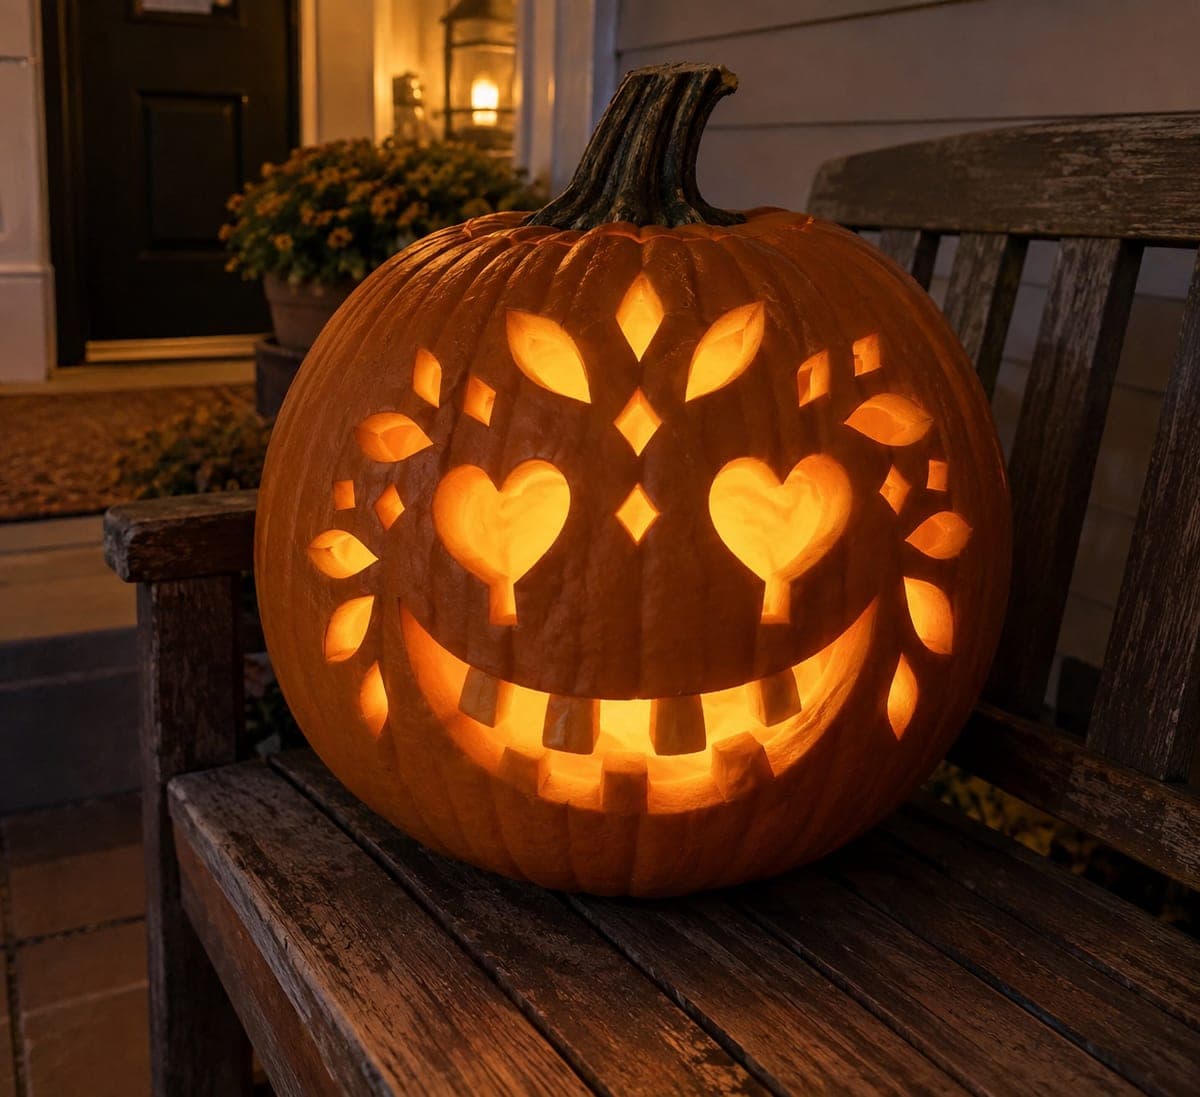
Heart Keyholes and Leaf Cheeks
A folk-art beauty: two heart-shaped keyhole eyes crowned with leafy sprigs, sprays of leaf cutouts fanning across both cheeks, diamond accents down the brow, and a huge grin filled with neat rectangular teeth. Every heart, leaf, diamond, and tooth gap is pierced through, creating a lacework of light. This is an expert pattern with many close-set openings, so work from the center outward and rotate the pumpkin often to keep your cutting angle comfortable.

Heart with Two Plain Pluses
A big glowing heart sits at the center flanked by two medical plus signs, with a trio of small dots beneath, a sweet salute to nurses, doctors, and healthcare workers. Every shape is a straightforward cut-through opening with generous spacing between them. This easy design makes a great clinic lobby or front desk pumpkin; cut the heart's notch as two downward strokes meeting in the middle, and use a drill bit for perfectly matched dots.
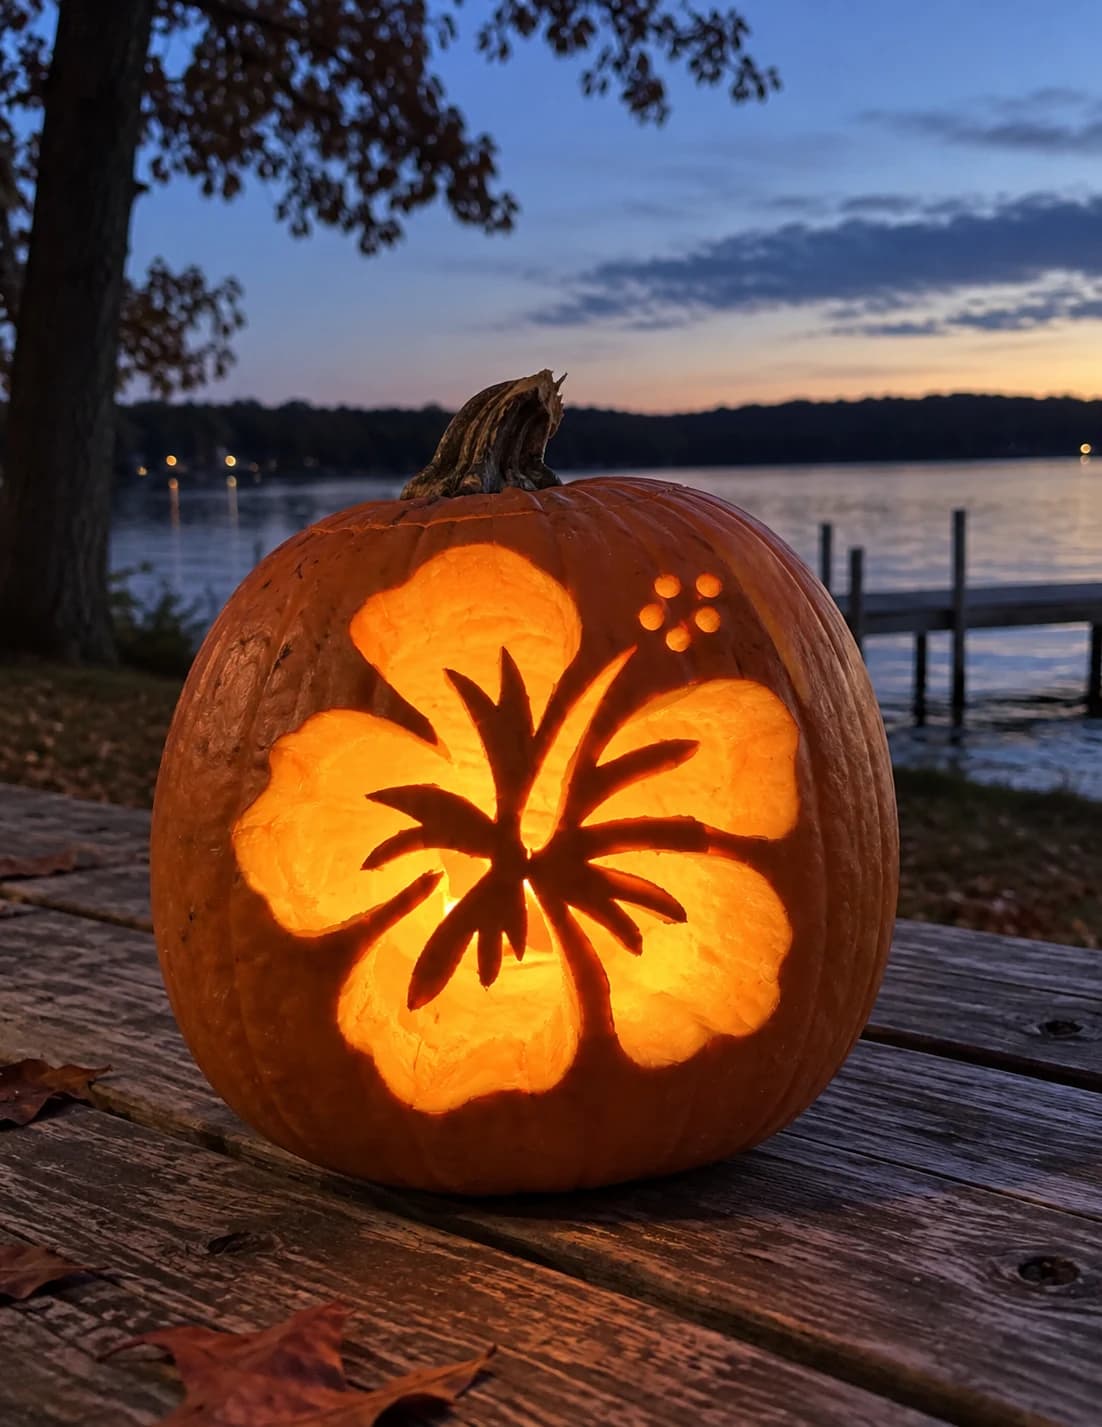
Hibiscus Flower Pumpkin Stencil
A large hibiscus flower with five broad rounded petals and a starburst of slender stamens radiating from the center fills this pumpkin stencil, plus a small cluster of four round pollen dots floating in the upper right corner. The five petal sections and the space around the stamens are all pierced-through, leaving the thin stamen lines as solid bridges that cross the open flower interior. Cut the four small pollen dots first, then work petal by petal from the outside in, saving the narrow stamen bridges for last so they remain stable throughout the carving process.
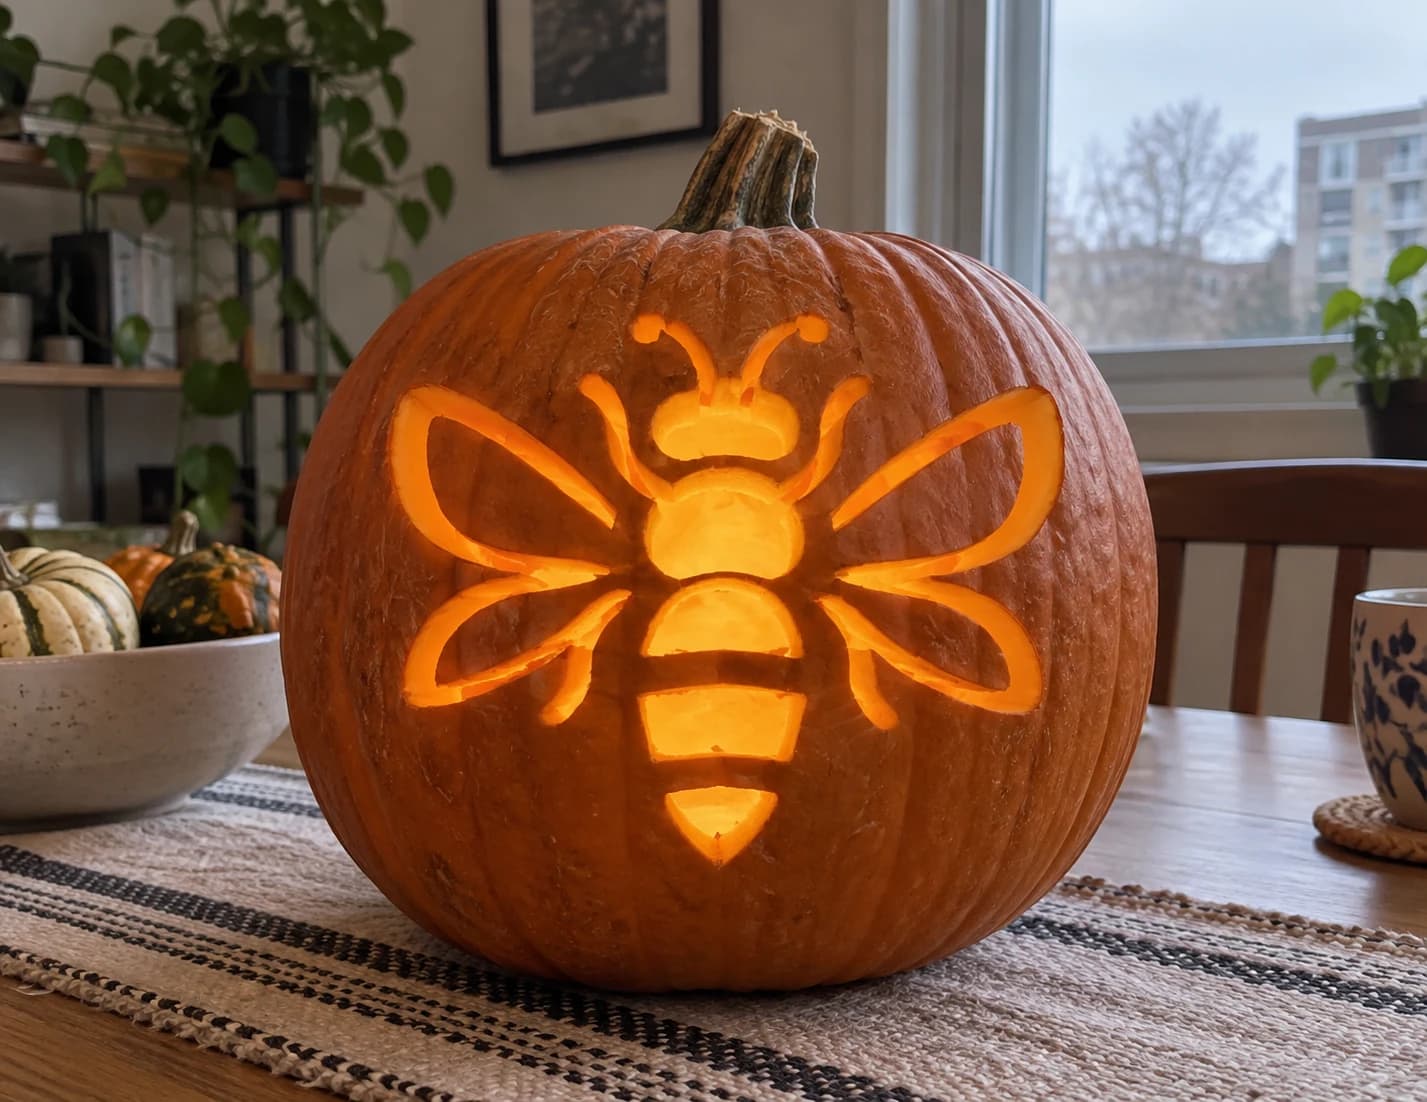
Honeybee Pumpkin Stencil
A honeybee shown from above spreads four large wing panels around a segmented body in this bee pumpkin stencil, each wing outlined by a curved channel and left as a solid pumpkin-skin shape, while the spaces inside and between the wings are cut open. The head, thorax, and three abdominal segments are kept solid with open gaps between them, and two curling antennae rise from the head. Cut the antenna curls first since they are the narrowest, most isolated elements, and finishing them before weakening the surrounding wall prevents breakage.
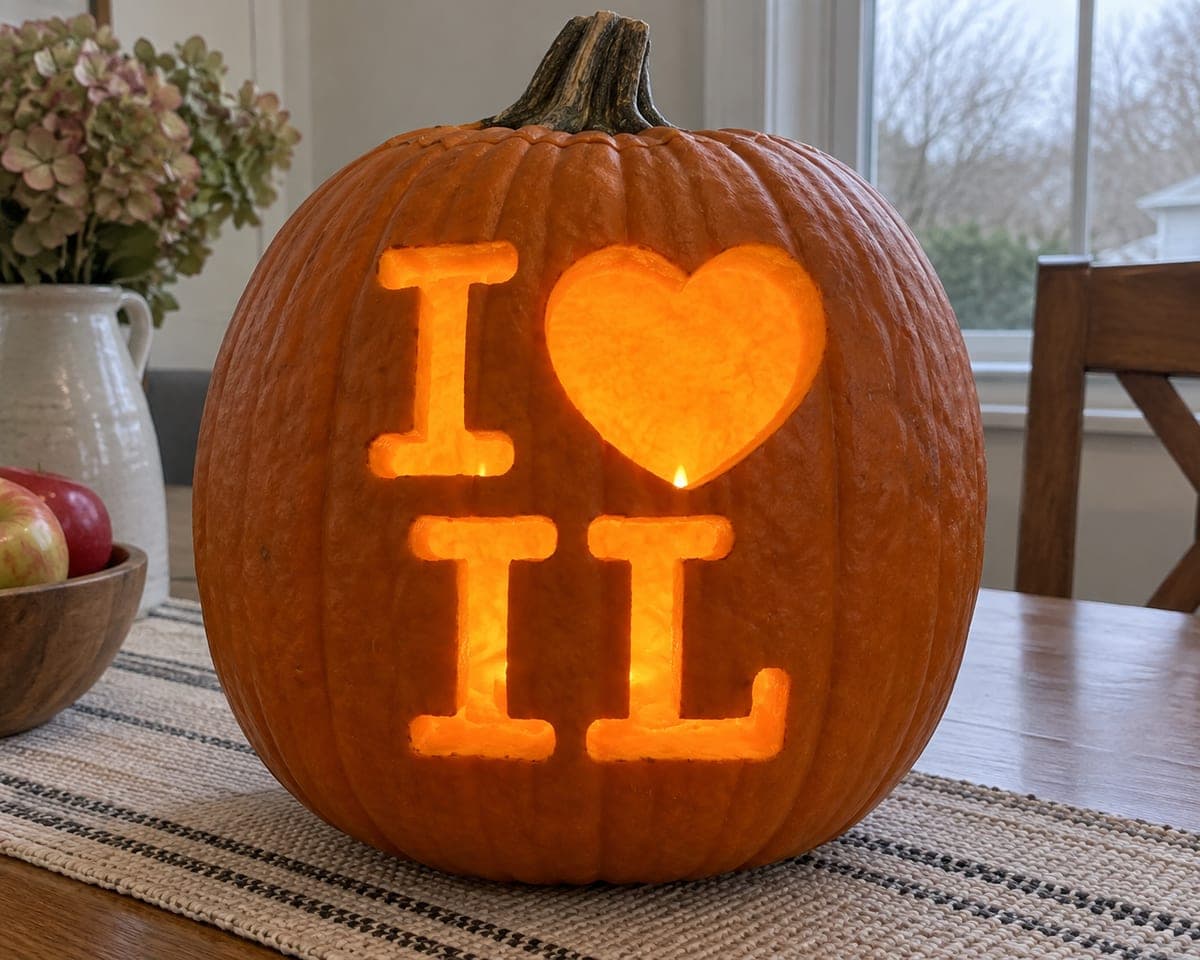
Illinois Heart Lettering
Bold block lettering spells out I, a chunky heart, then IL, stacked in two glowing rows for instant Illinois pride. Each letter and the heart cut fully through, and the thick strokes make the type sturdy and forgiving. Transfer the pattern with the rows level to the pumpkin's ribs, and cut each letter as its own closed shape so the serif corners stay square.
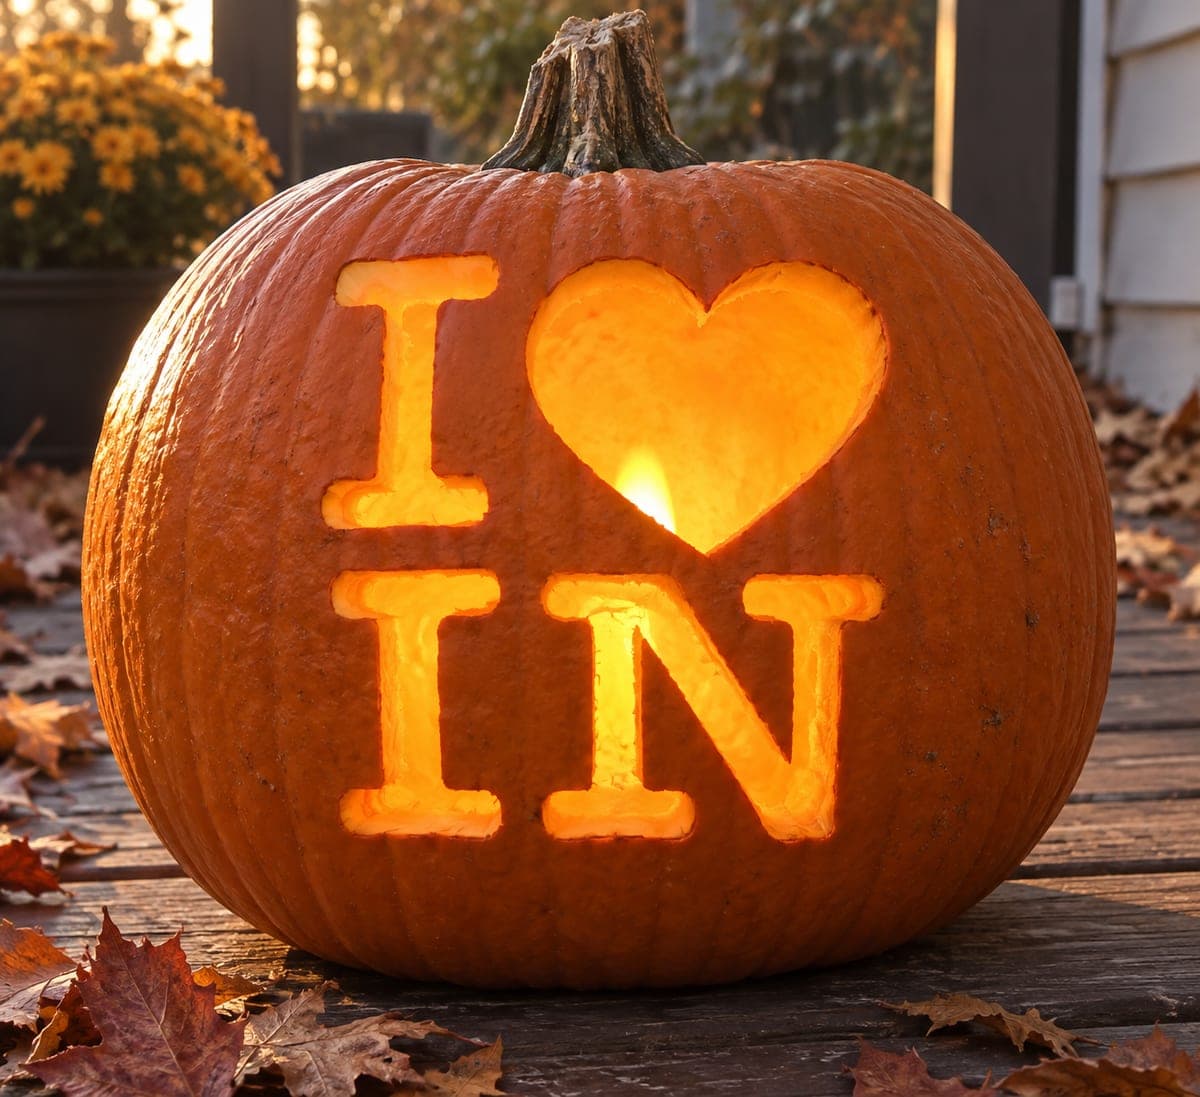
Indiana Heart Lettering
A classic love-note layout carved in glowing letters: a bold capital I beside a big heart on the top row, with the letters I and N spelling Indiana's abbreviation below. All four elements are pierced through, and the chunky serif letterforms keep every stroke wide and sturdy. This easy design just needs straight, confident cuts; trace the letter edges with a fine tip first, then saw along the lines so the serifs stay square.
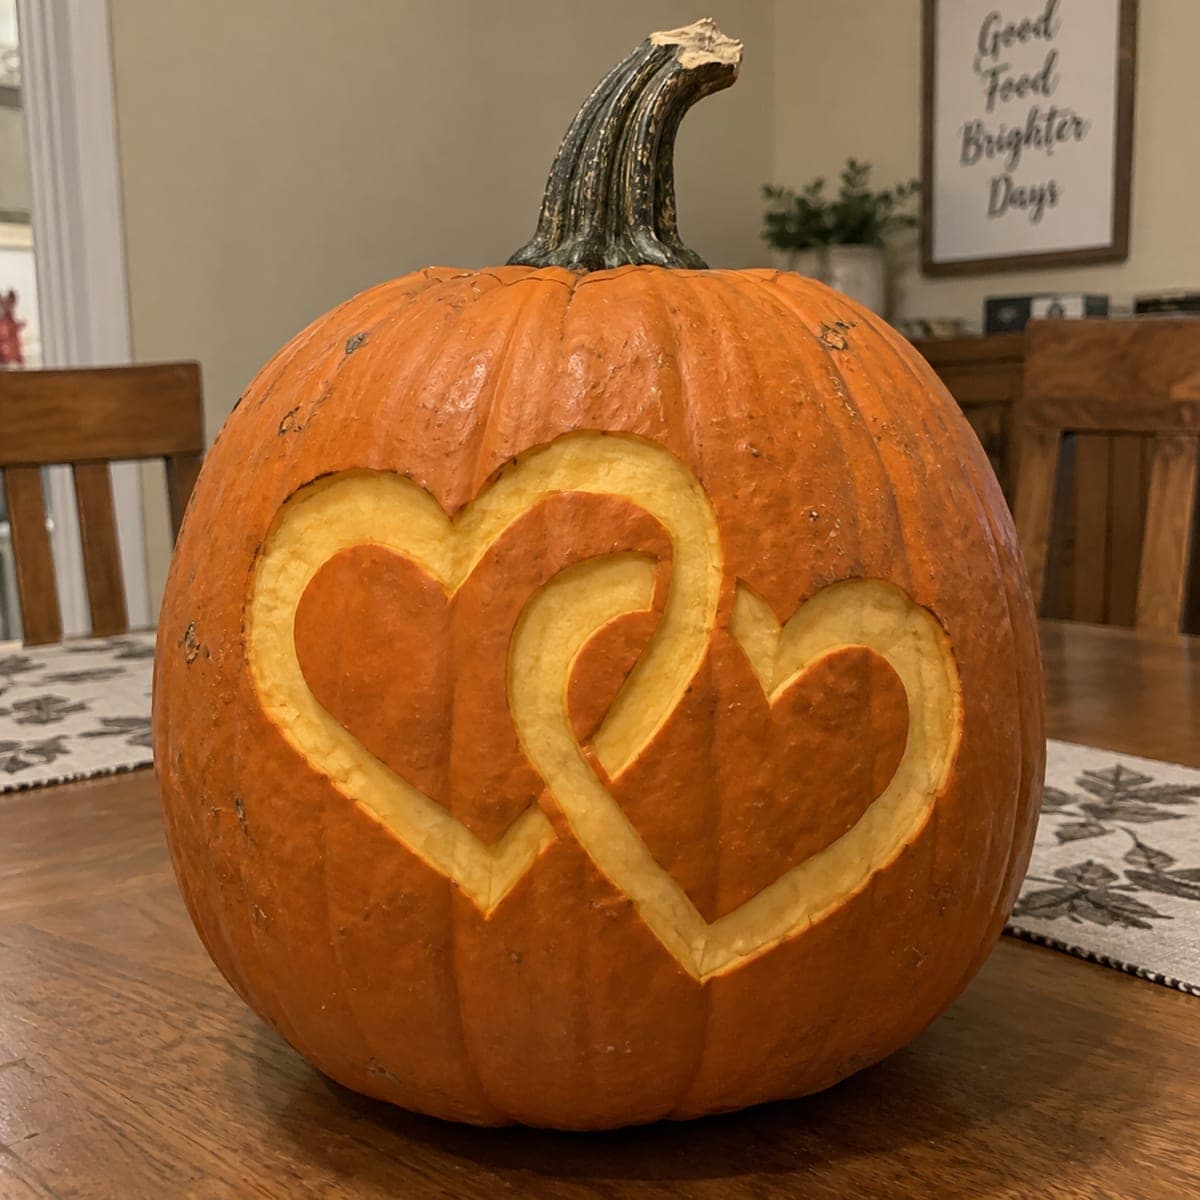
Interlocking Double Hearts
Two large hearts overlap and interlock, their outlines woven so one band passes over and under the other like linked rings. Nothing is pierced: you shave away only the skin along the heart outlines, leaving pale glowing bands against the untouched orange wall. Sketch the over-under crossings on the pumpkin before you shave, since keeping those weave points straight is the trick to this medium-level etch.
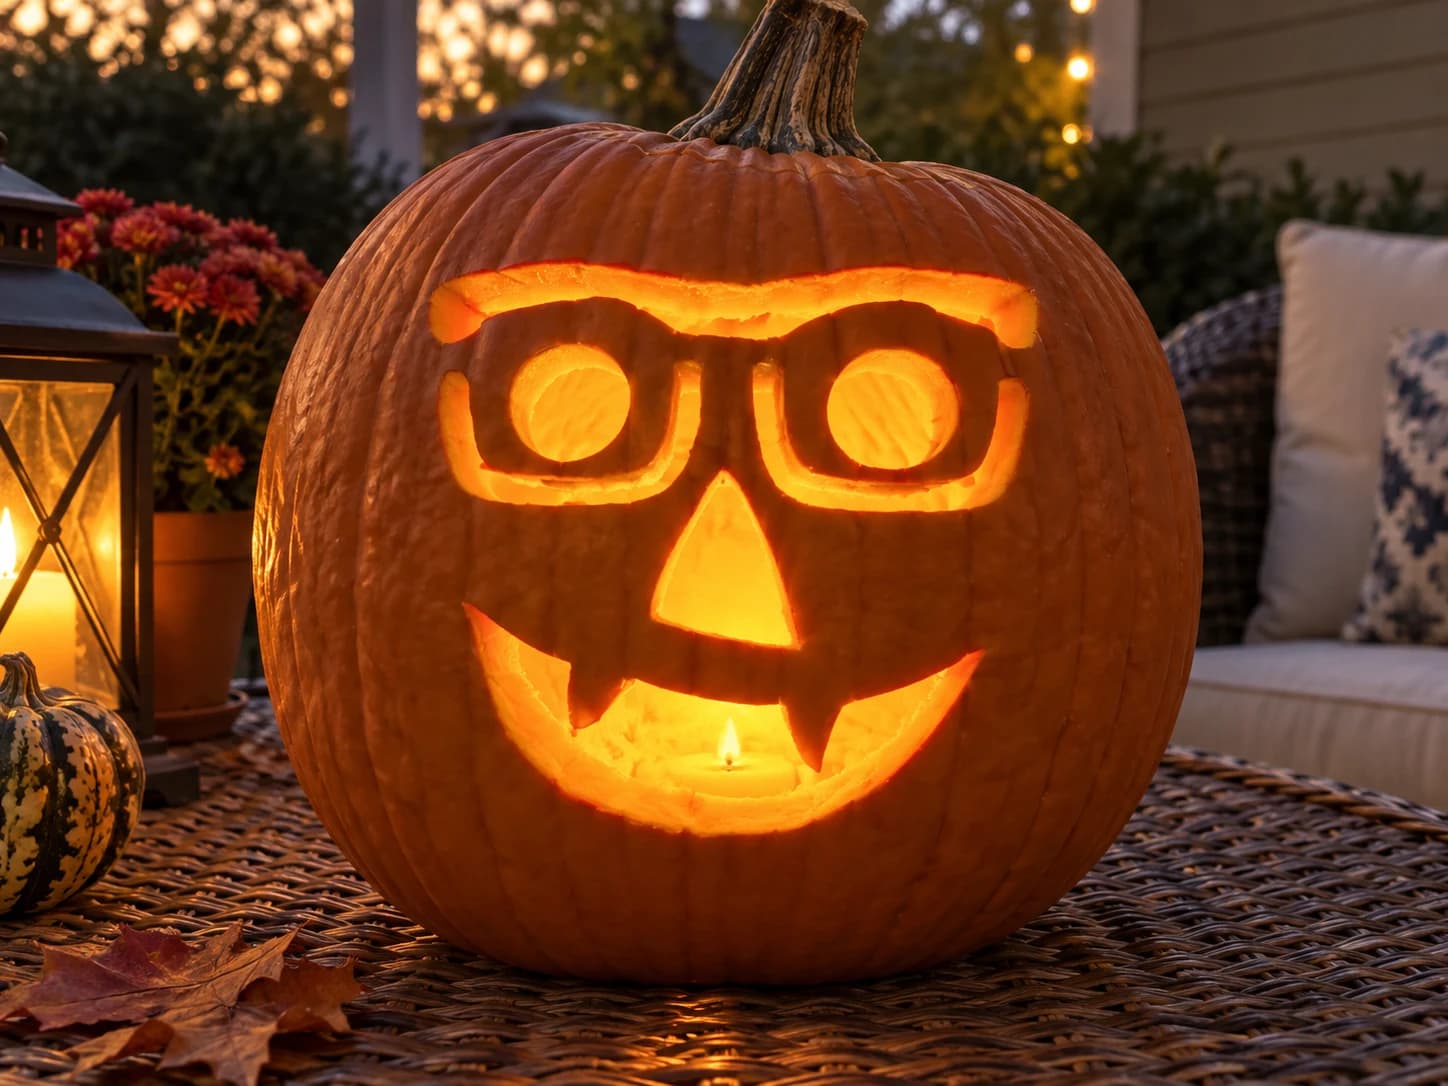
Jack-o-Lantern with Glasses Pumpkin Stencil
A classic jack-o-lantern face wearing oversized rectangular glasses makes up this beginner pumpkin stencil. The eyebrow is a wide arched strip across the top, the glasses frame is a connected pair of rectangular loops each containing a circular lens opening, a triangular nose sits below, and a broad grinning mouth with one dripping fang dominates the lower half. The thick glasses frame and face outlines remain solid while the lens circles, nose triangle, and mouth are cut through. Cut the two circular lens openings inside the glasses before the wide mouth, so the frame bridge between the lenses stays firm.
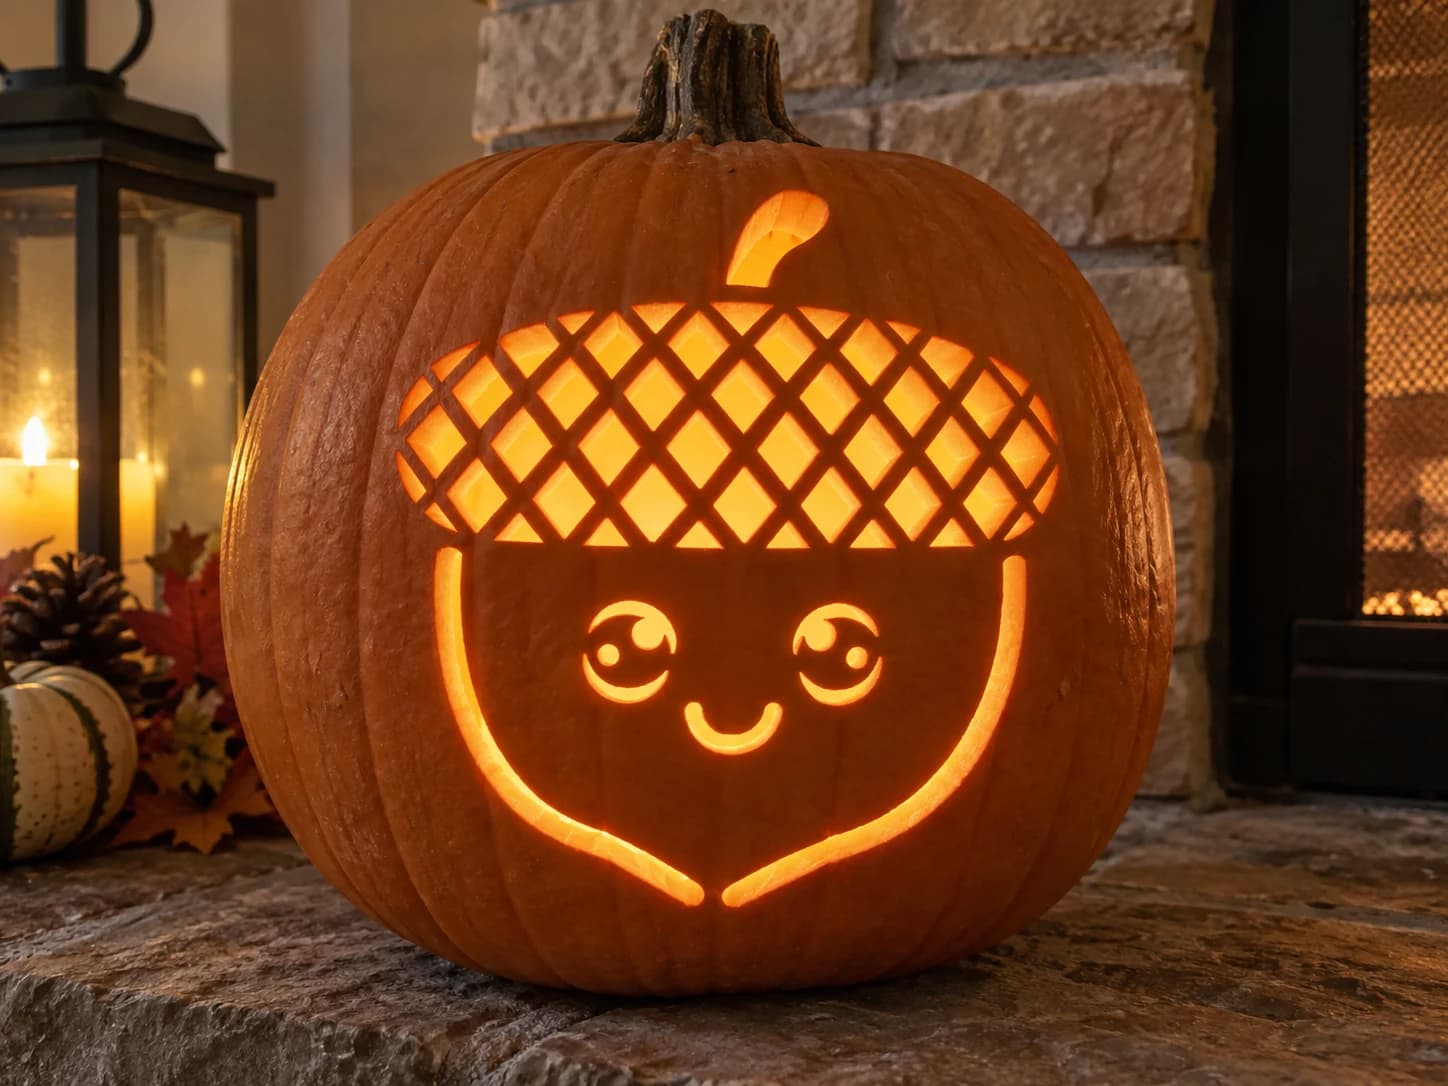
Kawaii Acorn Pumpkin Stencil
A kawaii-style acorn character fills the stencil: the domed cap is covered in a dense diamond lattice of cut-out shapes, while the rounded body below carries two crescent-shaped eyes, a small curved smile, and delicate arm curves along each side. Lit from within, the hatched cap glows like a lantern screen and the face reads warmly against the solid body. Carve the lattice diamonds from the center of the cap outward, and avoid cutting the thin grid lines between them until all surrounding diamonds are removed.
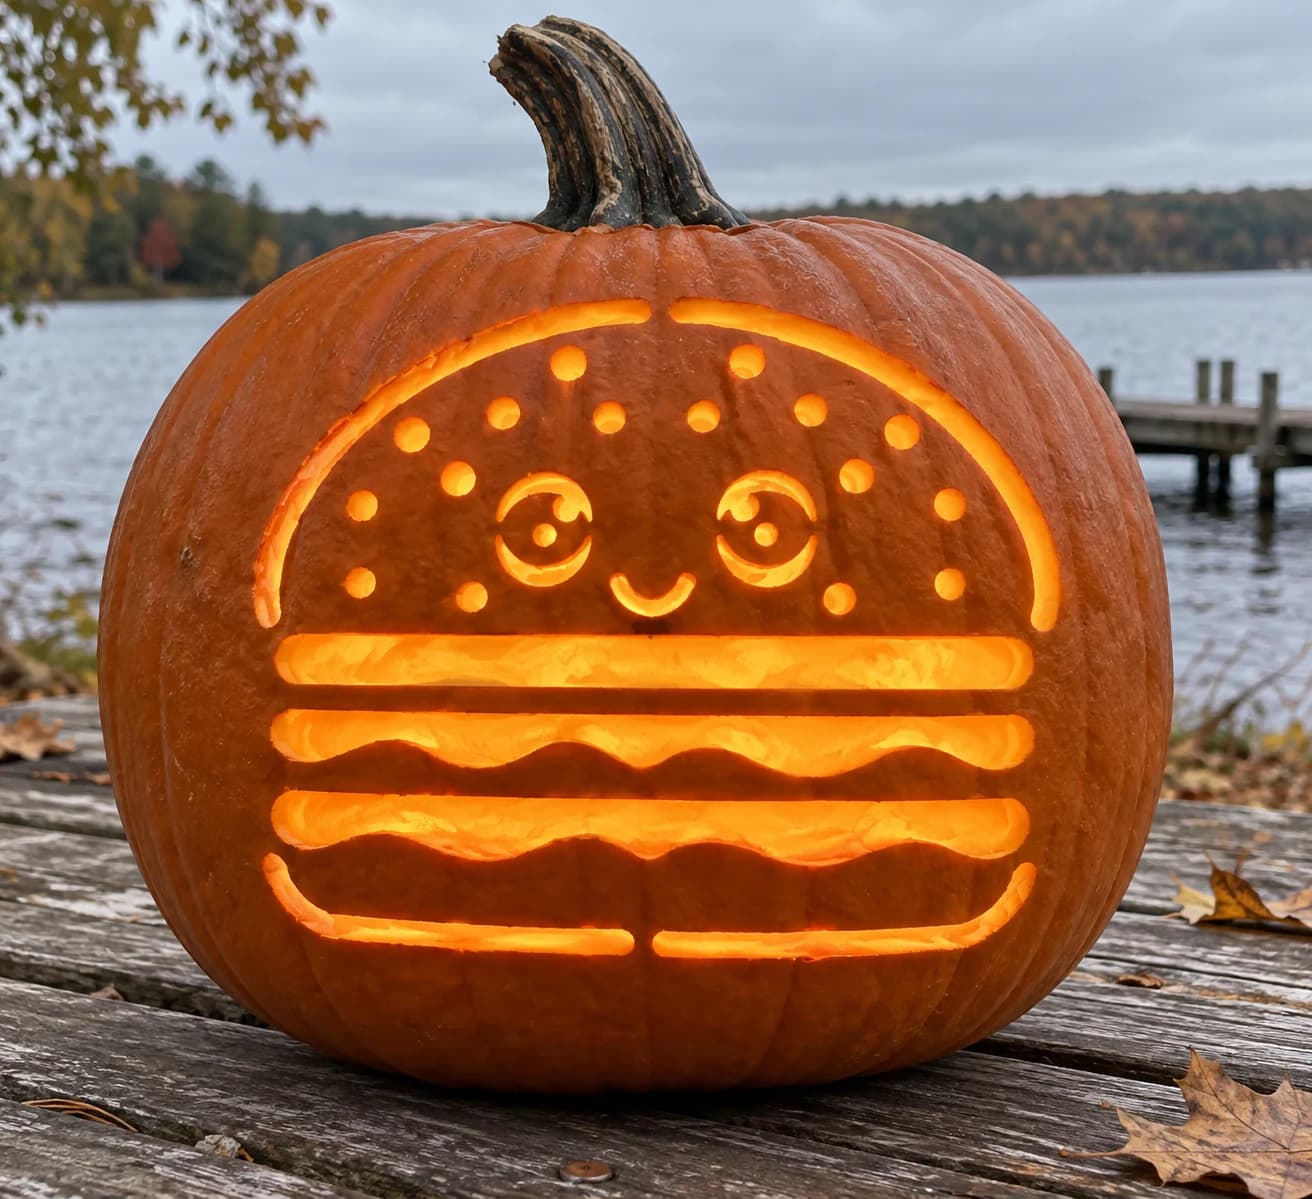
Kawaii Burger Pumpkin Stencil
A kawaii-style cheeseburger with a sesame-seed bun, two wavy patty layers, and a smiling face with spiral eyes fills this easy food pumpkin stencil, its stacked layers translated into a series of bold horizontal cuts separated by solid pumpkin-skin ridges. The round sesame seeds on the bun are punched as individual small circles, and the curly eyes and smile arc are cut as open shapes inside the bun half. Punch all the seed holes first with a small drill bit or apple-corer tip before cutting the long horizontal bun and patty slots, so the surrounding wall stays firm while you place those precise dots.
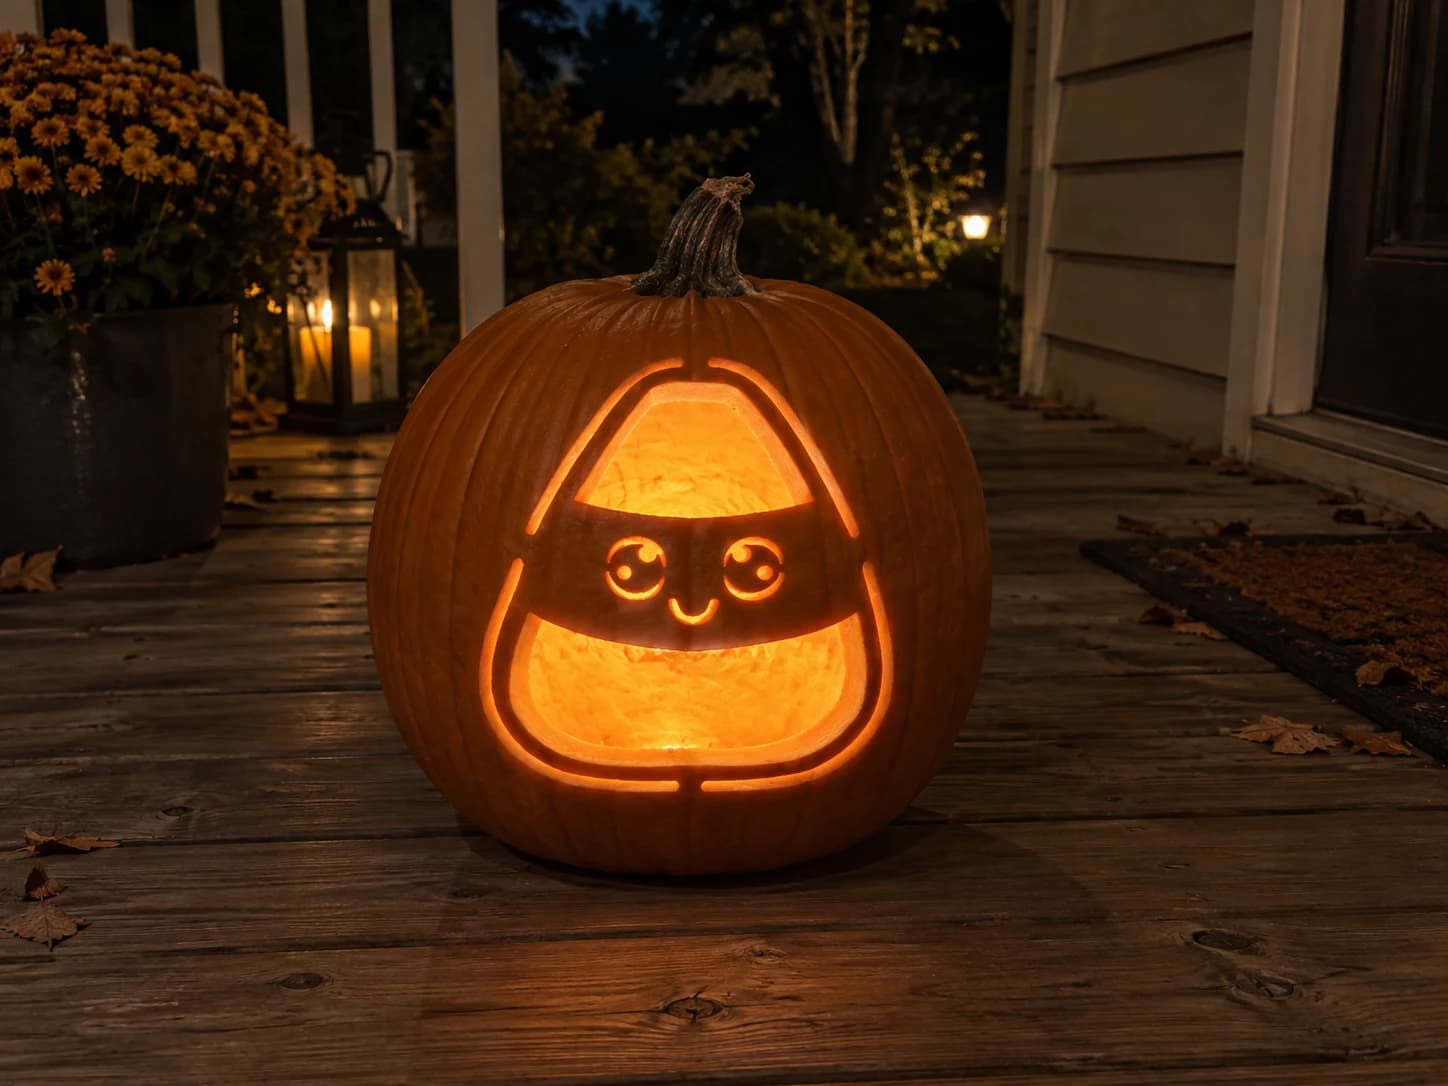
Kawaii Candy Corn Pumpkin Stencil
A kawaii candy corn character fills this pumpkin stencil, with a wide triangular body divided into two large cut-out sections and a solid mid-stripe band that holds a pair of circular eyes and a curved smile. The two open panels at top and bottom glow brightly when lit, while the pumpkin-colored face strip stays solid, making the cute expression pop in candlelight. Cut the smaller eye circles last to avoid weakening the surrounding pumpkin skin before the big panels come out.
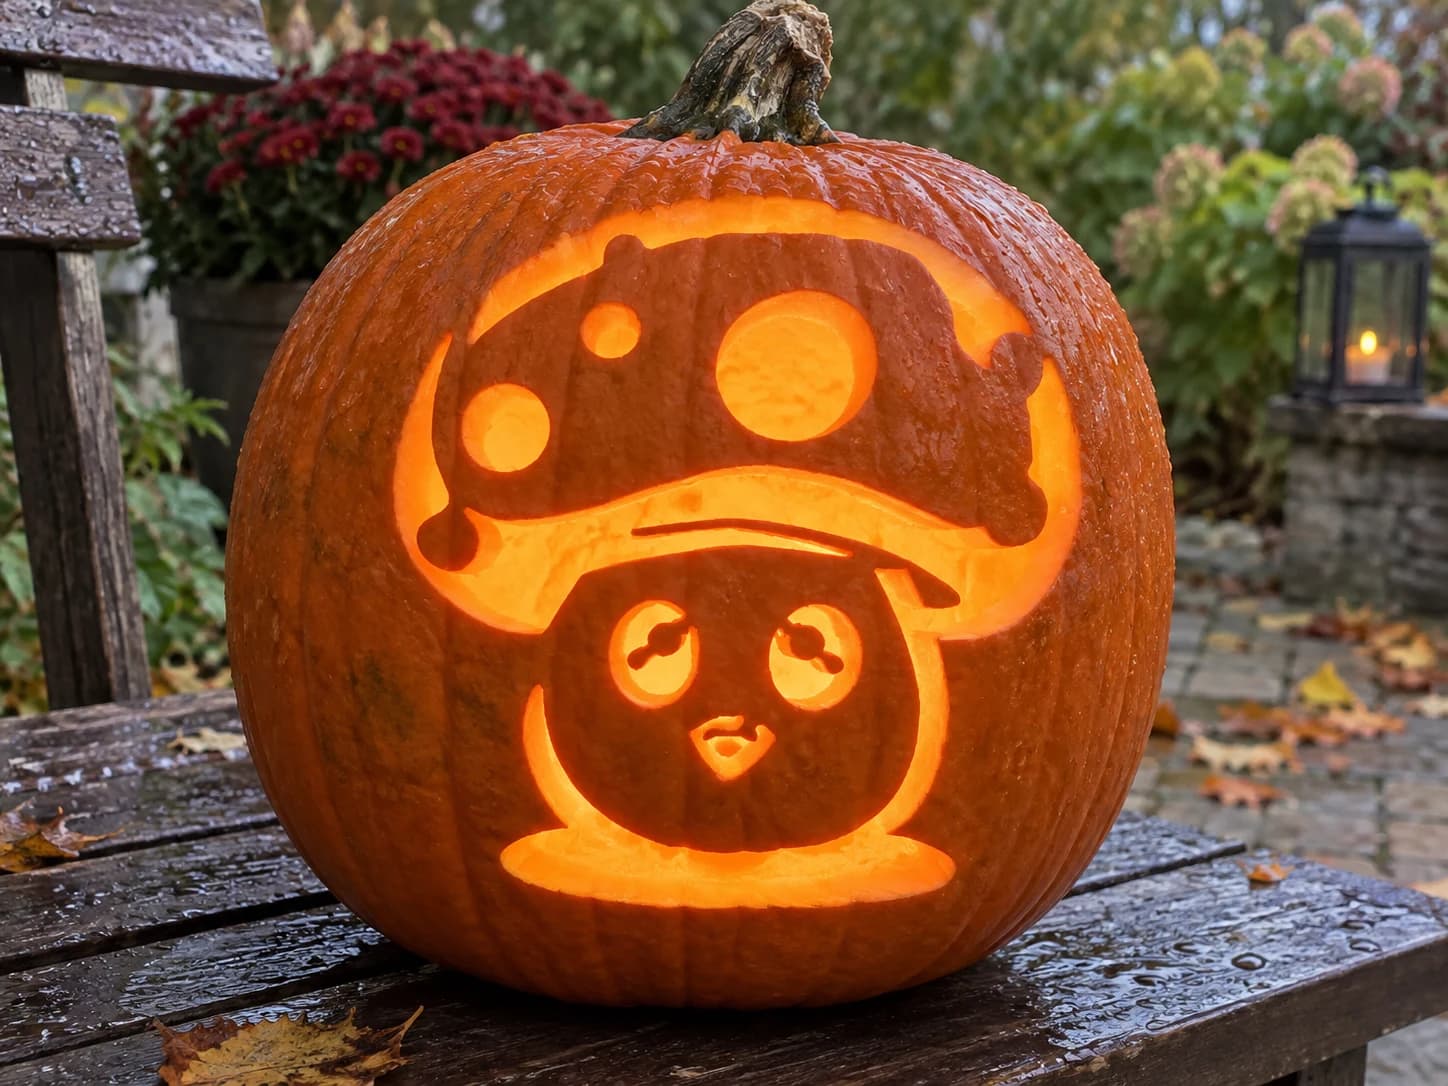
Kawaii Mushroom Pumpkin Stencil
A kawaii-style mushroom character fills this hard pumpkin stencil, with a broad spotted cap, small horns or fins at the sides, and a round face below it showing large anime eyes and a tiny curved mouth. The cap spots are solid orange circles against a pierced cap background, and the face details are fine interior cuts within the solid round head. Carve the small circular spots on the cap before removing the large open cap area, so those circles have firm pumpkin wall behind them while you make the precise cuts.
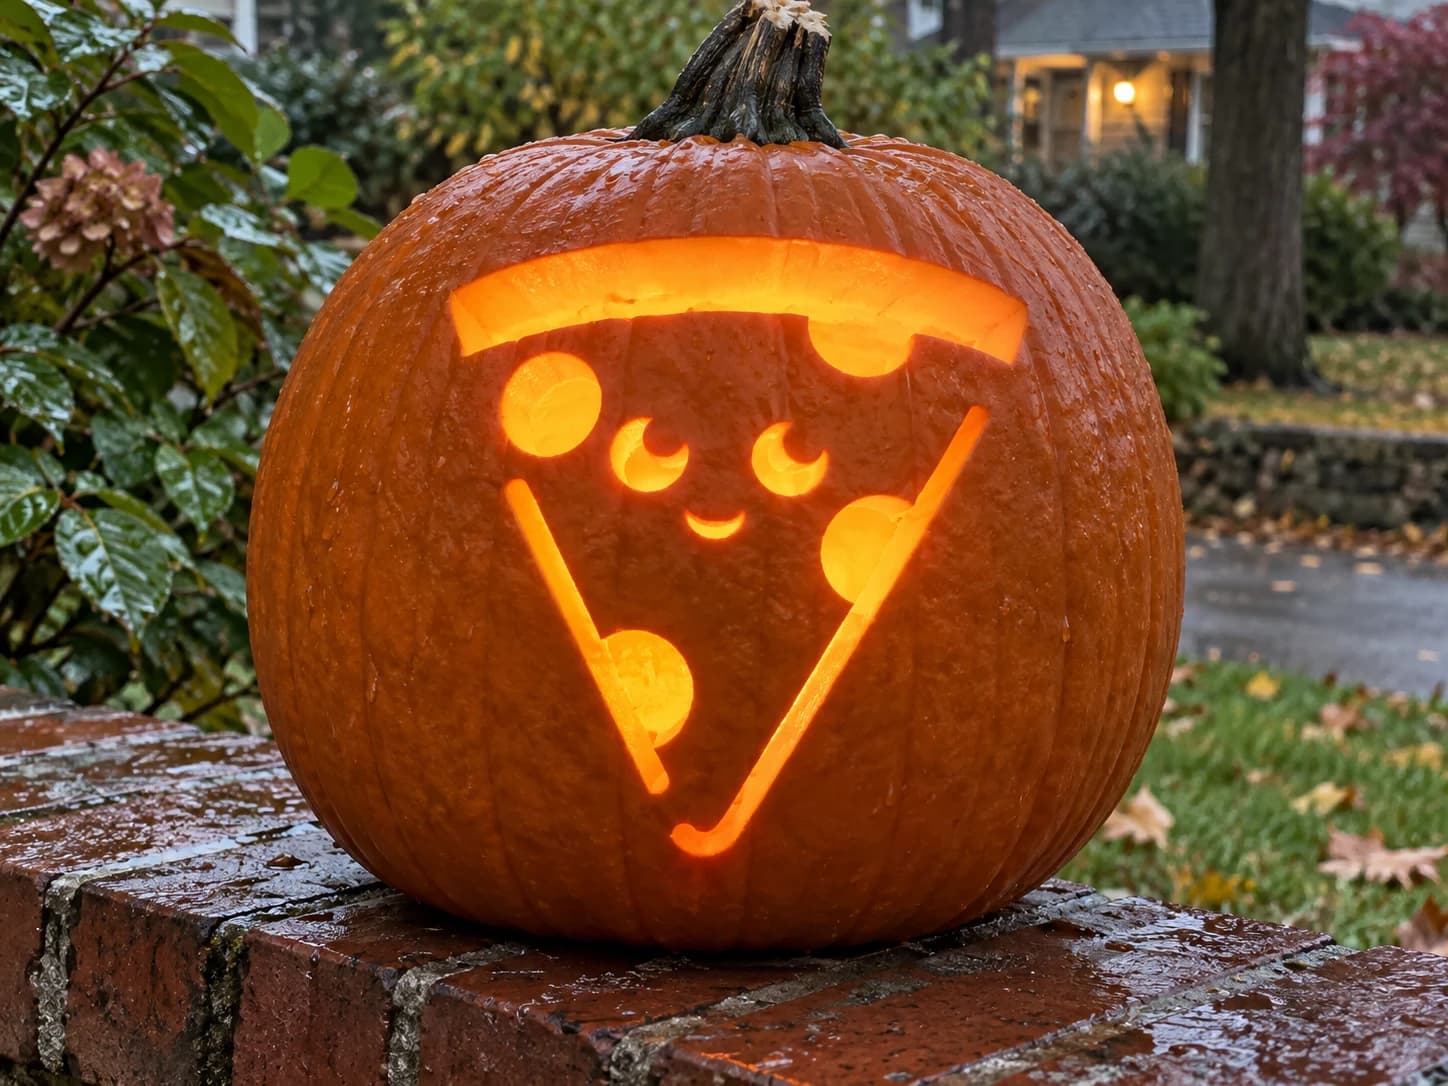
Kawaii Pizza Slice Pumpkin Stencil
A kawaii pizza slice takes center stage in this pumpkin stencil: the triangular slice has a curved crust bar across the top, a cute face with crescent-shaped eyes and a small smile, circular pepperoni cutouts, and two thin diagonal lines suggesting arms. All the face features, pepperoni circles, and the space surrounding the slice are pierced through, while the slice outline and crust shape remain solid. Cut the tiny crescent eyes and smile first before the circular pepperoni holes, which are easier to control while the surrounding skin is still intact.
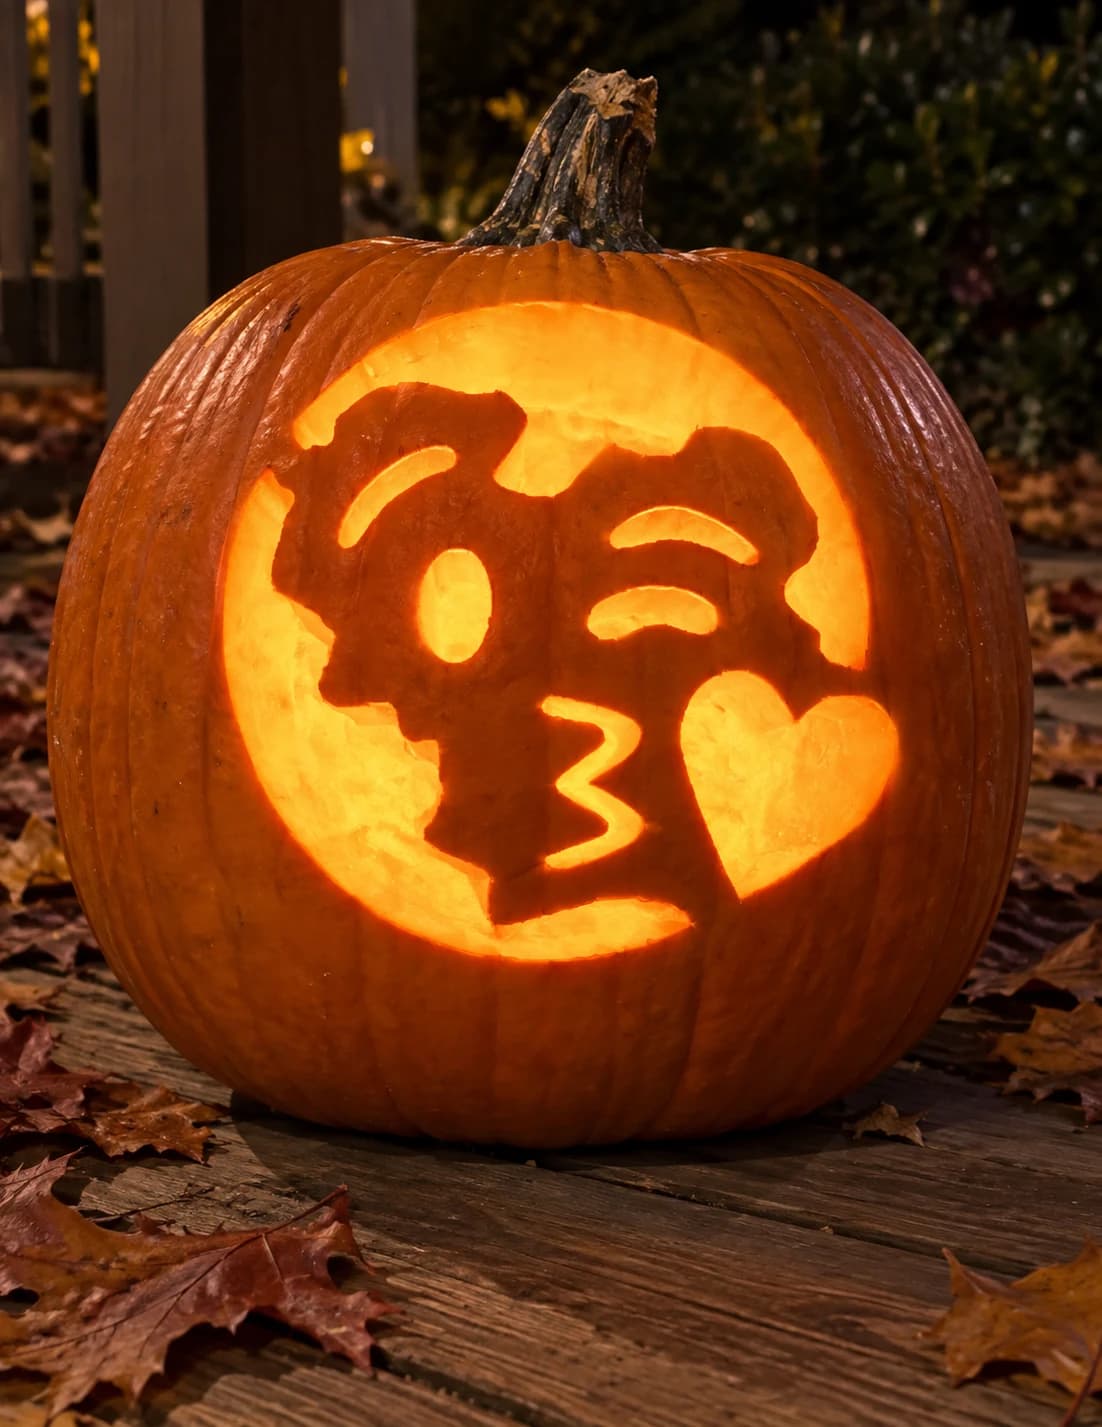
Kiss Emoji Pumpkin Stencil
The love heart kiss emoji fills the design: a round yellow face in profile with one visible winking eye, rosy cheek, puckered kissing lips, and a heart shape floating beside the mouth. The face is set against a large circular pierced background, with the facial features rendered as solid orange islands within the opening. The tiny oval winking-eye island and the small heart shape are the parts most likely to fall out during carving; cut the large circular outer ring last so the wall holds those islands in place until they are secured by their surrounding bridges.
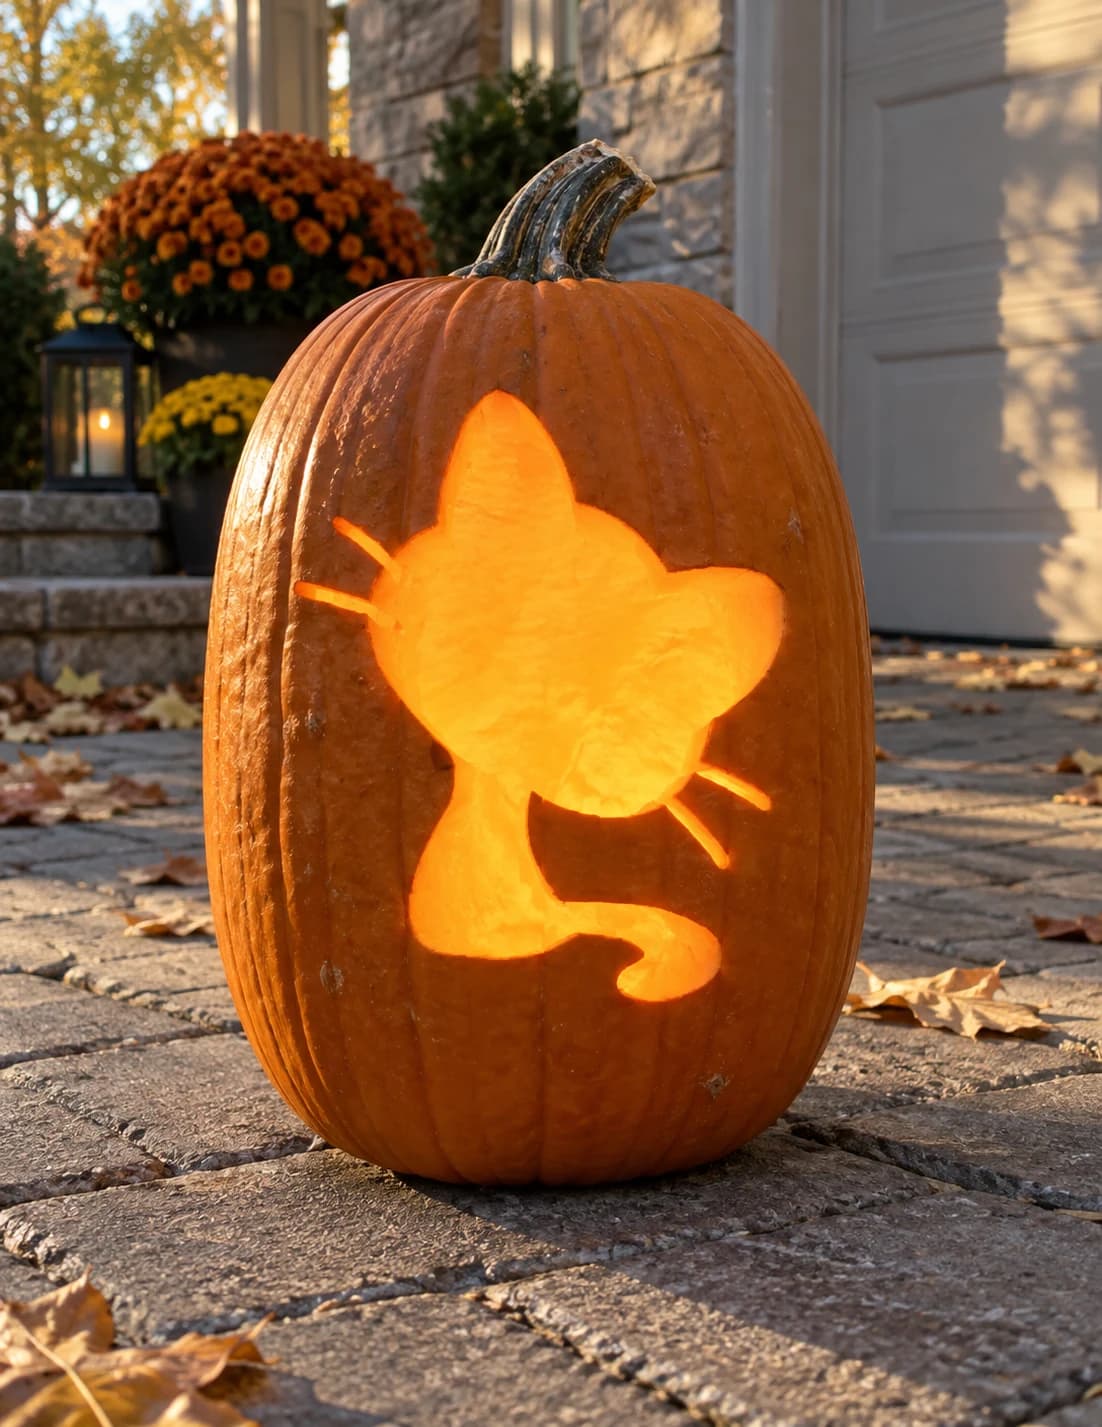
Kitten Pumpkin Stencil
A chubby kitten head in silhouette is the subject of this easy cat pumpkin stencil, showing one ear, a round face, and a small curled tail peeking below, with four delicate whisker lines extending from either side. The main body is cut away as one large opening; the whisker lines are narrow positive strips of pumpkin skin that must not be cut. When carving, leave the whisker lines until you have removed the large body void on each side, then carefully define their outer edges with a single shallow scoring pass.

Kitten with Long Whiskers
A sweet kitten face with pointed ear triangles, big almond eyes, a small triangle nose, extra-long whisker slits sweeping from each cheek, and a dainty curled smile beneath. All features are pierced through, and the long thin whiskers are what nudge this to medium difficulty. Cut each whisker as one smooth continuous stroke rather than sawing back and forth, and the slits will glow as fine clean lines.
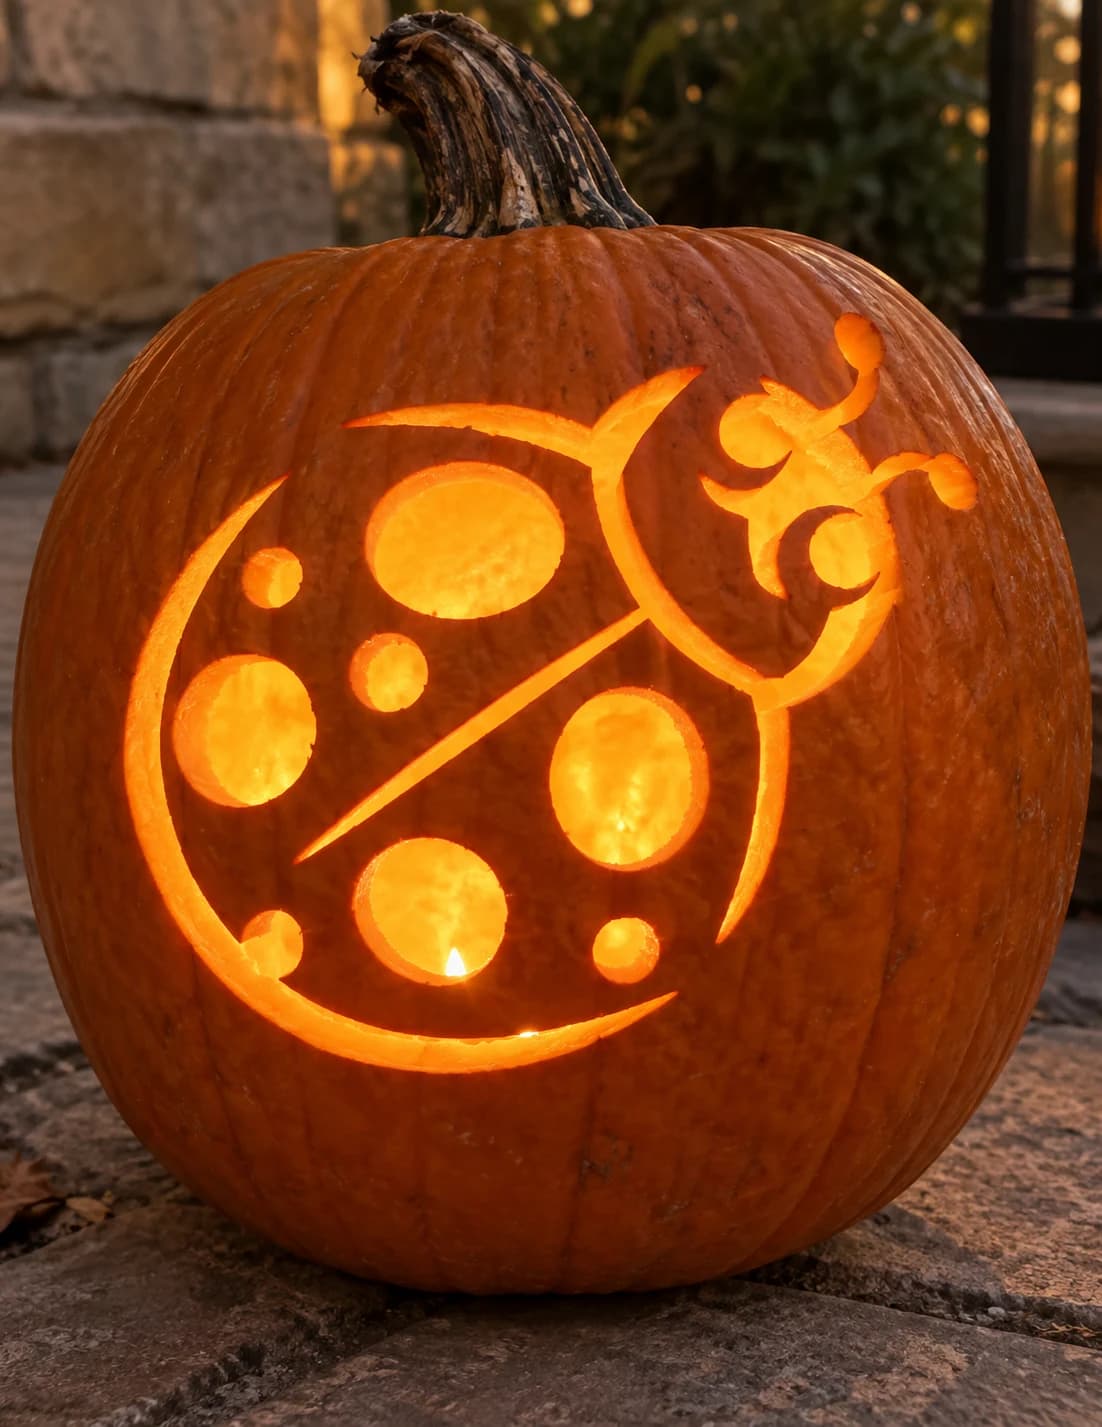
Ladybug Pumpkin Stencil
A plump ladybug viewed from above fills this cheerful pumpkin stencil, its round spotted body divided by a center-line ridge and ringed by a curved outline, while a decorative curling head with antennae sits at upper right. The circular spots are the cut-through elements that blaze as glowing dots; the outer body outline and dividing ridge stay solid. To keep the smaller spots from cracking inward, cut the largest center spot first, then work outward to the progressively smaller ones.
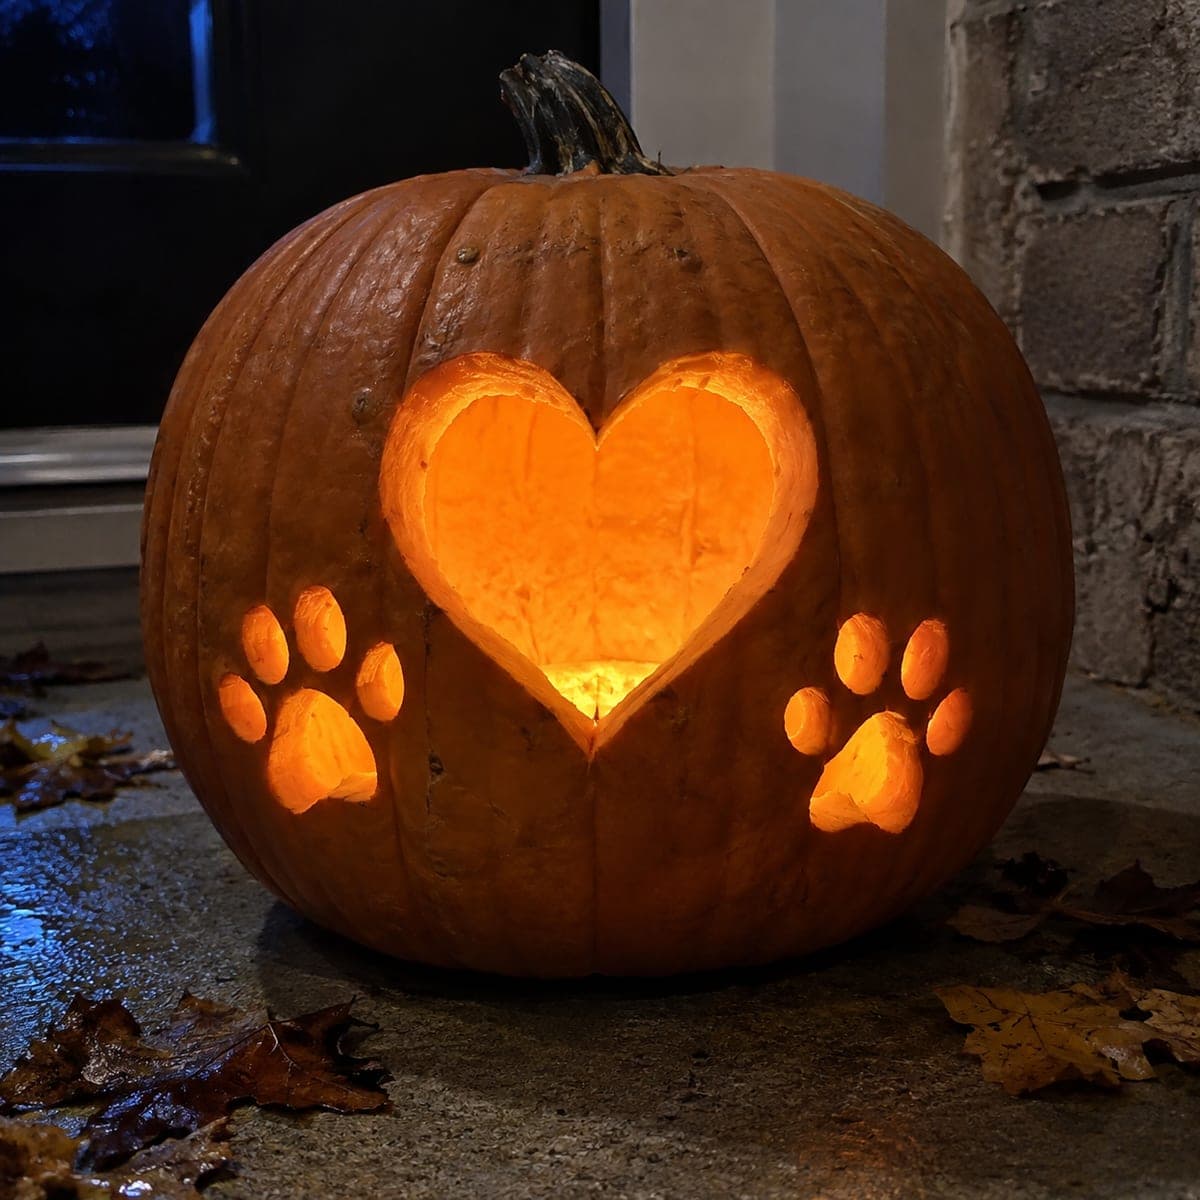
Large Heart and Two Paw Prints
A large heart glows at the center flanked by a full paw print on each side, every pad and toe pierced clean through the wall. It is a natural fit for pet lovers, veterinary clinics, and rescue fundraisers. Cut the eight small toe ovals first while the shell is sturdy, then the two big pads, and finish with the heart, easing around its top notch so both lobes stay symmetrical.