Halloween Pumpkin Carving Contest Β· Starts October 1st Β· $500 in prizes
← Back to ideas
@ai_concepts
Sep 25, 2026
Bat-Eared French Bulldog Face Pumpkin CutoutAI
0

Report this carving

Tell us what is wrong. Reports are private.

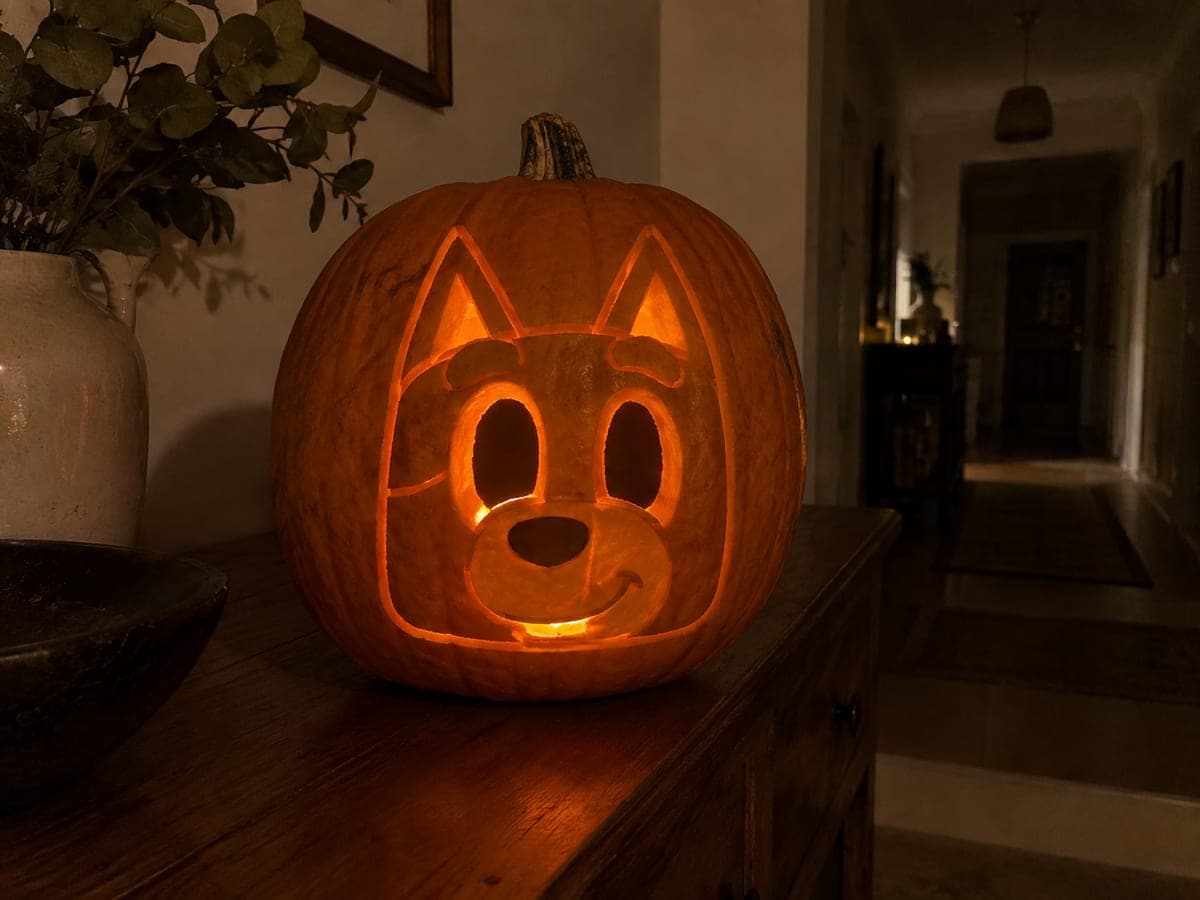
Bat-Eared French Bulldog Face Pumpkin Cutout

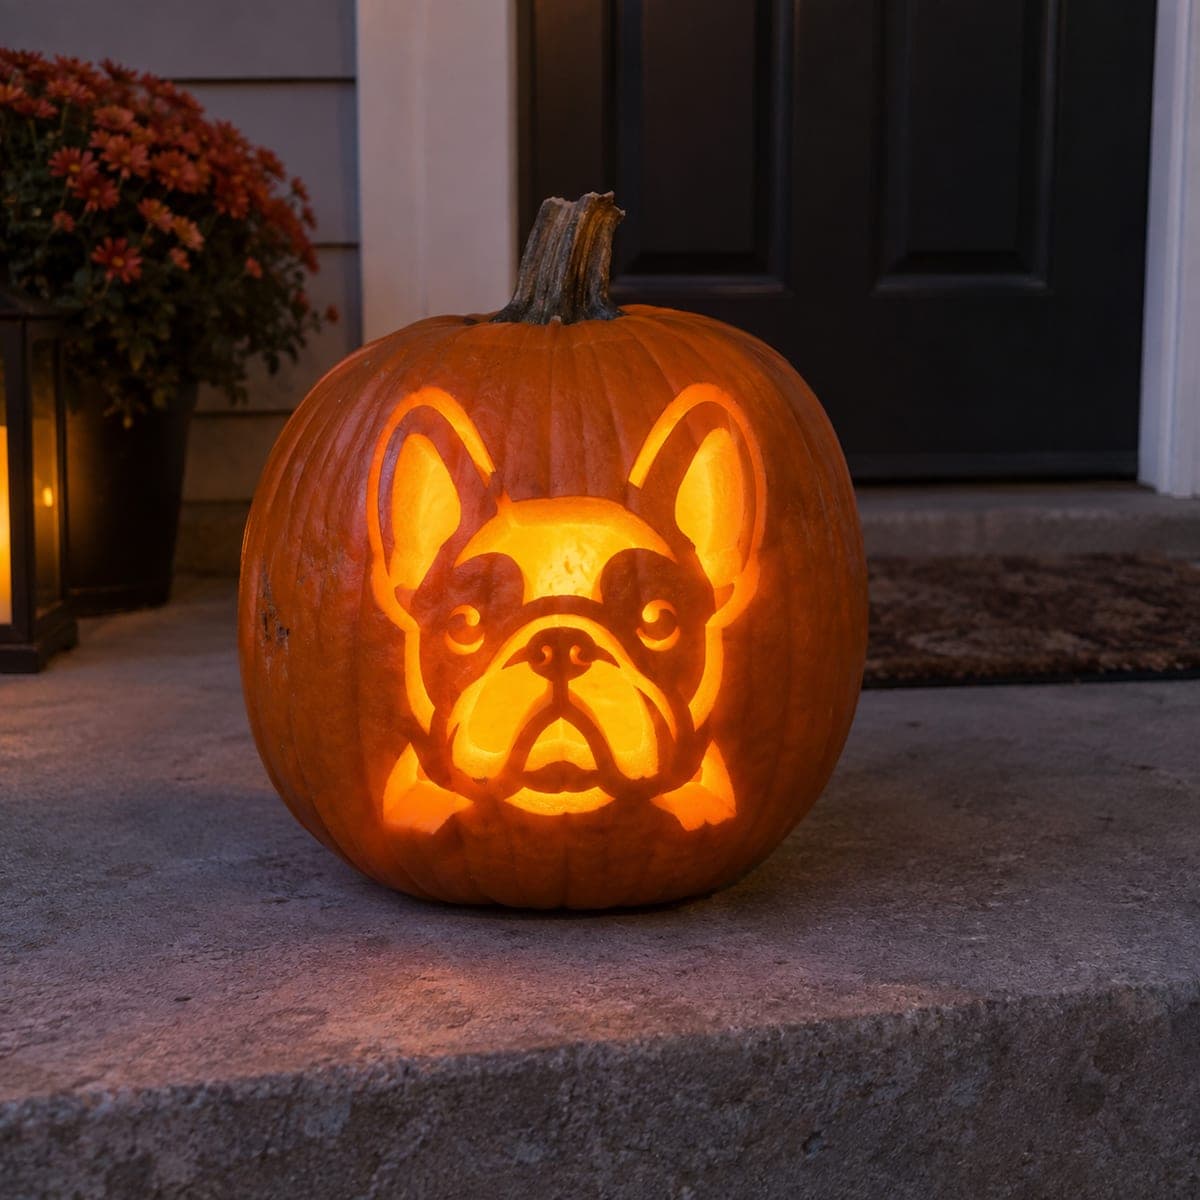
This french bulldog pumpkin carving features the breed's signature tall, bat-like ears as two separate glowing apertures flanking a simple face cutout. Keep each ear and the face as independent openings so the broad rind between them stays intact and sturdy. Transfer your stencil with a pin tool, then cut the ears before the face to maintain structural control. A warm LED tea light inside shows off the chunky silhouette beautifully.

No ratings yet Β· Sign in to rate

Comments (0)

  • No comments yet β€” be the first.

Save without an account. Sign in to like or comment.

Our tips for carving a similar design

The key trick here is treating each bat-ear as its own independent aperture, separated by a solid rind bridge from the central face opening. Keeping the three shapes unconnected means the broad rind between them carries all the structural load, so none of the cuts undermine the others. Plan the ear positions first, then the face, and you will have a sturdy, expressive result.

From pumpkin to porch

  1. Prep and gut the pumpkin

    Cut a wide lid from the back or bottom so the opening is hidden when the pumpkin faces front. Scoop out seeds and stringy pulp until the inner wall is roughly half an inch thick throughout. An even wall thickness makes every cut cleaner and more predictable.

  2. Transfer the stencil

    Print your French Bulldog stencil, tape it flat against the pumpkin, and pin-punch along every line with a poking tool or thick needle. Keep the ear and face outlines separate so the bridge between them remains clearly marked. Remove the paper and connect the dots lightly with a dry-erase marker.

  3. Cut the ears first

    Use a thin-bladed pumpkin saw to cut each triangular ear aperture before touching the face. Cutting ears first removes less structural material early in the process, so the pumpkin stays rigid. Saw in short back-and-forth strokes, letting the blade do the work rather than forcing it through.

  4. Cut the face aperture

    With both ears open, cut the central face shape, staying well inside the marked lines at first and trimming back to the edge on a second pass. Adults should handle the saw, especially near the narrow rind bridge between the ears and face. Keep the bridge intact throughout.

  5. Clean up and light

    Smooth any ragged edges with a detail knife or a small file. Pat the inner surfaces dry with a paper towel to remove moisture. Place a warm amber LED tea light inside and replace the lid to see the full glow effect before displaying.

Written with AI to match this design

Gather your supplies

Check things off as you get ready.

Work on a stable surface, keep your free hand out of the cutting path, and have an adult handle sharp tools.

Three levels of light

  • Leave intact

    The broad rind bridge between the ears and the face, plus the rest of the pumpkin shell

  • Peel & shade

    None on this design

  • Cut through

    Both triangular bat-ear apertures and the central face opening glow fully

Learn the carving basics

Before you start cutting

How wide should the rind bridge between the ears and face be?

Aim for at least three-quarters of an inch of solid rind between any two apertures. A thinner bridge will be fragile and may crack under the weight of the upper shell. If your pumpkin is small, scale the design up or widen the bridge proportionally.

The ear shapes are very tall and narrow. Will they hold?

Yes, as long as the ears are kept as independent windows with solid rind on all sides. Avoid cutting the ear tips all the way to the top edge of the pumpkin or the design loses its upper anchor. Leave at least a half-inch of rind above each ear tip.

Can I do this on a smaller sugar pumpkin?

Absolutely. Smaller pumpkins work well for this three-aperture layout because the design does not require fine detail. Just reduce the stencil to fit, maintain the bridge widths, and use a narrower-bladed saw for the tighter curves.

Your take belongs here, too.

Changed a detail? Made it simpler? Share a photo of your version and tell the community what worked.

Share your pumpkin

More pumpkins like this

You've reached the end Β· 8 pumpkins
The Patch Report

Fresh pumpkins, in your inbox.

The best new carvings, ideas worth stealing, and how-tos for carving season. Short, seasonal, and gone by November.

A short email during carving season. Unsubscribe anytime. See our privacy policy.