Halloween Pumpkin Carving Contest · Starts October 1st · $500 in prizes
← Back to ideas
@ai_concepts
Sep 25, 2026
Detailed French Bulldog Portrait Pumpkin CarvingAI
0

Report this carving

Tell us what is wrong. Reports are private.

Detailed French Bulldog Portrait Pumpkin Carving

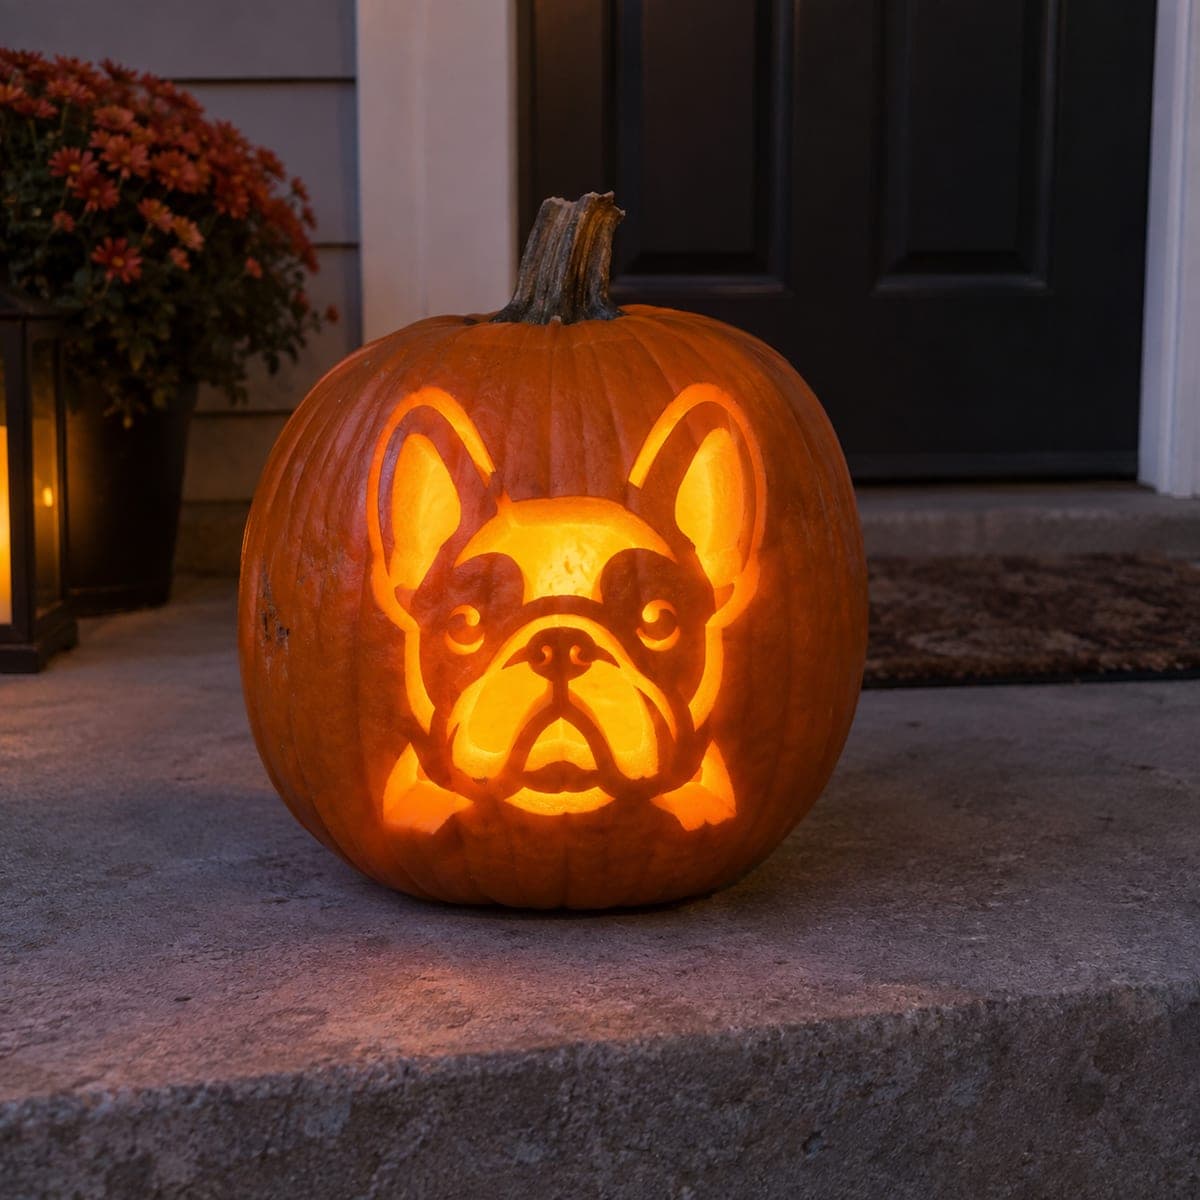
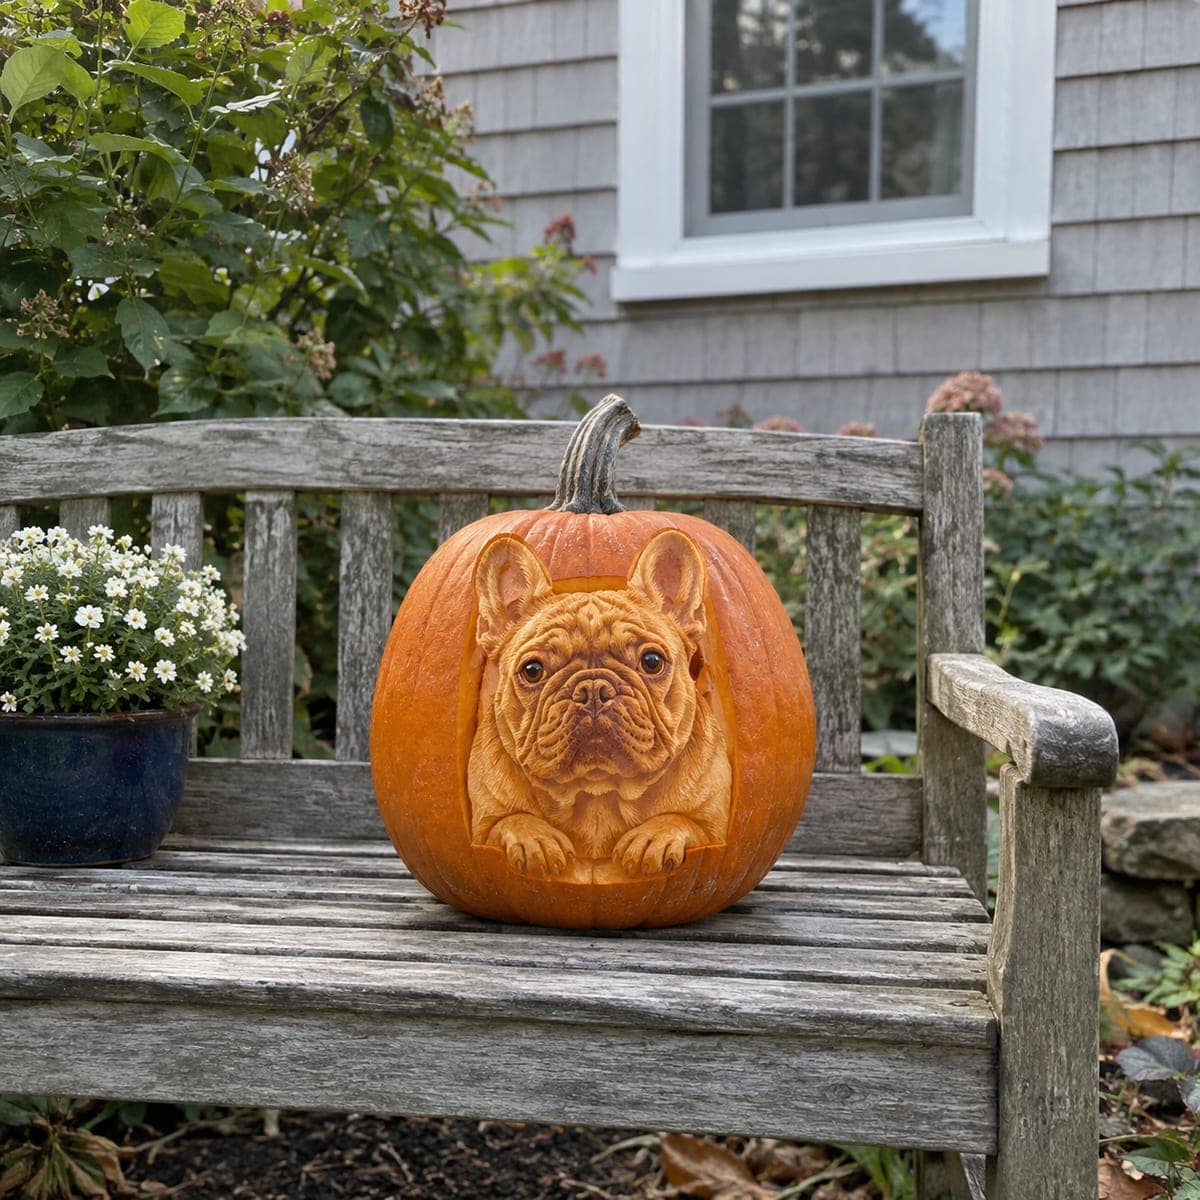
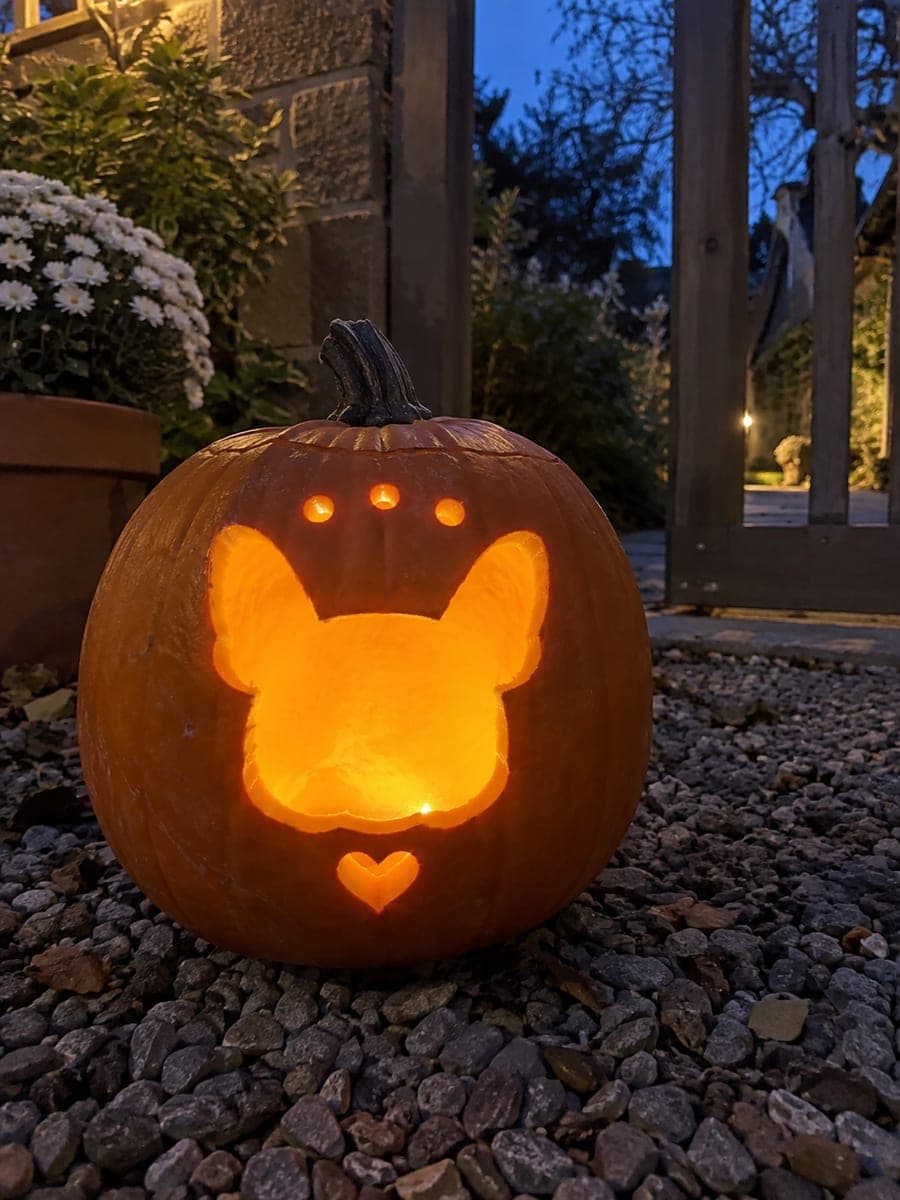
This detailed french bulldog pumpkin carving idea shows a connected portrait with upright ears that anchor into the upper frame and a muzzle combining through-cuts with shallow relief work for texture. The ears join the shell at both the tip and the cheek structure, keeping the design stable throughout. Carve the large ear and cheek apertures first to establish the framework, then use a linoleum-style tool or detail knife for the backed muzzle details. Use a single bright LED candle so the shaded muzzle texture reads clearly.

No ratings yet · Sign in to rate

Comments (0)

  • No comments yet — be the first.

Save without an account. Sign in to like or comment.

Our tips for carving a similar design

This portrait achieves stability by anchoring the ears into the upper frame and rooting the muzzle into the lower shell, so the structure acts like a connected arch rather than floating pieces. The ear and cheek through-cuts establish the framework, and the muzzle relief work fills in texture afterward. A single bright LED is essential so the backed muzzle detail casts readable shadows.

From pumpkin to porch

  1. Hollow and measure wall thickness

    Scoop the pumpkin to roughly three-eighths of an inch in the areas where relief work will happen, and slightly thicker elsewhere for support. Thinner walls make shading cuts shallower relative to the remaining shell, giving you more margin for error. Mark the planned relief zones on the outside with a marker before you begin.

  2. Transfer the full stencil

    Pin-transfer every line, distinguishing through-cut lines from relief lines with different colored marker strokes once the paper is removed. This prevents accidentally cutting through areas meant for backing. Confirm the ear tips connect to the upper frame in your marked lines before picking up a blade.

  3. Cut the ear and cheek apertures

    Start with the large ear apertures, ensuring each ear tip is connected at the top to the upper shell edge. Move to the cheek openings next, leaving the muzzle and central face region completely intact. Work from the outermost points inward to preserve structural integrity as long as possible.

  4. Add muzzle relief and texture

    Switch to a linoleum-style gouge or a sharp detail knife held at a low angle for the muzzle detail. Remove roughly half the wall depth for highlight areas, less for the subtler texture lines. Work in short strokes following the natural facial planes and wipe away shavings frequently so you can see your progress.

  5. Refine edges and check proportions

    Hold a flashlight inside and view the carving in a darkened room to see how the light reads through each area. Deepen any relief sections that look flat and smooth any jagged aperture edges with a fine detail knife. Step back periodically to check symmetry between the two ears.

  6. Light and photograph

    Place a single bright LED candle inside, positioning it toward the back wall so its light spreads evenly. The muzzle relief should cast visible shadows that read as facial texture. Photograph in complete darkness for the most dramatic result.

Written with AI to match this design

Gather your supplies

Check things off as you get ready.

Work on a stable surface, keep your free hand out of the cutting path, and have an adult handle sharp tools.

Three levels of light

  • Leave intact

    The central face panel, the solid bridges between ear and cheek apertures, and the lower shell base

  • Peel & shade

    Muzzle highlight areas and surface texture lines carved to roughly half the wall depth

  • Cut through

    The large ear apertures and the cheek openings along both sides of the face

Learn the carving basics

Before you start cutting

How do I keep the ear tips from breaking off when I cut them?

The key is making sure each ear tip connects into the upper shell frame rather than ending as a free-floating point. Your stencil should show the ear tip merging with the pumpkin's top edge. If your stencil has a floating tip, extend the cut slightly until it reaches the edge.

My muzzle relief looks flat when lit. What went wrong?

Relief needs enough depth difference between sections to cast a visible shadow. Aim for at least two distinct depth levels: roughly a quarter inch for lighter texture and half the wall thickness for the brightest areas. Also try moving the LED candle farther back inside the pumpkin, which creates a more raking light angle.

Should I seal the carved surface to slow drying?

Yes. After finishing the carving, wipe the cut surfaces with a damp cloth to remove debris, then brush on a thin coat of petroleum jelly or spray with a pumpkin-preserving sealant. This slows dehydration and keeps edges crisp for several more days. Reapply every day or two if the pumpkin is outdoors.

Your take belongs here, too.

Changed a detail? Made it simpler? Share a photo of your version and tell the community what worked.

Share your pumpkin

More pumpkins like this

You've reached the end · 8 pumpkins
The Patch Report

Fresh pumpkins, in your inbox.

The best new carvings, ideas worth stealing, and how-tos for carving season. Short, seasonal, and gone by November.

A short email during carving season. Unsubscribe anytime. See our privacy policy.