Halloween Pumpkin Carving Contest · Starts October 1st · $500 in prizes
← Back to ideas
@ai_concepts
Jul 9, 2026
Bubbling Witch Cauldron Pumpkin Carving IdeaAI
0

Bubbling Witch Cauldron Pumpkin Carving Idea

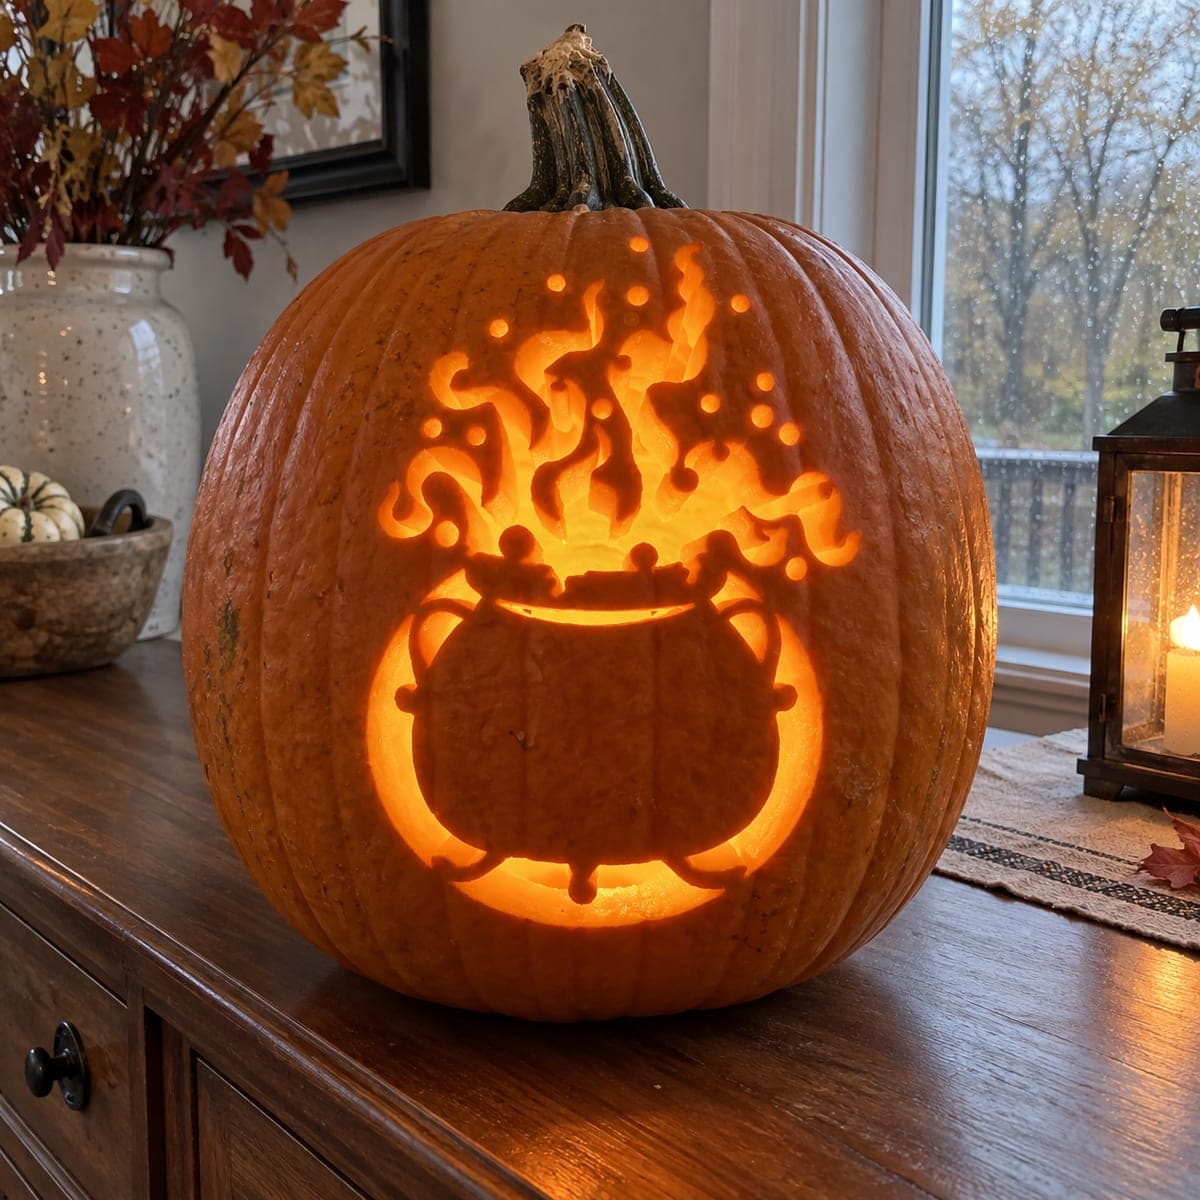
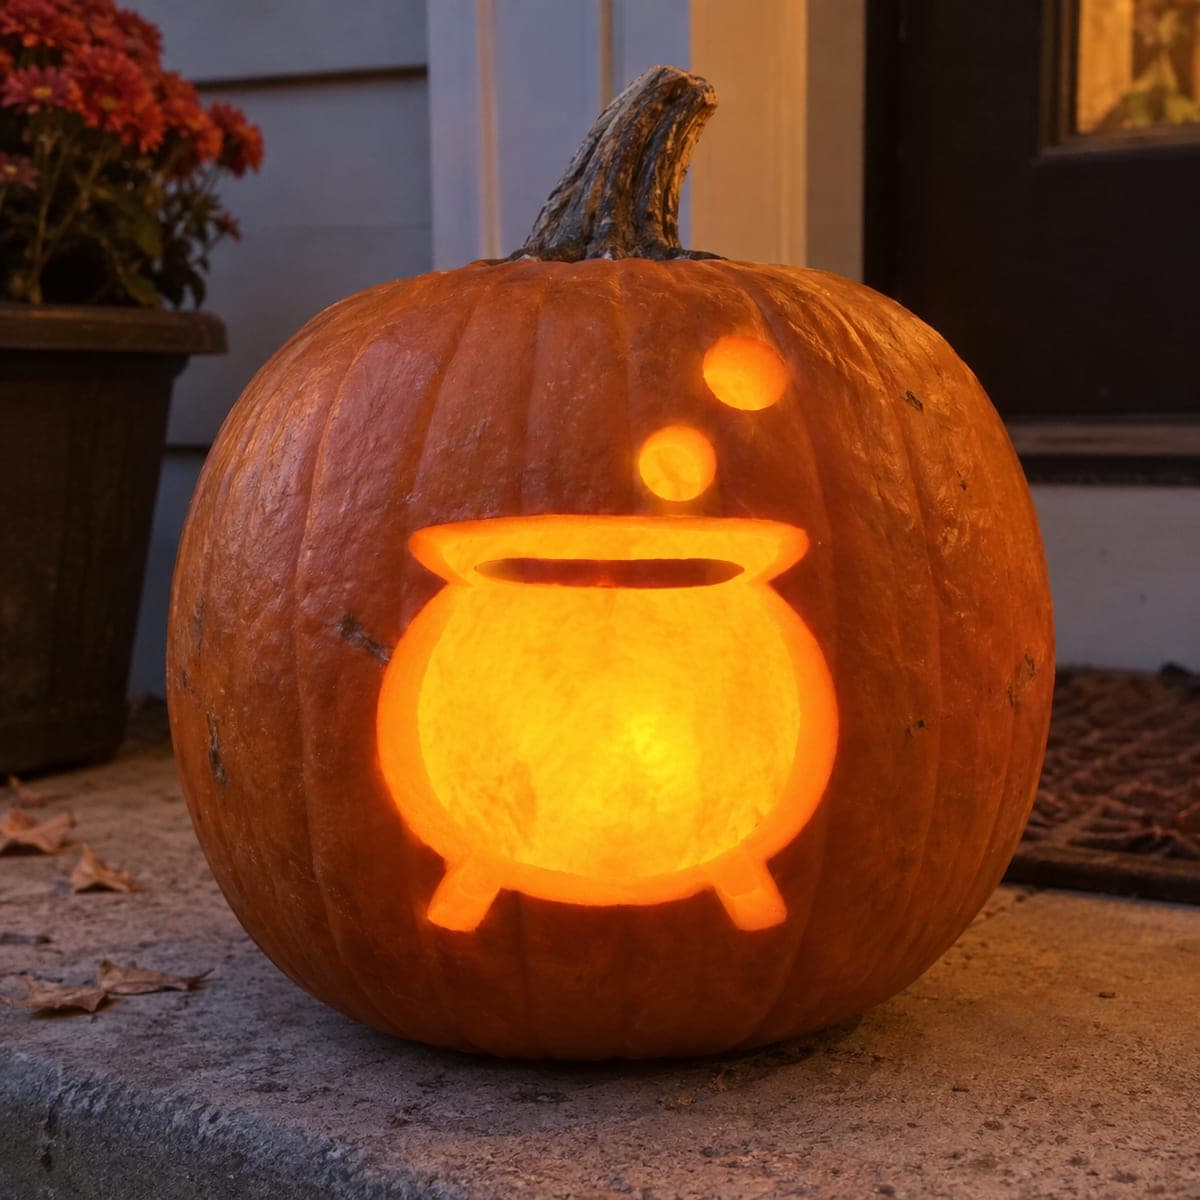
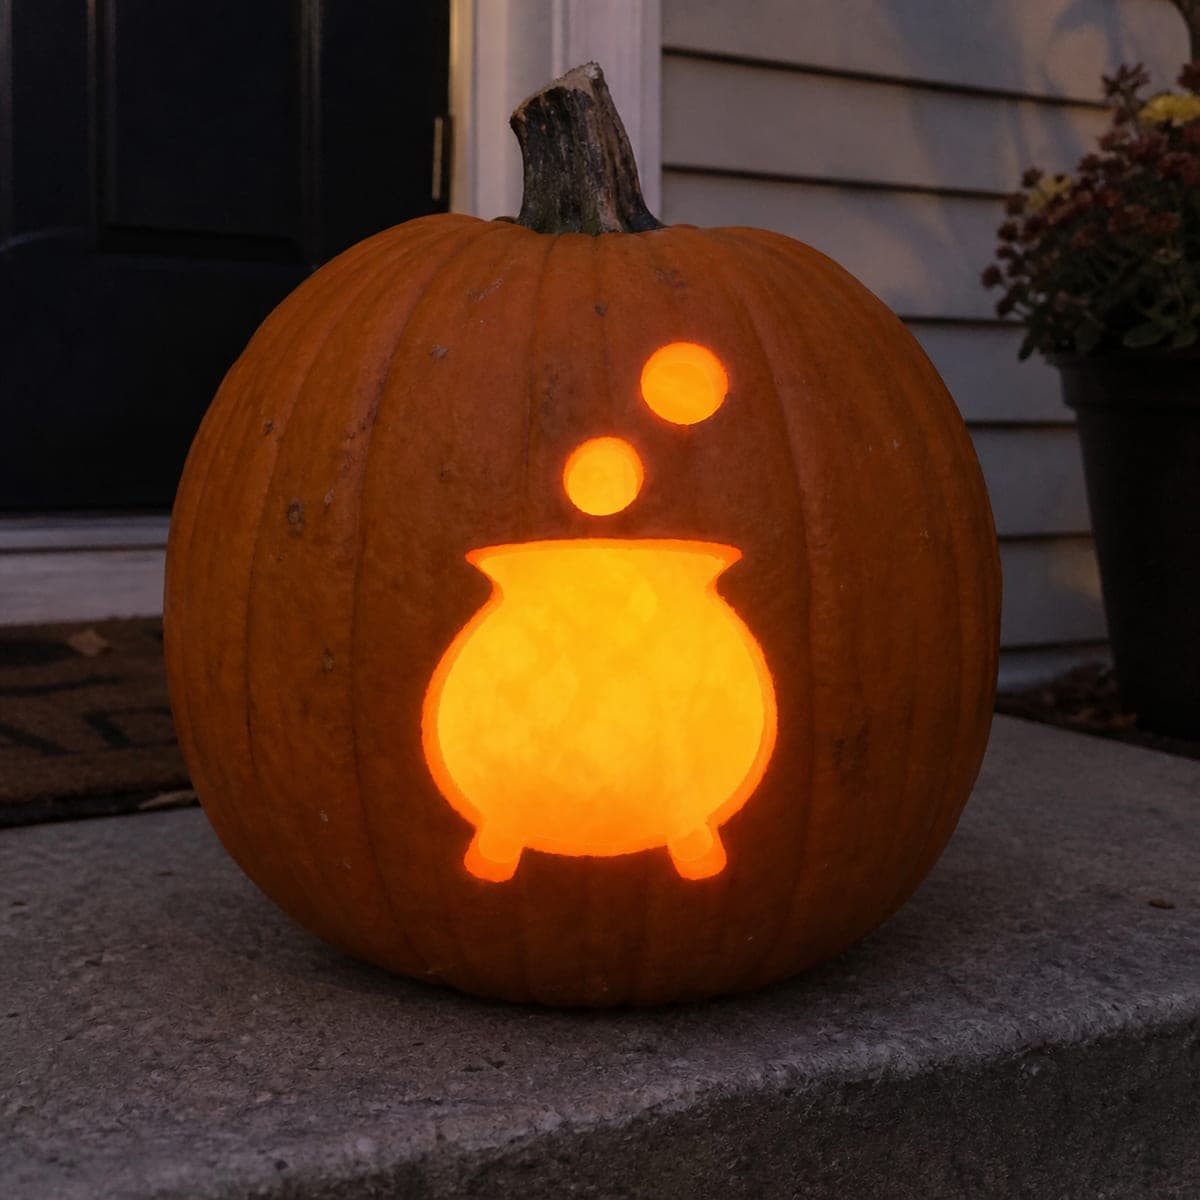
A witch's cauldron boils over on this easy Halloween pumpkin, with three round bubbles floating up toward the stem. The pot, its rim, and the bubbles are simple pierced shapes, making this a quick pumpkin carving idea for a first-time carver. Cut the big pot body first, then the thin rim crescent, and save the tiny bubbles for last with a small detail saw; a flickering candle makes the brew look like it is boiling.

This is an AI-generated concept image: a realistic, carvable design idea rather than a photo of a finished carve. AI concepts are always labeled and sit out the leaderboard and the contest.

No ratings yet · Sign in to rate
Comments (0)

  • No comments yet — be the first.

Save without an account. Sign in to like or comment.

Our tips for carving a similar design

The whole scene is built from a few simple pierced shapes: one big round pot, a thin crescent rim, small round bubbles, and two little leg lines. The trick is cutting the largest opening last so the surrounding skin stays strong while you carve the smaller details. You could recreate this look by transferring a clean cauldron outline and letting the interior glow do all the work.

Written by PumpkinCarvingIdeas.com, inspired by the image above. These are our suggestions, not instructions from the uploader. This approach to the AI concept has not been tested on a real pumpkin.

From pumpkin to porch

  1. Prep the pumpkin and pick your access hole

    Choose a round pumpkin with a smooth flat face for the cauldron. Cut a lid from the bottom or the back rather than the top so the stem stays intact and the light hides better. Scoop the inside until the front wall is about one inch thick so your tools glide through cleanly. Thinner walls light up better and are easier to pierce.

  2. Transfer the cauldron design

    Tape your stencil flat against the face, centering the wide pot low and the three bubbles rising toward the stem. Poke the outlines with a pushpin or transfer tool, spacing dots close together on curves. Peel the paper and connect the dots lightly with a marker so you can see the full layout. Double check that the rim crescent sits just below the pot opening and the bubbles climb in a gentle diagonal.

  3. Score the shapes and start with the rim

    Cut the thin rim crescent first while the surrounding skin is still fully supported. Use a small detail saw and take slow, short strokes, keeping the slot narrow so the band of skin above it stays attached as a bridge. This narrow opening reads as the pot's mouth and is the most fragile line, so patience here pays off. Save the wide pot body for later.

  4. Carve the bubbles and legs

    Pierce the three round bubbles with a small saw, working from the smallest to the largest and rotating the pumpkin as you go. Keep each bubble a clean circle by making many tiny cuts rather than forcing the blade. Then cut the two short leg lines under the pot with light, controlled strokes. Adults should handle all the sharp tools, especially on these small pieces.

  5. Cut the pot body last

    Now remove the large pot belly, cutting just inside your line so the shape stays full and round. Because this is the biggest opening, doing it last keeps the face rigid while you finish the fine work. Push the cut piece inward and gently free it so you do not crack the surrounding wall. Clean up any ragged edges with a paring knife.

  6. Light it and photograph

    Drop in a bright LED puck or a flickering battery tea light for a safe, candle-free boil effect. Set the flicker light low inside the pot so the glow rises through the bubbles like steam. Photograph in near darkness on a step or porch to let the orange interior pop. Skip real flames since the thin rim and small bubbles sit close to the light source.

Gather your supplies

Check things off as you get ready.

Work on a stable surface, keep your free hand out of the cutting path, and have an adult handle sharp tools.

Three levels of light

  • Leave intact

    The wide field of orange skin around the pot and up toward the stem stays untouched and dark, framing the scene.

  • Peel & shade

    You could shave a thin highlight along the pot's belly curve for a soft dim glow that hints at a rounded metal shine.

  • Cut through

    The pot body, the thin rim crescent, the three bubbles, and the two legs are cut fully through for the brightest light.

Learn the carving basics

Before you start cutting

How do I keep the thin rim from breaking?

Cut the rim crescent early while the whole face is still solid, and keep the slot narrow so the strip of skin above it acts as a natural bridge. Use short, gentle saw strokes instead of prying. If your pumpkin wall feels soft, thin it a little more from the inside so the blade passes through without force.

What order should I cut the shapes?

Work small to large so the pumpkin stays rigid as long as possible. Do the rim slot first, then the bubbles and legs, and save the big pot body for last. Cutting the largest opening at the end keeps the face from flexing and cracking while you carve details.

Can I make the brew look like it is really boiling?

Use a flickering battery LED rather than a candle to get that restless, bubbling glow safely. Place it low inside the pot so the light climbs up through the bubbles like rising steam. A warm orange bulb sells the effect best.

Your take belongs here, too.

Changed a detail? Made it simpler? Share a photo of your version and tell the community what worked.

Share your pumpkin

More pumpkins like this

You've reached the end · 8 pumpkins
The Patch Report

Fresh pumpkins, in your inbox.

The best new carvings, ideas worth stealing, and how-tos for carving season. Short, seasonal, and gone by November.

A short email during carving season. Unsubscribe anytime. See our privacy policy.