Halloween Pumpkin Carving Contest · Starts October 1st · $500 in prizes
← Back to ideas
@ai_concepts
Sep 14, 2026
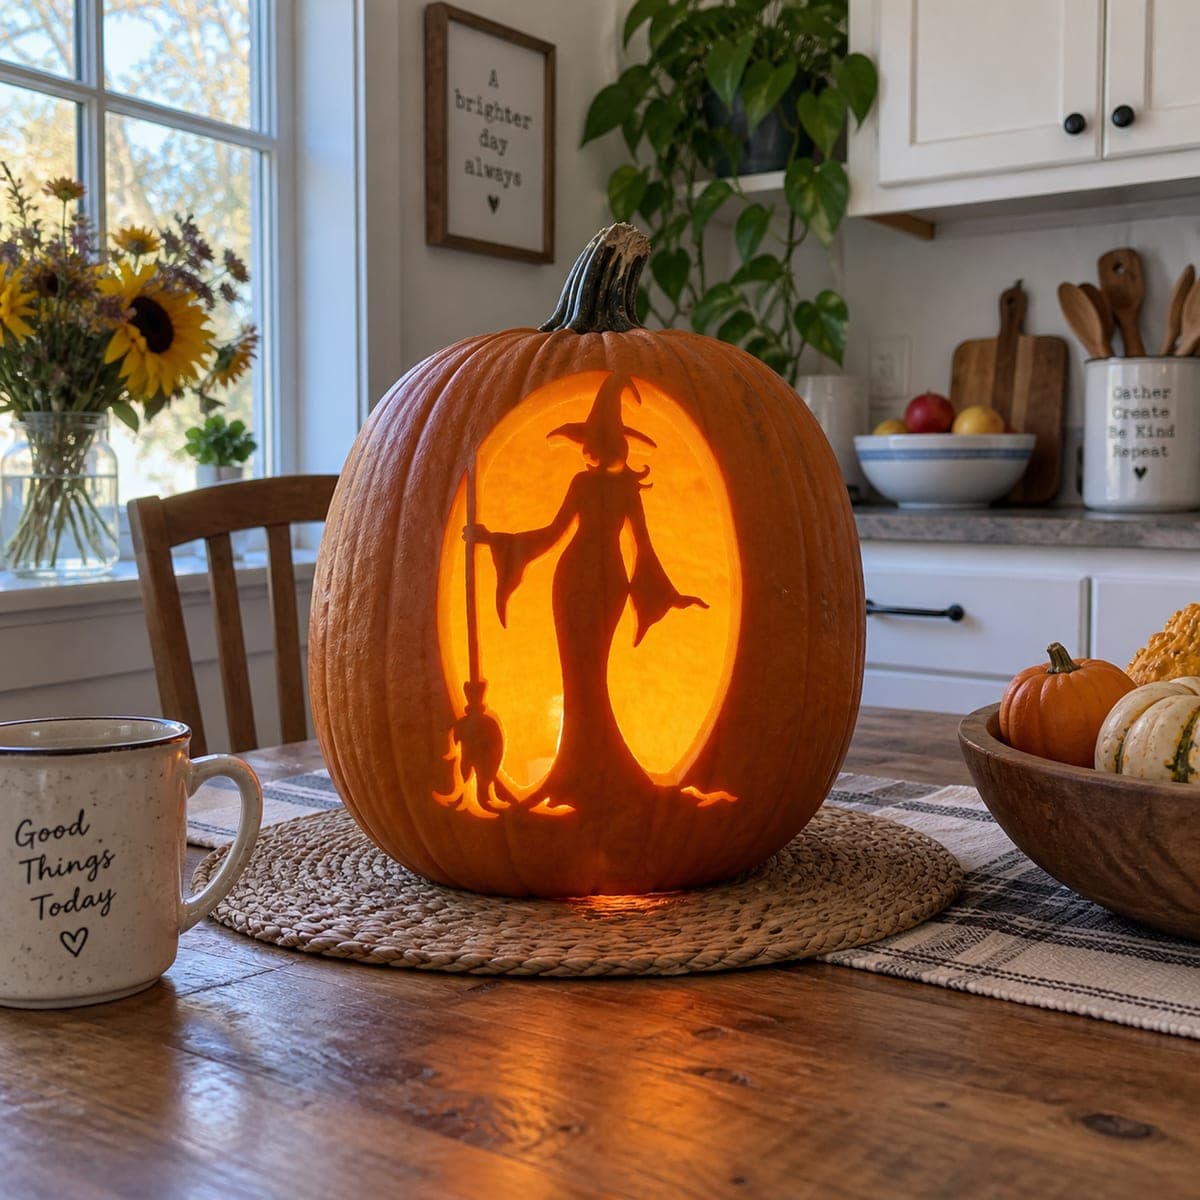
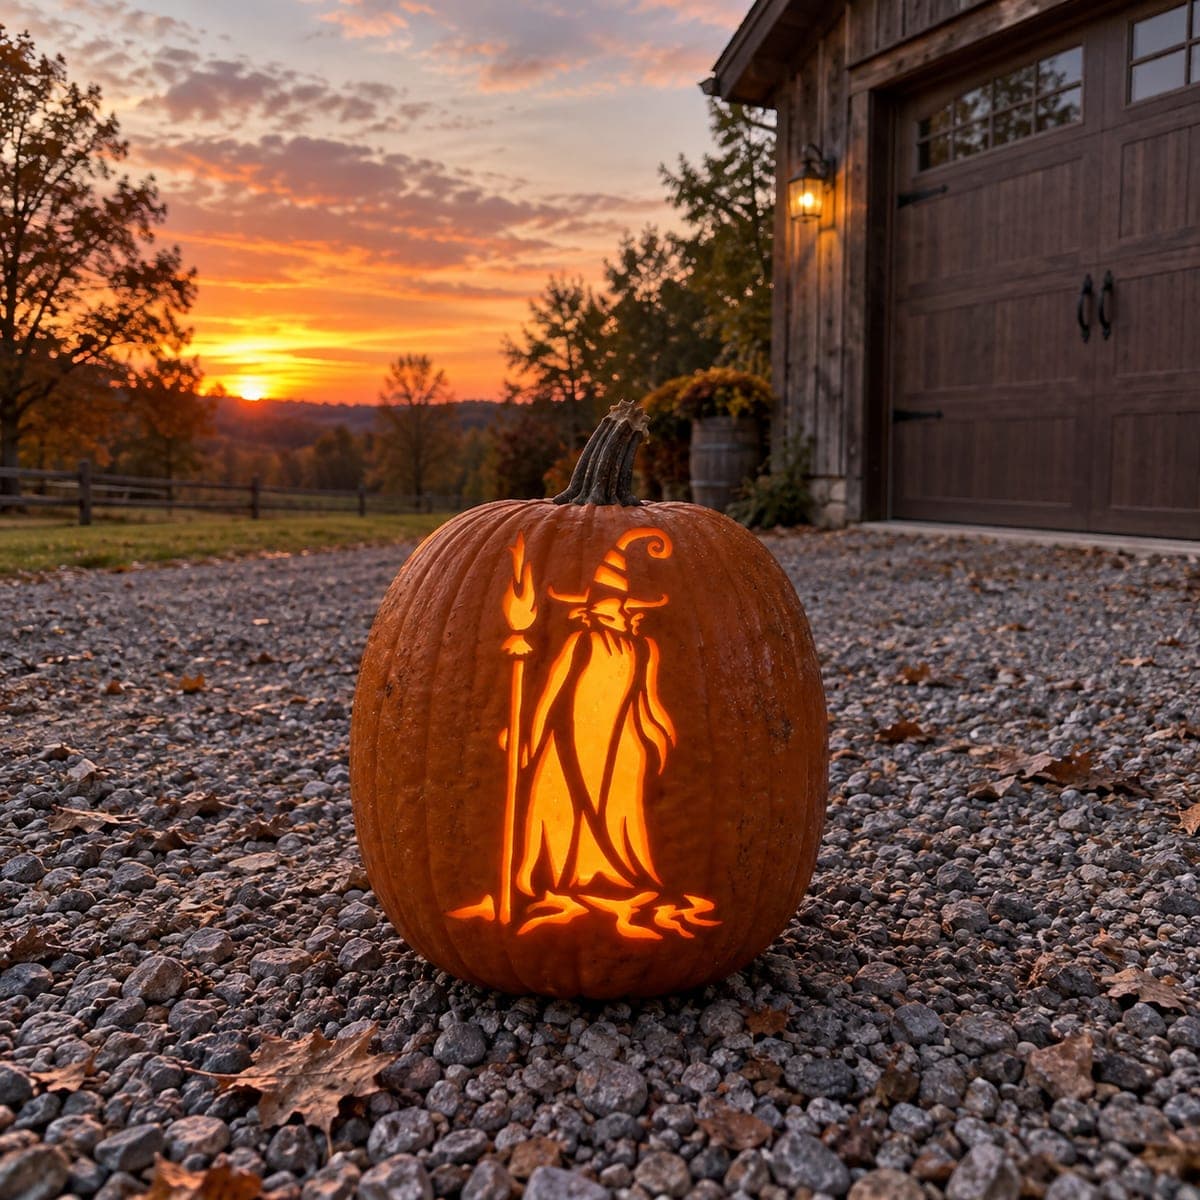
Broom-Holding Witch in Flowing Robes PumpkinAI
0

Broom-Holding Witch in Flowing Robes Pumpkin

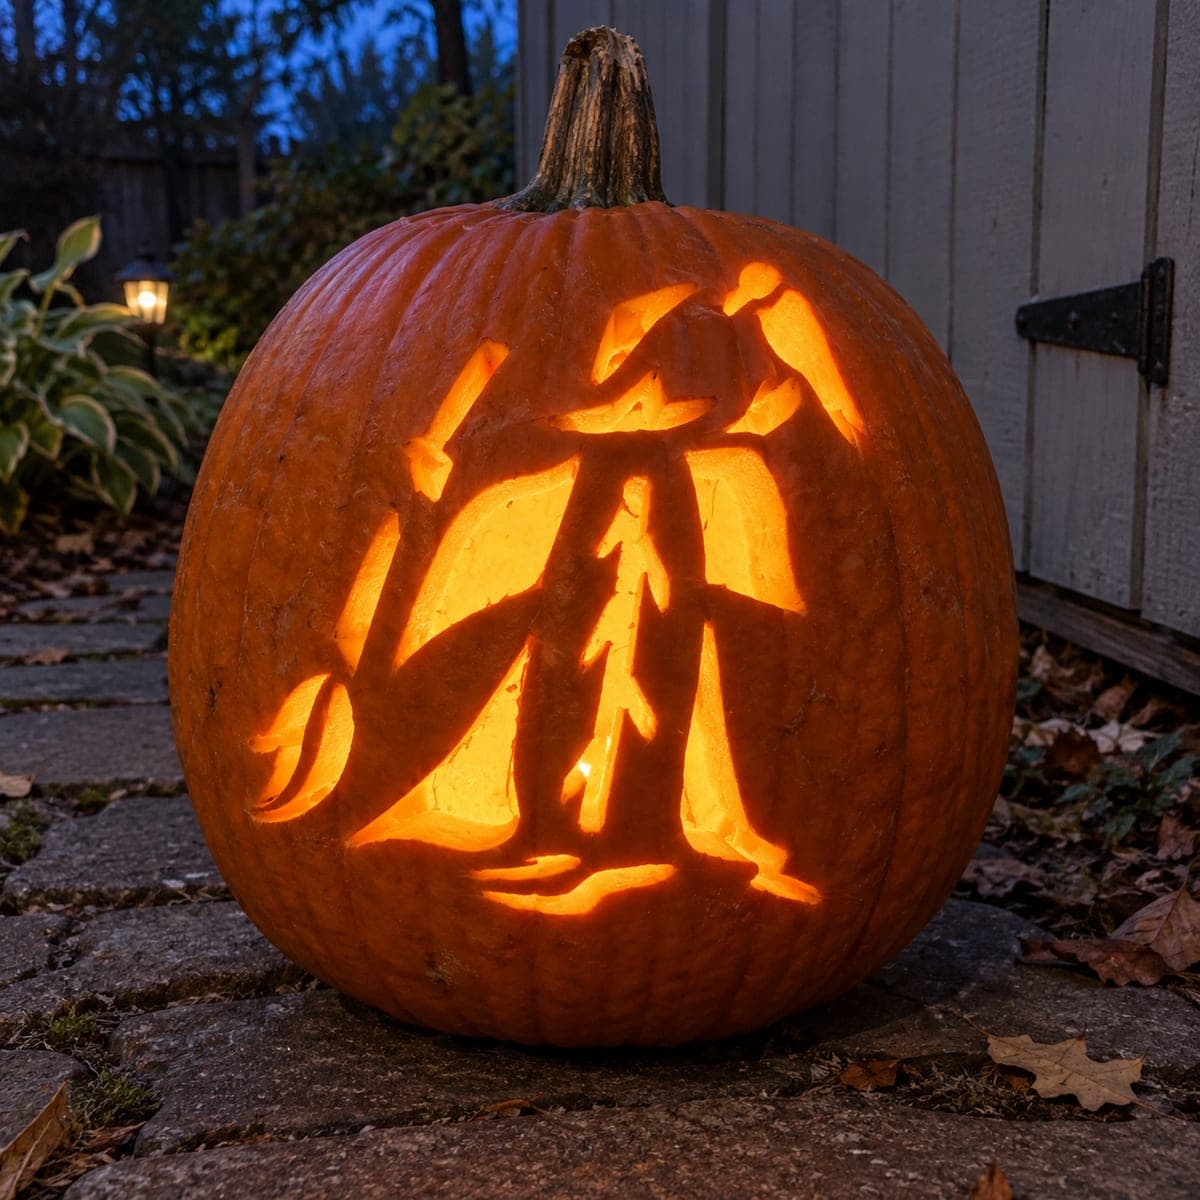
A full-figure witch in a wide brimmed hat grips a broom with one hand while her flowing cape and robes form large glowing panels that dominate the pumpkin face, photographed on a stone path at dusk. The open areas within and around the robe panels are cut through in this cutout carving, creating a strong contrast between the dark witch silhouette and the bright interior light. Position the design so the broom handle runs parallel to the nearest pumpkin rib, which gives the narrow shaft a natural ridge of extra rind thickness to lean against.

This is an AI-generated concept image: a realistic, carvable design idea rather than a photo of a finished carve. AI concepts are always labeled and sit out the leaderboard and the contest.

No ratings yet · Sign in to rate
Comments (0)

  • No comments yet — be the first.

Save without an account. Sign in to like or comment.

Our tips for carving a similar design

The core trick here is a negative-space silhouette: the witch, her hat, and her broom stay as dark uncut rind while the robe panels around and inside her are cut clean through to glow. Plan the layout so the broom handle runs parallel to a pumpkin rib, giving that thin shaft a thicker ridge of rind to sit on. Keep every narrow line, the broom handle, the bristles, and the robe edges connected to solid rind so nothing sags once the big openings are cut.

Written by PumpkinCarvingIdeas.com, inspired by the image above. These are our suggestions, not instructions from the uploader. This approach to the AI concept has not been tested on a real pumpkin.

From pumpkin to porch

  1. Pick the pumpkin and transfer the design

    Choose a large, evenly rounded pumpkin with a smooth front panel wide enough for the full standing figure. Tape your stencil on and line up the broom handle so it runs parallel to the nearest vertical rib. Poke through the outline with a pin or transfer tool, tracing both the witch silhouette and the open robe panels. Step back and check the figure reads clearly before you cut anything.

  2. Open the lid and hollow it out

    Cut a lid from the bottom or the back rather than the top so the stem stays intact for the photo. Scoop the inside wall behind the design down to about one inch thick using a sturdy scraper. A thinner wall lets light pass and makes the long robe cuts easier to control. Save some flesh scraps in case you want to shim a piece later.

  3. Score the silhouette and mark your bridges

    With the design mapped, decide what stays dark: the hat, the head and cape, the body, the broom handle, and the bristle cluster. Everything else in the robe panels gets cut away. Before cutting, pencil in small bridges where the broom handle meets the robe and where the hat brim meets the background so those slim parts stay anchored to solid rind. Bridges are tiny and easy to hide along an edge.

  4. Cut the fine details first

    Start with the smallest, most delicate lines: the broom bristles, the split tips, and the thin gaps that define the robe folds. Use a fine detail saw and take short, gentle strokes, letting the blade do the work. Cutting these while the surrounding rind is still solid keeps the pumpkin rigid and prevents cracking. Leave the broom handle attached to its rib ridge and its bridges as you work around it.

  5. Cut the large robe openings last

    Once the fine work is done, open the big glowing panels around and between the robes. Work from the center outward and support each large piece with your free hand as it releases so it does not tear a thin edge on the way out. Saving these wide cuts for last means the pumpkin holds its shape the whole time. Clean up any ragged inside edges with the tip of your saw.

  6. Light it and photograph at dusk

    Drop in one or two battery LED lights, never a candle, since the tall thin cutouts channel a lot of light and open flame is a fire risk. Aim the LEDs upward so the robe panels glow evenly and the dark witch reads as a crisp silhouette. Set the pumpkin on a stone path or step at dusk for that soft blue background. If a panel looks dim, add a second light or peel a little more flesh from behind it.

Gather your supplies

Check things off as you get ready.

Work on a stable surface, keep your free hand out of the cutting path, and have an adult handle sharp tools.

Three levels of light

  • Leave intact

    The witch herself stays untouched dark rind: her pointed hat, cape, body, the broom handle, and the bristle cluster.

  • Peel & shade

    Skin-peel any subtle robe folds or a faint ground line if you want a soft mid glow that hints at texture without a full opening.

  • Cut through

    Cut clean through the large panels of the flowing robes and the open background around the figure for the brightest light.

Learn the carving basics

Before you start cutting

How do I keep the thin broom handle from breaking?

Line the handle up parallel to a natural pumpkin rib so it sits on a ridge of extra rind thickness. Leave small bridges where it crosses into open robe panels, and cut those big openings last so the handle stays supported until the end. If it still feels fragile, widen the handle a hair on your stencil.

This is a concept image, so can a real pumpkin look like this?

Yes, with a few realistic adjustments. Keep the bristle tips and robe fold lines a touch wider than the artwork so they do not snap, and rely on bridges to hold the slim shapes. The big glowing panels are easy; it is the fine silhouette edges that need care.

Should I cut the lid from the top or the bottom?

Cut it from the bottom or the back so the natural stem stays in place for the dusk photo. A bottom opening also lets you set the pumpkin down over the LED lights instead of reaching inside. Just keep the wall behind the design thinned to about an inch so the panels glow.

Your take belongs here, too.

Changed a detail? Made it simpler? Share a photo of your version and tell the community what worked.

Share your pumpkin

More pumpkins like this

You've reached the end · 8 pumpkins
The Patch Report

Fresh pumpkins, in your inbox.

The best new carvings, ideas worth stealing, and how-tos for carving season. Short, seasonal, and gone by November.

A short email during carving season. Unsubscribe anytime. See our privacy policy.