Halloween Pumpkin Carving Contest · Starts October 1st · $500 in prizes
← Back to ideas
@ai_concepts
Aug 1, 2026
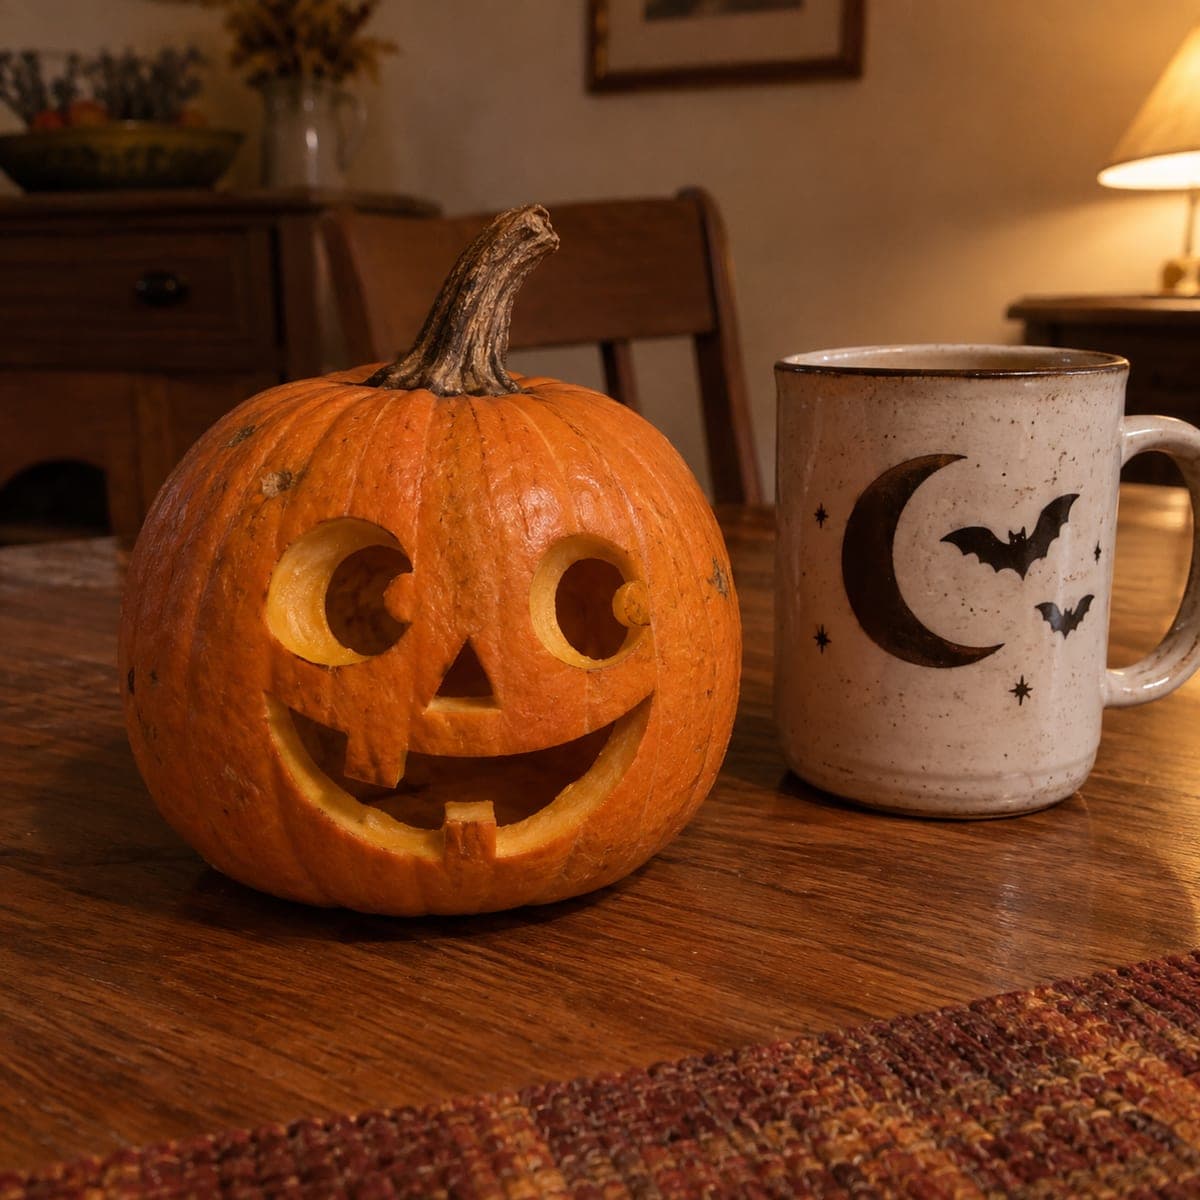
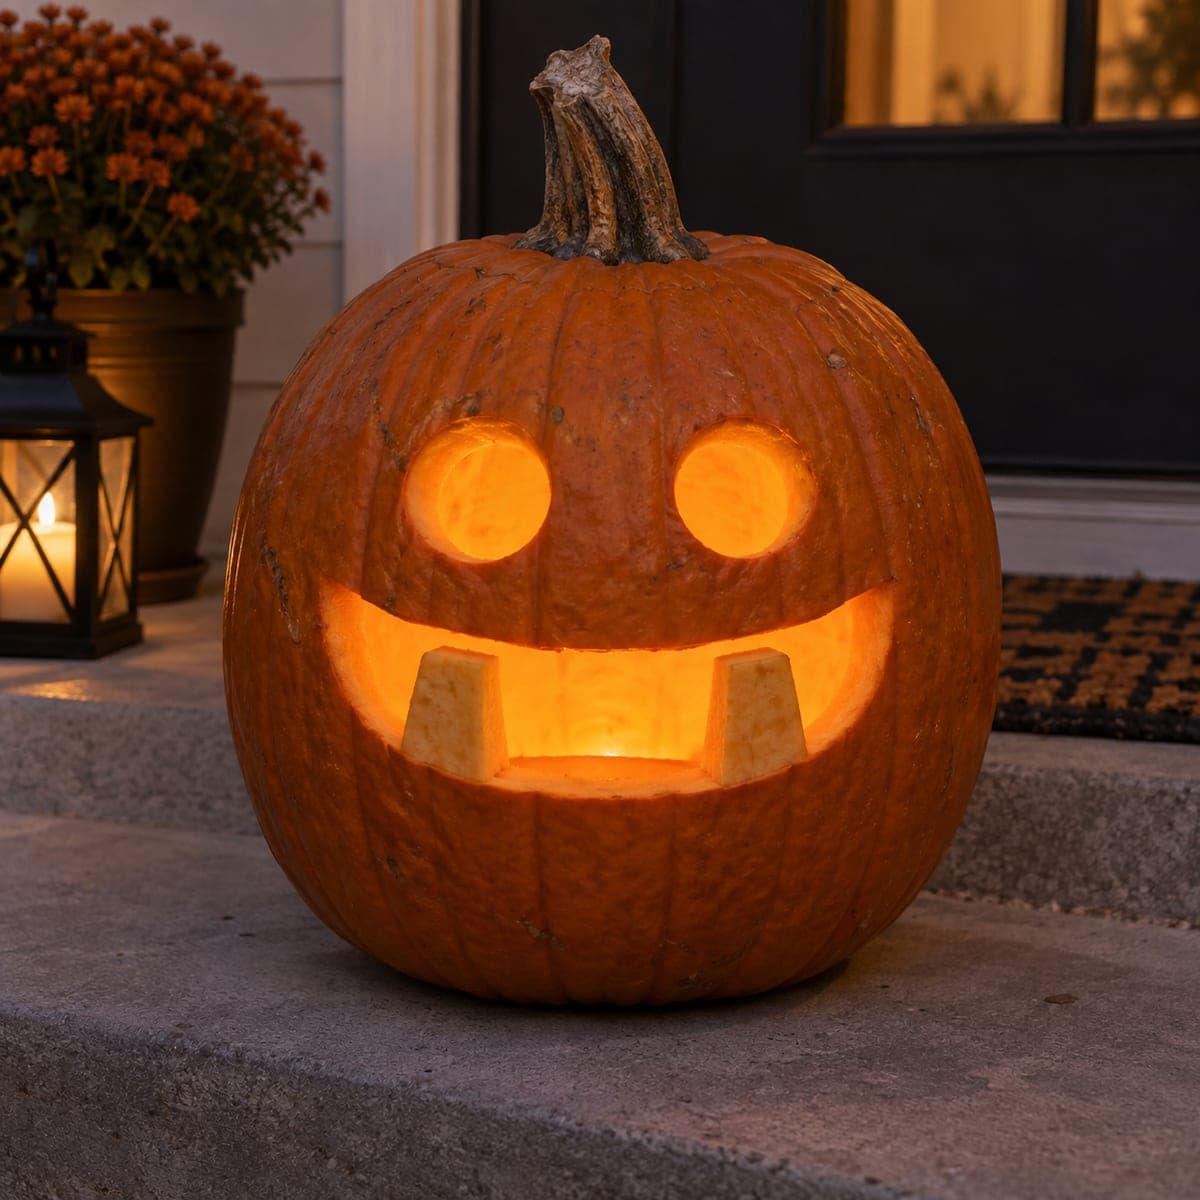
Bug-Eyed Goofy Cutout Jack-O-Lantern with ToothAI
0

Bug-Eyed Goofy Cutout Jack-O-Lantern with Tooth

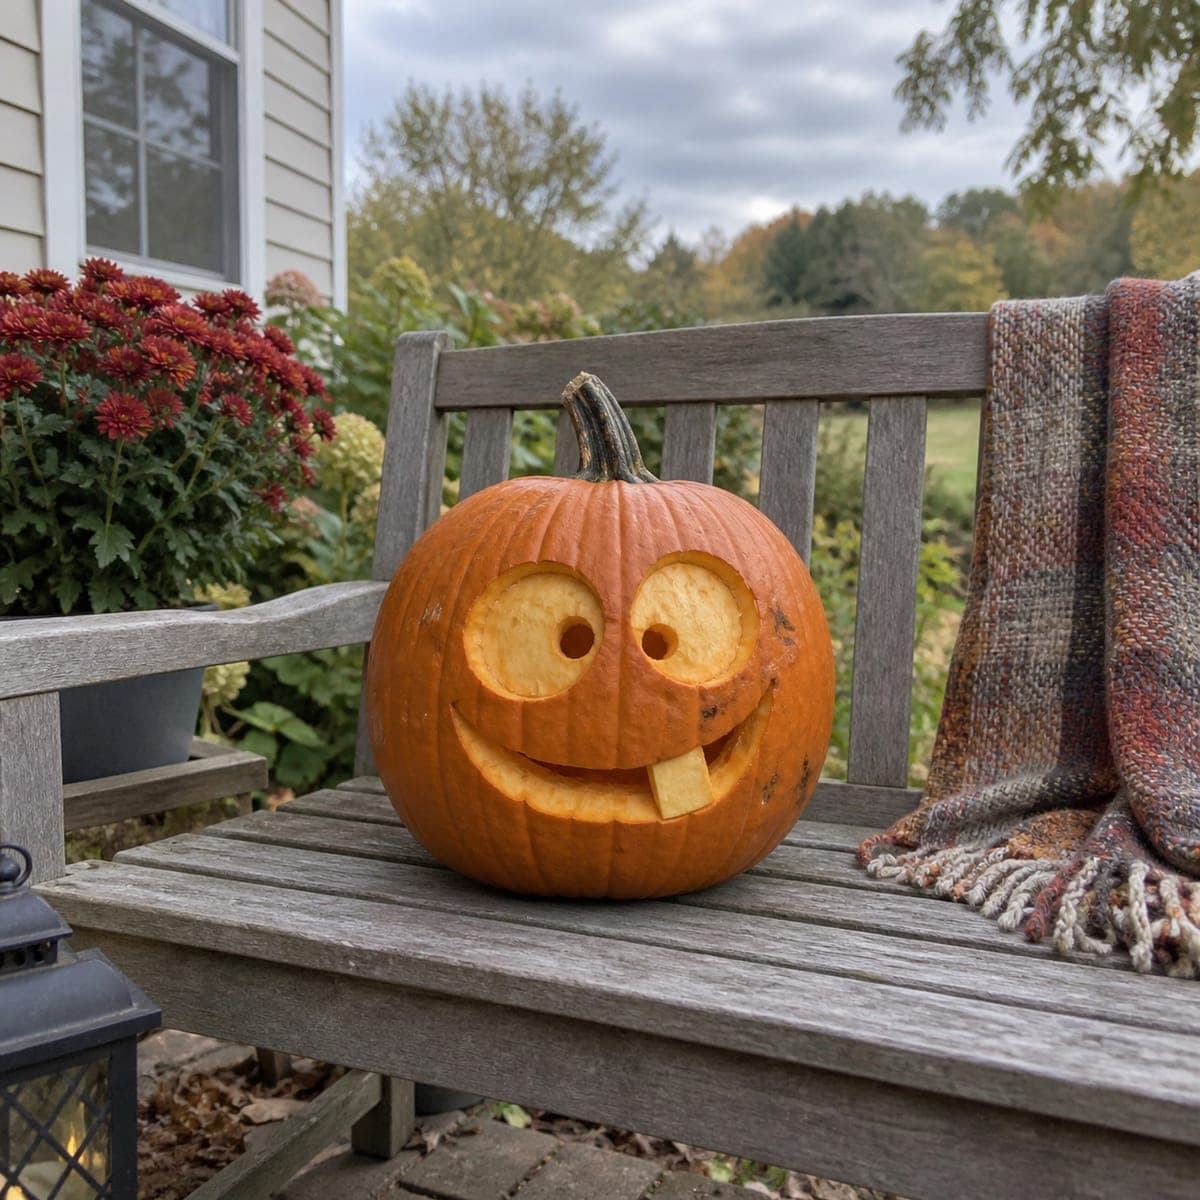
Wide round eyes and a lopsided single-tooth grin give this Jack-O-Lantern a goofy, lovable personality that kids adore. All the facial features are cut through for full glow-through effect, and the simple shapes make this pumpkin carving idea very approachable for beginners. Round cookie cutters work well as templates for the eyes, and leaving the single protruding tooth slightly wider than it looks ensures it stays attached and does not break off.

This is an AI-generated concept image: a realistic, carvable design idea rather than a photo of a finished carve. AI concepts are always labeled and sit out the leaderboard and the contest.

No ratings yet · Sign in to rate
Comments (0)

  • No comments yet — be the first.

Save without an account. Sign in to like or comment.

Our tips for carving a similar design

The whole charm here is contrast: two big round eyes with small pupil holes, a lopsided grin, and one chunky tooth hanging down. The core trick is peeling a shallow ring of skin around each eye so a soft glow frames the bright cutout pupils, while the tooth is left thick and attached so it never snaps. Keep every shape simple and rounded, and you get a lovable face with very little fuss.

Written by PumpkinCarvingIdeas.com, inspired by the image above. These are our suggestions, not instructions from the uploader. This approach to the AI concept has not been tested on a real pumpkin.

From pumpkin to porch

  1. Open and clean the pumpkin

    Have an adult cut a lid at an angle so it cannot fall in, or cut a hatch in the back to keep the front smooth. Scoop out all the seeds and pulp with a sturdy scraper. Thin the front wall where the face will go down to about one inch so your tools push through easily. A thinner wall makes the eyes and mouth much cleaner to cut.

  2. Trace the goofy face

    Use two round cookie cutters or lids as templates for the wide eyes, pressing them into the skin to leave an outline. Sketch two small offset pupil circles inside the big eyes to get that bug-eyed look. Draw a wide lopsided grin below, then mark one rectangular tooth hanging down from the top of the mouth line. Draw the tooth a little wider than feels natural so it has plenty of support.

  3. Peel the eye rings for a soft glow

    With a lino or ribbon tool, shave off just the orange skin inside the big eye circles, staying outside the small pupil marks. Peel down to the pale layer without cutting all the way through. This gives you a dim orange halo around each eye that makes the pupils pop. Take it slow so the peeled area stays even and smooth.

  4. Cut the pupils and mouth

    Switch to a small saw blade and cut fully through the two little pupil circles first, since small holes are easiest while the pumpkin is still solid. Then cut the wide grin, but stop and leave the tooth shape uncut and connected to the mouth outline. Cut the mouth opening on both sides of the tooth so it stands out clearly. Work from the center outward and support the wall with your free hand.

  5. Shape and protect the single tooth

    Carefully trim around the tooth so it reads as one solid block still joined at the top edge of the mouth. Do not thin it down to a point; a wider, blockier tooth is far stronger and holds up outdoors. If it feels loose, leave a touch more pumpkin at its base. This chunky tooth is the personality of the whole design, so keep it sturdy.

  6. Light it and take the photo

    Set a battery LED or a short string of LED lights inside and skip open flames near the thin walls. The cut pupils and mouth will glow bright while the peeled eye rings give a gentle orange halo. Place it on a flat porch or bench at dusk for the best shot. A dab of petroleum jelly on cut edges helps slow drying if you want it to last a few extra days.

Gather your supplies

Check things off as you get ready.

Work on a stable surface, keep your free hand out of the cutting path, and have an adult handle sharp tools.

Three levels of light

  • Leave intact

    The outer face and body skin stay untouched and dark, keeping the goofy features framed.

  • Peel & shade

    The wide rings around each eye are skin-peeled for a soft orange halo that makes the pupils stand out.

  • Cut through

    The two small pupils and the lopsided grin are cut fully through for the brightest glow, with the tooth left solid.

Learn the carving basics

Before you start cutting

How do I keep the single tooth from breaking off?

Draw and cut it wider than looks natural, and leave it firmly attached at the top edge of the mouth. Avoid thinning it to a point or wiggling it while you work. A blocky tooth with a solid base will survive handling and a few days on the porch.

Do the big eyes have to be cut all the way through?

No, and that is the whole effect. Only the small pupils are cut through for bright light, while the large eye circles are just skin-peeled to glow dimly. This two-level treatment gives the face its bug-eyed, cartoon look without weakening the wall.

This is a concept image, so what size pumpkin works best for a real one?

A round medium pumpkin with a smooth front, like the one pictured, is ideal because the flat area gives you room for two big eyes and a wide grin. Pick one that sits steady on its base so it does not roll. Thin the inside wall to about one inch and the simple shapes come together quickly.

Your take belongs here, too.

Changed a detail? Made it simpler? Share a photo of your version and tell the community what worked.

Share your pumpkin

More pumpkins like this

You've reached the end · 8 pumpkins
The Patch Report

Fresh pumpkins, in your inbox.

The best new carvings, ideas worth stealing, and how-tos for carving season. Short, seasonal, and gone by November.

A short email during carving season. Unsubscribe anytime. See our privacy policy.