Halloween Pumpkin Carving Contest · Starts October 1st · $500 in prizes
← Back to ideas
@ai_concepts
Jul 30, 2026
Cheetah Face Painted No-Carve PumpkinAI
0

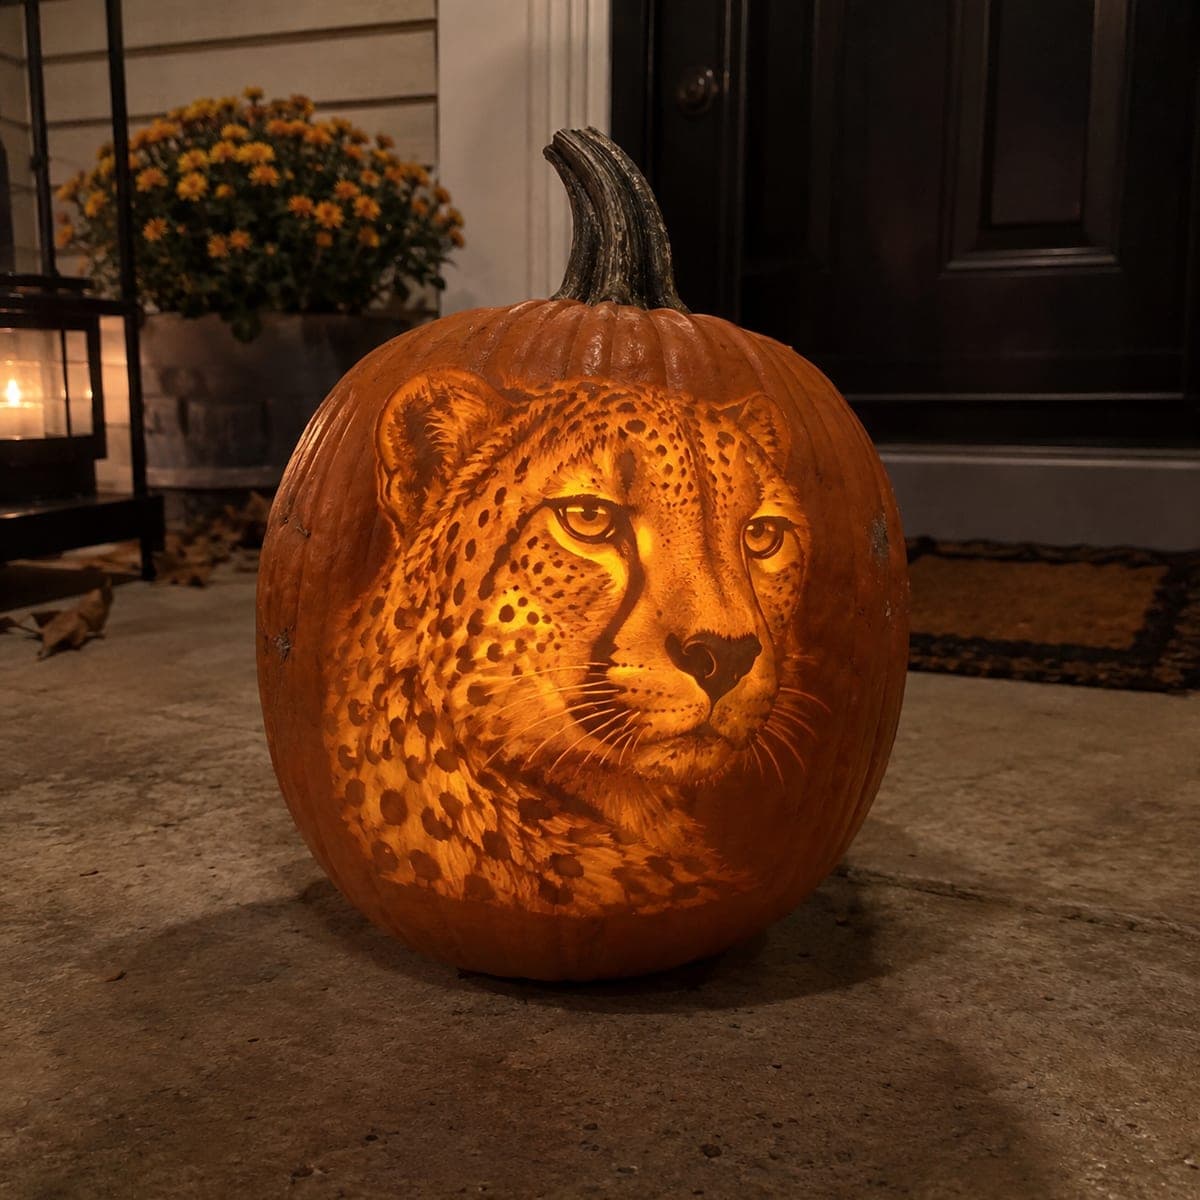
Cheetah Face Painted No-Carve Pumpkin

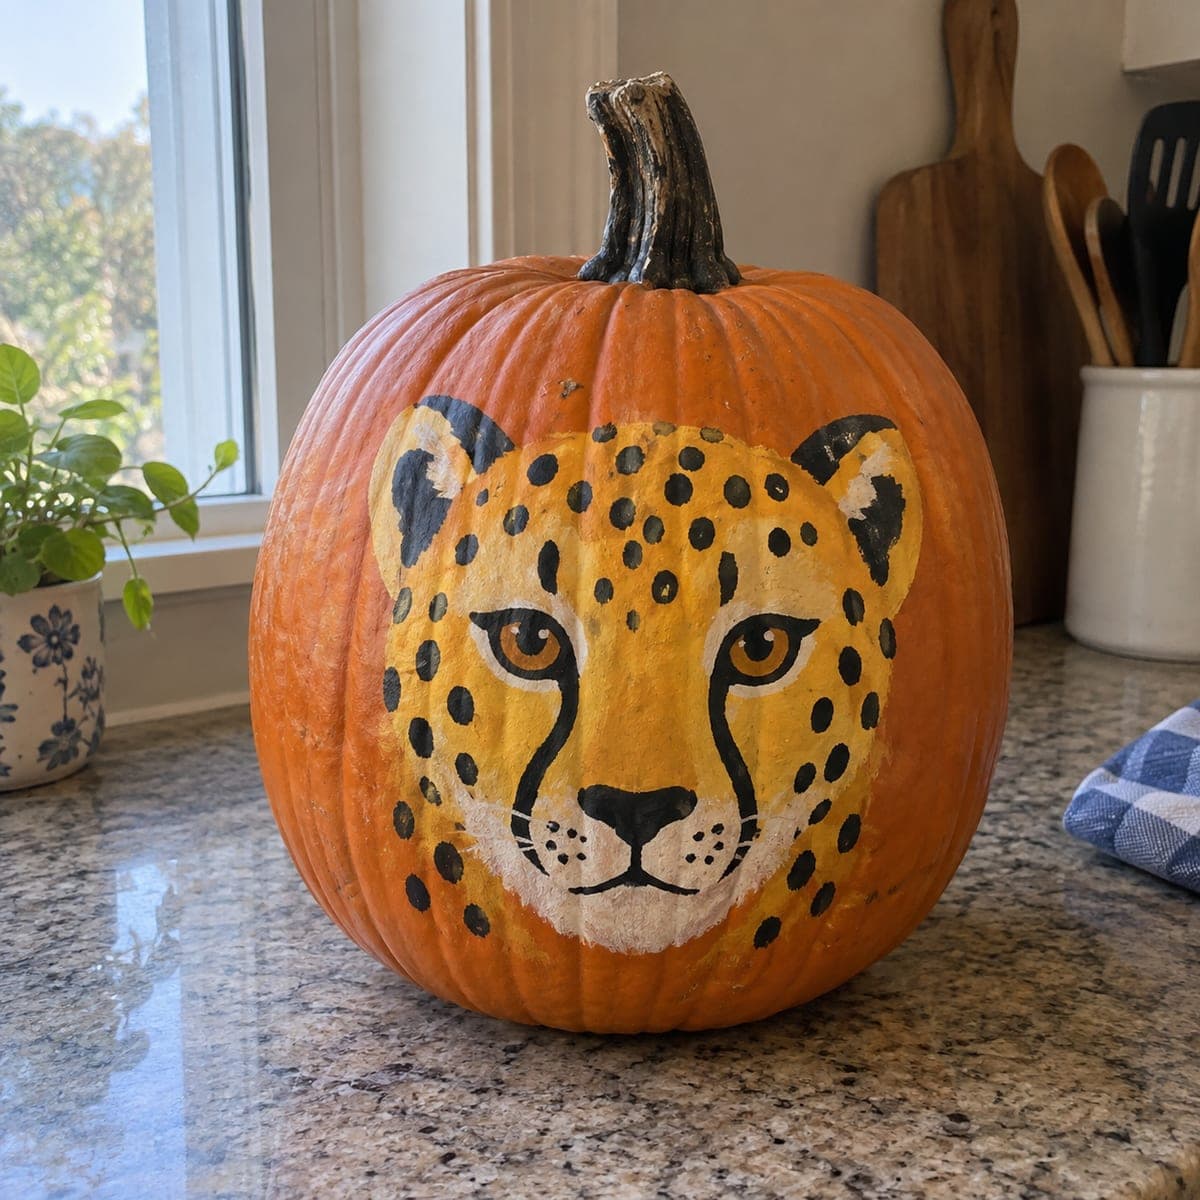
A bold cheetah face stares forward from a pumpkin, painted with golden-yellow tones, black spots, and the iconic tear-stripe markings running from eye to jaw. The simplified graphic style is striking and achievable without professional painting skills, making this no-carve pumpkin idea a weekend project for intermediate crafters. Acrylic paints in yellow ochre, black, and white create the core palette; a fine liner brush handles the spot outlines. Set it on a kitchen counter or windowsill for a pop of wild-animal energy in your fall decor.

This is an AI-generated concept image: a realistic, carvable design idea rather than a photo of a finished carve. AI concepts are always labeled and sit out the leaderboard and the contest.

No ratings yet · Sign in to rate
Comments (0)

  • No comments yet — be the first.

Save without an account. Sign in to like or comment.

Our tips for carving a similar design

The core trick here is treating the pumpkin like a canvas and letting a simplified graphic face do the work, so you never touch a carving tool. Block in the golden face and white muzzle first, then layer the black tear-stripes, nose, and spots on top once the base is dry. Because this is a no-carve paint concept, everything is about clean shapes and confident lines rather than cutting.

Written by PumpkinCarvingIdeas.com, inspired by the image above. These are our suggestions, not instructions from the uploader. This approach to the AI concept has not been tested on a real pumpkin.

From pumpkin to porch

  1. Clean and dry the pumpkin

    Wipe the whole pumpkin with a damp cloth and let it dry fully so paint grips the skin. Pick a smooth, flat-facing panel for the cheetah's face, ideally where the ribs are shallow. A dry surface keeps acrylic from beading or peeling later. Set the pumpkin on a towel so it does not roll while you work.

  2. Sketch the face lightly

    Use a pencil or washable marker to rough in the eyes, muzzle, ears, and the outline of the golden face mask. Keep the cheetah symmetrical by marking a faint centerline down the nose first. Step back and check the proportions before you commit to paint. Light guide lines will disappear under the acrylic later.

  3. Block in the base colors

    Paint the large golden-yellow face area with yellow ochre and let it dry. Add the white muzzle, chin, and the pale patches above the eyes as a second layer. Work light colors before dark so any overlap is easy to cover. Give each coat time to dry so colors stay crisp instead of muddying together.

  4. Add the dark features

    With black acrylic, paint the nose, the outlines around the eyes, and the two bold tear-stripes running from each eye down to the jaw. These dark markings define the whole cheetah, so keep the stripes even on both sides. Fill the amber irises with a golden-orange tone and leave a tiny white dot for a catchlight. Let everything dry before the final detail pass.

  5. Dot the spots and whiskers

    Load a fine liner brush with black and dab small, slightly irregular spots across the forehead, cheeks, and edges of the face. Vary the size a little so it reads natural rather than stamped. Add thin whisker lines and small muzzle dots last. A steady hand and a nearly dry brush give you clean spots without drips.

  6. Seal and stage

    Once fully dry, brush on a matte clear acrylic sealer to protect the paint from moisture. Set the finished pumpkin on a windowsill or counter where the face catches daylight. For evening, place a battery LED puck nearby rather than inside, since this pumpkin is not cut open. Snap your photo in soft, even light to show off the spots.

Gather your supplies

Check things off as you get ready.

Work on a stable surface, keep your free hand out of the cutting path, and have an adult handle sharp tools.

Three levels of light

  • Leave intact

    On this painted design the darkest values are the black nose, eye outlines, tear-stripes, and spots, which read as the deep markings.

  • Peel & shade

    The golden ochre face mask carries the mid-tone, filling most of the surface with warm color.

  • Cut through

    The white muzzle, chin, and pale eye patches act as the brightest highlights that pop the face forward.

Learn the carving basics

Before you start cutting

Do I need to carve anything for this cheetah?

No, this is a fully painted, no-carve design, so the pumpkin stays whole and lasts longer than a cut one. That also makes it a good pick if you want to skip sharp tools. If you would rather see it glow, set an LED light beside it instead of inside.

What if my two tear-stripes come out uneven?

Sketch a faint centerline down the nose first and measure each stripe from that line so both sides match. Paint one stripe, then mirror it on the other side while the first is still fresh in your eye. If a line wobbles, let it dry and touch it up with a thin coat of the golden base color, then repaint.

How do I keep the spots looking natural?

Use a fine liner brush and vary the spot sizes slightly instead of making them all identical. Cluster them a little tighter around the forehead and looser toward the cheeks, the way real cheetah markings thin out. A nearly dry brush prevents drips and gives you crisp edges.

Your take belongs here, too.

Changed a detail? Made it simpler? Share a photo of your version and tell the community what worked.

Share your pumpkin

More pumpkins like this

You've reached the end · 8 pumpkins
The Patch Report

Fresh pumpkins, in your inbox.

The best new carvings, ideas worth stealing, and how-tos for carving season. Short, seasonal, and gone by November.

A short email during carving season. Unsubscribe anytime. See our privacy policy.