Halloween Pumpkin Carving Contest · Starts October 1st · $500 in prizes
← Back to ideas
@ai_concepts
Sep 2, 2026
Classic Painted Jack-O-Lantern Face No-Carve PumpkinAI
0

Classic Painted Jack-O-Lantern Face No-Carve Pumpkin

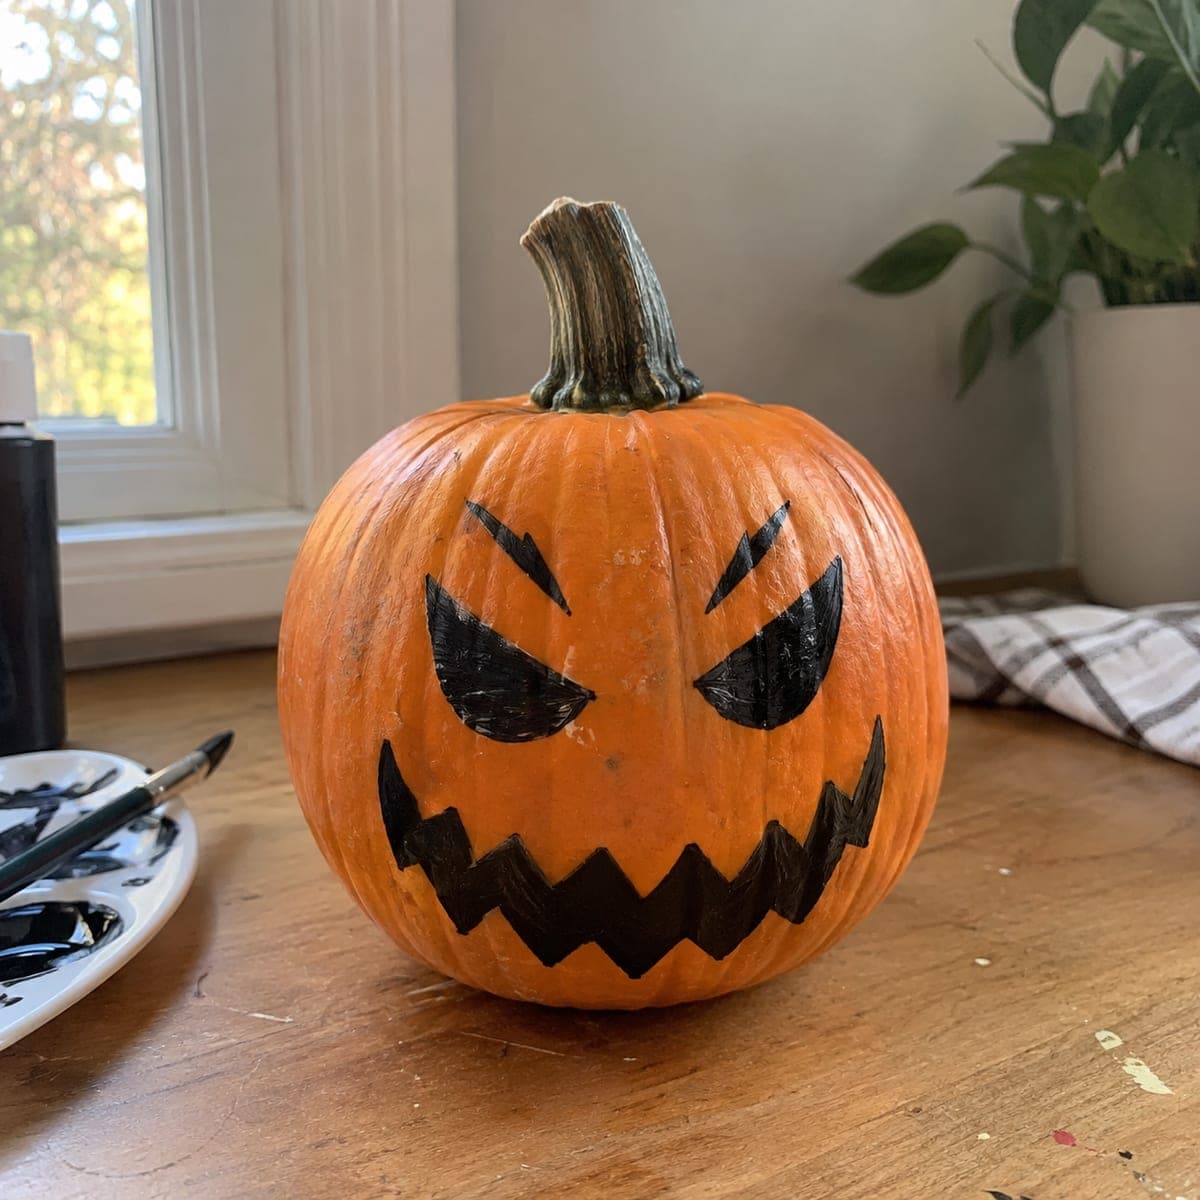
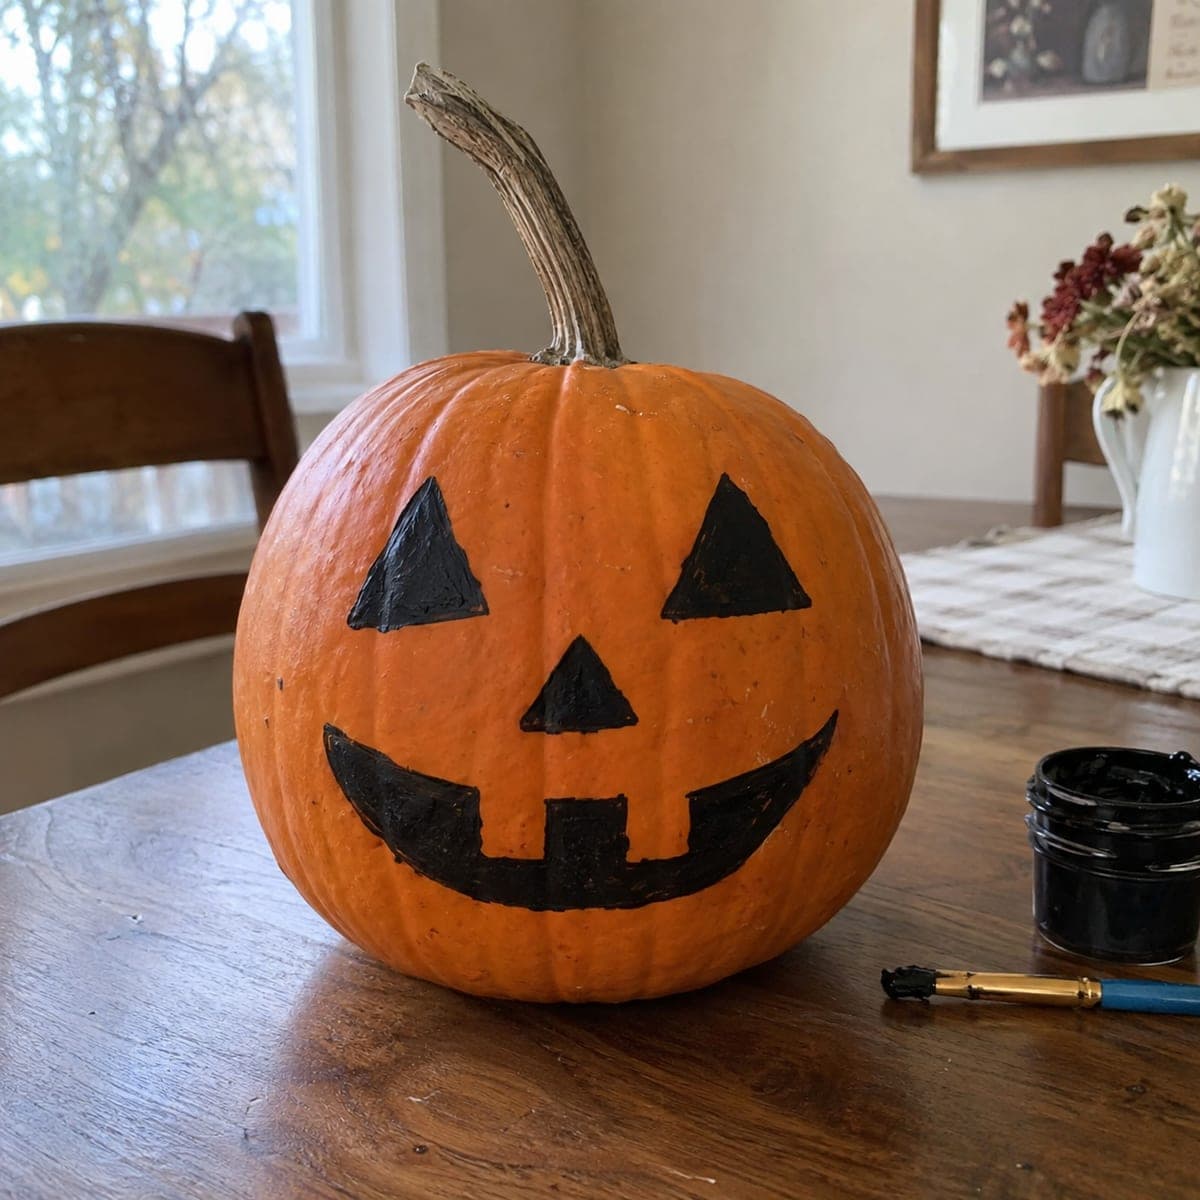
Triangle eyes, a small triangular nose, and a grinning mouth with a single square tooth are painted on in glossy black paint, capturing the timeless Jack-O-Lantern look without any cutting. The jar of black paint and brush visible beside the pumpkin underscore how quick and straightforward this no-carve pumpkin idea really is. Use craft acrylic or outdoor paint for better adhesion, and apply two thin coats rather than one thick coat to prevent drips. This design is especially popular for households with toddlers who want to decorate but cannot safely use carving tools.

This is an AI-generated concept image: a realistic, carvable design idea rather than a photo of a finished carve. AI concepts are always labeled and sit out the leaderboard and the contest.
No ratings yet · Sign in to rate

Comments (0)

  • No comments yet — be the first.

Save without an account. Sign in to like or comment.

Our tips for carving a similar design

The whole trick here is skipping the knife and painting a classic jack-o-lantern face straight onto the skin with glossy black paint. Triangle eyes, a small triangle nose, and a wide grin with one square tooth read as the timeless look while staying completely safe. Because nothing is cut, the plan is all about clean shapes and thin, even coats.

Written by PumpkinCarvingIdeas.com, inspired by the image above. These are our suggestions, not instructions from the uploader. This approach to the AI concept has not been tested on a real pumpkin.

From pumpkin to porch

  1. Pick and wipe down the pumpkin

    Choose a pumpkin with a smooth, fairly flat front panel so your paint sits evenly. Wipe the surface with a damp cloth and let it dry fully, since paint grips clean, dry skin far better than dusty or waxy skin. A rounder, medium pumpkin gives the face plenty of room. Set it on a couple of paper towels to catch stray drips.

  2. Sketch the face lightly

    Use a washable marker or a pencil to rough in two triangle eyes, a smaller triangle nose below and between them, and a curved grin. Keep the eyes tilted slightly inward and leave a gap in the mouth for the single square tooth. Step back and check the spacing before you commit. If a line looks off, wipe washable marker away with a damp cloth and try again.

  3. Outline each shape first

    Load a thin brush with craft acrylic or outdoor paint and carefully trace the edges of every shape. Clean outlines are what make the face look crisp, so go slow around the triangle points and the corners of the grin. Keep a paper towel handy to catch beads of paint before they run. Let this outline set for a few minutes so it does not smear when you fill.

  4. Fill with thin coats

    Switch to a slightly wider brush and fill each shape, working from the outline inward. Use two thin coats rather than one heavy one, which prevents drips and gives a solid, even black. Let the first coat dry to the touch before adding the second. The square tooth stays orange, so paint carefully around it to keep that little block clean.

  5. Touch up and seal

    Once dry, check for thin spots or ragged edges and dab in tiny fixes with the fine brush. If the pumpkin will sit outside, a light coat of clear acrylic sealer helps the paint shed dew and last longer. Wash your brushes right away so the acrylic does not harden in the bristles.

  6. Style and photograph

    Set the finished pumpkin on a porch step, mantel, or table where the glossy black really pops against the orange. Because there is no flame or cutout, you can safely tuck a battery LED string or a small lantern nearby for evening ambiance. Snap your photo in soft daylight or warm lamp light to catch the shine. Share it with the community when you are done.

Gather your supplies

Check things off as you get ready.

Work on a stable surface, keep your free hand out of the cutting path, and have an adult handle sharp tools.

Three levels of light

  • Leave intact

    The whole orange body plus the little square tooth stay untouched skin for contrast.

  • Peel & shade

    This design skips peeling; if you want a faint glow, you could lightly scrape a thin halo of skin around the painted face.

  • Cut through

    Nothing is cut on this no-carve pumpkin, so set an LED nearby instead of lighting from inside.

Learn the carving basics

Before you start cutting

What kind of paint works best and how many coats?

Craft acrylic or exterior craft paint grips pumpkin skin much better than tempera and resists smearing. Apply two thin coats rather than one thick one so the paint does not run or pool at the shape edges. Let each coat dry to the touch first for a solid, even black.

Can I fix a wobbly triangle or crooked grin?

Yes, and that is the beauty of starting with washable marker or pencil. Sketch the whole face first and wipe away any line you do not like with a damp cloth before you paint. Once you are happy, outline in paint slowly, then fill.

Will a painted pumpkin last outside?

A painted pumpkin holds up well since the skin is never opened, so it will not rot as fast as a carved one. A light coat of clear acrylic sealer helps the paint shrug off dew and rain. Bring it indoors on frosty nights to stretch its life even further.

Your take belongs here, too.

Changed a detail? Made it simpler? Share a photo of your version and tell the community what worked.

Share your pumpkin

More pumpkins like this

You've reached the end · 8 pumpkins
The Patch Report

Fresh pumpkins, in your inbox.

The best new carvings, ideas worth stealing, and how-tos for carving season. Short, seasonal, and gone by November.

A short email during carving season. Unsubscribe anytime. See our privacy policy.