Halloween Pumpkin Carving Contest · Starts October 1st · $500 in prizes
← Back to ideas
@ai_concepts
Jul 12, 2026
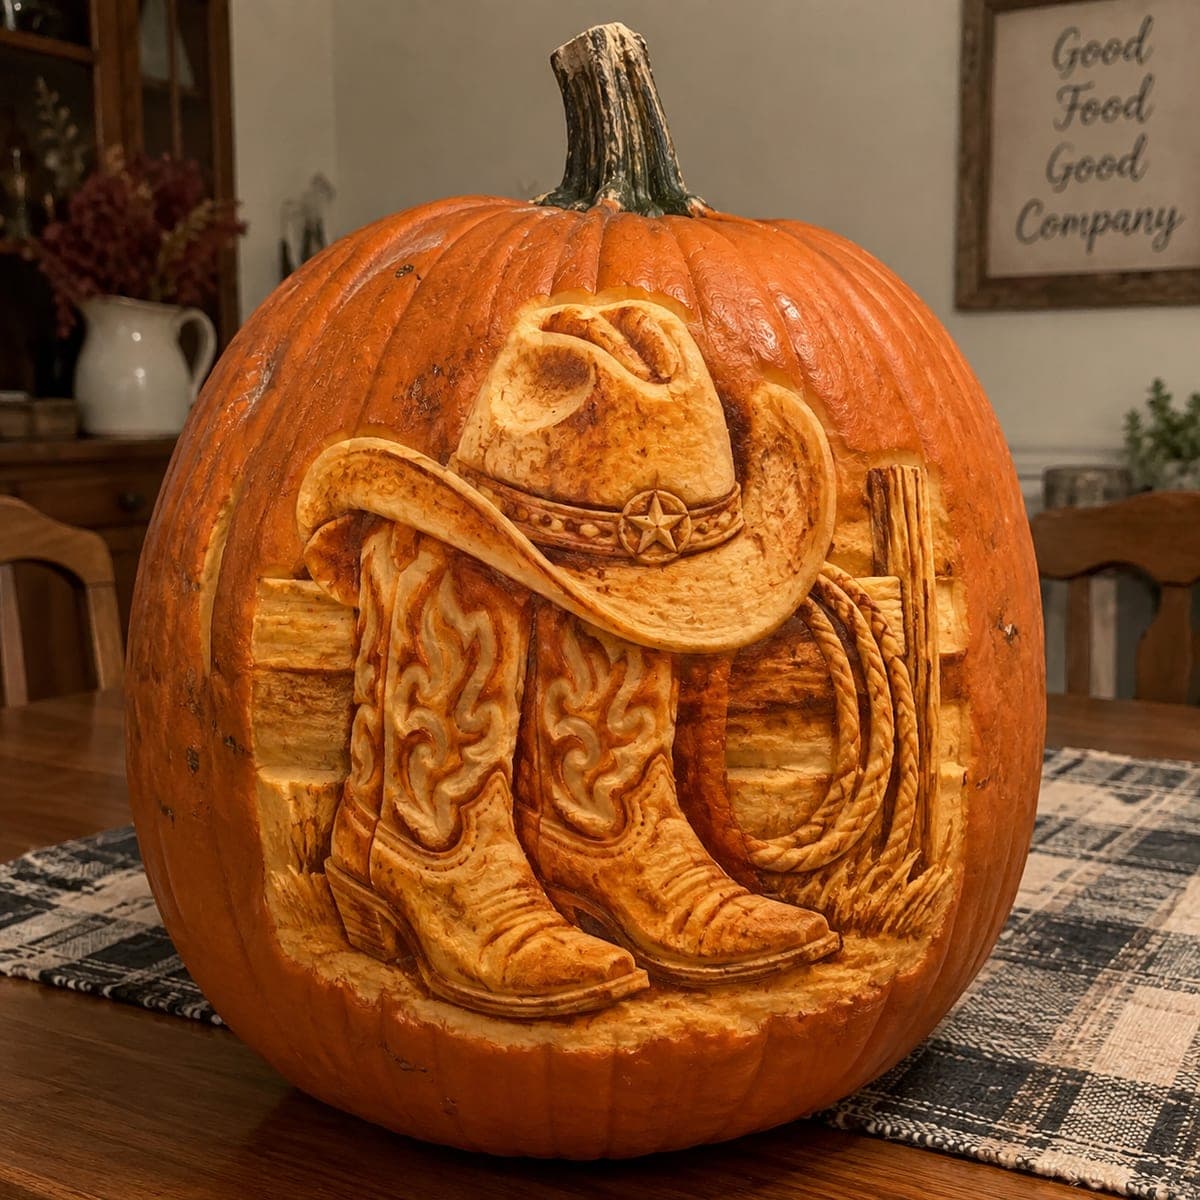
Cowboy Hat and Boots Etched Pumpkin CarvingAI
0

Cowboy Hat and Boots Etched Pumpkin Carving

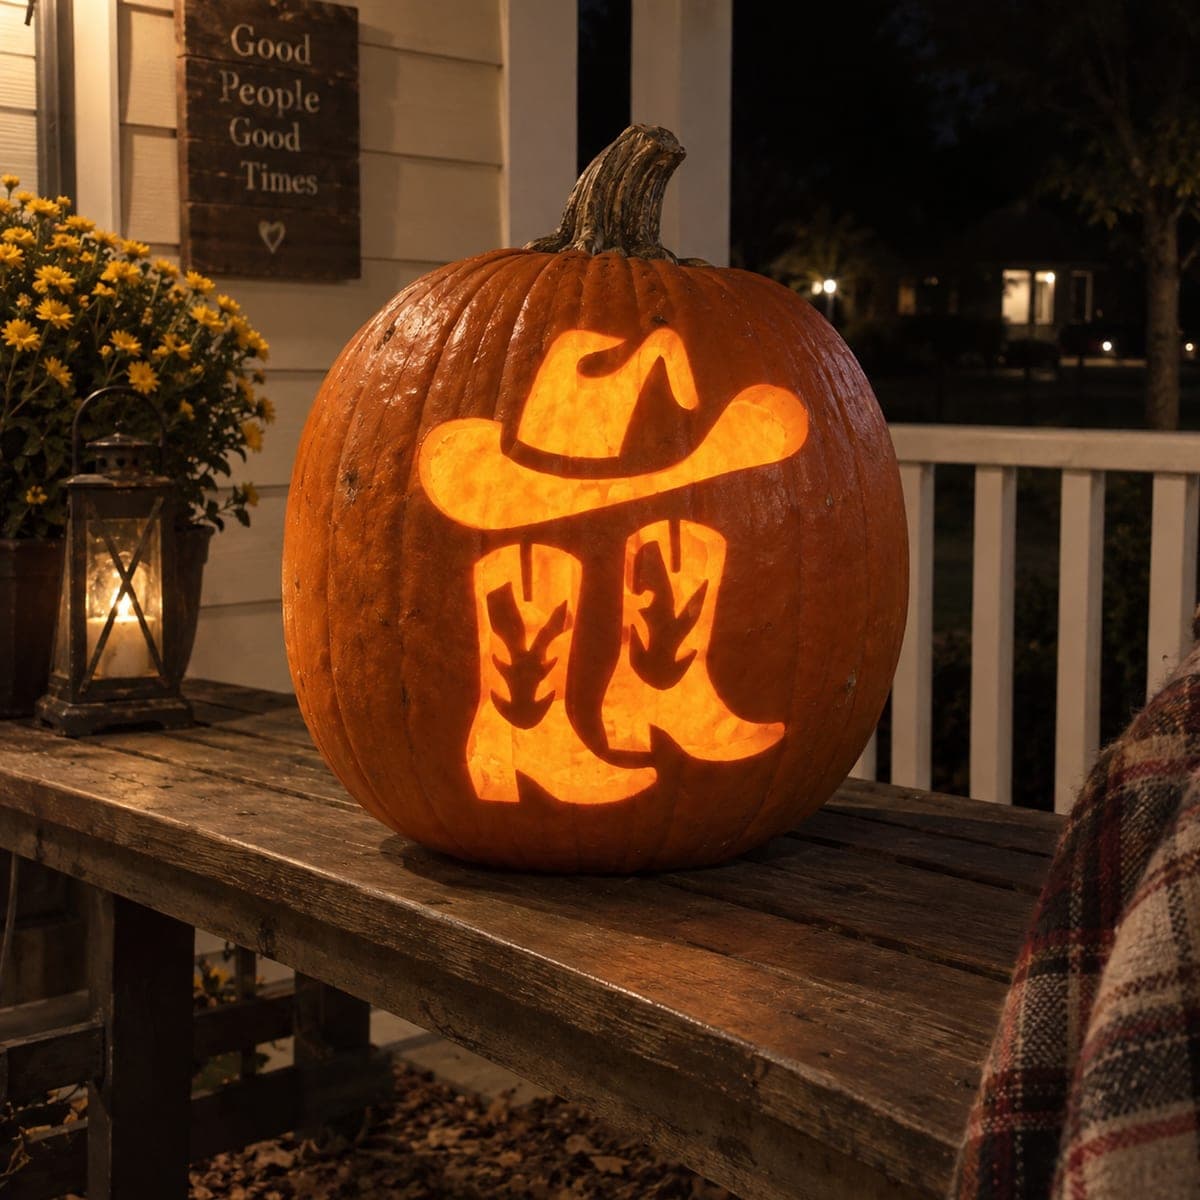
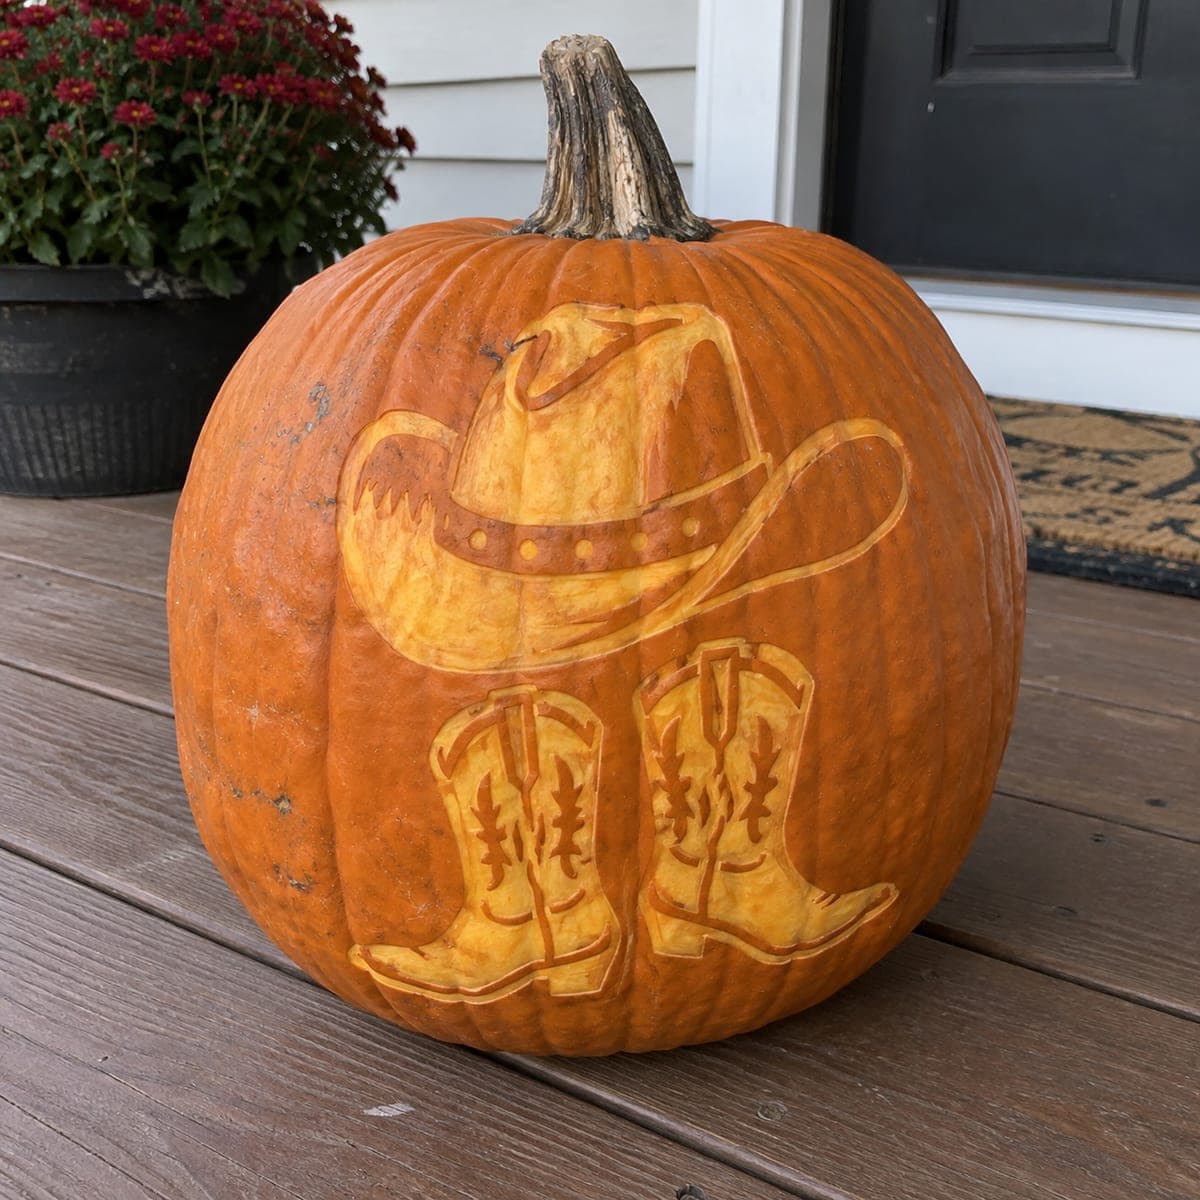
A wide-brimmed cowboy hat centered above a pair of decorative cowboy boots are etched into the pumpkin surface in a clean graphic arrangement, dots and stitching details visible in the leather. The design sits well within the pumpkin's natural color palette without needing paint, relying on depth contrast alone to read clearly. Etch the studded hat band dots with a drill bit and carve the boot pull straps with a narrow V-tool for the most legible result. This Western-themed pumpkin carving idea adds a fun country twist to fall porch decor.

This is an AI-generated concept image: a realistic, carvable design idea rather than a photo of a finished carve. AI concepts are always labeled and sit out the leaderboard and the contest.

No ratings yet · Sign in to rate
Comments (0)

  • No comments yet — be the first.

Save without an account. Sign in to like or comment.

Our tips for carving a similar design

The whole design reads through depth contrast rather than open holes, so the skin is peeled to different thicknesses to create the glow. A wide cowboy hat sits above a pair of boots, with tiny studded band dots and stitching lines giving the leather texture. Plan to keep every element as a surface etch and save the finest details, like the stitching and dots, for last.

Written by PumpkinCarvingIdeas.com, inspired by the image above. These are our suggestions, not instructions from the uploader. This approach to the AI concept has not been tested on a real pumpkin.

From pumpkin to porch

  1. Prep the pumpkin and transfer the design

    Pick a tall, smooth pumpkin with a broad flat front so the hat and boots have room to breathe. Cut a lid or a back access hole and scrape the inside wall behind the design down to about one inch thick so light passes evenly. Tape your stencil flat and poke the outlines with a pin or transfer tool. Step back to check the hat is centered above the boots before you start cutting.

  2. Outline every shape with a shallow score

    Using a small detail knife or a fine loop tool, trace the outer edges of the hat, brim, and both boots just deep enough to break the skin. Keep these cuts shallow and controlled since nothing here gets cut all the way through. Adults should handle the blades, and always draw the tool away from your holding hand. These score lines become the crisp borders that separate light from dark.

  3. Skin-peel the hat and boots for the main glow

    Peel away only the orange skin inside the hat crown, brim, and boot bodies, leaving the pale flesh exposed. Aim for a consistent shallow depth so the whole shape lights up the same soft orange. Take it slow near the edges to keep those borders sharp. This is the shading layer that makes the design read from the sidewalk.

  4. Carve the stitching and pull straps deeper

    Switch to a narrow V-tool and carve the decorative stitching lines and the boot pull straps a little deeper than the peeled areas. Going deeper here lets more light through, so these accents pop brighter than the surrounding leather. Work in smooth, steady passes rather than forcing the tool. Keep the lines thin and connected so the boot pattern stays legible.

  5. Add the studded hat band dots

    Use a small drill bit or the tip of a round tool to bore the row of band dots partway through the wall, deeper than the peel but not fully open. Space them evenly by marking each spot first. These bright pinpoints give the hat its studded band without weakening the surface. Clean out any pulp so each dot glows clearly.

  6. Light it and photograph

    Drop in a battery LED puck and never a candle, since flame heat can scorch the thin peeled areas. Test the glow in a dark room and deepen any spot that looks too faint. If the pumpkin is fresh, coat the cut surfaces with a little petroleum jelly to slow drying. Set it on the porch and shoot at dusk when the shaded glow shows best.

Gather your supplies

Check things off as you get ready.

Work on a stable surface, keep your free hand out of the cutting path, and have an adult handle sharp tools.

Three levels of light

  • Leave intact

    The background around the hat and boots stays as untouched skin for a dark frame.

  • Peel & shade

    The hat crown, brim, and boot bodies are peeled to a thin layer for a steady mid orange glow.

  • Cut through

    The stitching lines, pull straps, and hat band dots go deepest for the brightest accents, without opening fully.

Learn the carving basics

Before you start cutting

Do any parts get cut all the way through?

No, this design works entirely as a surface etch. The brightness comes from peeling and thinning the wall, not from open holes. That keeps the hat and boots structurally solid and lets the light glow softly through the flesh.

How do I keep the boot stitching from looking muddy?

Carve the stitching lines with a narrow V-tool and go a touch deeper than the peeled leather around them. The extra depth makes those lines catch more light so they stand apart. Keep the strokes thin and connected, and clean out any loose pulp before lighting.

This is an AI concept image, so can a real pumpkin look like this?

Yes, the design is fully carvable because it relies on shading rather than fragile cutouts. Choose a pumpkin with a broad, even front and thin the interior wall so light spreads through the peeled areas. Just work at a consistent depth and the hat and boots will read clearly.

Your take belongs here, too.

Changed a detail? Made it simpler? Share a photo of your version and tell the community what worked.

Share your pumpkin

More pumpkins like this

You've reached the end · 8 pumpkins
The Patch Report

Fresh pumpkins, in your inbox.

The best new carvings, ideas worth stealing, and how-tos for carving season. Short, seasonal, and gone by November.

A short email during carving season. Unsubscribe anytime. See our privacy policy.