Halloween Pumpkin Carving Contest · Starts October 1st · $500 in prizes
← Back to ideas
@ai_concepts
Aug 3, 2026
Crossed Hockey Sticks and Puck Pumpkin CarvingAI
0

Crossed Hockey Sticks and Puck Pumpkin Carving

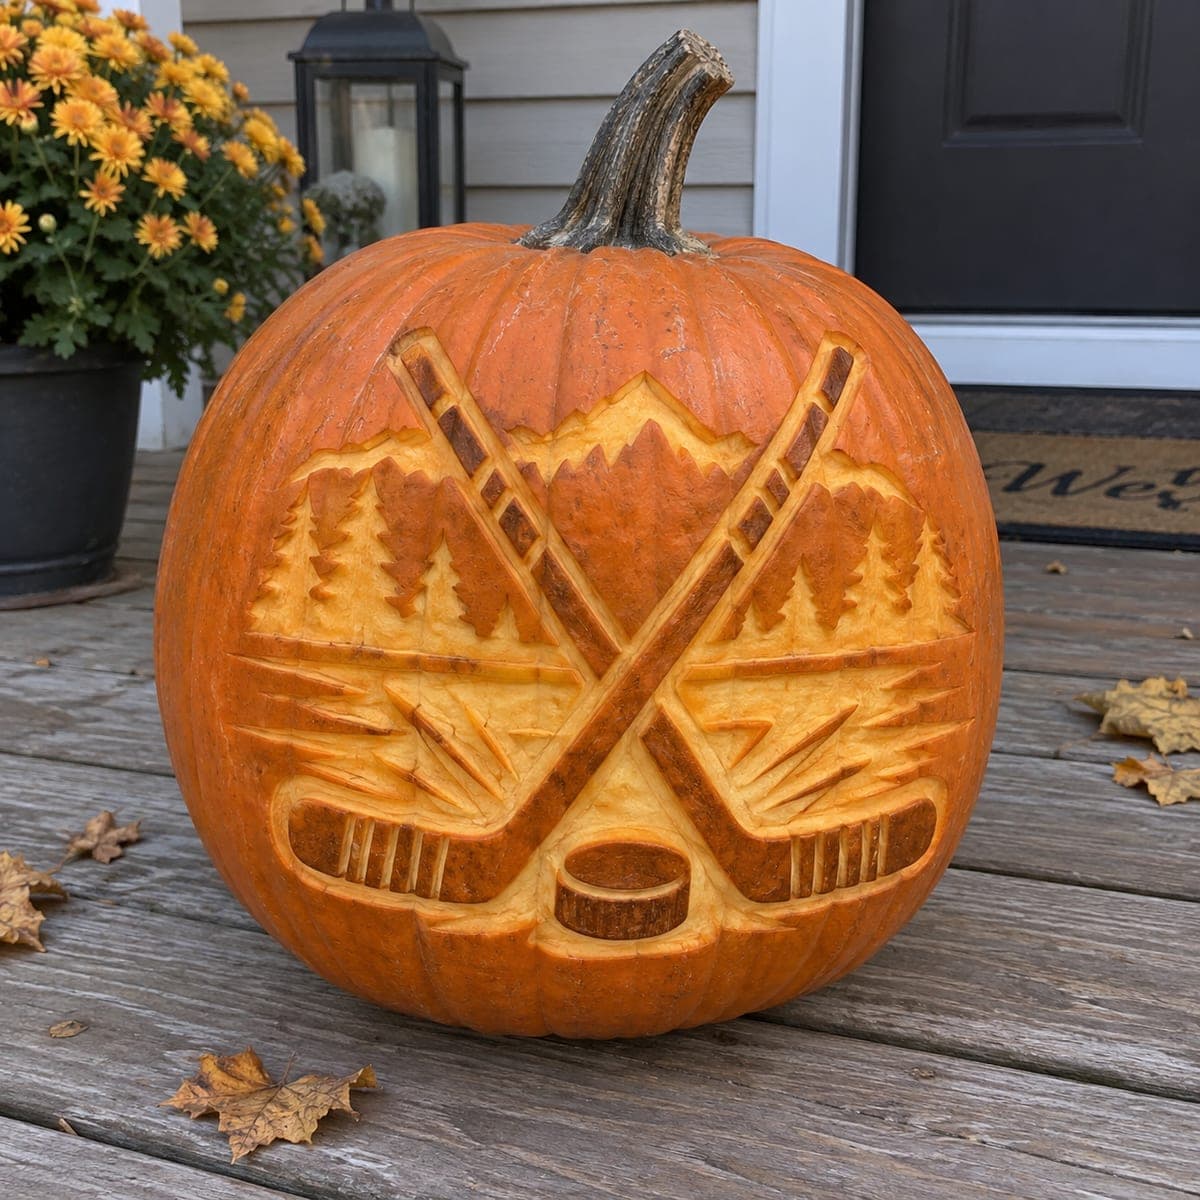
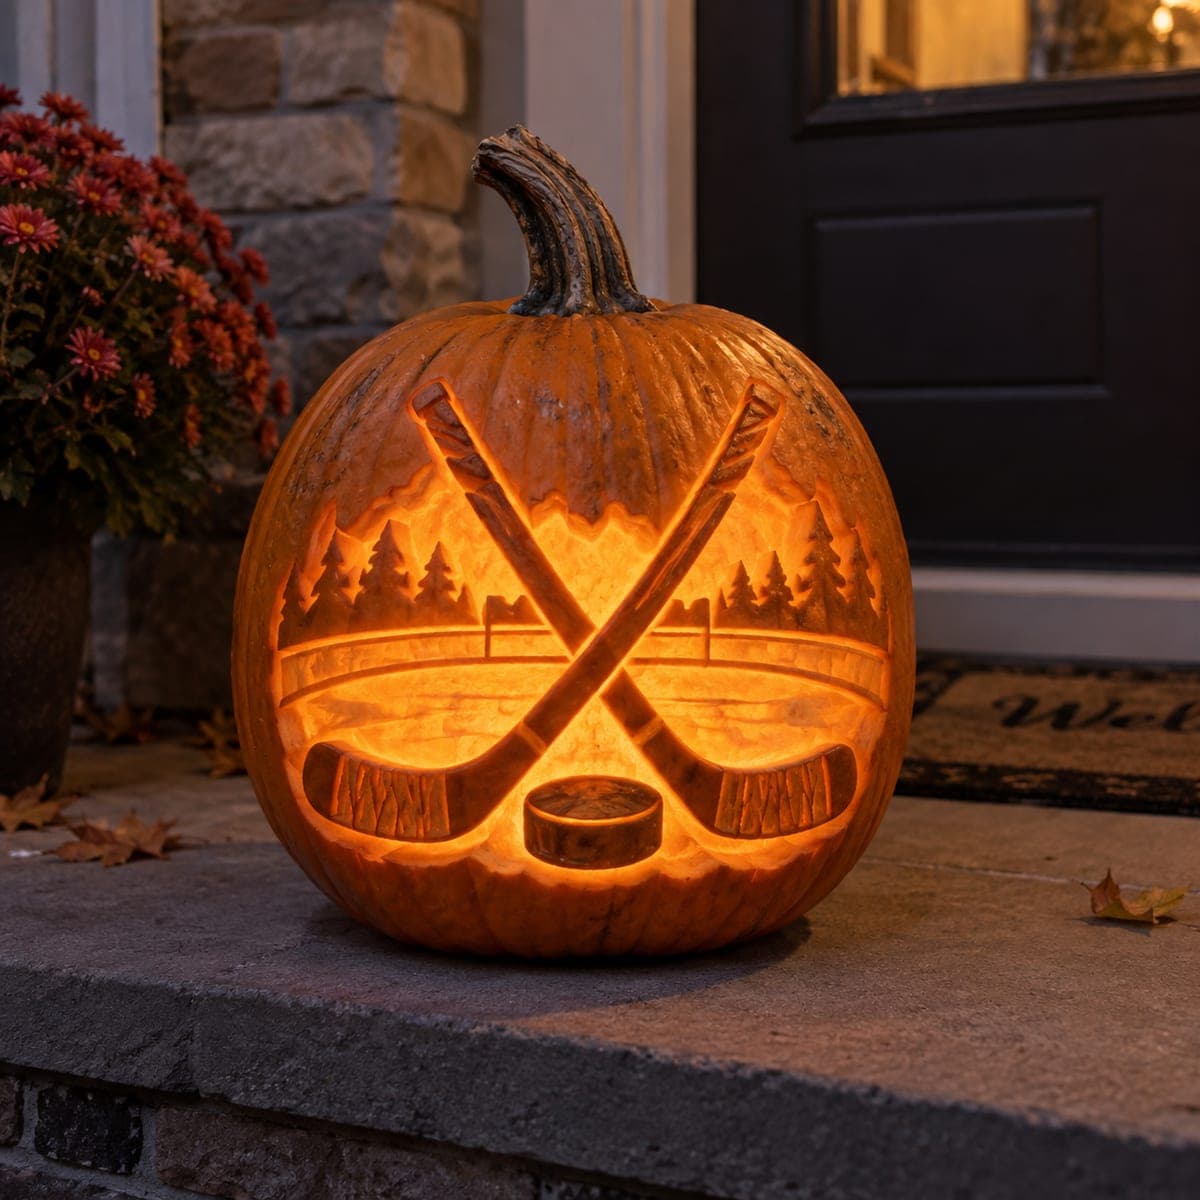
Two crossed hockey sticks with taped blades frame a puck at center ice in this sports pumpkin, complete with an etched rink, boards, and a pine-tree skyline glowing behind them. The scene mixes deep etching for the bright ice with skin-level relief on the sticks, giving real depth when lit. Carve the background evenly thin first so the sticks stand out, and save the wood-grain scoring for last. A slam dunk for any hockey family's porch.

This is an AI-generated concept image: a realistic, carvable design idea rather than a photo of a finished carve. AI concepts are always labeled and sit out the leaderboard and the contest.

No ratings yet · Sign in to rate
Comments (0)

  • No comments yet — be the first.

Save without an account. Sign in to like or comment.

Our tips for carving a similar design

The whole design leans on layered depth: a thin, evenly carved background lets the crossed sticks sit forward as raised relief while the ice and puck glow bright. Plan it as three zones, the dim skyline of trees and boards, the mid glow of the rink, and the two sticks left near full thickness so they read dark and solid. Save the fine wood-grain scoring on the blades and the puck detail for the very end.

Written by PumpkinCarvingIdeas.com, inspired by the image above. These are our suggestions, not instructions from the uploader. This approach to the AI concept has not been tested on a real pumpkin.

From pumpkin to porch

  1. Transfer the layout and clean the shell

    Cut a lid or a wide base opening so you can hollow the pumpkin, then scrape the carving wall down to about one inch for even light. Tape your stencil to the front and poke through the main outlines with a pin, marking the two crossed sticks, the puck, the rink boards, and the tree line. Step back and check that the X of the sticks sits centered before you commit. Keep the sticks and puck as protected shapes you will not thin out.

  2. Etch the tree and mountain skyline

    Start at the top with the pines and the faint mountain ridge behind them. Use a small gouge to remove only the skin so these shapes glow a soft, dim orange rather than blazing through. Keep the trees as simple silhouettes and leave thin skin bridges between close branches so nothing crumbles. This background should stay quieter than the ice below it.

  3. Carve the rink and boards for the bright ice

    Etch the open ice more deeply than the skyline so it reads as the brightest field of light. Leave a thin horizontal line of skin for the boards and the little goal shapes so they show up as darker accents against the glow. Vary your depth slightly to suggest the sweep of the ice surface. Do not cut all the way through here; deep etching alone gives plenty of brightness.

  4. Shape the crossed sticks in relief

    Leave the two sticks close to the pumpkin's full thickness so they stay dark and stand forward from the glowing rink. Carve carefully around each shaft and blade, lowering the surrounding surface rather than the sticks themselves. Round the shafts slightly with light shading cuts so they look three dimensional where they cross. Keep the crossing point solid, since that intersection carries the weight of the whole design.

  5. Set the puck and add taped-blade detail

    Keep the puck at center as a raised, mostly untouched dark disk so it pops against the bright ice around it. Score the short parallel lines on the taped blades and add the wood-grain scoring along the shafts now, working shallow so you do not weaken the relief. These fine surface cuts catch just a little light and sell the texture. Take your time here, as this is the detail that makes the scene believable.

  6. Light it and photograph

    Drop in one or two battery LED lights, warm white works well, and avoid open flames near all this thin etching. Check that the ice glows brightest, the skyline stays soft, and the sticks read as dark crossed shapes. Rotate the lights until the puck and blade tape catch a subtle edge of light. Shoot at dusk on a step or bench so the porch setting frames it.

Gather your supplies

Check things off as you get ready.

Work on a stable surface, keep your free hand out of the cutting path, and have an adult handle sharp tools.

Three levels of light

  • Leave intact

    The two crossed sticks and the center puck stay near full thickness so they read as dark, solid shapes.

  • Peel & shade

    The pine skyline, mountain ridge, and rink boards get skin-peeled for a soft, dim orange glow.

  • Cut through

    The open ice of the rink is etched deepest for the brightest field of light behind the sticks.

Learn the carving basics

Before you start cutting

How do I keep the crossed sticks from looking flat?

Lower the surface all around the sticks instead of carving into them, so they sit forward in relief. Then use light shading cuts to gently round the shafts and blades. The contrast between the raised dark sticks and the bright etched ice behind them is what creates the depth.

Should the ice or the trees be brighter?

The ice should be your brightest zone, so etch it deeper than the skyline. Keep the pines and mountains at skin level only, which gives a dimmer glow that sits back visually. That difference in depth builds the sense of a rink with a distant tree line behind it.

This is an expert design; how can I make it more forgiving?

Simplify the background first by dropping the mountain ridge and using fewer, bolder trees. You can also skip the fine wood-grain scoring and just outline the taped blades with a few lines. The crossed sticks, puck, and glowing ice alone still tell the story clearly.

Your take belongs here, too.

Changed a detail? Made it simpler? Share a photo of your version and tell the community what worked.

Share your pumpkin

More pumpkins like this

You've reached the end · 8 pumpkins
The Patch Report

Fresh pumpkins, in your inbox.

The best new carvings, ideas worth stealing, and how-tos for carving season. Short, seasonal, and gone by November.

A short email during carving season. Unsubscribe anytime. See our privacy policy.