Halloween Pumpkin Carving Contest · Starts October 1st · $500 in prizes
← Back to ideas
@ai_concepts
Sep 8, 2026
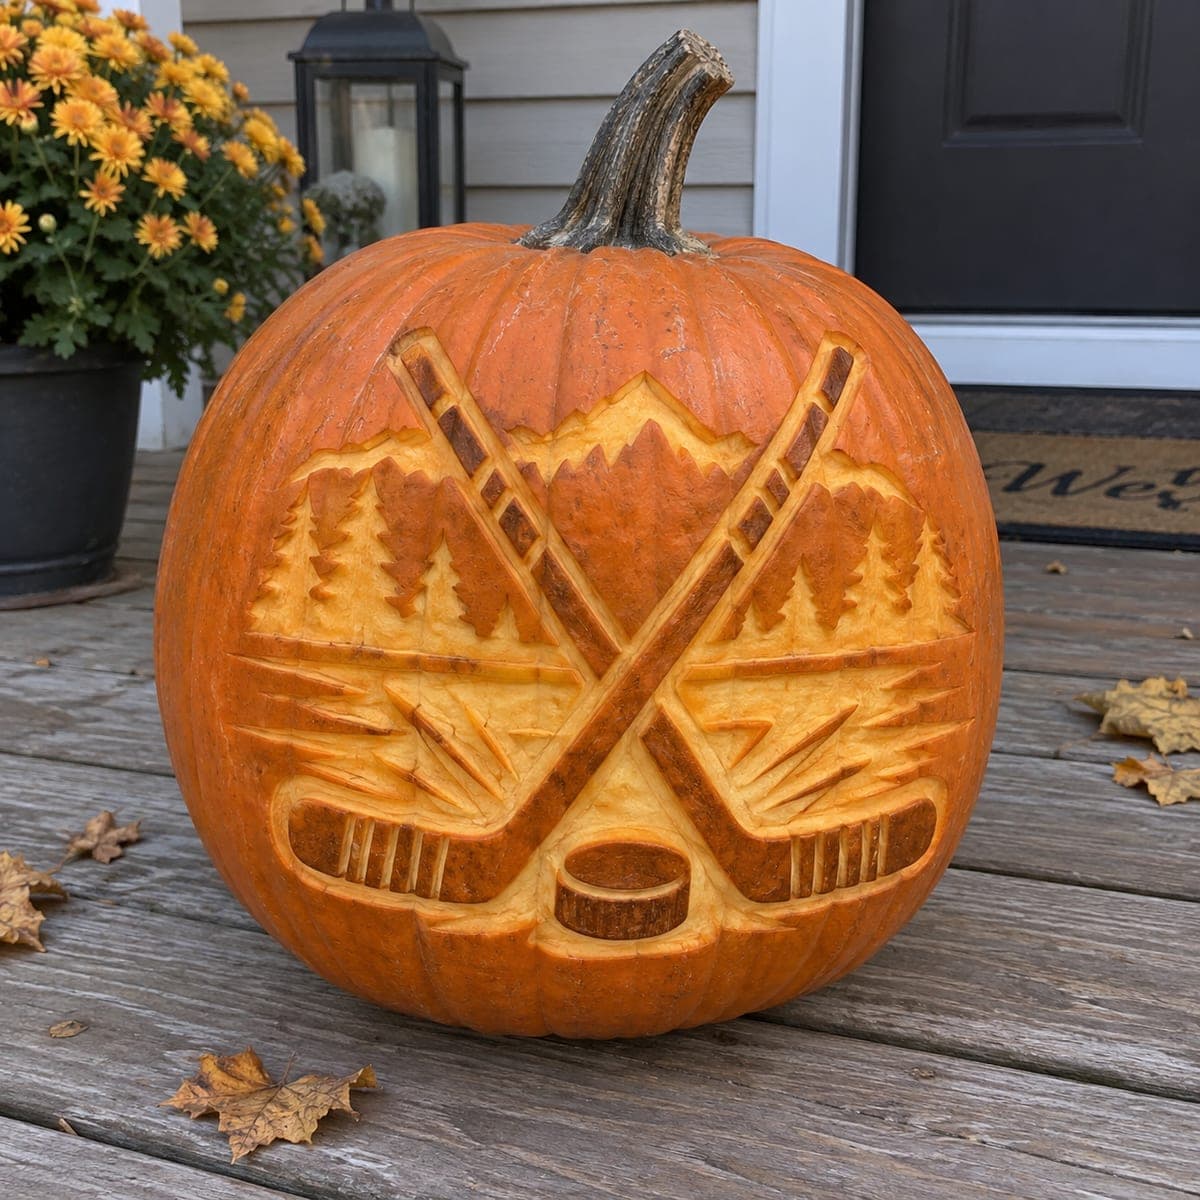
Crossed Hockey Sticks and Puck Relief PumpkinAI
0

Crossed Hockey Sticks and Puck Relief Pumpkin

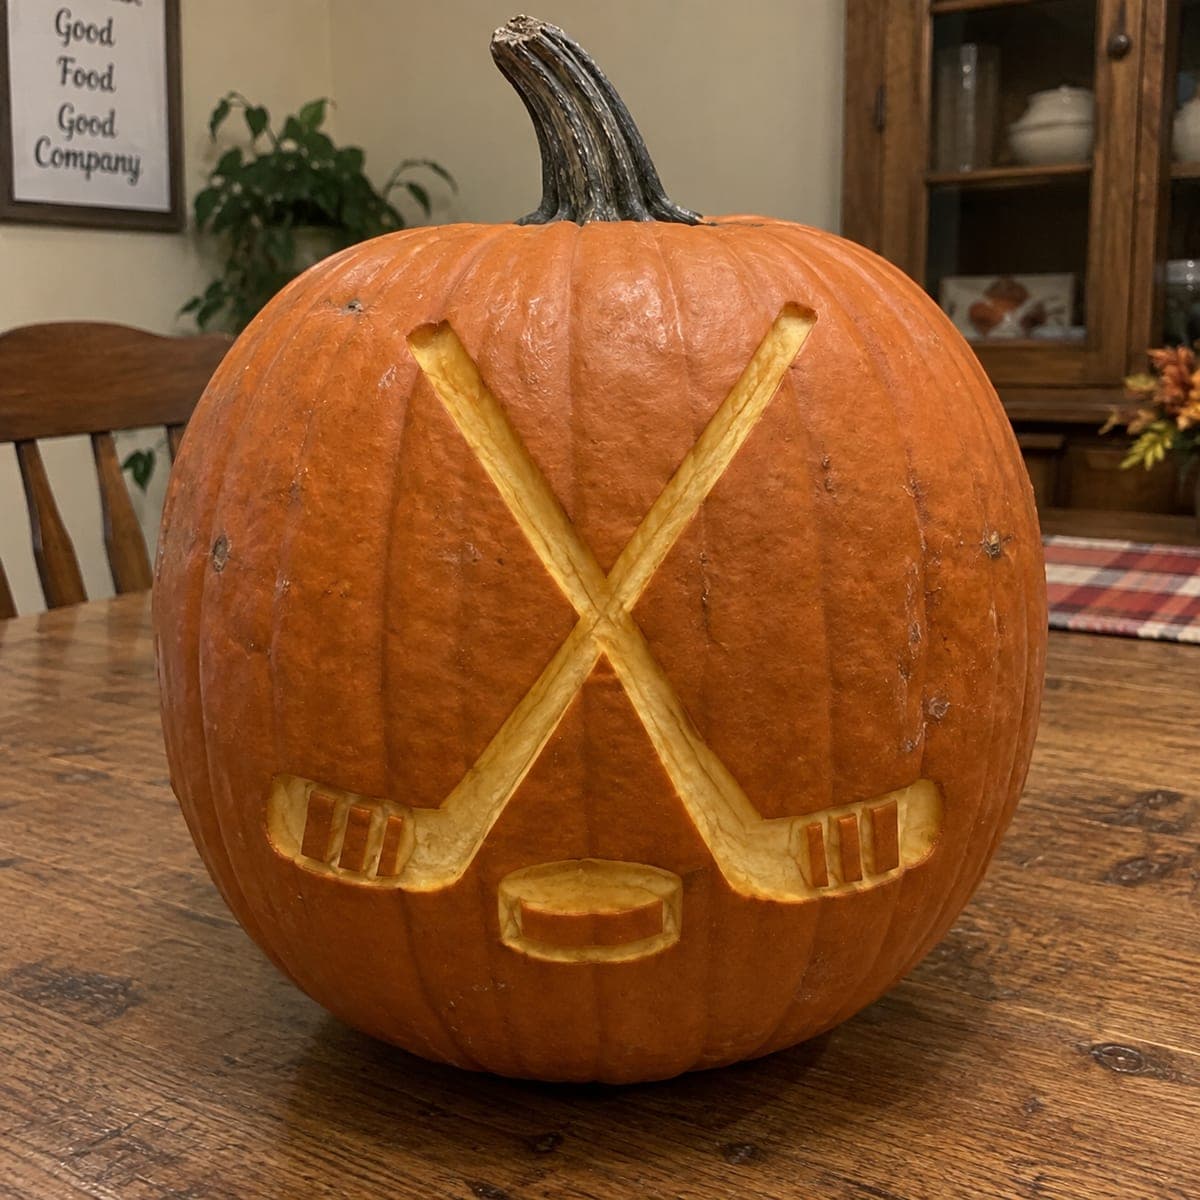
Two crossed hockey sticks frame a puck at the base, with a mountain and pine tree landscape rising behind them, all carved in rich relief shading across this large pumpkin. The scene is achieved entirely with surface-depth carving at multiple levels, no cutouts needed, giving it a striking 3-D look in daylight. Start by outlining the sticks, then work background elements like the trees and peaks at a shallower depth than the foreground details to build convincing perspective.

This is an AI-generated concept image: a realistic, carvable design idea rather than a photo of a finished carve. AI concepts are always labeled and sit out the leaderboard and the contest.

No ratings yet · Sign in to rate
Comments (0)

  • No comments yet — be the first.

Save without an account. Sign in to like or comment.

Our tips for carving a similar design

The whole design lives in the pumpkin's skin, with no cutouts at all, so the trick is stacking several carving depths to fake a 3-D scene. The crossed sticks and puck sit closest to you as the deepest, boldest shapes, while the pines and mountain peaks stay shallow to read as distant background. Peel and scoop to different depths and the daylight shadows do the rest.

Written by PumpkinCarvingIdeas.com, inspired by the image above. These are our suggestions, not instructions from the uploader. This approach to the AI concept has not been tested on a real pumpkin.

From pumpkin to porch

  1. Pick a big pumpkin and plan your levels

    Choose a large pumpkin with a broad, smooth front face so you have room for the full landscape. Wipe it clean and sketch your composition lightly in pencil or washable marker: crossed sticks and puck in the center foreground, ice lines behind them, then pines and mountains at the top. Mark which areas will be deep, mid, and shallow before you cut anything. Since this is a relief design, you are removing skin and flesh at controlled depths rather than punching holes.

  2. Score all the outlines first

    With a fine detail knife or a small clay loop tool, trace the edges of every element to a shallow, even depth. Outline the two sticks and the puck, then the horizon and ice lines, then the tree and mountain shapes. Keeping every outline in place first gives you clean borders and prevents you from carving into the wrong zone later. Adults should handle all sharp tools.

  3. Carve the foreground sticks and puck deepest

    Use a ribbon or loop tool to scoop the wood tape wrapping, blade angles, and puck to the deepest level, cutting through the orange skin and well into the pale flesh so they read boldest. Round the edges of the crossed sticks slightly so light gradients wrap over them. Leave a thin ridge of skin where the two sticks overlap so the crossing point stays crisp. This deepest layer will glow brightest and carry the eye.

  4. Shape the mid-depth ice and lines

    Bring the ice surface and the radiating stress lines to a medium depth, shallower than the sticks. Peel the skin fully on the open ice so it glows soft, and leave narrow raised lines unpeeled where you want darker accents. Blend the transition between the deep sticks and the mid ice with gentle slopes rather than hard steps. This middle tier separates the props from the backdrop.

  5. Keep pines and mountains shallow

    Carve the tree line and peaks at the shallowest depth to push them into the distance. Just skim the skin off for a dim glow on the mountain faces, and leave thin unpeeled spikes for tree trunks and ridge shadows. Vary the pressure so far peaks stay faint and nearer trees show a touch more contrast. Resist going deep here, since shallow work is what sells the perspective.

  6. Light it and photograph in daylight

    Because there are no cutouts, this design shines in daylight where side light throws real shadows across the relief. For evening, drop a battery LED puck inside and gently thin the flesh from the interior behind the sticks so a little glow seeps through. Mist the carved areas with water and shoot in morning or late afternoon light for the strongest 3-D effect. Reapply a light water mist daily to slow drying.

Gather your supplies

Check things off as you get ready.

Work on a stable surface, keep your free hand out of the cutting path, and have an adult handle sharp tools.

Three levels of light

  • Leave intact

    Unpeeled skin left on the stick tape stripes, tree trunks, and ridge shadows for the darkest accents

  • Peel & shade

    Skin skimmed off the mountain faces, distant pines, and open ice for a soft dim glow

  • Cut through

    Deepest scooped areas on the crossed stick blades, puck, and radiating lines for the brightest relief

Learn the carving basics

Before you start cutting

There are no cutouts, so will this even glow at night?

It is built mainly for daylight, where shadows across the relief give the 3-D look. To add a night glow, thin the interior flesh behind the deepest carved areas so a battery LED can shine through faintly. Keep the front wall thicker where you want shapes to stay dark.

How do I keep the crossing point of the sticks looking clean?

Leave a thin raised ridge of skin along the edge where the two sticks overlap so the upper stick reads as passing in front. Carve the lower stick slightly deeper right at the intersection. That small depth difference is what makes the cross look convincing.

How many depth levels do I actually need?

Three is enough: deepest for the sticks and puck, medium for the ice and lines, and shallow for the pines and mountains. Keeping the background shallow is what creates the sense of distance. If levels start blending together, deepen the foreground rather than cutting the background deeper.

Your take belongs here, too.

Changed a detail? Made it simpler? Share a photo of your version and tell the community what worked.

Share your pumpkin

More pumpkins like this

You've reached the end · 8 pumpkins
The Patch Report

Fresh pumpkins, in your inbox.

The best new carvings, ideas worth stealing, and how-tos for carving season. Short, seasonal, and gone by November.

A short email during carving season. Unsubscribe anytime. See our privacy policy.