Halloween Pumpkin Carving Contest · Starts October 1st · $500 in prizes
← Back to ideas
@ai_concepts
Sep 14, 2026
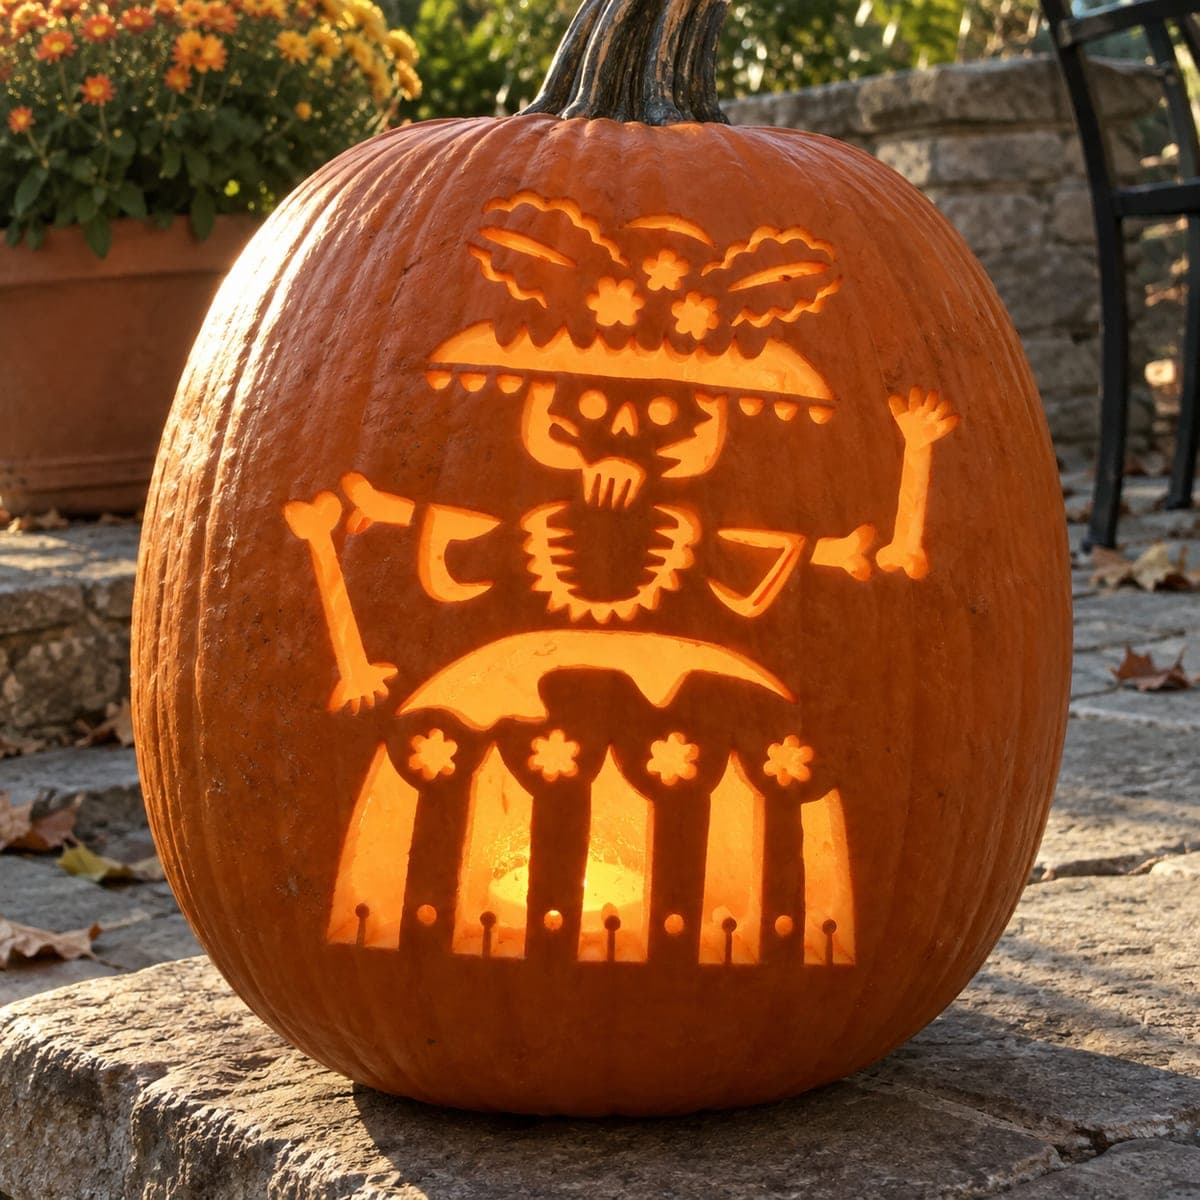
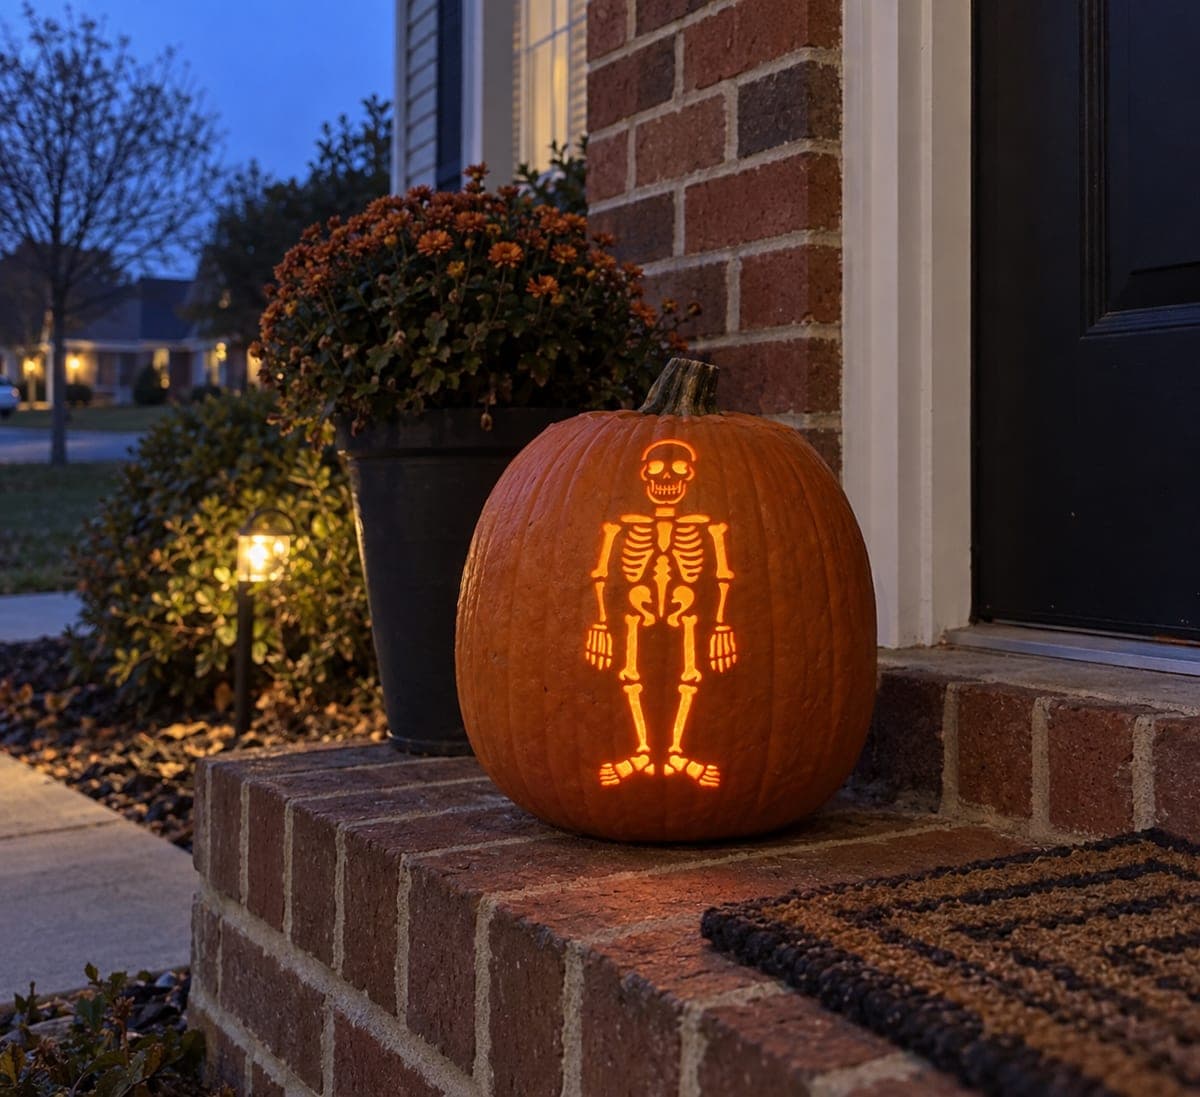
Dancing Skeleton in a Flowered Hat PumpkinAI
0

Dancing Skeleton in a Flowered Hat Pumpkin

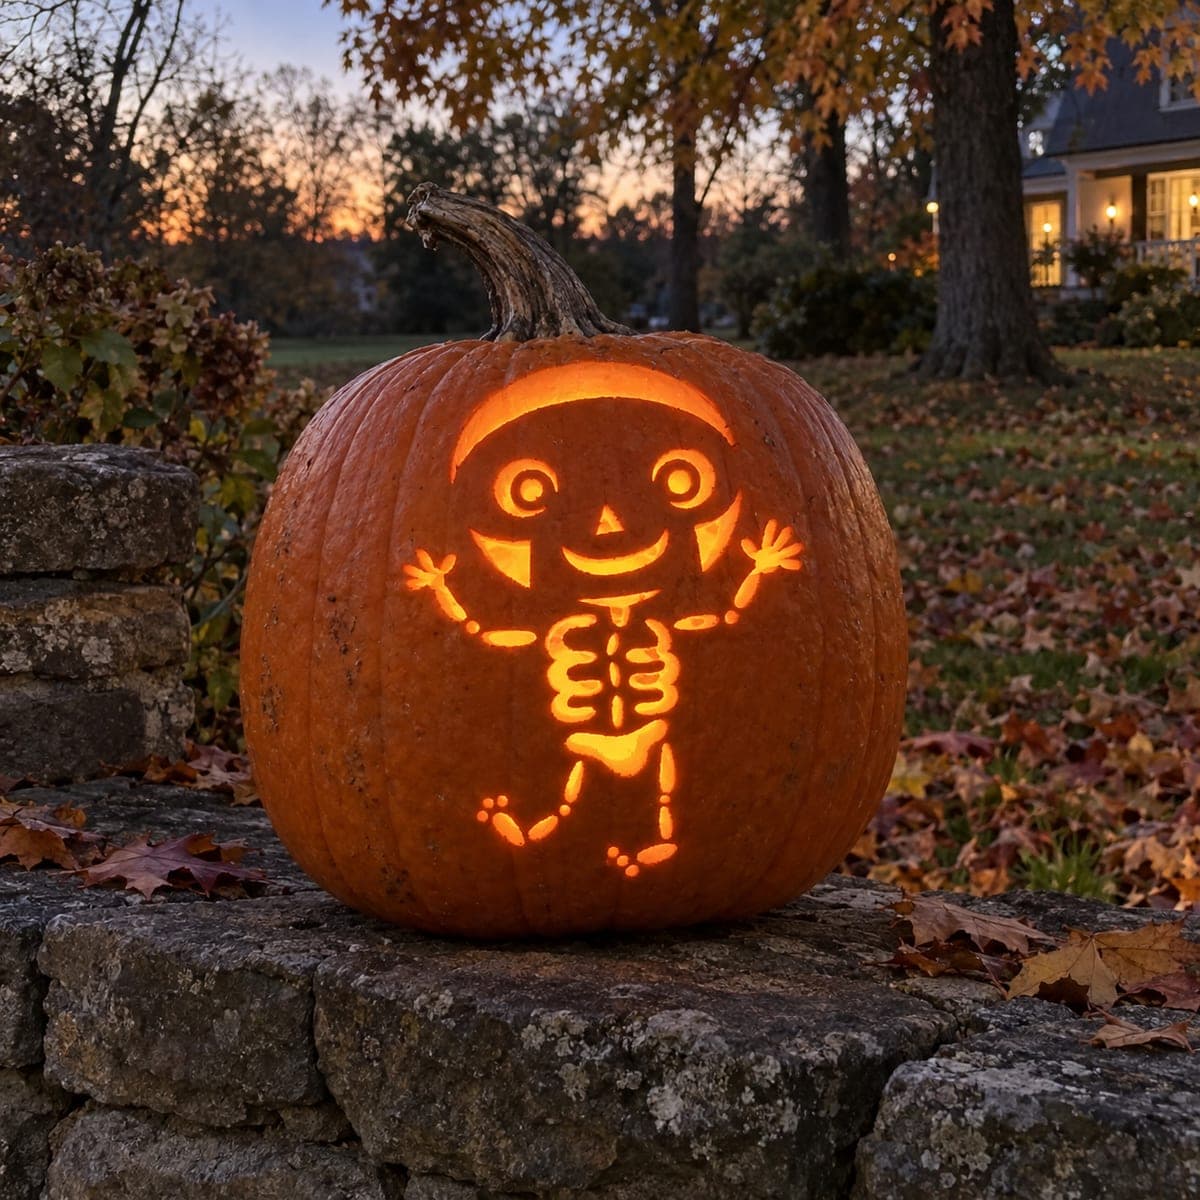
A flat folk-art skeleton figure dances with both arms raised, wearing a floral headband and a fringed skirt above stick legs, with crossbone motifs at the wrists. The cutout design opens the skirt fringe, the wrist bones, and the body segments as separate glowing sections connected by thin dark rind bridges. Cut the narrow skirt fringe slits first using a detail blade, keeping each slit short enough that adjacent ones do not merge and weaken the strip. Daylight carving works well for this Dia de los Muertos pumpkin carving idea because the fine folk-art lines are easier to follow before the pumpkin interior is lit.

This is an AI-generated concept image: a realistic, carvable design idea rather than a photo of a finished carve. AI concepts are always labeled and sit out the leaderboard and the contest.
No ratings yet · Sign in to rate

Comments (0)

  • No comments yet — be the first.

Save without an account. Sign in to like or comment.

Our tips for carving a similar design

The core trick here is a flat folk-art skeleton built entirely from separate glowing shapes held together by thin dark rind bridges. You plan the whole figure so the fringed skirt, the wrist crossbones, and the body segments each read as their own cutout while the bridges keep the strips from collapsing. Since this is a concept image, think of it as a plan for how you could carve a similar dancing skeleton on a tall, wide pumpkin.

Written by PumpkinCarvingIdeas.com, inspired by the image above. These are our suggestions, not instructions from the uploader. This approach to the AI concept has not been tested on a real pumpkin.

From pumpkin to porch

  1. Pick a big pumpkin and prep it

    Choose a tall, broad pumpkin with a smooth front panel so the full figure fits from the flowered hat down to the fringe. Cut a hatch in the bottom rather than the top so the pumpkin can sit over your light source later. Scrape the inside wall behind the design down to about one inch thick so a detail blade passes through cleanly. A thinner wall makes the fine slits far easier to control.

  2. Transfer the stencil carefully

    Tape a printed skeleton stencil flat against the front, clipping the paper edges so it hugs the curve without wrinkling. Poke closely spaced dots along every line with a pin or awl, paying extra attention to the skirt fringe and the crossbone shapes. Peel the paper and connect the dots lightly with a marker so you can see the bridges you need to leave. Working in daylight makes these fine folk-art lines much easier to follow before the inside is lit.

  3. Cut the narrow skirt fringe slits first

    Start with the thin vertical slits in the skirt using a sharp detail blade. Keep each slit short enough that neighboring slits do not merge, which would weaken the whole strip. Leave a small dark rind bridge between every slit and at the top and bottom so the fringe stays firm. Doing these fragile cuts while the pumpkin is still solid means less flexing and fewer breaks.

  4. Open the body segments and wrist bones

    Move up to the ribcage segments, the arms, and the crossbone motifs at the wrists. Cut each shape as its own opening and preserve the thin bridges the design shows between segments, since those dark lines are what make the skeleton read. Support the pumpkin wall with your free hand near each cut and take slow, shallow passes. If a bridge feels loose, stop and leave a touch more rind rather than forcing the blade.

  5. Save the hat and the biggest openings for last

    Carve the flowered headband, the eye and nose openings, and the widest arch of the skirt at the end. Cutting these larger windows last keeps the panel rigid while you do the delicate work above them. Clean up ragged edges by trimming from the front at a slight bevel, which lets more light spill through. Take your time so the flowers and the grinning skull stay crisp.

  6. Light it and photograph it

    Set a battery LED puck or string inside and never a real candle, since the thin bridges and fringe scorch easily. Place the pumpkin over the light through the bottom hatch and check that each segment glows evenly. If any area stays dark, shave a little more from the inside wall behind it. Shoot your photo at dusk so the warm cutouts pop against the fading sky.

Gather your supplies

Check things off as you get ready.

Work on a stable surface, keep your free hand out of the cutting path, and have an adult handle sharp tools.

Three levels of light

  • Leave intact

    The thin rind bridges between body segments, the outline of the skull, and the background stay untouched and dark to define the figure.

  • Peel & shade

    You could skin-peel the flower petals on the headband and skirt for a softer mid glow that separates them from the bright cutouts.

  • Cut through

    The skirt fringe slits, ribcage segments, wrist crossbones, and eye and nose openings are cut fully through for the brightest light.

Learn the carving basics

Before you start cutting

How do I keep the skirt fringe from breaking apart?

Cut each slit short and leave a dark rind bridge between every one, plus a solid band across the top and bottom of the fringe. Do these slits first while the pumpkin wall is still solid and least likely to flex. If a strip feels wobbly, leave a slightly wider bridge rather than chasing a perfectly thin line.

What size pumpkin works best for this figure?

Go tall and wide so the whole skeleton fits from the flowered hat to the fringed skirt without crowding. A larger front panel also gives you more room between the fine folk-art lines, which makes the delicate cuts more forgiving. Avoid lumpy or ribbed faces that would distort the symmetric design.

Can a beginner attempt this Dia de los Muertos design?

It is rated hard because of the many small connected cutouts and fragile bridges, so some carving experience helps. If you are new, try a simpler single skull or flower stencil first to build blade control. You can also enlarge this pattern so every slit and bridge is bigger and easier to manage.

Your take belongs here, too.

Changed a detail? Made it simpler? Share a photo of your version and tell the community what worked.

Share your pumpkin

More pumpkins like this

You've reached the end · 8 pumpkins
The Patch Report

Fresh pumpkins, in your inbox.

The best new carvings, ideas worth stealing, and how-tos for carving season. Short, seasonal, and gone by November.

A short email during carving season. Unsubscribe anytime. See our privacy policy.