Halloween Pumpkin Carving Contest · Starts October 1st · $500 in prizes
← Back to ideas
@ai_concepts
Sep 7, 2026
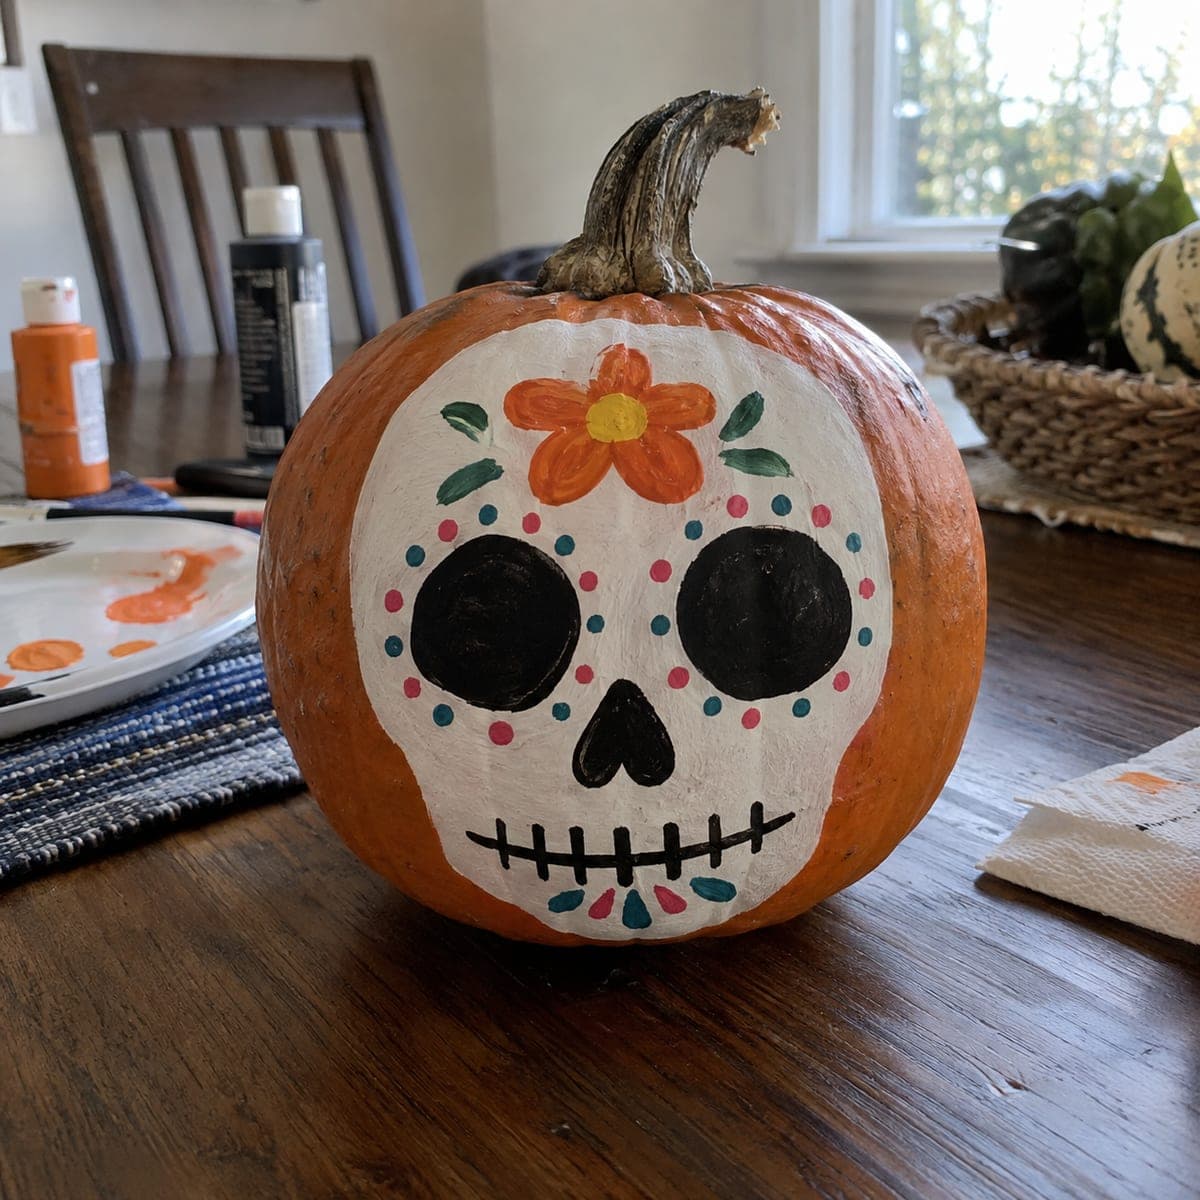
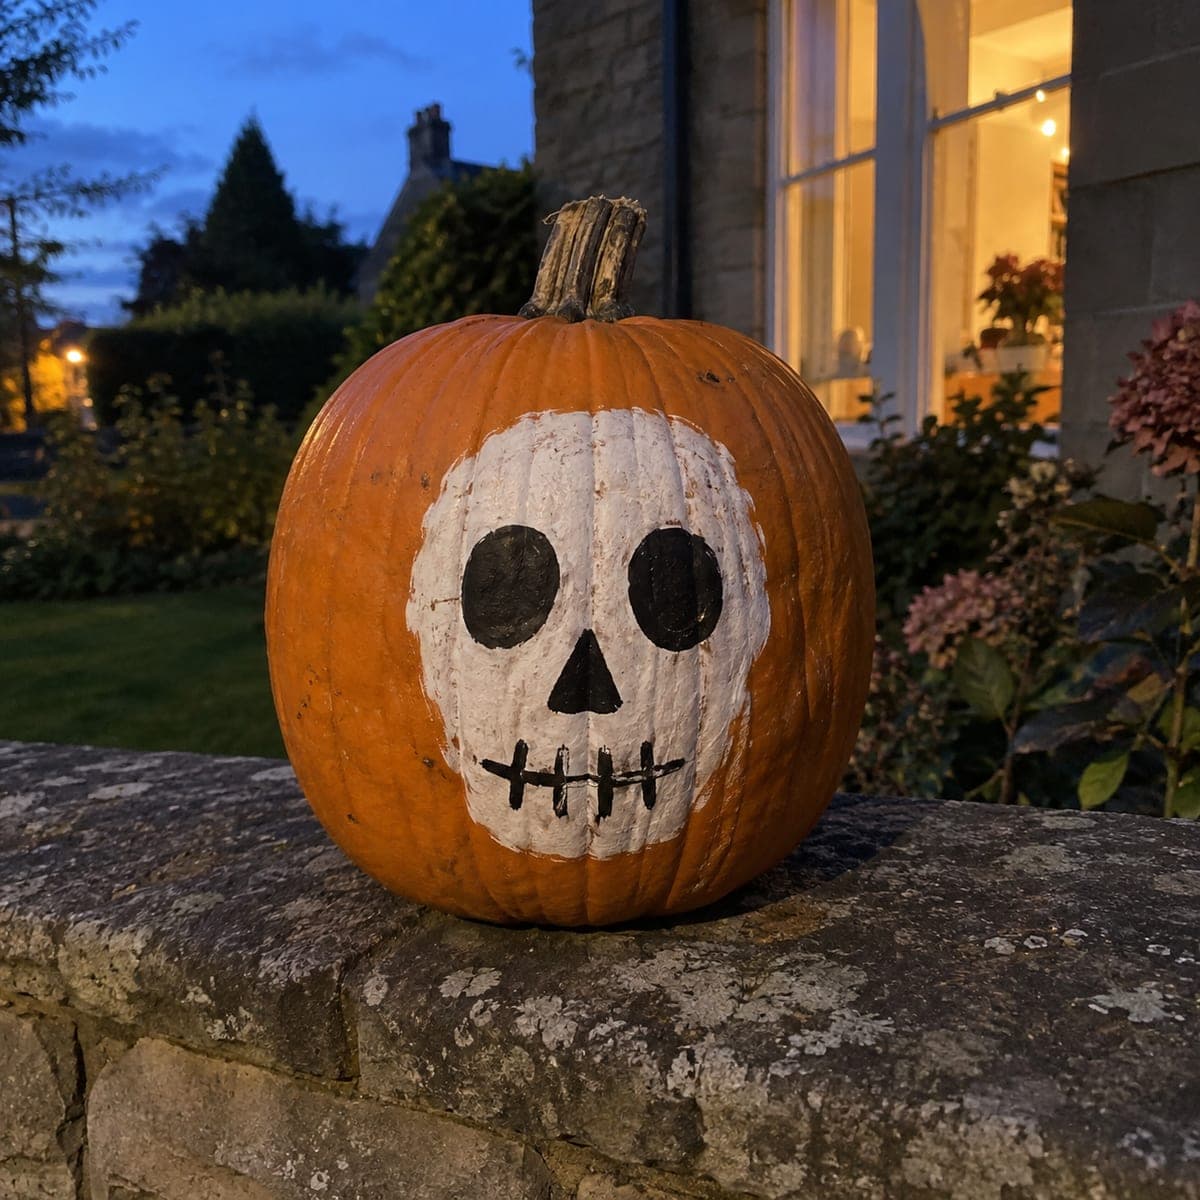
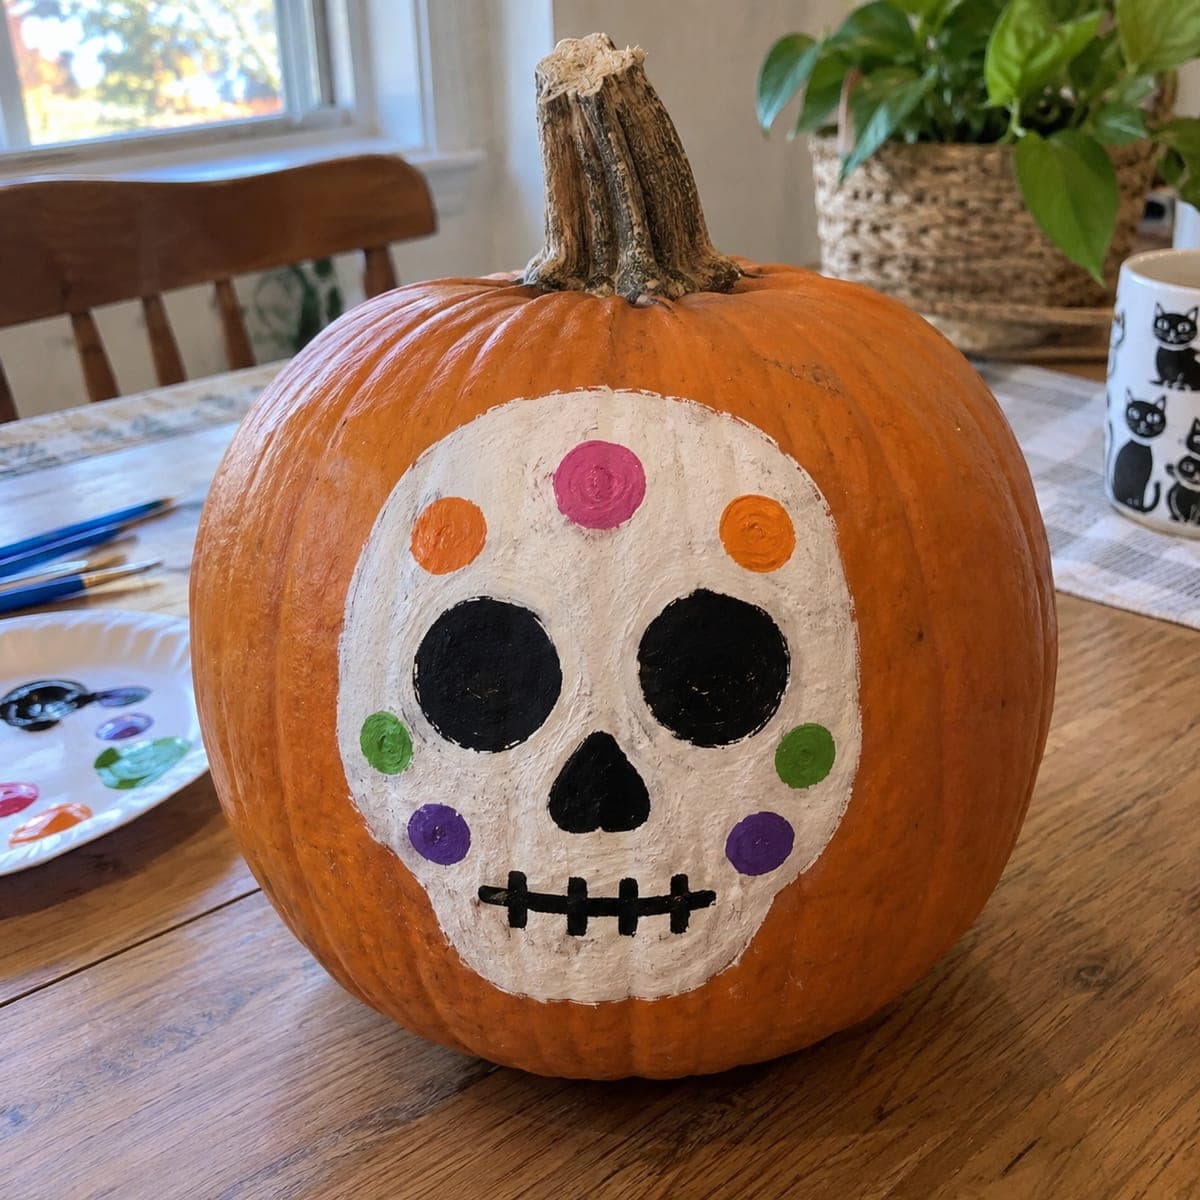
Day of the Dead Sugar Skull Painted PumpkinAI
0

Day of the Dead Sugar Skull Painted Pumpkin

Bold black eye sockets, a heart-shaped nose, and a marigold-orange flower crown turn this painted pumpkin into a cheerful sugar skull for Dia de los Muertos. Base-coat the face shape in white craft paint and let it dry fully before adding the colorful dots and petals, or the details will smear. A fine liner brush handles the stitched smile; everything else works with a basic round brush.

This is an AI-generated concept image: a realistic, carvable design idea rather than a photo of a finished carve. AI concepts are always labeled and sit out the leaderboard and the contest.

No ratings yet · Sign in to rate
Comments (0)

  • No comments yet — be the first.

Save without an account. Sign in to like or comment.

Our tips for carving a similar design

The core trick here is a clean white base-coat face floating on the orange skin, then bright dots, petals, and a stitched smile layered on top once the white is bone dry. Because it is a no-carve design, you build it in paint from big shapes to fine lines. If you want it to glow at night, you can add a few small cutouts at the end.

Written by PumpkinCarvingIdeas.com, inspired by the image above. These are our suggestions, not instructions from the uploader. This approach to the AI concept has not been tested on a real pumpkin.

From pumpkin to porch

  1. Prep and sketch

    Wipe the pumpkin clean and dry so paint grips well. With a pencil or washable marker, lightly draw the rounded face outline, the two large eye sockets, a heart nose, and the smile line. Keep the shapes centered on the flattest front face so the details do not distort. Do not worry about the dots yet.

  2. Lay the white base coat

    Fill the whole face shape with white craft paint using a basic round brush. Two thin coats look smoother than one thick one and cover the orange better. Let it dry completely, at least an hour, or the colors on top will smear into the white. Patience here makes every other step easier.

  3. Paint the black features

    Fill both eye sockets solid black and paint the heart-shaped nose. Keep the brush loaded but not dripping so the edges stay crisp. Switch to a fine liner brush for the stitched smile: one horizontal line with short vertical ticks crossing it. Let the black set before adding anything near it.

  4. Add the flower crown

    Paint the marigold-orange flower centered on the forehead with a yellow dot in the middle. Add a few small teal leaf strokes fanning out to each side. Keep petals rounded and slightly uneven for a hand-painted look. Let this layer dry so the dots you add next stay separate.

  5. Dot the decorations

    Use the tip of a round brush or the end of a paintbrush handle to place rows of pink and teal dots arcing around each eye. Add small teal and pink teardrop shapes under the nose. Space them evenly and keep them small so they read as jewelry, not clutter. Step back often to check symmetry.

  6. Seal, light, and photograph

    Once everything is dry, brush on a thin clear matte sealer to protect the paint. If you want a glow, an adult can cut a small hole in the back and drop in a battery LED, or carefully open just the eye sockets for light. Set the pumpkin on a dark surface and shoot slightly above eye level so the flower crown shows.

Gather your supplies

Check things off as you get ready.

Work on a stable surface, keep your free hand out of the cutting path, and have an adult handle sharp tools.

Three levels of light

  • Leave intact

    The bare orange skin around the face stays dark and untouched, framing the white skull.

  • Peel & shade

    Lightly scuffing or thinning the white base near the eye edges can give a soft dim halo if you later add a light.

  • Cut through

    For a lit version, cut only the eye sockets and nose all the way through so those shapes glow brightest.

Learn the carving basics

Before you start cutting

Do I have to carve this pumpkin at all?

No, this is a fully painted no-carve design, so it works great on a pumpkin you want to keep intact for weeks. If you do want a nighttime glow, an adult can add a small back hole for an LED or open just the eye sockets. Carving is optional and always the last step.

Why does my paint keep smearing when I add the dots?

The white base coat is almost certainly still damp underneath. Give each layer a full drying time, an hour or more, before painting on top of it. Working from large shapes to small details also keeps wet colors from bleeding together.

How do I keep the dots even around the eyes?

Dip the end of a brush handle or a cotton swab in paint to stamp uniform dots. Start with a few evenly spaced anchor dots, then fill the gaps between them. Step back after each row to check that both sides mirror each other.

Your take belongs here, too.

Changed a detail? Made it simpler? Share a photo of your version and tell the community what worked.

Share your pumpkin

More pumpkins like this

You've reached the end · 8 pumpkins
The Patch Report

Fresh pumpkins, in your inbox.

The best new carvings, ideas worth stealing, and how-tos for carving season. Short, seasonal, and gone by November.

A short email during carving season. Unsubscribe anytime. See our privacy policy.