@veiledvine
Sep 5, 2026
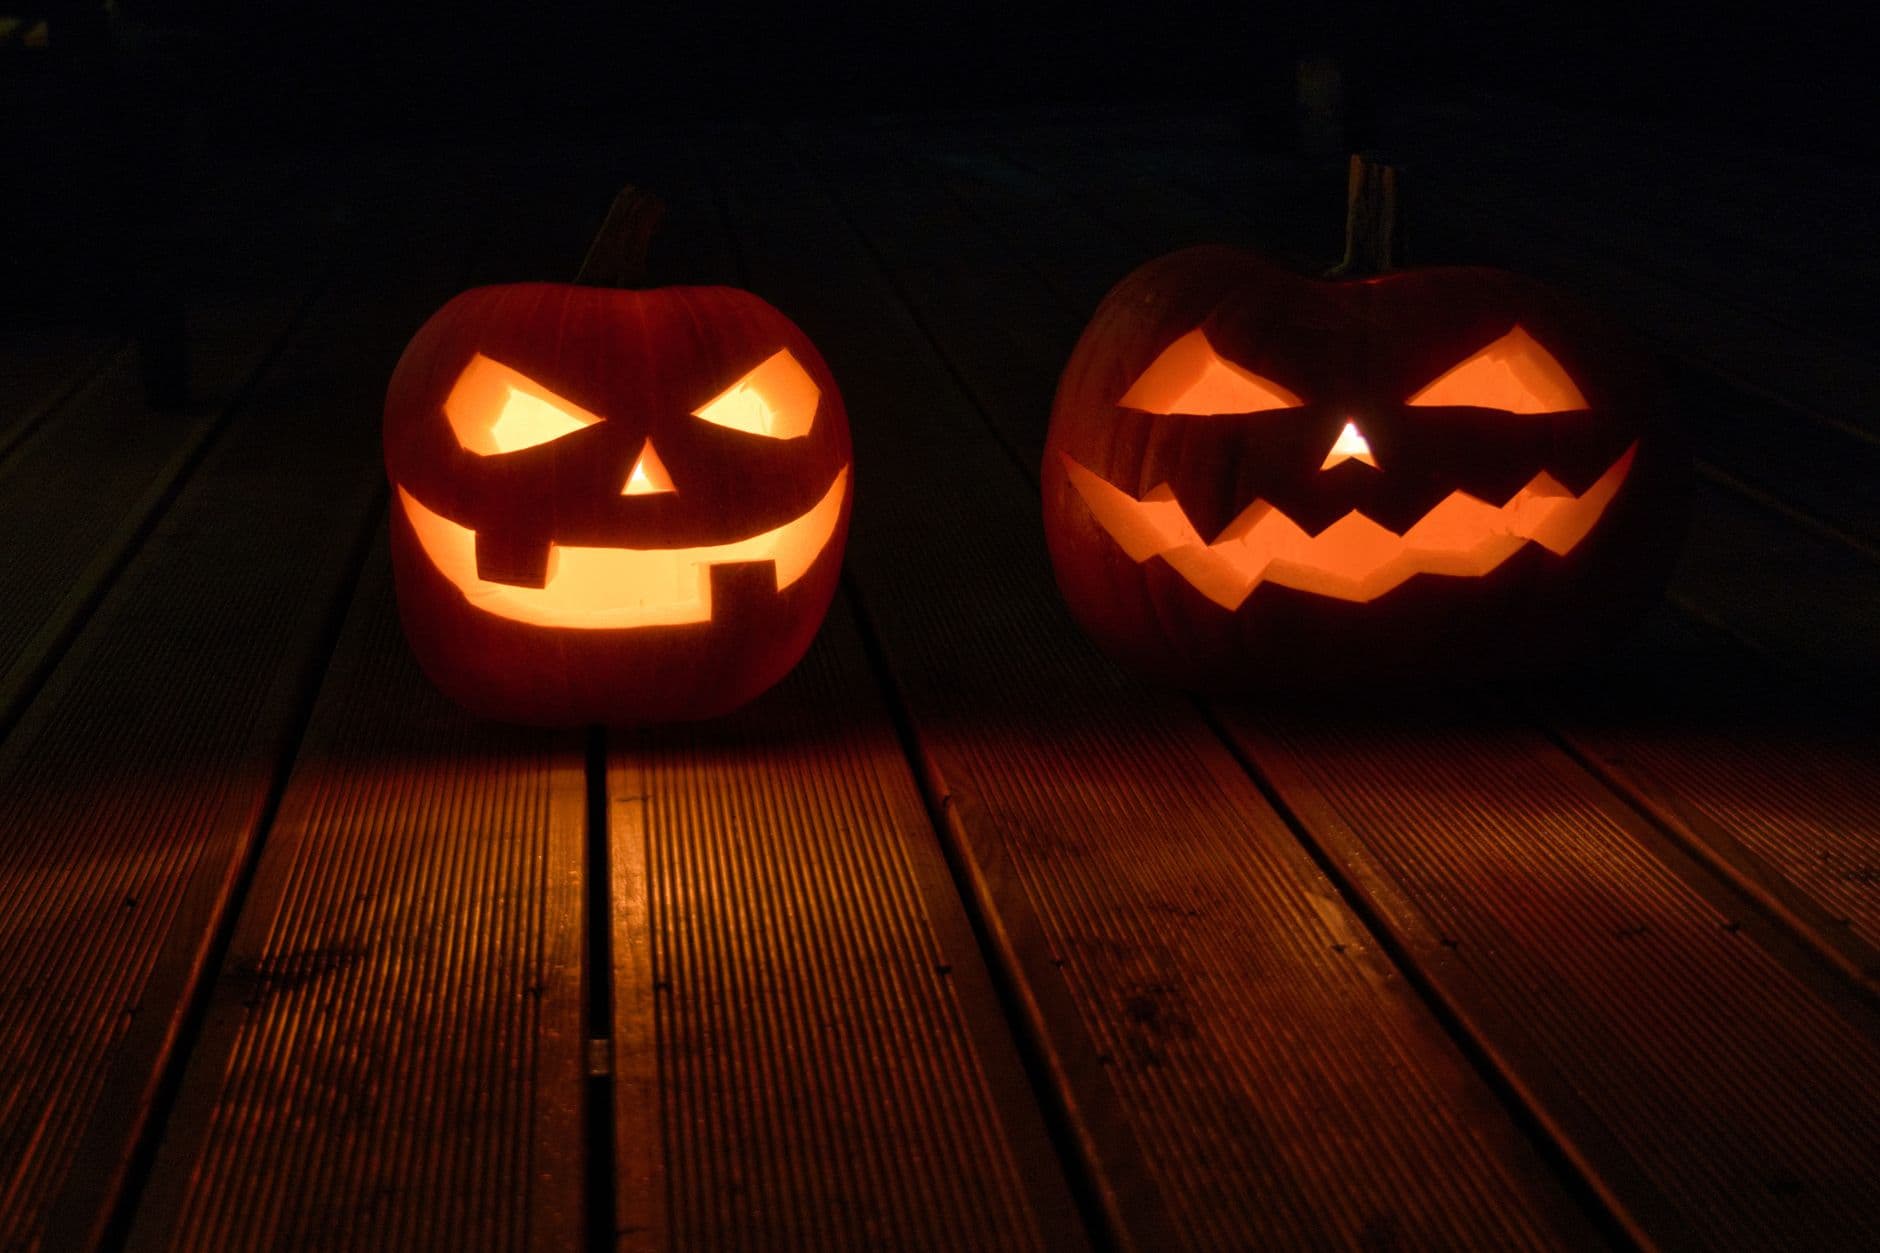
Deck watchmen
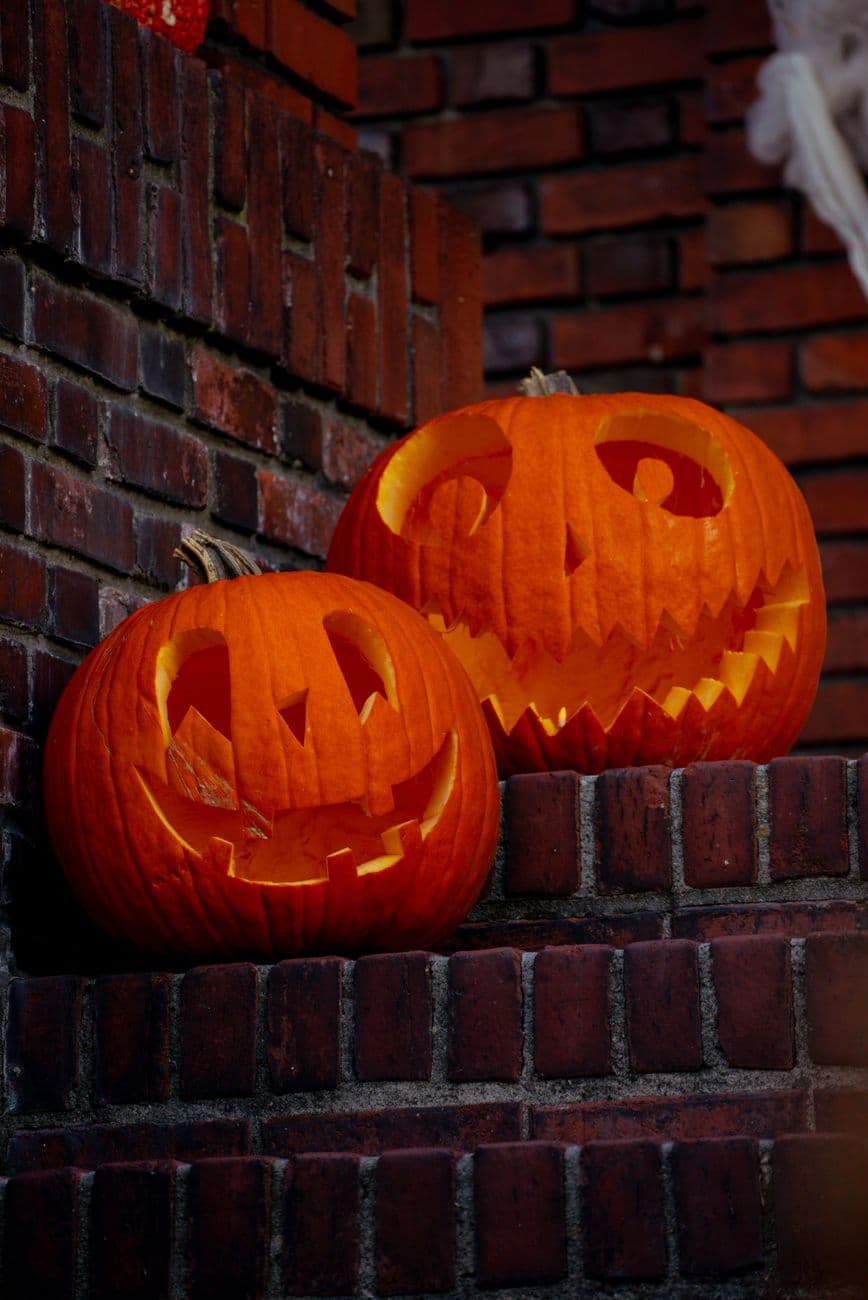
Two jacks on night duty on the deck boards: sharp-browed suspicion on the left, wide zigzag delight on the right.
No ratings yet · Sign in to rate
Two jacks on night duty on the deck boards: sharp-browed suspicion on the left, wide zigzag delight on the right.
The core trick here is a matched pair with two moods: one with angled, angry brows and a couple of blocky teeth, the other with a wide sawtooth grin. Both rely on simple straight-cut shapes rather than fine detail, so the light reads clearly from across the yard. Keep the cuts clean and the edges beveled slightly outward so more light escapes.
Written by PumpkinCarvingIdeas.com, inspired by @veiledvine's photo above. These are our suggestions, not instructions from the uploader, and this approach hasn't been tested on their exact carve.
Choose two pumpkins with flat sides facing your viewer and sturdy stems. Cut a lid on each at an angle so it rests without falling in, or open a hole in the base instead for easier lighting. Scoop the insides and scrape the front wall down to about an inch thick. A thinner wall is much easier to cut through cleanly.
Sketch the left pumpkin with sharp angled triangle eyes, a small triangle nose, and a grin with two blocky teeth. Give the right pumpkin larger triangle eyes, a triangle nose, and a wide zigzag mouth. Use a washable marker so you can wipe off and redo lines. Keep the zigzag teeth chunky so they stay strong.
Start with the smaller shapes while the pumpkin is still solid and stable. Use a small serrated carving saw and take slow, straight strokes, letting the blade do the work. Push each piece out gently from the inside. Adults should handle all the sharp tools.
Save the biggest openings for last so the face keeps its strength while you work. On the right pumpkin, carve the zigzag one triangle at a time and leave the points connected to the rim. On the left, cut around the teeth so the blocky shapes stay attached top and bottom. Wide mouths can sag if you rush, so go slowly.
Trim any ragged edges and angle each cut slightly wider on the inside face. This bevel lets more light spill out and makes the features glow brighter. Wipe the front clean of marker lines. Test the fit of every cut piece before lighting.
Drop a battery LED tealight or puck light into each pumpkin, never a real flame. Set them side by side on the deck boards a short distance apart so both faces catch the glow. Photograph in near darkness with the lights low to get that warm night look. Angle them slightly toward each other for a paired, watchful feel.
Check things off as you get ready.
Work on a stable surface, keep your free hand out of the cutting path, and have an adult handle sharp tools.
The full orange face and body skin stays untouched and dark, holding the classic silhouette.
Optional shallow scraping just inside the eye and mouth edges can add a soft halo, though this design mostly skips it.
The triangle eyes, triangle noses, blocky teeth gaps, and the zigzag mouth are cut all the way through for the brightest glow.
They do not need to match exactly, and a slight size difference actually reads as a natural pair. Just make sure both have a good flat side facing the camera. Pick similar wall thickness so both light up with the same brightness.
Keep each tooth chunky rather than thin and pointy, and carve one triangle section at a time. Leave the zigzag points connected to the pumpkin rim so nothing floats free. Cutting the mouth last also keeps the face stable while you work.
Angling each cut so it is wider on the inside than the outside lets more light escape. This simple bevel makes the eyes and grin pop, especially in a dark photo. Scrape the interior wall thin too, since light passes more easily through less flesh.
Changed a detail? Made it simpler? Share a photo of your version and tell the community what worked.
The best new carvings, ideas worth stealing, and how-tos for carving season. Short, seasonal, and gone by November.


Comments (0)