Halloween Pumpkin Carving Contest · Starts October 1st · $500 in prizes
← Back to ideas
@ai_concepts
Sep 25, 2026
Detailed Witch on Broom Round Window Pumpkin CarvingAI
0

Report this carving

Tell us what is wrong. Reports are private.

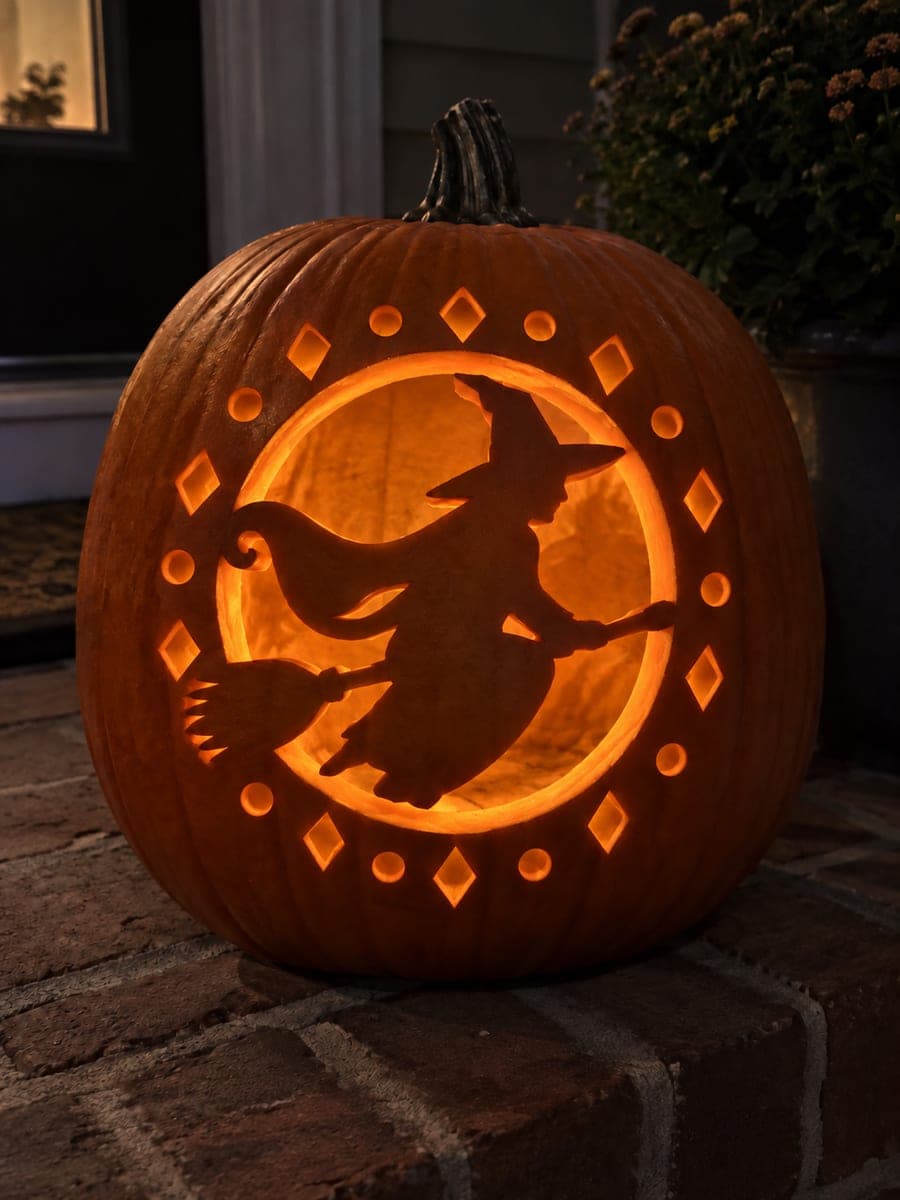
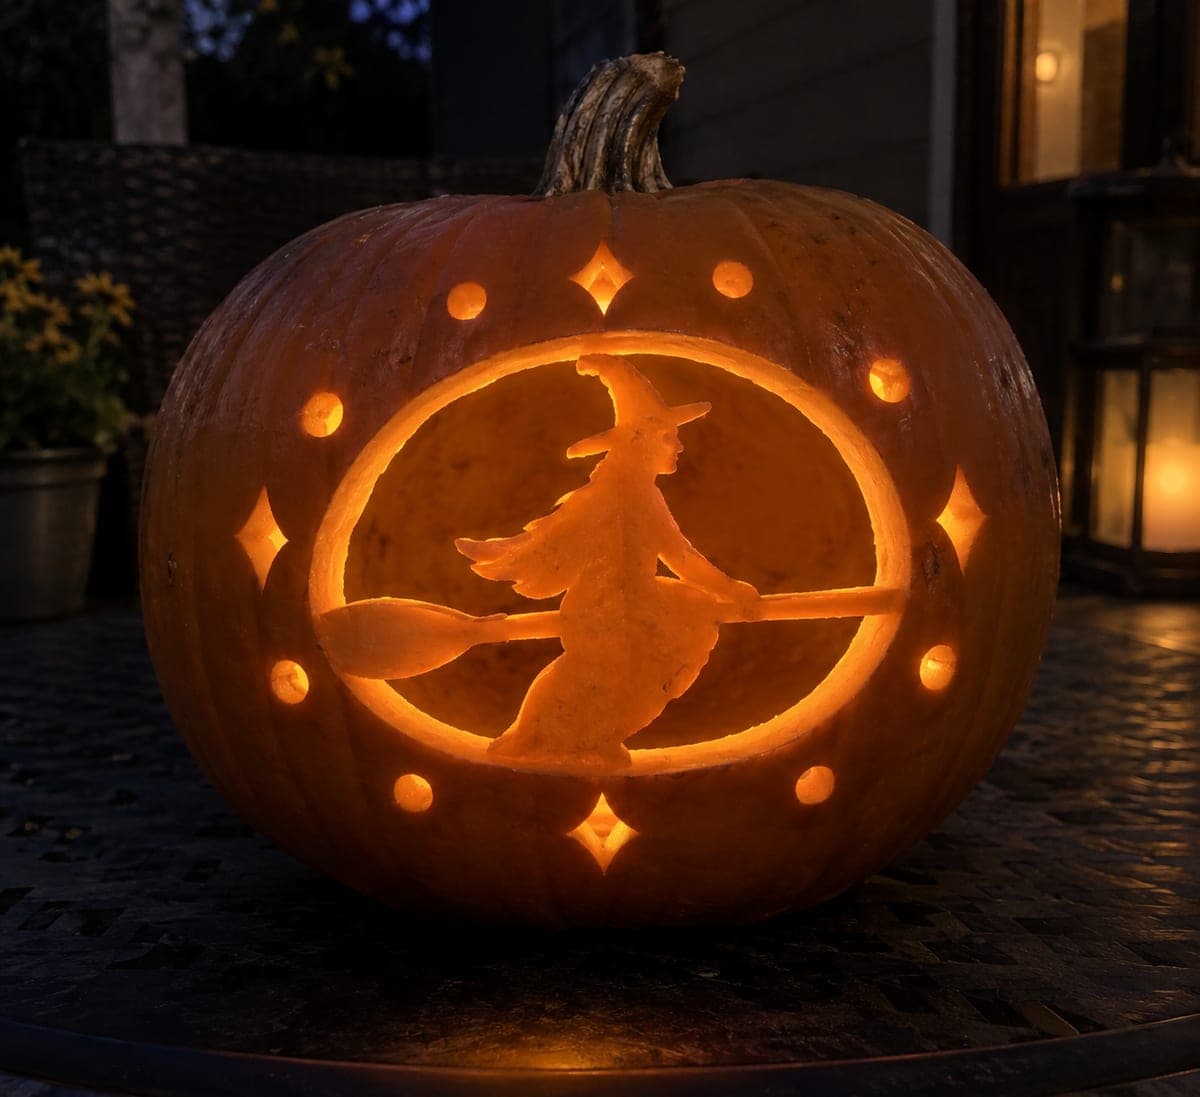
Detailed Witch on Broom Round Window Pumpkin Carving

A detailed retained witch-on-broom silhouette sits inside a large round cut-through window, the broom connecting both sides of the circle, the hat brim bridging to the window edge, and a separate teardrop cut in the cloak adding depth, with twelve diamond and twelve round openings outside. Begin by cutting the large outer circle, then work inward to remove the negative space around the witch and broom, saving the teardrop cloak detail for last when the surrounding structure is already confirmed stable. The multiple external accent holes project a star-field backdrop that frames the central scene.

No ratings yet · Sign in to rate
Comments (0)

  • No comments yet — be the first.

Save without an account. Sign in to like or comment.

Our tips for carving a similar design

The witch figure is retained inside a large circular cut-through window, with the broom connecting both sides of the circle, the hat brim bridging to the window edge, and a separate teardrop hole within the cloak. Twelve diamond and twelve round holes outside the circle project a star-field backdrop. The outer circle is cut first to establish the frame, then the background inside the circle is removed while the retained figure connections are protected at every stage.

From pumpkin to porch

  1. Select and prep the pumpkin

    A large, uniformly round pumpkin with very thick walls is essential. Hollow through the back lid and measure wall thickness in at least six spots across the carving zone; anything below an inch should prompt you to adjust the design scale. Transfer the full template with all elements marked.

  2. Cut the outer circle

    Carve the large round window outline and remove the disc. This gives you the frame to work from. Confirm the outer circle edge is clean and even all the way around.

  3. Mark and protect the retained connections

    Re-tape the figure template inside the circle. Mark every connection point between the retained figure and the circle wall, including both broom ends and the hat brim bridge, with a dot of marker. Do not cut within a quarter inch of these points.

  4. Remove the background inside the circle

    Work from the outer circle edge inward, removing the background flesh around the retained figure in sections. Keep the blade well clear of the retained cloak, broom, and hat outlines. Save the zone closest to any connection point for very last, when surrounding structure is confirmed.

  5. Cut the teardrop cloak detail

    The teardrop is a fully cut-through hole within the retained cloak body. Cut it last so the surrounding cloak flesh is confirmed intact before adding this internal hole. Work slowly around the teardrop curve.

  6. Add external accent holes and light

    Cut the twelve diamond and twelve round holes in the outer rind, spacing them evenly around the circle. Then position the LED at center, replace the lid, and display on brick porch at night. Step back to view the full star-field effect.

Written with AI to match this design

Gather your supplies

Check things off as you get ready.

Work on a stable surface, keep your free hand out of the cutting path, and have an adult handle sharp tools.

Three levels of light

  • Leave intact

    The retained witch-on-broom figure inside the circle and all outer shell rind

  • Peel & shade

    None

  • Cut through

    The circular window background around the retained figure, the teardrop cloak hole, and all twelve diamond and twelve round external accent holes

Learn the carving basics

Before you start cutting

How do I handle the hat brim bridge to the window edge without snapping it?

The bridge must be at least three-quarters of an inch wide at its connection to the window wall. Never cut within a quarter inch of it while removing background. Thin the bridge gradually from the edges inward rather than trying to trim it in one pass.

The teardrop cloak detail is small. Is there a minimum size?

The teardrop should be no smaller than a large grape in surface area so the surrounding cloak rind stays at least a quarter inch wide on all sides. Smaller than that and the cloak risk becomes too high.

Twenty-four external holes sounds like a lot. Can I reduce the count?

Absolutely. Six to eight holes scattered evenly outside the circle creates the same star-field effect with less cutting time and less structural stress on the outer shell. The count can be adjusted freely.

Your take belongs here, too.

Changed a detail? Made it simpler? Share a photo of your version and tell the community what worked.

Share your pumpkin

More pumpkins like this

You've reached the end · 8 pumpkins
The Patch Report

Fresh pumpkins, in your inbox.

The best new carvings, ideas worth stealing, and how-tos for carving season. Short, seasonal, and gone by November.

A short email during carving season. Unsubscribe anytime. See our privacy policy.